


Fix X-Axis Sag on Ender 3: Simple Steps to Restore Leveling
I bought my Ender 3 just a few weeks ago and after putting it together it seemed to work fine, but I noticed that I had quite some issues while leveling the bed since after leveling, I would start a print, yet for some reason the nozzle was always digging into the build surface on the right side of the bed.
So, I checked if the bed was leveled and to my surprise, on the right side of the bed it was always way off, even though when I had previously leveled it and it was perfectly fine, after starting a print, something would drastically change and the nozzle would either be too far or too close to the bed.
I realized that this was due to the X Axis sagging, but sometimes it would sag while some others it wouldn’t which is why leveling the bed was nearly impossible.
I even swapped out the springs that are used to level the bed, yet nothing changed (this was before I realized what the problem was, still, I’m happy I did it since I don’t need to level the bed anymore, even after weeks).
So, I decided to address the sagging issue and found one solution that worked for me after trying out a couple other alternatives I found online.
Here’s what worked for me, but I’m also going to include all the possible ways of fixing this so you don’t have to scout the internet for the solution.
If you don’t want to have to go through all the trial and error that we did in order to find the Ideal Settings for creating high-quality prints on your Ender 3, then definitely check out our own Cura Profiles tailored specifically for the Ender 3 Printer Series (You can get all of them for just $7).
Essential First Steps (Partial Printer Disassembly)
- Remove the filament as well as the spool since you don’t want to be dealing with the weight of it, plus it will tangle up and be a nuisance.
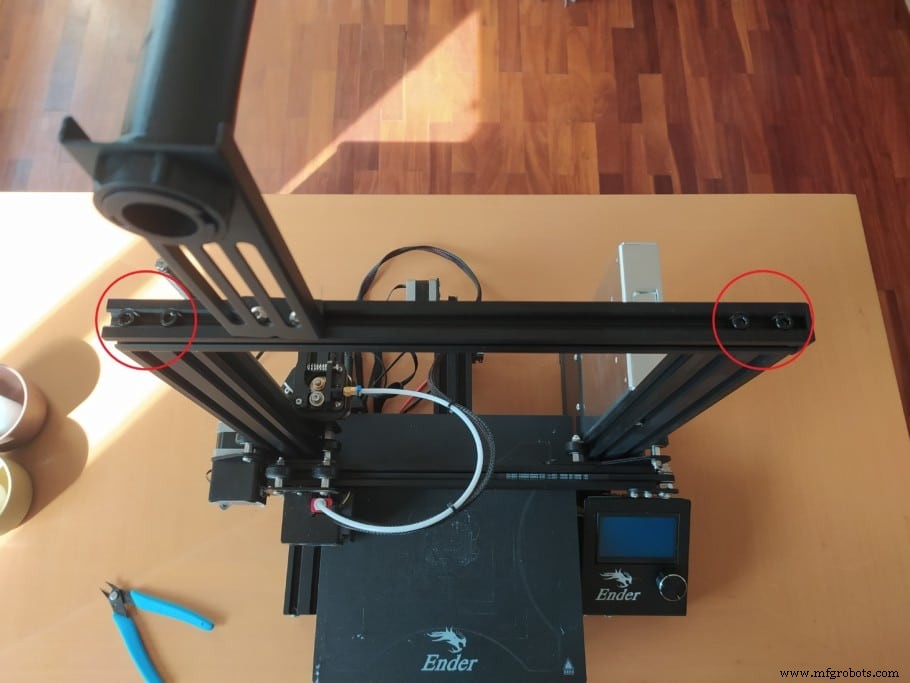
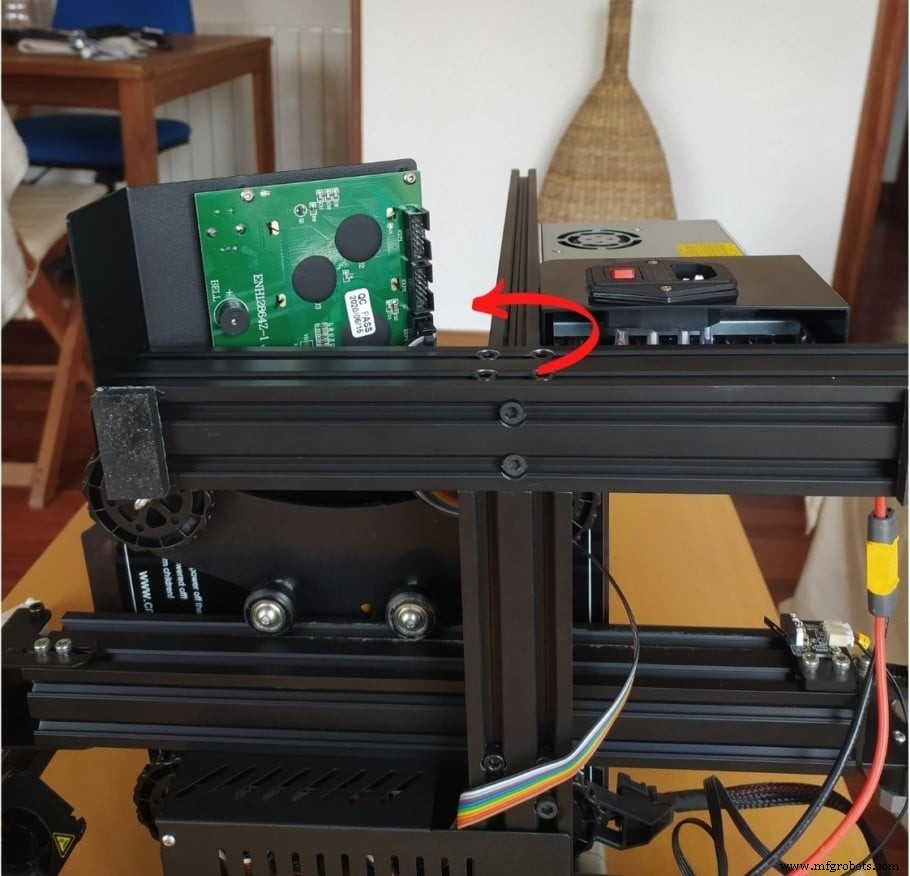
- Using the big Allen key that came with you assembly kit, remove the screws on the top rail.
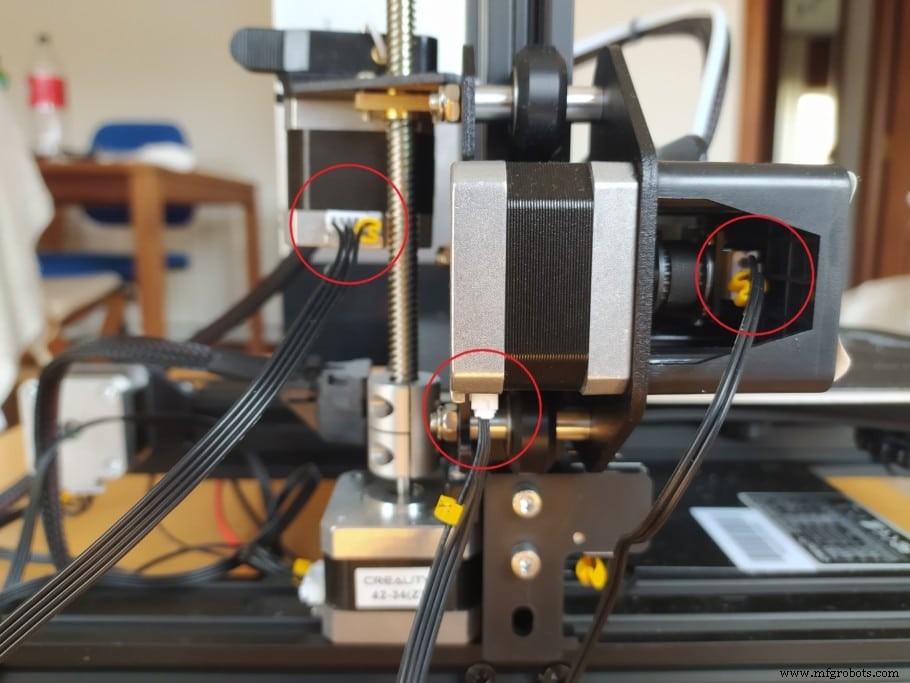
- Next, make sure to remove the cables connected to the E motor, X and Y axis motors.
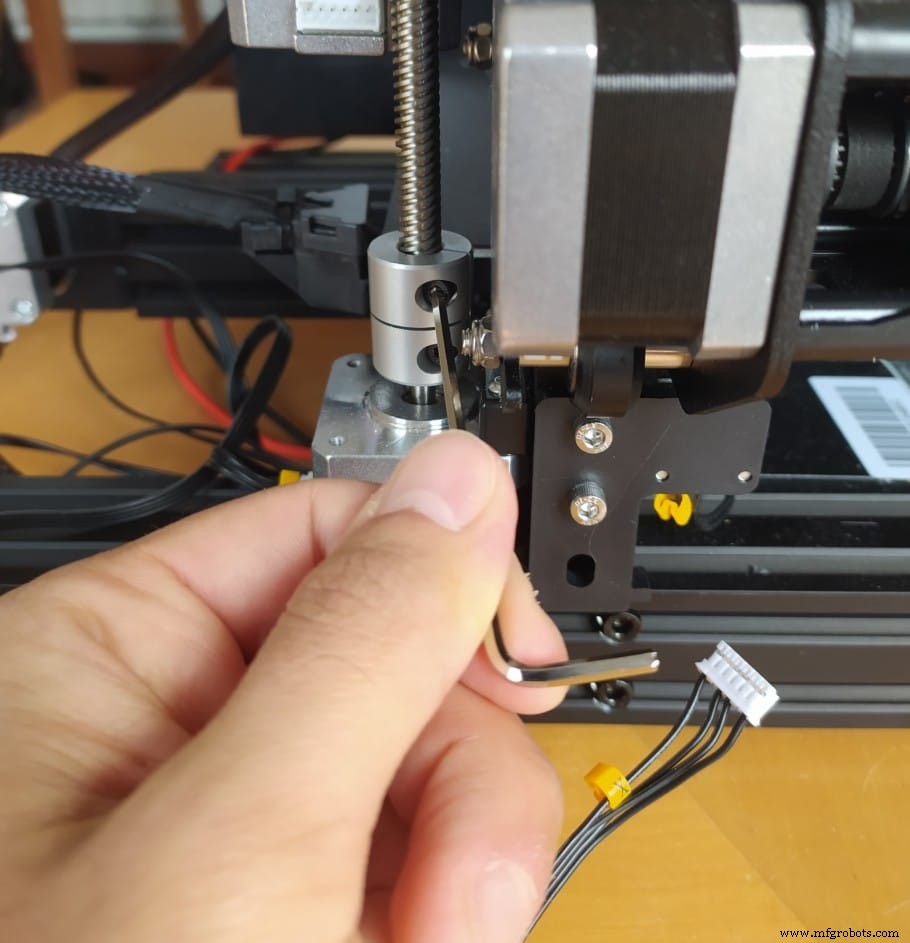
- Using the smaller Allen key, loosen up the screw on the Z rod and then remove it completely by rotating it counter clockwise and leave it on the side for now.
Straighten the two Z Axis
When I first put together my Ender 3, I didn’t do that great of a job at making sure that all the axis were aligned properly, and by that I mean that when I screwed the Z Axis on, I didn’t check to see if they were slightly rotated/misaligned in regards to the frame of the printer.
What this will do is cause a lot of unnecessary pressure on the rollers/wheels and they won’t be able to freely move up and down the axis, causing it to sag, but this will also ruin the wheels over time.
Not only that, but since the Z axis where the power supply is attached to was slightly rotated inwards, the magnetic build surface would always contact the power supply when the bed moved back.
So, here’s how to solve both these issues:
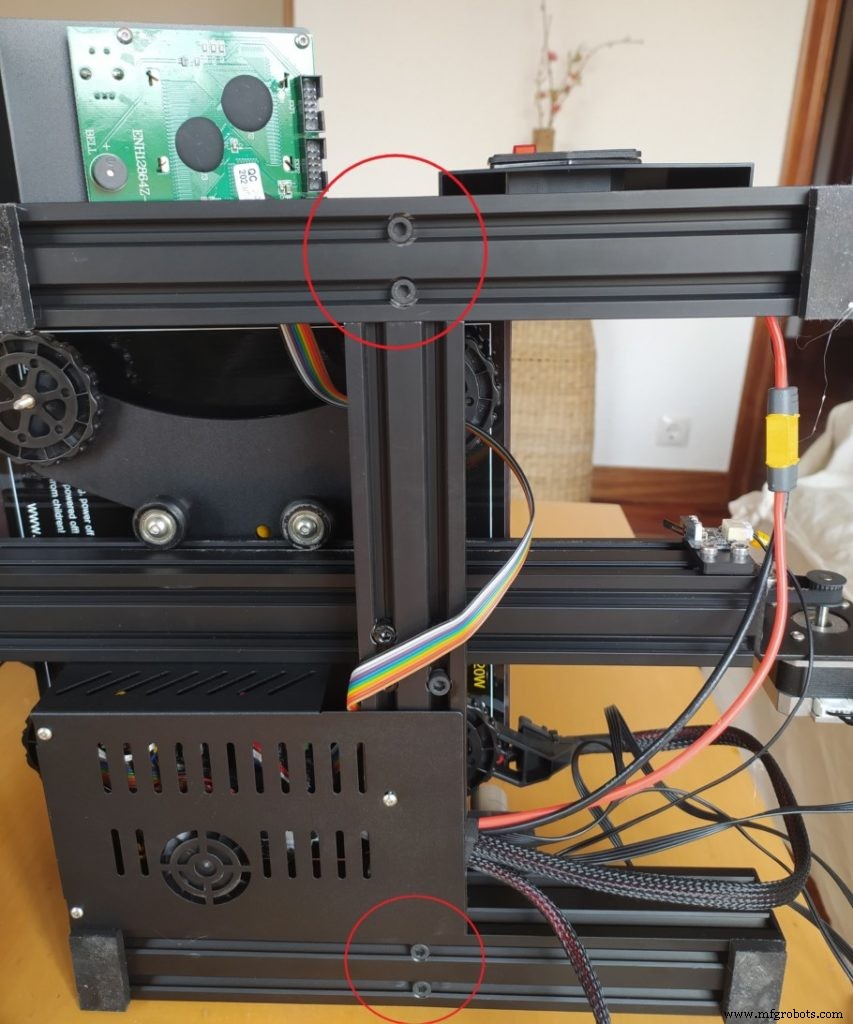
- Put the printer on its side, but make sure that the side where the display is at is facing upwards, since you don’t want the whole weight of the printer on it.
- Lightly loosen up the screws on the bottom of the printer that hold the Z Axis in place. There’s no need to completely remove them, just loosen them until you can rotate or wiggle the Z Axis a little.
- Rotate the Z Axis until it’s properly aligned and not slightly rotated to one side or the other, and holding it in place with one hand, use the other hand to tighten the screws with the Allen key to keep it in place. I did this with the power supply still attached and it worked like a charm, but it’s definitely going to be easier if you unscrew the PSU first, and this way it won’t apply any rotating forces onto the Z Axis while you’re trying to align it.
- Do the same with the other Z Axis making sure that it’s as squared and aligned as possible.
- Now it’s time to put the whole X Gantry back in place to test if the sagging is gone and if the rollers can freely roll up and down the Z Axis. To check if the issue is solved, screw in the top rail with the countersunk holes facing towards the top, just to make sure that there’s no room for any part of the printer to move, and then push the X Gantry up and down.
Important note: The Z Rod should not yet be installed at this point.
In my case, everything worked perfectly and the rollers didn’t need any adjusting at all since they were neither too loose nor too tight, but this might not be the case for you, so let’s take a look at how to fix that.
Adjust the Eccentric Nuts
An eccentric nut is different from a regular one because the hole in the nut is skewed to one side and when you turn it, it pushes the wheel/roller closer or farther away from the axis, and this allows you to adjust how tightly the whole roller assembly will be grabbing on to the axis.
Too tight, and it won’t be able to move up and down freely. Too loose, on the other hand, and the whole roller assembly will wiggle and move like crazy.
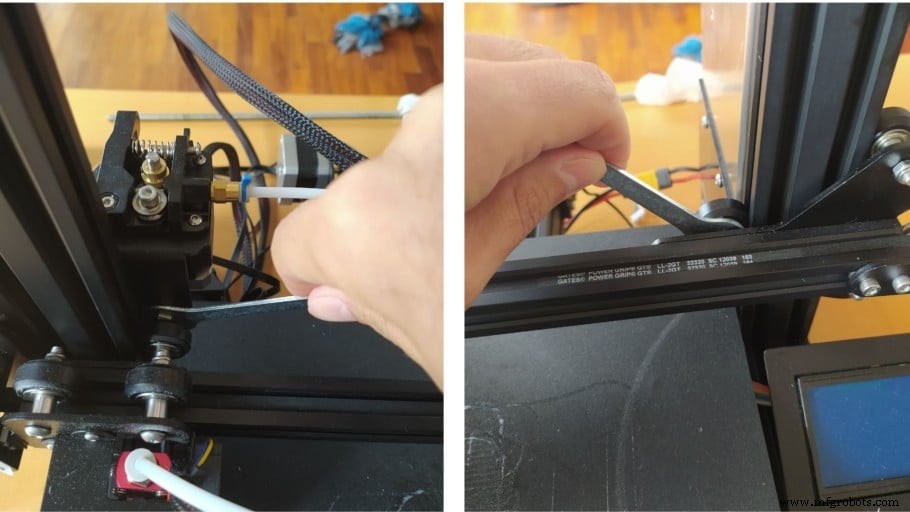
To adjust the eccentric nuts, you’ll have to use the wrench that came included in the assembly kit:
- Using the bigger side of the wrench loosen the nut until you can move the whole roller assembly/trolley and it feels loose.
- Next, start tightening it until you feel that the roller assembly is grabbing on snuggly to the Axis but not too strongly (this is actually not that easy to explain but it’s fairly easy to feel once you do it).
- Once you’re done on one side, it’s time to move on to the other side and do the same thing.
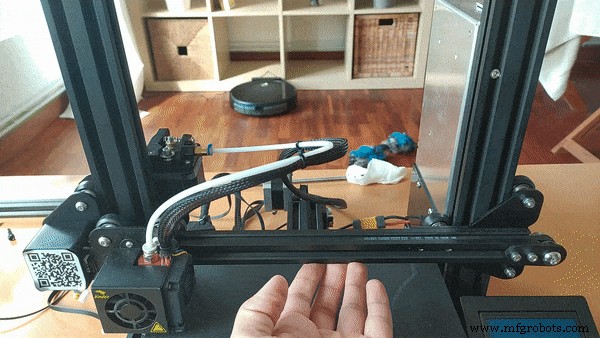
Slide the X Gantry up and down to check that it’s working smoothly, and then let it go all the way down until you hear it “Click”, essentially where the home position is, and then try pushing the X Gantry up but this time don’t push from the middle but rather from the right side (where the sag happens).
If the whole structure moves together and the right side isn’t moving farther than the left side, you’re done!
There might be one additional step you might have to take in order to fully solve this, and this would be to tighten the bolts that attach the roller assemblies.
Tighten the bolts that attach the roller assemblies
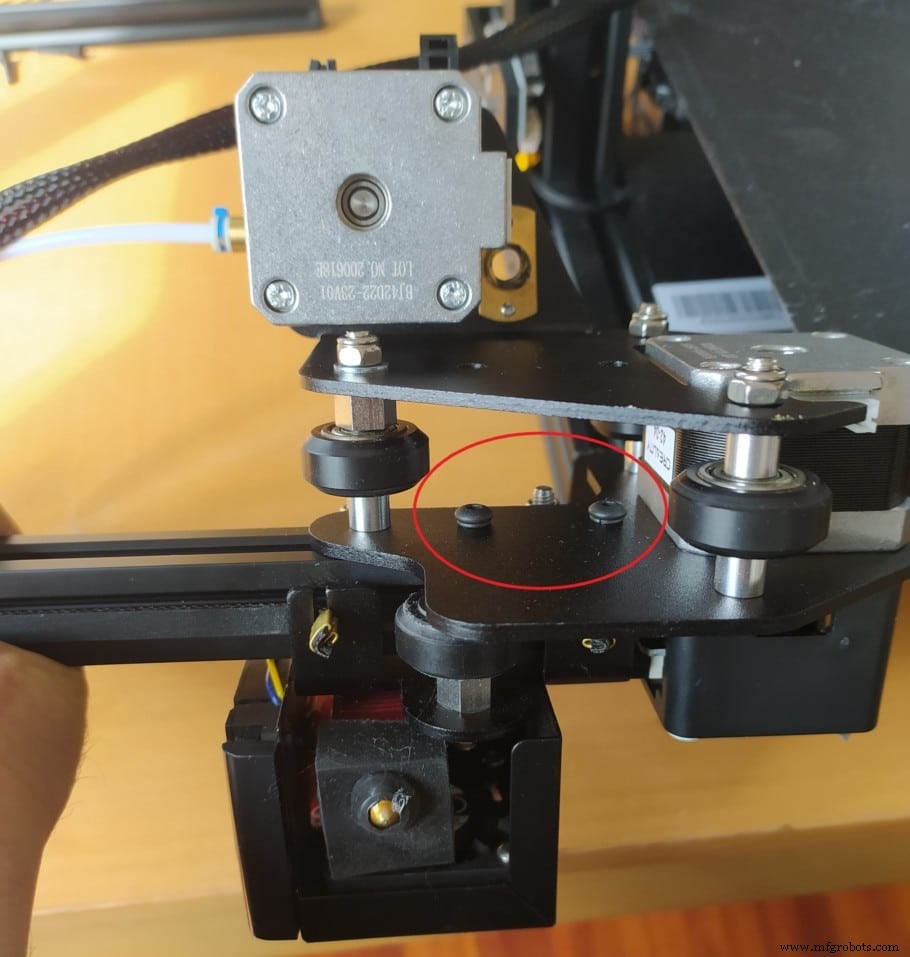
If you look at the trolley that the extruder is attached to, in the middle there should be two screws that secure it to the X Axis, and these might either be a bit loose, or when you tightened them during the assembly process, the whole structure didn’t line up correctly.
Here’s how to fix it:
- Using one of the Allen keys provided with the printer, loosen the two screws that secure the carriage to the X Axis, but leave the one closer to the center of the printer a bit tighter than the outer one.
- Using that first (inner side) screw as an anchor point, slightly adjust the X Axis until it’s lined up correctly.
- Tighten both screws until there is no play whatsoever.
However, this isn’t the main culprit as far as X Axis sagging goes, at least not in general, which is why you should focus on adjusting the eccentric nuts and the Y Axis misalignment first.
If you don’t want to have to go through all the trial and error that we did in order to find the Ideal Settings for creating high-quality prints on your Ender 3, then definitely check out our own Cura Profiles tailored specifically for the Ender 3 Printer Series (You can get all of them for just $7).
Conclusion
X Axis sagging will create a whole lot of problems and fixing it is a must. Luckily, it’s not really that hard and it took me about 10 minutes until I had the printer running smoothly again.
You could start by adjusting the eccentric nuts without even taking apart the printer, but I’d strongly suggest to follow the steps I described since it’s a super simple and effective method.
I hope this information was useful!
Have a great day!
Check out our recommended products section
We created a recommended products section that will allow you to remove the guesswork and reduce the time spent researching what printer, filament, or upgrades to get, since we know that this can be a very daunting task and which generally leads to a lot of confusion.
We have selected just a handful of 3D printers that we consider to be good for beginners as well as intermediates, and even experts, making the decision easier, and the filaments, as well as the upgrades listed, were all tested by us and carefully selected, so you know that whichever one you choose will work as intended.
3D printing
- Step‑by‑Step Guide: Replacing the Nozzle on Ender 3, Ender 3 Pro, and Ender 3 V2
- Ender 3 Nozzle Cleaning: Quick, Easy Unclogging for Reliable Prints
- Precise Z‑Offset Calibration for Ender 3: Step‑by‑Step Guide
- Fix Ender 3 Bed Leveling Issues: A Step-by-Step Guide
- Master Bed Leveling on the Ender 3: Step‑by‑Step Guide to Smooth Prints
- Print Directly from USB on Your Ender 3: A Step‑by‑Step Guide
- Eliminate Jerk and Ghosting in 3D Printing: Proven Techniques for Smoother Prints
- Fixing a 3D Printer That Won’t Feed Filament: Step-by-Step Guide
- Upgrade Your Ender 3 with Auto Bed Leveling: Benefits & How‑to
- Professional Guide: Mastering Glass 3D Printer Bed Cleaning for Perfect Prints