


Comprehensive Guide to Surface Finishes for CNC Machining
CNC machining is a subtractive manufacturing process that can produce parts with tight tolerances (up to ± 0.025 mm) and fine detail from an enormous range of metals and plastics. However, due to CNC’s subtractive nature— in contrast with 3D printing and additive manufacturing—parts often come off milling and turning machines with visible tool marks.
This is where surface finishing come in. Applying post-processing and the right surface finishes can improve surface roughness, cosmetic and visual properties and wear resistance of CNC-machined parts . Surface finishing, applied correctly, improves functionality and aesthetics, and in many cases both.
In this article, we discuss the most common surface finishes for metal CNC parts to help you select the right ones for your application.
What machining CNC surface finishes does Hubs offer?
Here are the most common surface finishes available on the Hubs platform. Please note that these are all for metal parts.
| As machined | As machined parts—or parts that come right off the machine—have minor visible tool marks and a standard surface roughness (Ra) is 3.2 μm. Surface finish requirements can be increased to 1.6, 0.8 and 0.4 μm. |
| Bead Blasting | Bead blasted parts have a matte finish with a light texture. It’s mainly used to improve a part’s visual appearance. |
| Anodizing Type II (clear or color) | Anodizing (Type II) adds a corrosion-resistant, ceramic layer to the surface of the part. Only available for aluminum and titanium, anodized parts can be dyed several colors. |
| Anodizing Type III (hardcoat) | Anodizing (Type III) adds a wear- and corrosion-resistant ceramic layer to the surface of the part. It offers greater protection than Type II and can be dyed different colors. Available only for aluminum and titanium. |
| Powder coating | Powder coating adds a wear- and corrosion-resistant finish to the surface of the parts. It has higher impact resistance compared to anodizing, comes with a large range of colors, and can be applied to any metal. |
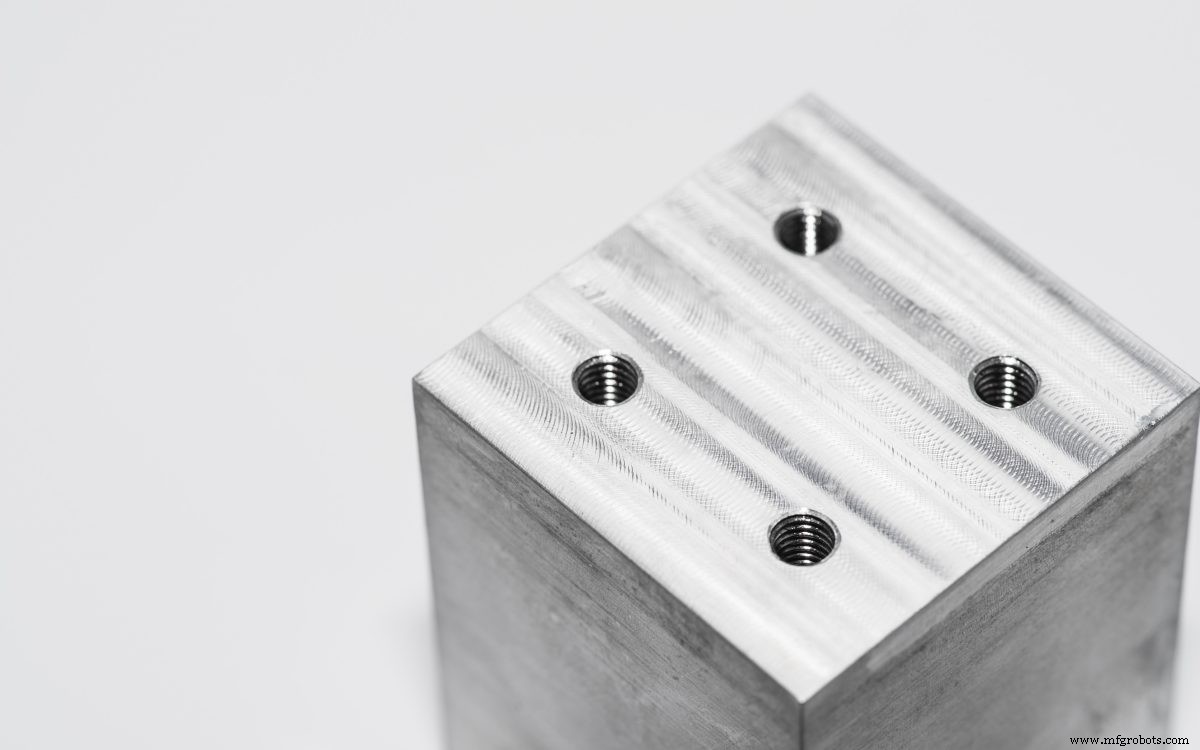
Surface finishes explained: As machined
All CNC machined parts will have marks that follow the path of the cutting tool used during machining. The quality of the surface is measured in terms of average surface roughness (Ra). Ra is a measure of the average deviation of the machined profile from the ideal surface.
The standard as machined surface roughness is 3.2 μm (125 μin). A finishing cutting pass can be applied to reduce the roughness of a surface down to 1.6, 0.8 or 0.4 μm (63, 32 or 16 μin). This will increase the cost of producing a part, as extra machining steps and tighter quality control are required.
As machined parts can be smoothed or polished to improve their surface quality and visual appearance by reducing their surface roughness. Smoothing and polishing will remove some material affecting the dimensional tolerances of the part.
Pros
Tightest dimensional tolerances
No added cost (for standard finish)
Cons
Visible tool marks| Finish | ★ ★ ☆ ☆ ☆ |
| Tolerances | ★ ★ ★ ★ ★ |
| Protection | ★ ☆ ☆ ☆ ☆ |
| Cost | $ |
| Suitable for | Any material |
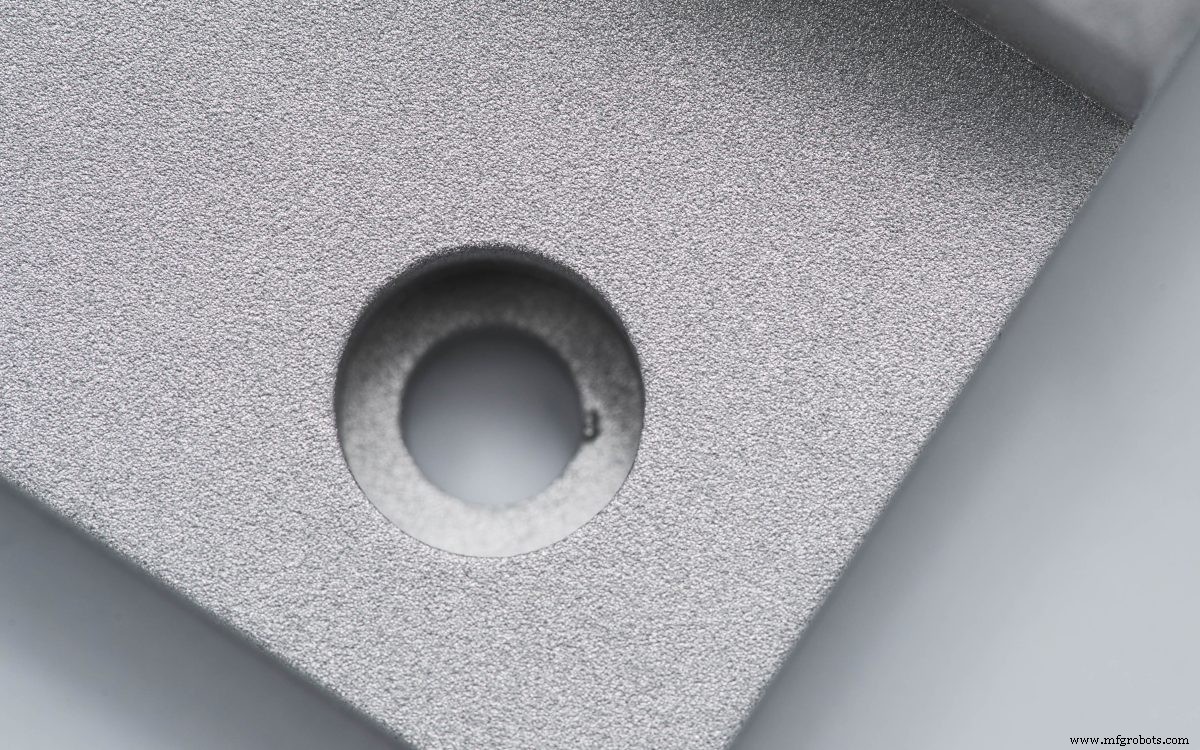
Surface finishes explained: Bead blasting
Bead blasting adds a uniform matte or satin surface finish to a machined part, which removes the tool marks. It works by bombarding your part with small glass beads using a pressurized air gun. This removes excess material and smoothes out the surface of the part. Critical surfaces or features (like holes) can be masked to avoid any dimensional changes.
In general, bead blasting is used more for part aesthetics than functionality. It is a manual process, so the result will depend to some extent on the skill of the operator. The size of the air pressure and the size of the glass beads are the main process parameters. Glass beads come in different sizes (from courser to very fine) just like sandpaper comes in different sizes and grades.
Pros
Uniform matte or satin finish
Low-cost surface finish
Cons
Affects critical dimensions and surface roughness| Finish | ★ ★ ★ ☆ ☆ |
| Tolerances | ★ ★ ★ ☆ ☆ |
| Protection | ★ ☆ ☆ ☆ ☆ |
| Cost | $$ |
| Suitable for | Any material |
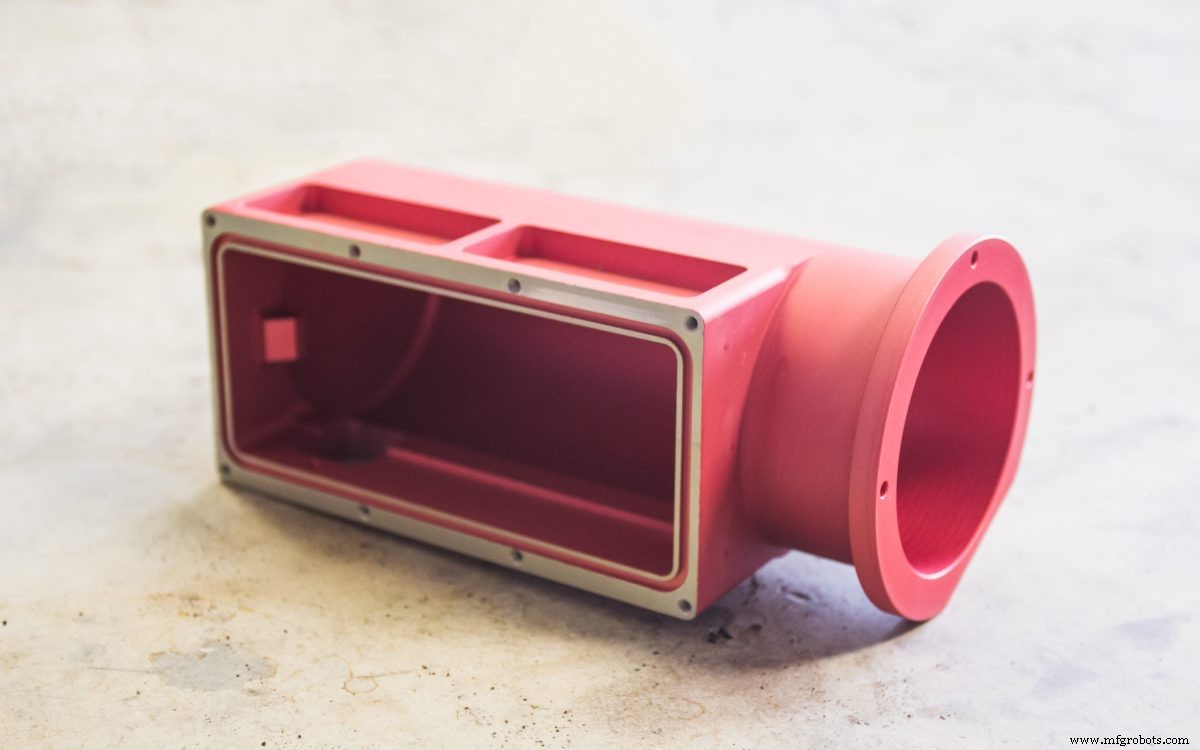
Surface finishes explained: anodizing (Type II and Type III)
Anodizing adds a thin ceramic layer to the surface of metal parts that protects against corrosion and wear. The anodic coating is electrically non-conductive, has high hardness and can be dyed different colors. Anodizing is only compatible with aluminum and titanium.
With Type II & Type III anodizing, the part is submerged in a diluted sulfuric acid solution and an electric voltage is applied between the component and the cathode. An electrochemical reaction consumes the material on a part’s exposed surface, converting it into hard aluminium or titanium oxide. A mask can be applied to surfaces with critical dimensions (like threaded holes) or surfaces that must remain electrically conductive to prevent them from anodizing. The anodized parts can also be dyed various colors before sealing (such as red, blue, black or gold).
By varying the electric current, anodizing time and consistency and temperature of the solution, coatings of different thickness and density are created.
What is Type II (clear or color) anodizing?
Anodizing Type II is also called "standard" or "decorative" anodizing and can produce coatings with a thickness of up to 25 μm. The typical coating thickness depends on the color and can vary between 8-12 μm for parts dyed black and 4-8 μm for clear (un-dyed) parts.
Type II anodizing is mainly used to produce parts with a smoother surface and provides good corrosion resistance and limited wear resistance.
What is Type III (hardcoat) anodizing?
Anodizing Type III is also called "hardcoat" anodizing and can produce coatings up to 125 μm thick. If not otherwise specified, the typical type III anodic coating is 50 μm thick.
Type III anodizing produces thick, ceramic coatings with high density that provide excellent corrosion and wear resistance, suitable for functional applications. Be aware that it requires closer process control compared to type II anodizing (higher current density and constant solution temperature near 0oC), so the cost is higher.
Pro-tip for anodizing
The anodic coating grows in both directions equally. This means that a 50 μm thick coating will protrude approximately 25 μm above the original surface and that a cylinder with 1 mm diameter before anodizing, will have a diameter of 1.05 mm after anodizing. More details on anodizing can be found in the MIL-A-8625 standard.
Pros
Durable, cosmetic coating
High wear resistance coating for top-end engineering applications (type III)
Can be applied easily to internal cavities and small parts
Good dimensional control
Cons
Compatible only with aluminum and titanium alloys
Relatively brittle compared to powder coating
Type III anodizing is the most expensive among the finishes discussed in this article
| Finish | ★ ★ ★ ★ ★ |
| Tolerances | ★ ★ ★ ★ ☆ |
| Protection | ★ ★ ★ ☆ ☆ (Type II); ★ ★ ★ ★ ☆ (Type III) |
| Cost | $$$ (Type II); $$$$ (Type III) |
| Suitable for | Aluminum & titanium |
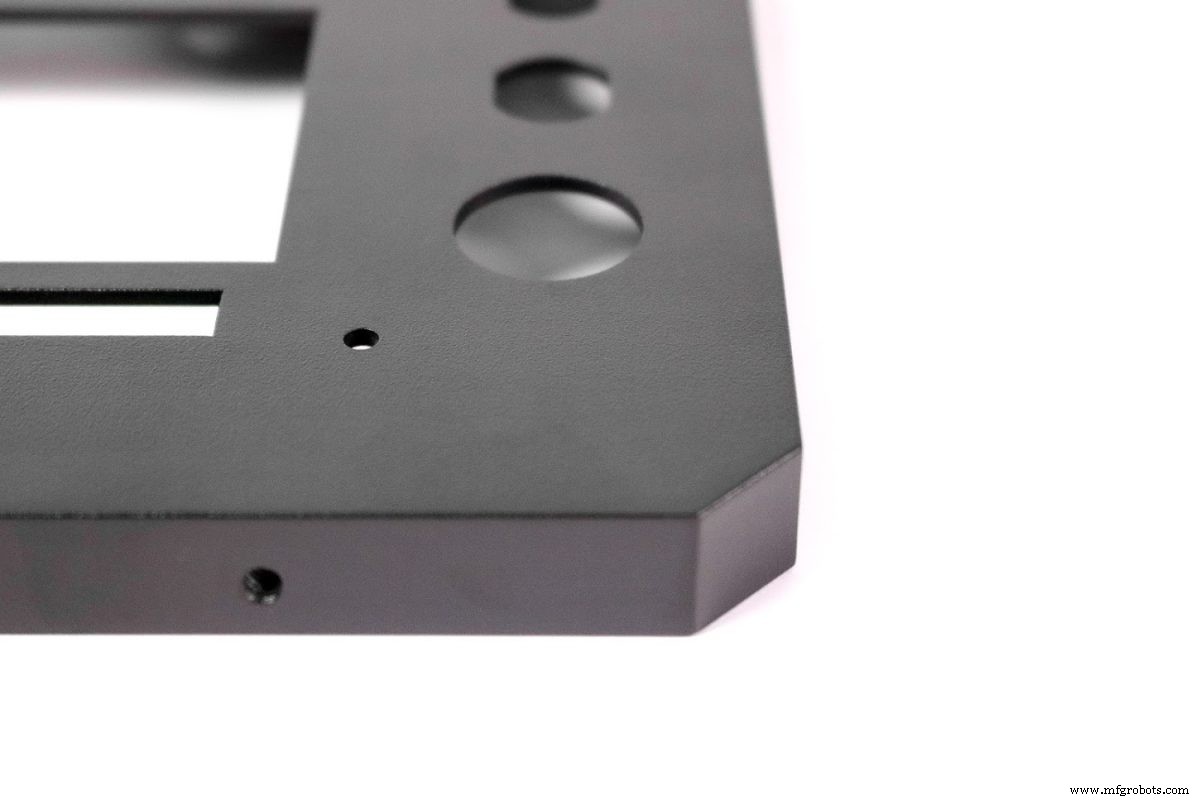
Surface finishes explained: Powder coating
Powder coating adds a thin layer of protective polymer to the surface of the part. Powder coating is a strong, wear-resistant finish that is compatible with all metal materials and can be combined with bead blasting to create parts with smooth and uniform surfaces and excellent corrosion resistance.
The powder coating process is similar to spray painting, but the "paint" in question is a dry powder instead of a liquid. The parts are first primed with an optional phosphating or chromating coating to increase their corrosion resistance, then coated with dry powder using an electrostatic "spray" gun and then cured in at high temperature (usually in an oven at 200 degrees Celcius).
Multiple layers can be applied to create a thicker coating and the typical thickness varies from approximately 18 μm up to 72 μm. A wide range of colors is available.
Pros
Strong & wear- and corrosion-resistant coating for functional applications
Higher impact resistance than anodizing
Compatible with all metals
Multiple colors available
Cons
Not easily applied to internal surfaces
Less dimensional control than anodizing
Not suitable for small components
| Finish | ★ ★ ★ ★ ★ |
| Tolerances | ★ ★ ★ ☆ ☆ |
| Protection | ★ ★ ★ ☆ ☆ |
| Cost | $$$ |
| Suitable for | Any material that can survive the thermal curing process |
What are Hubs top tips & tricks for choosing surface finishes for CNC machining?
Every surface finish has its advantages and disadvantages, so choosing the right one depends on what features match your parts requirements and application.
It’s essential to evaluate the functional and aesthetic characteristics you need, and to consider how your part will interact with adjoining components. Whether or not your part will be subject to repeated or intense friction may sway your decision.
Also, remember to take into account your parts operational environment. You may believe your part doesn’t need robust resistances, but the environmental facts might require a more intensive surface finish than you previously thought during the design phase.
Best practices per surface finish
-
Bead blasting: This surface finish works well if you’re not worried about dimensional tlerances. It leaves the part with a matte uniform finish.
-
Anodizing (type II): Use this to give your aluminum and titanium parts a protective layer that’s also cosmetic—parts come out with natural matte colors.
-
Anodizing (type III): Perfect for advanced engineering applications, anodizing (type III) gives parts high wear resistance and surface hardness.
-
Powder coating: Use this surface finish for applications where you need high impact strength. Powder coating is also suitable if your parts can’t be anodized.
Frequently asked questions
What is surface finishing?
Surface finishing is the last phase of the CNC machining process. You can use surface finishing to remove defects and flaws from parts and improve their appearance, boost resistances from certain types of wear and tear, adjust capacity to conduct electricity and more.
What is the purpose of surface finishing?
Applying surface finishes to your part protects it from wear and tear and improves it cosmetically while maintaining or even improving its functionality.
What are the different types of surface finishes?
The surface finishes available on the Hubs platform include bead blasting, anodizing (type II & type III), powder coating, brushed + electropolished, brushing and many others.
What’s the difference between surface finishing and surface roughness?
Surface finishing is any post-processing applied to a part after machining, while surface roughness is a method of quantifying the number of irregularities on a surface. The Ra parameter represents the average of all surface heights measured across a given surface area.
What preparation is needed before applying surface finishes?
In many cases, there are steps between taking your part off the machine and applying a surface finish. For instance, you may need to mask the part to protect surfaces or holes, as certain finishes augment part thickness (extra material layers). This can interfere with threaded holes and tight tolerances.
Can you combine several surface finishes?
You can combine multiple types of surface finishes to utilize varying properties. Prior to anodizing a part, for instance, you can bead blast it to achieve a smoother, matte finish.
CNC Machine
- Master CNC Machining: Proven Design Strategies for Optimal Parts
- Choosing the Right Surface Finish for Custom Molded Products
- Choosing a Trusted CNC Machining Shop: A Guide to Reliable CNC Parts Production
- Precision CNC Machining for Custom Parts – Fast, Accurate, Tailored Solutions
- CNC Machining Large Parts: Strategies for Overcoming Size Constraints
- Advanced CNC Machining Solutions for Ceramics
- Custom CNC Machining for Motorcycle Parts: Precision & Durability
- How to Choose the Ideal Surface Roughness for CNC Machining Success
- Mastering Custom CNC Machining: The Power of Jigs & Fixtures
- Precision CNC Machining: Diverse Components for Multiple Industries