


Build a Reliable Raspberry Pi UPS with PiJuice HAT – Step‑by‑Step Guide
UPS often plays a crucial role in Raspberry Pi by providing emergency power when the mains power or input power source fails. Today, we will enlighten you on building a Raspberry Pi UPS using a PiJuice HAT and simple hardware.
Why do You need a Raspberry Pi UPS?
UPS stands for Uninterruptible Power Supply. When working on a Pi project, you’ll need a UPS to ensure continued working despite occasional bumped AC adapter, power outages, or minor power fluctuations.
Others include;
- Prevent SD card corruption
Unfortunately, you can corrupt your Raspberry Pi SD card every time you shut down the Raspberry Pi improperly. However, UPS can prevent the challenge.

Raspberry Pi SD card
- Projects that need to remain on all the time
Additionally, UPS enables the integrity of projects that involve running continuously, complex scripts that don’t restart when booted, streaming, data collection, and camera.
It can also serve various custom projects like Pi-Hole and OctoPrint. They can send safe shutdown commands or notifications if it has a low battery voltage.
Raspberry Pi UPS Options
The two main options for constructing Pi UPS include:
- Option #1: Power bank

(power bank)
It’s a simple process that requires you to plug your Raspberry Pi into a power bank with high output. Essentially, you plug the external battery pack into a wall, then plug the Raspberry into the battery pack.
Important factors to consider
Power output
The power bank should have a minimum output of 1A for Raspberry Pi Zero, 2.5A – Raspberry Pi 3B+, and 2A – Raspberry Pi 3.
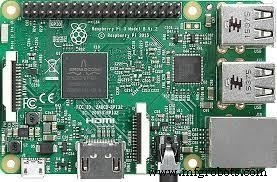
Raspberry Pi 3B+ model
The condition means the power bank doesn’t draw power, or you have not plugged any peripherals into the Raspberry.
Sadly, the Pi won’t always experience a safe shutdown since it’s unable to detect being on battery power. Also, such portable power banks with needed requirements are expensive and rare.
Simultaneous discharge/charge
The power bank should output maximum power to one of the USB ports as it charges, i.e., simultaneous charge and discharge.
Again, finding power banks with this feature is challenging because it needs additional circuitry.
- Option #2: Power management board
You will directly connect a battery and power management circuit to the Pi. Next, connect the AC adapter to the power management board.
If there’s power loss, the board still operates smoothly for a longer period. Furthermore, the Pi can notify you when its power is low to initiate a safe shutdown and if it’s using battery power.
Hardware
You will use components like;
- JuiceBox Zero – A cheap option for Raspberry Pi Zero UPS or
- PiJuice – It is easy to set up and compact.
UPS Runtime
Start by connecting a large onboard BP7X 1820mAh off-the-shelf Li-Ion/LiPo battery to continuously run your Pi for 4-6 hours or a day.

(Lithium battery)
The runtime mostly depends on the type of Raspberry Pi in use, the external hardware it supplies power to, and the tasks it’s performing. To make work easier, you can also use a battery discharge calculator to know the project’s runtime.
Install Raspberry Pi OS & Configure your Raspberry Pi
Usually, your Pi runs some software. So, depending on whether the project needs GUI or not, you can settle for a Lite or full version of Raspberry Pi OS.
Shut Down Your Pi
Run the following command after connecting the Pi to the PiJuice to shut down the Pi while working safely.

Connect the HAT (PiJuice Hardware)
Next up, cautiously press the PiJuice onto the GPIO header of the Pi, and secure it using plastic standoffs and screws.
Note; Solder a header onto your Pi first if your hardware is Raspberry Pi Zero.
Connect the Battery
A PiJuice package has a preinstalled off-the-shelf battery making it easy to replace or swap the battery in a powered Pi. If you find the battery, remove the clear plastic insulation tab on the battery.
There are circumstances where PiJuice doesn’t have a battery, or you need additional power capacity from a different Lithium-polymer/Lithium-ion battery. Here, solder a battery terminal on PiJuice, then connect the separate battery.
Attach the PiJuice case (optional)
Omit the top of the case off PiJuice when it lacks a GPIO port/ slot or uses Raspberry Pi cases. Moreover, you can use the cases designed for PiJuice, like a tall and short case for a full-size Pi, e.g., Pi-3.

Raspberry Pi plastic case
Steps; Slide off the front, back, and top of the case. Afterward, slide the PiJuice and Pi into their respective places to lock the whole assembly into slots on the case’s sides. Lastly, swap the top and sides, then connect the 4-rubber feet.
Connect a Power Source and Power on the Pi
You can connect a standard Raspberry Pi power source to the Micro-USB port of the PiJuice. Then, press the small SW button near the flashing LEDs with a pin or paperclip to turn on your Pi.
Safe shutdown; Hold and press the same power button on Pi for a minimum of ten seconds before releasing it.
Unsafe shutdown; Hold and press the power button for 20 seconds.
Additionally, install PiJuice software to enable your Pi to perform some commands on low power or undergo a safe shutdown.
Automatically shut down if the Raspberry Pi UPS battery is low
We’re now in the last step that requires configuring PiJuice to shut down PiJuice at low battery percentage/voltage.
To achieve configuration;
In the PiJuice CLI
Use the command line to run the instructions below, then check and change the configuration options.

In the PiJuice GUI
Use VNC or a keyboard to move from the menu, preference, to PiJuice settings, where you’ll change the option from Raspberry Pi OS GUI.
Afterward, press the system tasks tab, click the box on minimum charge and insert 1 in the text input. Lastly, select Apply.
For both CLI and GUI configuration options
Furthermore, you can directly edit the JSON configuration when battery capacity is low by;

Then add the following in the system_task object;

The configuration above will automatically shut down the Pi when the battery percentage reaches 1%.
Conclusion
As we conclude, we hope the guideline in our post today was easy to grasp. However, if you still have burning queries or need any assistance, kindly reach out to us.
Industrial Technology
- Integrate Azure with Power BI: Step‑by‑Step Guide for Modern Businesses
- Mastering Power Hammers: A Comprehensive Guide for Modern Blacksmithing
- Mastering Digital Circuit Design: Your Complete Guide
- Essential Guide to Choosing the Right 9V Battery Holder
- Reliable Emergency Light Circuit: Expert Step‑by‑Step Guide
- Digital Buffers Explained: A Comprehensive Guide to Signal Isolation & Strength
- Battery Backup Circuit: A Complete Guide to Building Reliable Power Solutions
- Master PCB Laminates: The Definitive Guide for Engineers
- Raspberry Pi Programming: Which Languages Are Supported? A Complete Guide
- Sark 110 Antenna Analyzer: Full Feature Guide