


OscPocketO – A Compact Arduino Synth & Drum Machine
Components and supplies
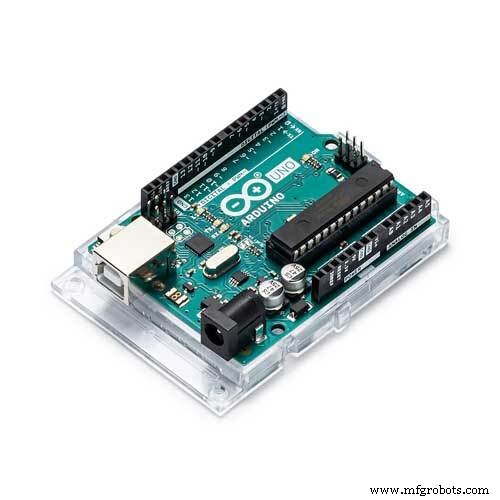 |
| × | 1 | |||
| × | 1 | ||||
 |
| × | 2 | |||
| × | 2 |
Necessary tools and machines
 |
|
About this project
Download latest code and build instructions: https://oscillator.se/arduino!
Inspired by other portable music making machines, I read up on the excellent Mozzi library. Wouldn't it be useful to be able to make a number of synths and drum machines and be able to synchronize them in tempo? OscPocketO was born - a portable music studio using only Arduino and a LCD keypad!
TheOscPocketO is controlled by switching to different modes using the SELECT button. Use the UP button to increase a value, DOWN to decrease a value, and LEFT and RIGHT to move the cursor.
The Arduino built in LEDblinks every time the OscPocketO plays a note.
Beware that connectingthe OscPocketO directly to your home stereo might overload it! Useheadphones or a mixer.
If the LCD display messesup press repeatedly so you pass the Tools menu - the LCD will bereset.
Demo:
OscPocketO SynthModes:
START. Starts and stops the sequencer.
SYNC. Sets the sync mode. NONE = no sync signals arereceived or transmitted. INT = internal, the built in clock of theOscPocketO is used andsync signals are sent (Conductor mode). EXT = external, theOscPocketO sequencer iscontrolled by an external signal, but sync signals are still sent(Player mode).
PATTERN. Select the current pattern.
EDIT. Edit the current pattern. Notes are stored as MIDIvalues in 1 bar (16 x 1/16th notes).
STATE. Edit the state of the notes: X = on, O = off.
TEMPO. Set tempo of the sequencer.
GATE. Set gate of notes played. Gate is expressed aspercent of 1/16th.
SHIFT. Transpose(UP/DOWN) and Shift the sequence (LEFT/RIGHT).
WAVEFORM. Set the waveform of the (first) oscillator: SIN(sine), TRI (triangle), SAW (sawtooth) and SQUARE (square).
ATTACK. Set the Attack time in ms.
RELEASE. Set the Release time in ms.
FILTERMODE. The OscPocketOhas a low pass filter. The Cutoff can be modulated:
- FIXED. No modulation, use the Cutoff and Resonance values.
- RANDOM. Random modulation from 0 up to the Cutoff value.
- SLOW. Modulation over approximately 4 bars from 0 to 255. Changes the Cutoff value.
- FAST. Modulation over approximately 1 bar from 0 to 255. Changes the Cutoff value.
CUTOFF. Set the Cutoff frequency of the filter (as a numberfrom 0 to 255).
RESONANCE. Set the Resonance of the filter (as a numberfrom 0 to 255).
WAVEFORM2. Activate and set the waveform of thesecond oscillator: NONE (off), SIN (sine), TRI (triangle), SAW(sawtooth) and SQUARE (square).
DETUNE2. Detune the second oscillator relative to thefirst. The value is in Hz and is added to the frequency of the firstoscillator.
PLAY. Keyboard mode. The sequencer is stopped (if running)and the 4 first notes of the current pattern are mapped to LEFT, UP, DOWN and RIGHT.
TOOLS. Utilities. Activate with UP.
- S. Save synthesizer settings and patterns to EEPROM so they can be recalled after power off.
- L. Load synthesizer settings and patterns from EEPROM.
- R. Create Random pattern.
- B. Create a Bassline pattern based on the current note.
- C. Copy current pattern to next pattern position.
The OscPocketO Drumscan play 5 simultaneous sounds, all created by virtual analog synthsthanks to the Mozzi library: Kick, Snare, Hihat, Clap and Crash.
Modes:
START. Starts and stops the sequencer.
SYNC. Sets the sync mode. NONE = no sync signals arereceived or transmitted. INT = internal, the built in clock of theOscPocketO is used andsync signals are sent (Conductor mode). EXT = external, theOscPocketO sequencer iscontrolled by an external signal, but sync signals are still sent(Player mode).
PATTERN. Select the current pattern.
EDIT. Edit the current pattern. Notes values areconstructed by adding values that corresponds to different sounds:
- Kick = 1
- Snare = 2
- Hihat = 4
- Clap = 8
- Crash = 16
- Tom = 32
An example: A value of 17 means that this step will play Kick (1)and Crash (16), 1 + 16 = 17.
TEMPO. Set tempo of the sequencer.
GATE. Set gate of SYNC OUT signal. Gate is expressed aspercent of 1/16th.
EDITKICK. Set frequency of kick, releasetime and slope (how quickly the sound drops in frequency) wherelarger value = quicker drop.
EDITSNARE. Set frequency of snare, releasetime and slope (how quickly the sound drops in frequency) wherelarger value = quicker drop.
EDITHIHAT. Set frequency in some interestingstepped values and release time.
EDITCLAP. Set release time.
EDITCRASH. Set release time.
EDITTOM. Set frequency of tom, release timeand slope (how quickly the sound drops in frequency) where largervalue = quicker drop.
PLAY. Solo mode. LEFT = Kick, UP = Snare, DOWN = Tom andRIGHT = Crash.
TOOLS. Utilities. Activate with UP.
- S. Save patterns to EEPROM so they can be recalled after power off.
- L. Load patterns from EEPROM.
- R. Create Random pattern.
- B. Create a repeating pattern based on the current note.
- C. Copy current pattern to next pattern position.
One OscPocketO has to be theConductor. This is the machine that sends synchronization data to theother OscPocketO:s called Players.
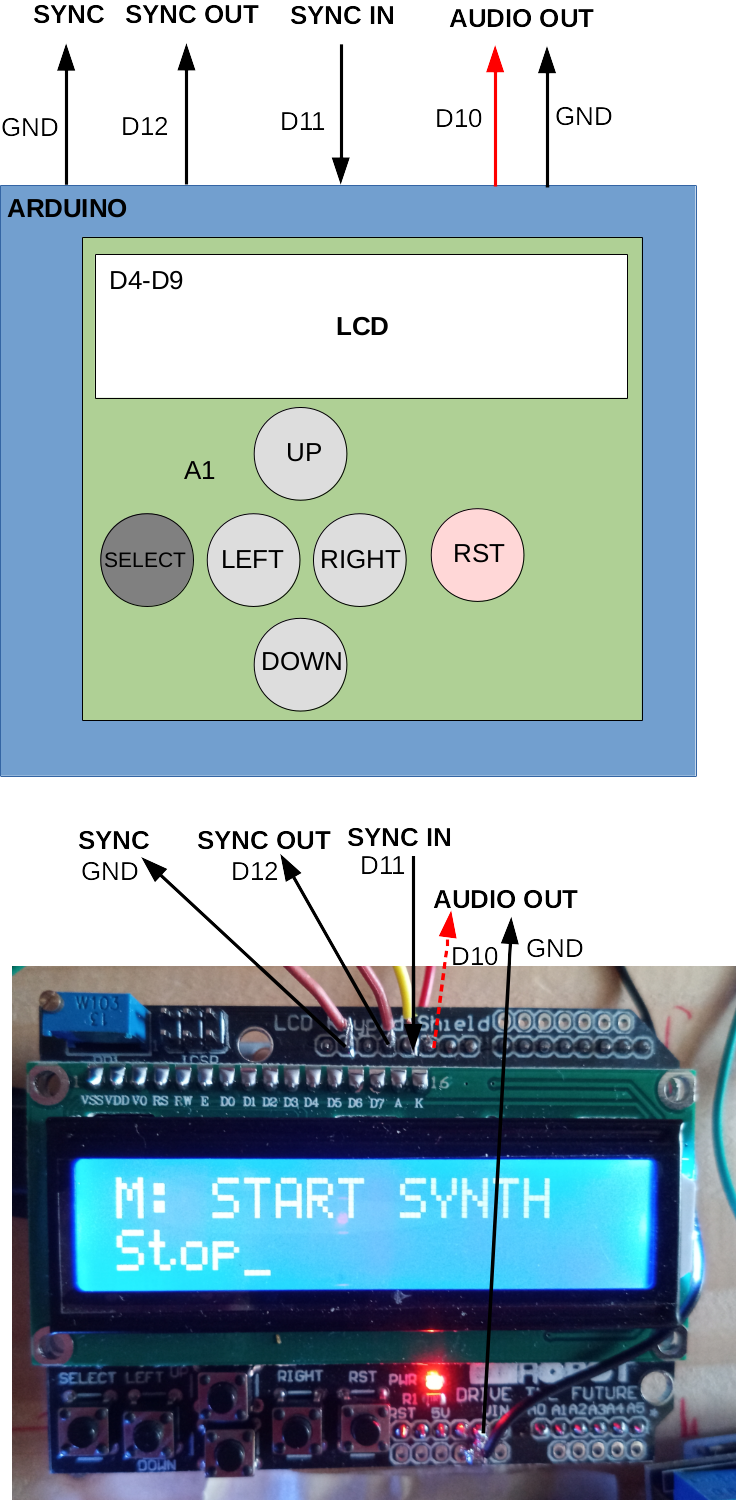
1.SetupConnect GND (ground) of allconnected OscPocketO:s. See build instruction for how to make asuitable cable.
Conductor. Start: Stop.Sync: Internal.
Player(s). Start: Stop.Sync: External. Start: Play. (Order is important.)
Connect SYNC OUT fromConductor to SYNC IN of first Player.
If you have several Playersconnect SYNC OUT from the first Player to SYNC IN on the secondPlayer. Repeat for each Player.
2.PlayConductor. Start: Play.
You can tweak sounds andswitch patterns on all OPOs. You change tempo (only) on theConductor.
Building the hardware1.LCD Keypad shieldBeforeattaching the LCD Keypad shield we have to make sure that it is notconnected to pin 10 (D10) on the Arduino. D10 is normally used tocontrol the backlight (brightness) on the LCD. But we are going touse D10 for audio.
To make this work you haveto bend the pin on the shield that goes into D10 on the Arduino. Bendit 90 degrees.
This image of the back ofthe Arduino shows the bent pin of the shield (1) and the audioconnection from the Arduino (2) which we are going to fix in the nextstep.
Now attachthe LCD Keypad shield.
The LCD and the buttons areconnected to the Arduino by the Shield:
- LCD: D4, D5, D6, D7, D8, D9
- Buttons: A1
The RST (Reset) buttonresets (restarts) the Arduino and is not used by the software.
2.Audio jackThe audio jack is connectedto D10 and GND on theArduino. The Mozzi library normally works with D9, but as thisconnection is used by the LCD Keypad shield, we have to make somechanges to the Mozzi library. This is described in the Softwaresection later on.
Solder acolored wire to the"tip" ofthe audio jack(signal)and solder a black wireto the sleeve(GND = ground).
Solder thecolored wire to the D10 of the Arduino. As we already have attachedthe shield use the D10 solder joint on the back of the Arduino.Solder the black wire to Arduino GND which can be found on top of theshield.
3.Sync in and outCut the female-female patchcables in half and solder one part to D11 (SYNC IN), one part to D12(SYNC OUT) and one part to GND.
4.Put it in a boxFor durability you shouldput the OscPocketO into a box and fasten the cables and the audiojack.
5.Making a cable/wire for synchronization groundTake a long male-male patchcable, remove some isolation in the middle, and solder a cut off malecable. Now all three (or more) end pins connect.
Installing the SoftwareConnect your Arduino to your computer running the Arduino IDE.
Installand configure the Mozzi libraryDownload and install Mozzi using the instructions on the Mozzisite: https://sensorium.github.io/Mozzi/download/.
If you need, read more about installing Arduino libraries:https://www.arduino.cc/en/Guide/Libraries.
By default Mozzi outputs to D9, but as this pin is used by the LCDKeypad Shield, we have to change this to D10.
In the Mozzi libraries folder, find and openAudioConfigStandardPlus.h in a text editor.
Change A to B and B to A on the following four lines so they looklike this:
// Used internally.  If there was a channel2, it would be OCR1B.
#define AUDIO_CHANNEL_1_OUTPUT_REGISTER OCR1B
#define AUDIO_CHANNEL_2_OUTPUT_REGISTER OCR1A
(...)
#define AUDIO_CHANNEL_1_PIN TIMER1_B_PIN //defined in TimerOne/config/known_16bit_timers.h
#define AUDIO_CHANNEL_2_PIN TIMER1_A_PIN
Chose which OscPocketOyou would like to try: Synth or Drums. Open thecode_synth/code_synth.ino och code_drums/code_drums.ino in theArduino IDE and upload them to your Arduino.
Code
- Code for Synth and Drum machine.
Code for Synth and Drum machine.Arduino
No preview (download only).
Schematics
Manufacturing process
- Understanding Milling Machines: Key Components and How They Operate
- NC vs CNC Machines: Key Differences Explained
- Expert Guide to Drilling and Tapping Machines: Customization & Versatility
- Enhance Metal & Wood Cutting with a High-Performance Bandsaw Machine
- Advanced 5-Axis Machining & Multi-Tasking: Precision & Efficiency
- Advanced Turning Centers & CNC Machine Technology
- Understanding Boring and Milling Machines: How They Work and Their Applications
- Understanding CNC Turning and Milling Machines: Functions, Benefits, and Applications
- Power-Feed vs Hand-Feed Drilling Machines: A Comprehensive Guide
- Shaper vs Planer: Key Differences Explained