


TIG Welding Magnesium Made Easy: A 6-Step Professional Guide
Welding Magnesium is not something many welders I know are willing to attempt, even though it is possible. Magnesium tends to catch fire if heated too much and God help you put out a magnesium fire once it gets started.
Magnesium has a flashpoint of 883 ˚F and burns at a temperature of 4,000 ˚F. This kind of heat turns to water and even carbon dioxide into fuel, so not many are willing to try welding magnesium.
How To TIG Weld Magnesium In 6 Steps
Before we get on to the more intricate matters, let’s settle down on the procedure first. Here are the step-by-step instructions on how to TIG weld magnesium properly.
Step 1: Identifying the Base Metal
It’s often hard to figure out what metal you’re working on because they all more or less look the same. And it’s even harder to separate magnesium from aluminum as they are both structurally and visually, similar to each other.
So, that’s a big problem. The methods for tig welding magnesium and tig welding aluminum are completely different. As a result, proceeding to apply the wrong method on one of them might result in catastrophic results.
Okay, okay, maybe thinking of it as a ‘catastrophe’ is too much of a stretch. But considering how valuable both of these metals are, it’s a shame to see them go to waste. They have unique properties and that’s why they are an integral part of most aerospace designs.
In fact, all those helicopters and airplanes that you see from time to time, integral parts of the inner gears and frameworks of such structures are made from aluminum and magnesium alloy. And why? Because they have a light build but strong structural integrity.
So, it doesn’t make sense to let such precious metals go to waste for no reason, does it? Precisely. That is the primary reason why you should always check out the base metal before proceeding to weld it.
And don’t worry. You can easily figure out which metal is which by some super simple tricks. And we will elaborate on that bit fully with separate instructions in just a while. Let’s find out about the actual welding mechanism first.
Step 2: Alloyed Composite Identification
Only identifying whether the metal is aluminum or magnesium isn’t enough when it comes to TIG welding. You have to thoroughly check the metal’s alloy composition as well.
Since magnesium is a highly reactive metal in nature, it’s rarely found in free form. As a result, it always comes mixed with some other metals like aluminum, zinc, zirconium, thorium, etc. And these special combinations are what are known as magnesium alloys.
Out in nature, you’ll find several types of magnesium alloys like these. Again, the base piece that you’re working with could also end up being pure magnesium. It’s indeed a rare occurrence but it’s not impossible.
Thus, after identifying the welding piece as magnesium, your next job is to identify the correct alloy of the metal. This is a highly important step as identifying the right alloy will directly determine your next step.
Remember how you can’t use the same welding method for aluminum and magnesium? The same stands true for the alloys as well. Because with alloy composites, you’ll need to use filler metals in later stages.
And depending on the combined metal, the choice of filler metal will continue to change as well. Not all of these filler metals can withstand the same temperature. As a result, it’s super important to know what alloy composite to work with before preheating the mixture.
Actually, not the heating temperature, you’ll realize the appropriate voltage settings and electrode type too. Needless to say how important these two factors are for matters like welding and cutting down metals and minerals.
But how can you figure out or identify the right type of alloy composite? Well, contacting the original manufacturer should give you an appropriate idea. Since they are the ones who provided you with the composite, they should have all kinds of history about it alongside.
And that history will help you to not only figure out the alloy type but also the proper equipment. All welding material comes with guidelines that specify what to use and what not to use. So, you need to thoroughly read such instructions before starting.
However, it’s not always possible to get in touch with the manufacturer due to unavoidable reasons. It becomes much harder to identify the alloy composition properly when that happens. But that being said, it’s not impossible to do so if you have the skills.
The main hindrance in identifying a magnesium alloy that comes without proper instructions is to find accessible pieces. If you carry out the experiments on a large scale, you might end up destroying most of the welding piece itself.
That’s why it’s important to look for expendable pieces that you can work on with ease. It’s best if you have some scraps i.e. bits and pieces alongside the main boulder. But, if you don’t, you’ll most likely have to break out a small part to continue with the experiment.
Such experiments include – figuring out the strength to weight ratio, differences in molecular weight of the compounds, etc. Again, you can also carry out several reactions to see how each of the alloys reacts with a certain compound.
All in all, it’s pretty basic level knowledge for a welder to have in their arsenal. But if you need some help remembering them correctly, you can contact the American Welding Society.
They own the entire library of Welding Handbooks to help welders with every possible situation that they may face. So, feel free to take the help of these handbooks if you suddenly get stuck during the welding process.
Step 3: Confirming the Welding Area
Now that all matters of metal and alloy are finally resolved, time to carry on with the actual welding! And the first step in preparing the magnesium for welding is to confirm the specific welding area.
This helps to clean and properly prepare the piece of the welding metal. That way, you can have a clear-cut idea on which part to work on and how to systematically progress. In short, it’s like this little map that later directs you in the subsequent processing period.
You can either create a mind map for the specific area if you’re experienced enough. Or, you can take a metal marker and just draw around the edges you’ll work on later. You can also use random board markers since it’s a temporary map.
Just don’t use any permanent marker or anything like that. Those can cause unwanted chemical reactions including passive corrosion and stuff. Plus, it’s another hassle if you can’t simply wipe off the marking. So, it’s just best, in general, to refrain from using such markers.
Step 4: Grinding The Welding Area
After you have chosen which area you’ll work on, time to bring in the big guns. Now you can start grinding the area which is an important step of the welding procedure. It will help you to fill down the area or lay beads throughout the base.
However, instead of grinding, some welders prefer to boldly crack up the surface. And then they proceed to fill or cover up the crack with the filler metal or magnesium beads. But, we would highly recommend not to go down that road as it’s not as full-proof as simply grinding.
Many may disagree but grinding is actually better than cracking up the surface. Because while you’re boldly cracking, you can’t guarantee equal force on all points of the surface. As a result, some parts get smashed a little too deep while the others, not so much.
On the other hand, you have a better chance of equal pressure distribution during grinding. That way, all surface points are more or less equally hit and there are no visible irregularities.
Furthermore, it’s easier to fill the base when you start by grinding. As mentioned above, cracking results in improper openings. And since magnesium is the lightest structural metal, it can’t fill up the huge gaps properly.
Only the upper surface is kind of filled and the rest not so much as the metal is too lightweight. So, as you can understand already, it kind of creates a structural imbalance of some sort. And that’s not good for the welding piece in the long run as it becomes vulnerable.
Meanwhile, since all the gaps are more or less equal in dimension after grinding, the filling becomes easier. The filler metal can easily reach all the nooks and crannies with no extra effort that way. As a result, it can properly bind to the base and becomes structurally sound.
Step 5: Utilizing Time Properly
Welding indeed takes a lot of concentration and with that, loads of time. So, everyone looks for ways to not make the procedure so tedious and time-consuming. And that’s where they make a huge mistake. While trying to do the work more quickly, they end up compromising on the quality of the work.
Again, some may end up skipping certain steps altogether which results in a complete failure. That way, not only are the welding pieces destroyed in the process but they also have to start the whole process anew. As a result, they actually end up having to do double the work.
The moral of the story – don’t use cheats that you aren’t 100% sure will work out. Also, do not under any circumstances, compromise on the work itself. You may make a few mistakes on your first few tries, which is completely okay.
But purposely using shortcuts that reduce the welding quality is completely advised against. Because how structurally sound a framework is directly correlated to the quality of welding. Now, do you see why we recommend grinding instead of simply cracking the surface?
Precisely. Cracking may take less time and effort but it’s not a reliable method in the long run. That’s why even though grinding may take much longer and a higher level of concentration, it’s the only way to go.
However, there are indeed some tried and tested methods for lowering down the time with the grinding procedure. Professional welders over ages have intricately tried out these methods and slowly perfected the application to reduce the grinding period.
For instance – you can use a coarse carbide burr while grinding the metal. That way, you’ll cover sufficient space in one go while grinding. Using a smaller burr will increase your grind to space ratio and thus, will end up taking way longer.
Again, you can take a few minutes to thoroughly clean the metal before starting to grind. Because magnesium is actually quite porous due to its lightweight structure. So, if you don’t clean it in advance, you might find it troublesome to navigate while grinding.
You can use a chromic acid solution to thoroughly clean the metal quickly. Here are the components that you can include in the cleaning solution:
- Chromic acid (24 oz)
- Sodium Nitrate (40 oz)
- Calcium Fluoride (⅛ oz)
- Water (50/60 oz)
Basically, use enough water to make a gallon of this special cleaning solution. That much amount is enough to completely soak and clean the metal thoroughly. You can let the concoction soak the metal for about an hour to make sure it takes effect.
And if you want the reaction to happen faster, here’s a great tip. Heat up the welding metal in advance in an appropriate oven for a few minutes. The high temperature will highly accelerate the rate of the overall reaction.
As a result, when you apply the concoction to a preheated magnesium piece, it will get cleaned much faster. However, make sure to wear protective hand and eye gloves while doing this and the concoction is quite corrosive. And don’t handle the heated magnesium directly.
Step 6: Filling the Gaps
At last, you need to fill up the gap caused by grinding with the filler metal. You can use multiple filler metals for this part. But you’ll find most welders using the AG 92 A filler rod for this purpose.
The reason why this rod is used is that it’s generally an all-purpose filler. So you can’t really go wrong with it while welding. And they are quite reasonably priced as well.
Anyway, while heating the welding area, it’s important to remember that magnesium heats up easily. It starts to melt around 800-830 degrees Fahrenheit and goes all the way up to 1200-1300 degrees Fahrenheit.
So, remember to set the temperature properly before starting to weld. And use inert gases, preferably Argon as a buffer because reactive gases or metals will catch fire at this temperature. And of course, don’t forget to use alternating current for magnesium welding.
Additional Safety Precautions for Tig Welding Magnesium
Magnesium can be a treacherous and difficult metal to work on. The reasons being for this are that:
- Magnesium is a flammable metal, once it catches, the metal burns at 4,000 ˚F, which is hot enough to break apart to molecular bonds of H2O releasing the oxygen and immediately turning it into fuel for the fire, the same goes for CO2. Often in order to put out a magnesium fire the only option is to starve it of oxygen via either sand, cement powder, or Class D Osha recommended extinguishers.
- Magnesium is a porous metal, meaning that its microscopic structure is filled with minute pores. Due to magnesium casting being used largely in machine parts and its inherent porousness, a magnesium casting will often absorb large amounts of oil. This increases the risk of a fire, and it is difficult to get a good contact with the metal in order to establish a solid weld.
- Magnesium, like aluminum, can come in a variety of different alloys, sometimes they are zinc alloys. Also, both metals tend to develop an oxide layer on its surface, making the two metals difficult at times to identify
- Because magnesium is flammable, the shavings from grinding and cleaning the metal can easily burst into flame. After grinding and preparing the metal for welding, it is good practice to go ahead and wipe down the station and sweep the area, so any errant arcs or sparks won’t cause a fire.
- Magnesium alloys, like aluminum, that have been heat treated in order to improve strength are sensitive to getting too hot. If you get these alloys too hot, it will reduce the strength of the material.
Tips for welding magnesium castings
- Clean as good as you can with acetone and a carbide burr…. A coarse burr that won’t load up.
- Often, filler rod choice is governed by a written procedure according to the composition of the magnesium alloy base metal… But if you have the option, use az101 filler rod
- Preheat thick parts to around 300f
- Use same tig machine settings as for aluminum, except that a 50/50 argon/helium mix makes a huge difference.
- Light up and increase amperage until it barely puddles. If it does not puddle clean, stop, burr, wire brush, repeat as many times as necessary to get it to puddle clean
- Oil gets into the pores of this stuff and it takes a while sometimes to get enough out to weld clean
- Use a much closer arc length than for aluminum…like so close that you think it’s too close.
- Weld small beads and clean in between with your small 90 air grinder and a carbide burr and then a stainless wire brush.
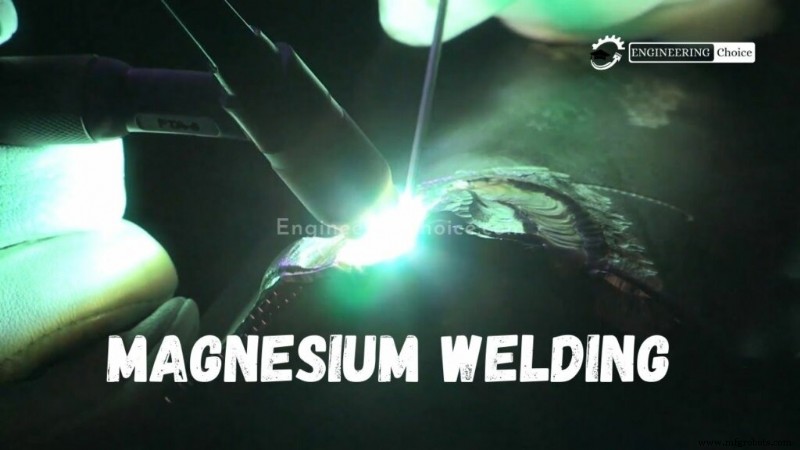
Magnesium Welding Video
Manufacturing process
- Mastering TIG Welding on Magnesium: A Safe, Step‑by‑Step Guide
- Expert Guide to Aluminum Welding: Techniques, Tips, and Safety for Strong, Sleek Seams
- MIG Welding Explained: Techniques, Benefits, and How to Get Started
- Master Titanium Welding: Proven Process & Techniques
- Mastering Nickel Alloy Welding: Comprehensive Techniques & Best Practices
- Master Copper Welding: Expert Techniques & Practical Guide
- Understanding Welding Spatter: Causes and Effective Reduction Techniques
- Secure Affordable Car Insurance in 5 Simple Steps
- Preventing Weld Smut: Proven Strategies for Cleaner, Higher-Quality Welds
- Robot Welding Accuracy: Reliability, Quality, and Cost Efficiency