


How to Weld and Glue 3D‑Printed Plastic Parts for Strong, Precise Assemblies
When a design exceeds the build envelope of a 3D printer, the most practical approach is to segment the model into smaller, printable components and then assemble them into a single finished part. This workflow is common in both industrial prototyping and hobbyist projects, and it opens the door to advanced joinery techniques that combine mechanical strength with aesthetic polish.
Preparing Your Parts
Before you apply adhesive or heat, clean each component thoroughly. Remove any residual support material—especially for SLS prints—by brushing, rinsing, or a brief soak in a suitable solvent. Verify that the mating surfaces fit snugly; warping or dimensional drift can compromise the joint and make post‑processing more difficult.
Safety reminder: Work in a well‑ventilated area and wear gloves, eye protection, and a respirator if necessary. Proper ventilation protects you from fumes generated by many adhesives and solvents.
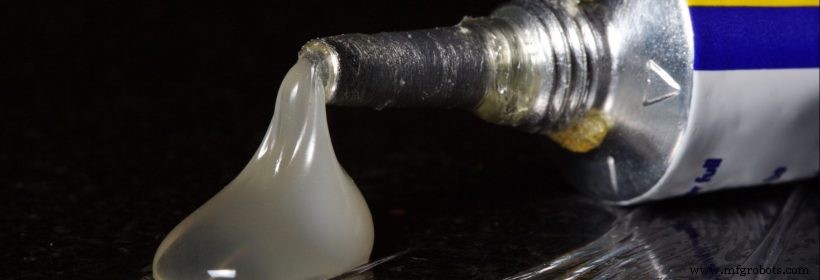
Gluing Your Parts
Several adhesives work well with FDM, SLA, and SLS prints. Choose the one that matches your material, desired bond strength, and finish.
- Superglue (cyanoacrylate) – Inexpensive, fast‑setting, and resistant to temperature extremes. It bonds quickly but can discolor dyed filaments, so test a small area first. Allow 24 hours for full polymerisation before applying stress.
- Epoxy – Two‑component resin that cures slowly, giving you time to reposition parts before the bond hardens. Epoxy tolerates most thermoplastics, ceramics, and metals, and produces a robust, durable joint.
- Neoprene (rubber cement) – Less common, but flexible and compatible with a wide range of plastics. It dries slowly and leaves a visible residue, so it’s best for low‑visibility applications.
Welding Techniques for Plastic
When the printed parts are made from the same polymer, you can employ thermal welding methods that create a seamless bond.
- Acetone Fusion (SLS) – A light mist of acetone applied to the contact surfaces, followed by the original powder, melts the surface layers and fuses them together. Use sparingly on thin or intricate features to avoid distortion.
- Friction Welding (SLA/ABS) – A rotating tool heats the interface by friction, allowing the two pieces to melt and merge. This method is ideal for large assemblies that require a mechanically superior connection.
- Microwave Welding (research) – Texas A&M researchers demonstrated a microwave‑assisted process that heats the plastic uniformly without direct contact. Though still experimental, it promises a hands‑free, high‑strength join.
Getting a Clean, Strong Join
Regardless of the joining method, finish the interface with a light sand, a quick touch‑up, or a coating that matches the rest of the part. A clean joint reduces the need for further machining and ensures a professional appearance. The end result is a robust, durable assembly that can be manufactured in any size your design demands.
3D printing
- The Three Pillars of 3D Printing Success: Hardware, Materials, and Software
- Choosing Between 3D Printing and CNC Machining for Plastic Parts
- ADAM Metal 3D Printing: A Breakthrough for Low‑Volume, High‑Mix Production
- Plasma Arc Welding (PAW): Process Overview, Parts, and How It Works
- Gas Welding Explained: Process, Parts, and Applications
- Beyond Plastic: 3D Printing Services Transforming Modern Industry
- Plasma Arc Welding (PAW): Process, Parts, and How It Works
- Gas Welding Explained: Process, Components, and Applications
- Ultrasonic Welding of Plastics: Process, Benefits, and Applications
- Expert Plastic Part Marking: Pad Printing & Laser Engraving for Superior Finish