


How to 3‑D Print a Durable Skateboard Truck Using Onyx‑Carbon Fiber – A Step‑by‑Step Guide
This article walks you through building a fully functional skateboard truck using 3‑D printing. The parts are printed in Onyx reinforced with carbon fiber, combined with a custom steel axle, and assembled with off‑the‑shelf hardware. Let’s dive in.
What Is a Skateboard Truck?
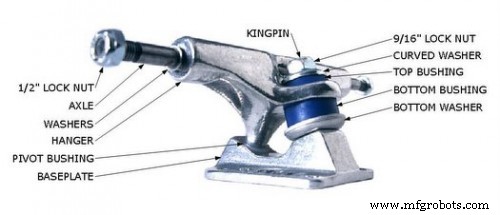
A skateboard truck connects the deck to the wheels and provides steering. It is made up of a baseplate (bolted to the board) and a hanger (which holds the wheels). The hanger pivots around one edge of a triangular interface with the baseplate; bushings act as springs to re‑center the truck when the rider isn’t leaning.
Why 3‑D Print a Truck?
Instead of printing the entire truck, this build focuses on the aluminum‑like components: the main sections of the baseplate and hanger. The axle is fabricated from 1144 “fatigue‑proof” steel, and the bushings and hardware are purchased off‑the‑shelf.
Traditional aluminum trucks are cast in steel or sand molds, requiring a full mold‑making cycle for each new design. 3‑D printing can drastically reduce prototyping time—print a part overnight and assemble it the next morning. This project demonstrates that workflow while showcasing how the Mark Two simplifies hand fabrication.
Designing the Hanger
Fusion 360 was chosen for its blend of sculptural and parametric tools. Most dimensions were taken from an Indy 139 Silver truck, a respected industry standard. The bulk of the hanger was sculpted manually to add stockiness and better resist bending.
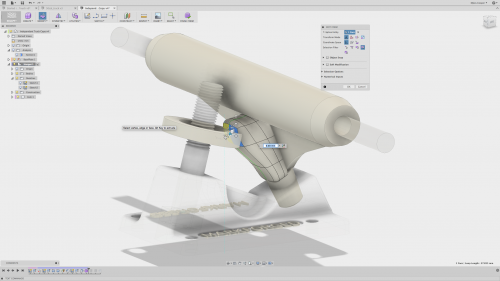
The initial prototype printed the hanger in two parts joined by simple mortise‑and‑tenon joints, hoping to orient carbon fibers in two planes for added strength. The joint, however, flexed under load and did not meet the required rigidity. Switching to a single‑piece hanger resolved this issue and allowed a steel axle insert.
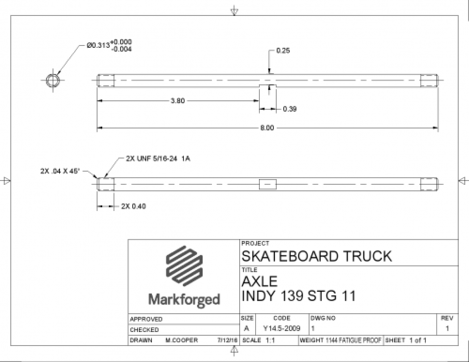
For the axle, 1144 medium‑carbon steel rods were selected for their 125,000 psi yield strength, excellent machinability, no need for heat treatment, high impact resistance, and low cost on McMaster. The rod was not cast into the hanger; instead, a custom keyway was milled into the hanger to lock the axle axially and rotationally.
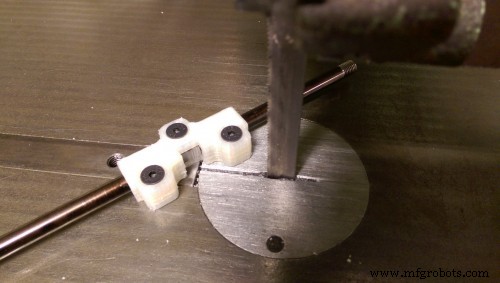
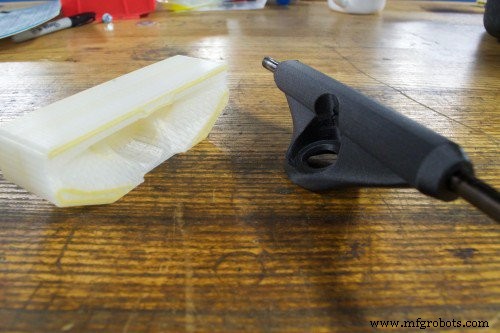
The keyway jig, 3‑D printed from the same carbon‑fiber‑reinforced Onyx, held the rod against a band‑saw table and a vice, ensuring precise dimensions. Rough cuts were made with the band‑saw, then filed to match the jig’s nylon guide. Threads were cut on each end with a drill and lightly sanded to remove burrs, completing the axle.
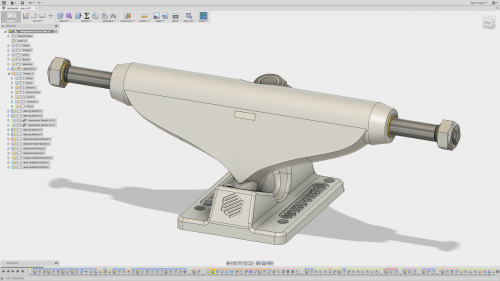
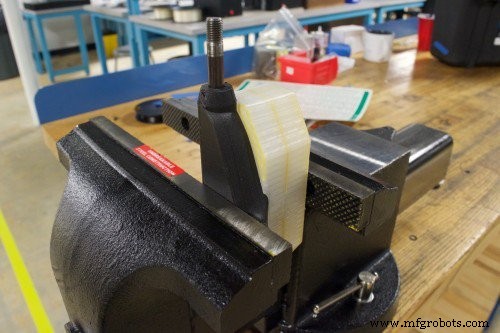
The printed hanger was finished by removing removable supports and drilling out the axle hole. A soft‑jaw vice fixture, also printed, secured the front of the hanger for accurate hammering. After inserting the axle and key, the hanger was ready for assembly.
Assembly
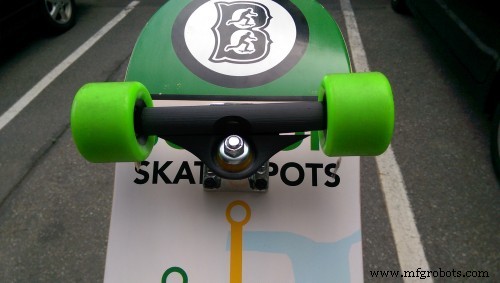
The baseplate was printed as a single part and fitted with an off‑the‑shelf pivot cup. Final assembly mirrored a standard skateboard truck: insert the kingpin, slide in bushings and the hanger, then tighten with a nylon‑insert locknut. The result is a functional, high‑strength truck built entirely with 3‑D printing and minimal hand machining.
We’re excited to share this build and would love to hear about your own projects using the Mark Two. Reach out via Twitter, Facebook, or LinkedIn!
3D printing
- Custom 3D‑Printed Headrest for Quarter Midget Racer: A Mark Two Case Study
- 3D‑Printed Drone Enables Rapid, Cost‑Effective Data Collection in Antarctica
- Skateboard Part 1: Building Durable 3D‑Printed Wheels
- Revolutionizing 3D Printing: Precise Joinery for Effortless Assembly
- Introducing Inconel 625 for 3D Printing – A Game‑Changing Nickel‑Based Superalloy
- Markforged Introduces 3D‑Printed Copper – Unlocking High‑Conductivity Parts
- LittleArm 2C: Build a Durable 3D‑Printed Arduino Robot Arm for STEM Education
- Build the Fridgeye App Using a Nextion Display: Step‑by‑Step Guide
- 7 Steps to Build a Successful Automation Roadmap
- Silencio: A 3D-Printed Tactile Poetry Book for Sighted and Blind Readers