


Smart Plant Monitoring System Powered by AWS IoT
Components and supplies
 |
| × | 1 | |||
 |
| × | 1 | |||
| × | 1 | ||||
 |
| × | 1 | |||
 |
| × | 1 |
Necessary tools and machines
 |
|
Apps and online services
 |
| |||
 |
| |||
 |
| |||
 |
| |||
| ||||
 |
|
About this project
Picture this you are going on a vacation for a week or so and are worried about your house plant at home.Here is a great project to under take a week before you head out for your vacation.
Build yourself a plant monitoring and notification system with the following feature
- Monitor the Temperature,Light Value and Soil moisture value using dweet.io
- OR using the new Amazon IoT service to log data to AWS - DynamoDB
- Use AWS -SNS notification, to send out an email to yourself, so that you can inform your cousin/neighbor to quickly water the plant or check on your thermostat at home.
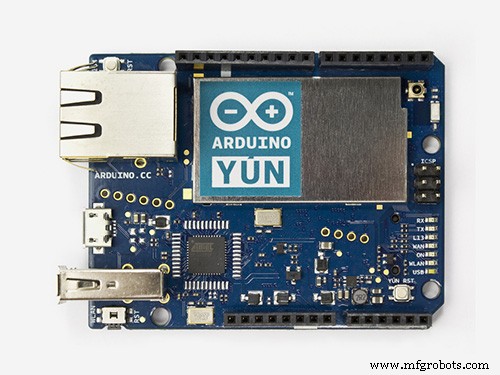
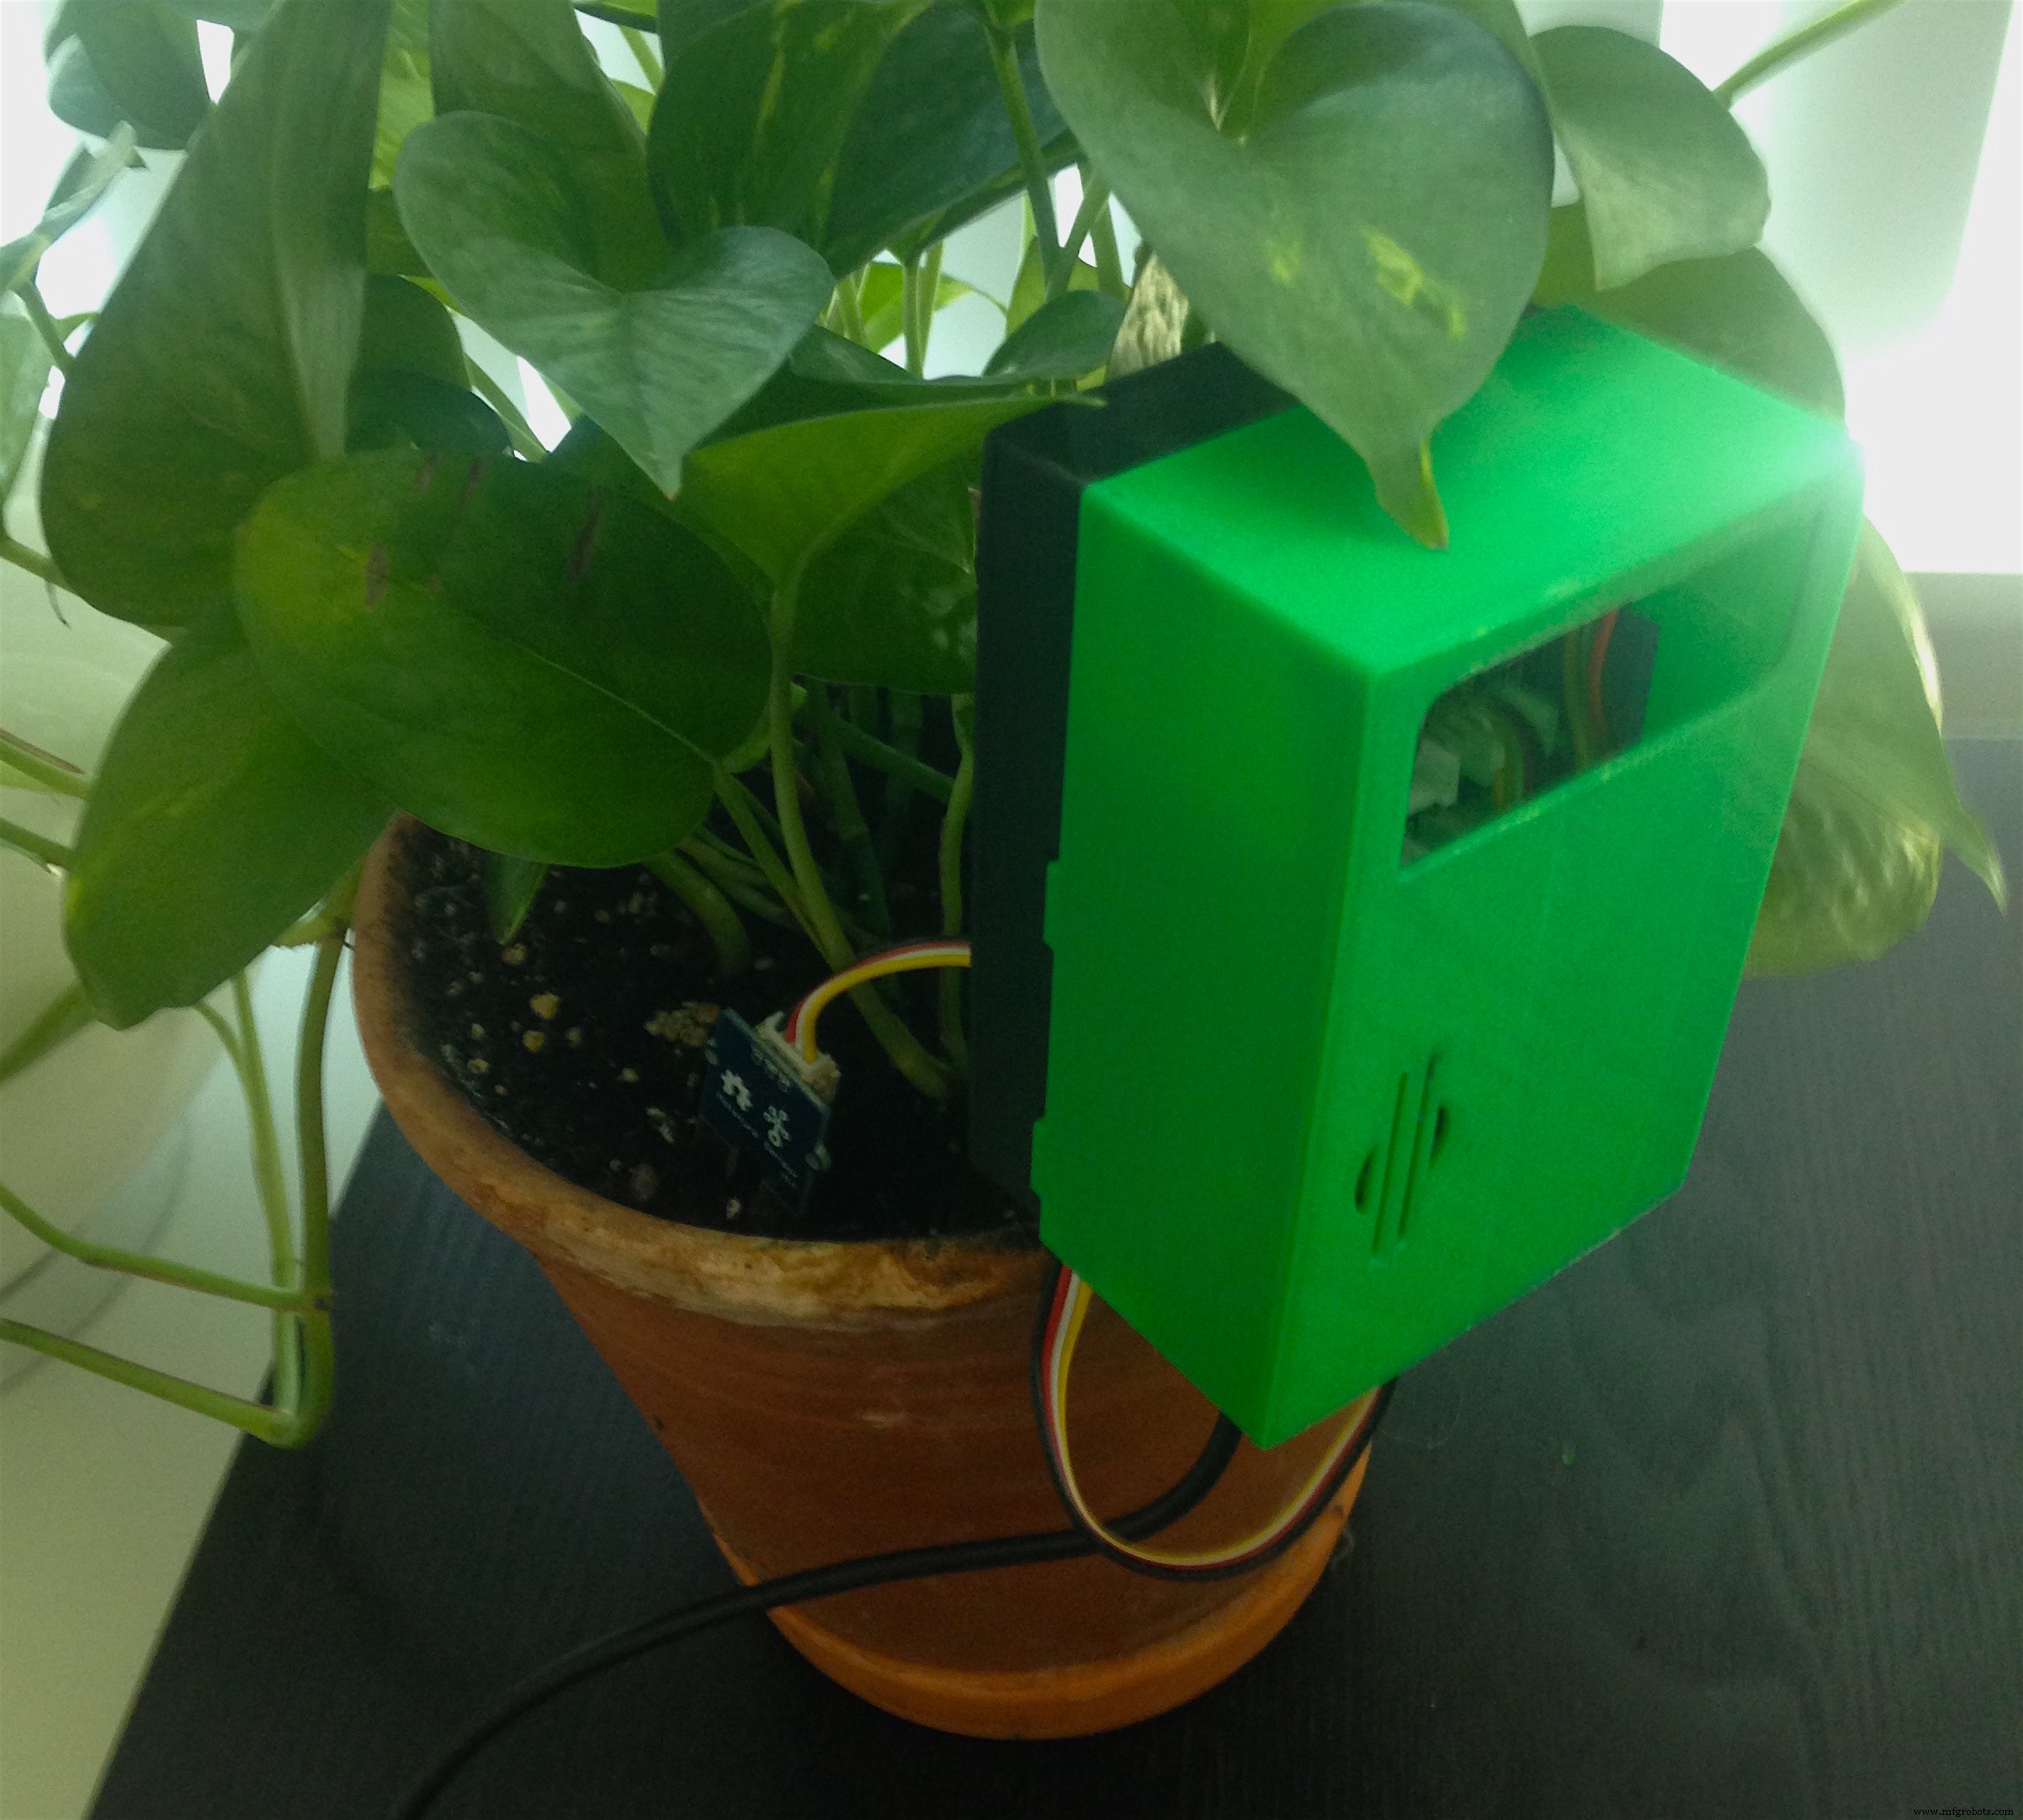
In addition, I have designed a 3D printed enclosure, to house the Arduino Yun , grove shield and sensors.
If you are interested to check out how my plant is doing here is the link
http://dweet.io/follow/PlantMonitorTorontoON
Here are the steps you will need to perform to complete the build
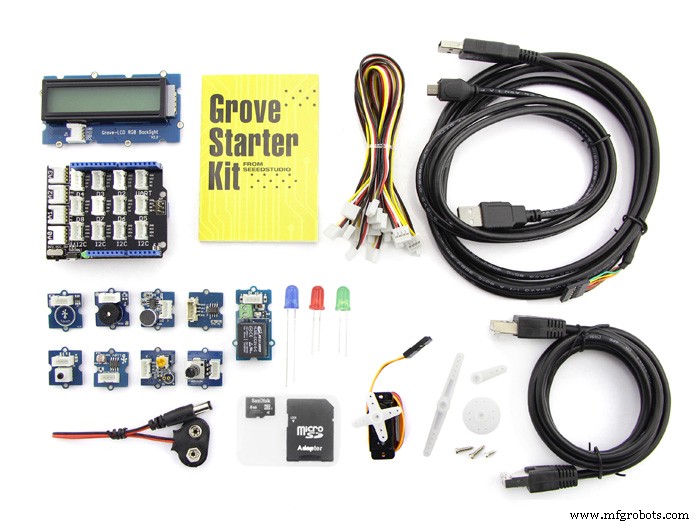
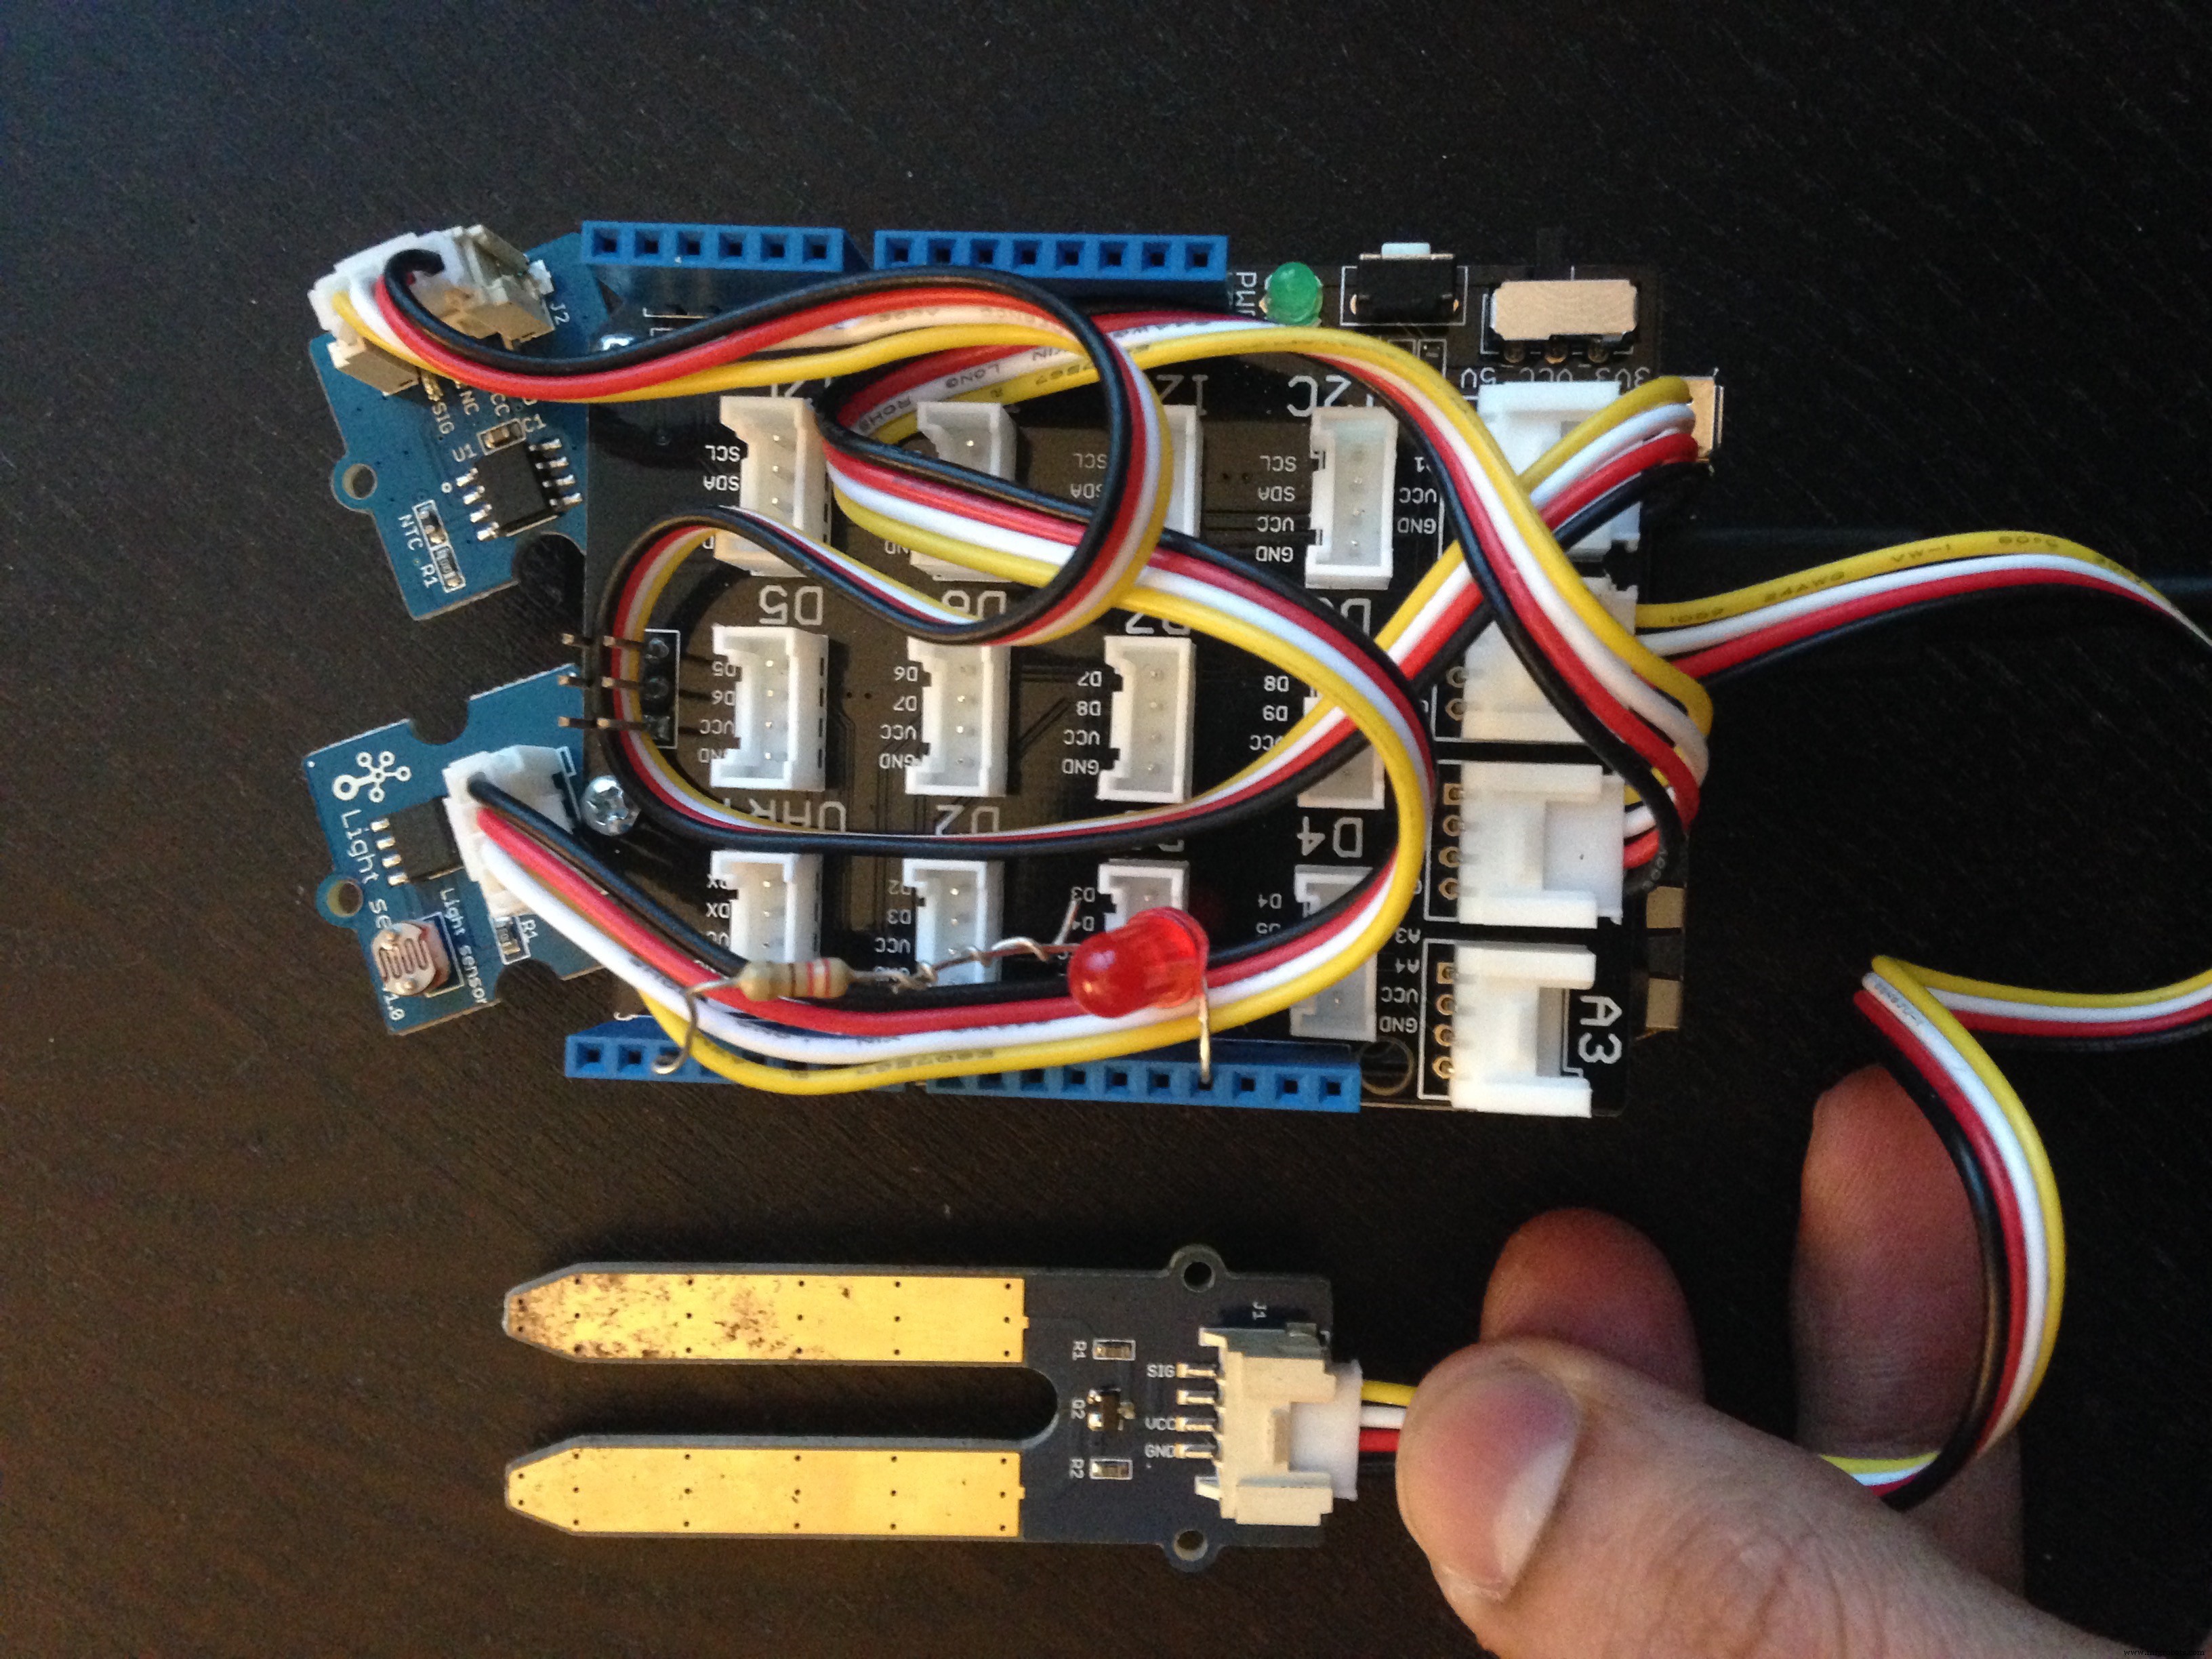
#1 Build the circuit using the Grove connector shield as shown in the schematic section of the project, basically connect the
- Temperature sensor to A0
- Soil Moisture sensor to A1
- Light sensor to A2
- And using a 220 Ohms resistor connect an LED to pin#2
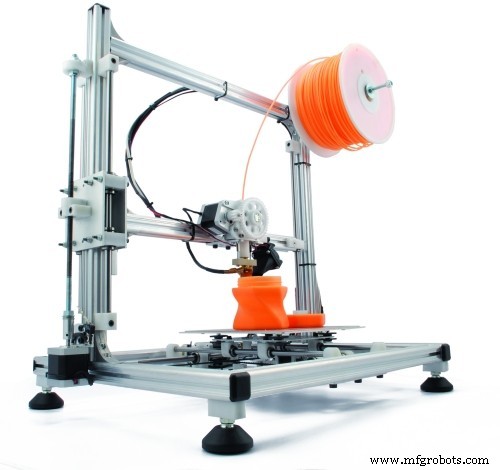
#2 3D print the STL files , attached in the custom part and enclosure section , here you have 3 STL files to print , set your slicing software to 0.3 mm layer height and a fill density of at-least 25% or higher
3D printing should take about 2 hours , so download the STL files and fir up your 3D printer while you complete the other steps below
#3 Determining the Soil Moisture Value
Upload the code attached below(soil moisture value) to your Arduino Yun and determine the tooDryValue in the code below.Basically if the value of the soil moisture falls below tooDryValue you need to water the plant.(and this value is the value that you will use in AWS-SNS condition to send an email)
Here is the video of showing the method I used to determine the toodryvalue
#4 Upload Arduino code to Yun to post data to dweet.io
Now once you have decide on the toodryvalue , upload the ArduinoYunDweetIO.ino file to the Yun, And as part of the code also replace "PlantMonitorTorontoON" to something more meaning full for you.
Here is video testing the Upload of sensor data to dweet.io
#5 Setting up AWS CLI on your computer (here I am using a Mac)
Now to log data using AWS IoT in DyanamoDB , you will have to create an account at https://aws.amazon.com/free, here you will also have to provide your credit card details, but for the tutorial below you should not incur any cost (again this depends on the region of AWS setup)
Once done create a folder "AWS" on your mac and follow the link below to download and install AWS CLI
http://docs.aws.amazon.com/iot/latest/developerguide/installing-aws-cli.html
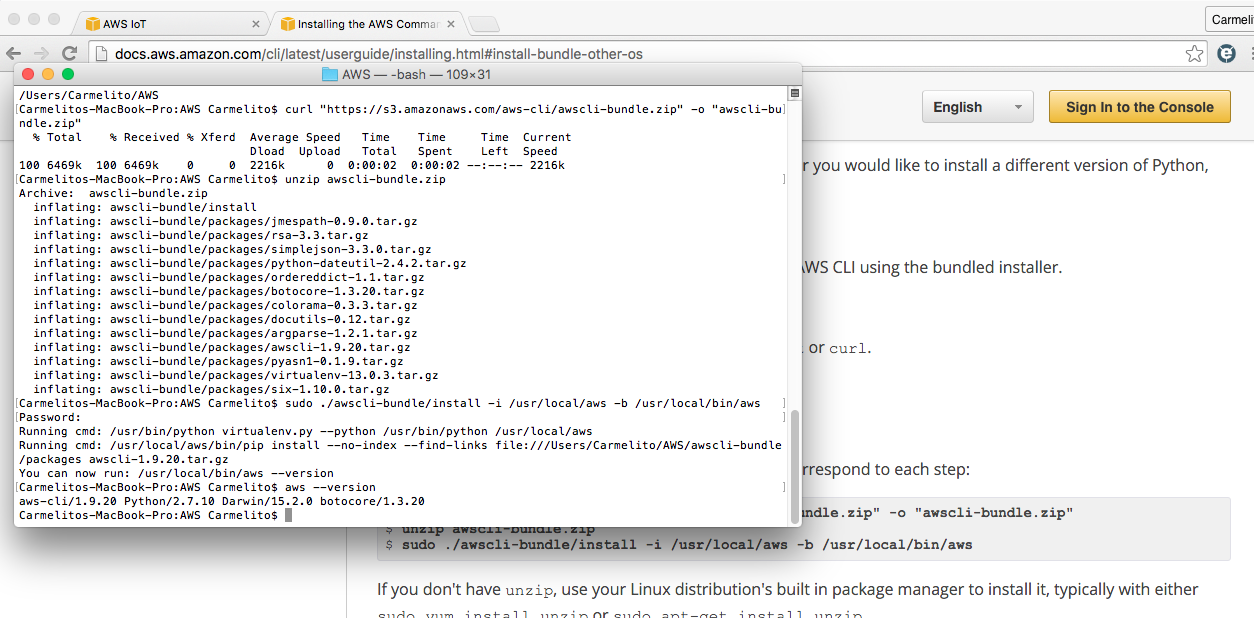
I am using a mac , here are the instructions I followed
$ curl "https://s3.amazonaws.com/aws-cli/awscli-bundle.zip" -o "awscli-bundle.zip"$ unzip awscli-bundle.zip$ sudo ./awscli-bundle/install -i /usr/local/aws -b /usr/local/bin/aws
Note: at the terminal you need to be in the AWS folder you just created
#6 Creating a thing using the CLI which should show in the AWS IoT console
Now we will create a thing in AWS IoT using the following command
aws iot create-thing --thing-name "plantSystem"

For more info refer to the link
http://docs.aws.amazon.com/iot/latest/developerguide/create-thing.html
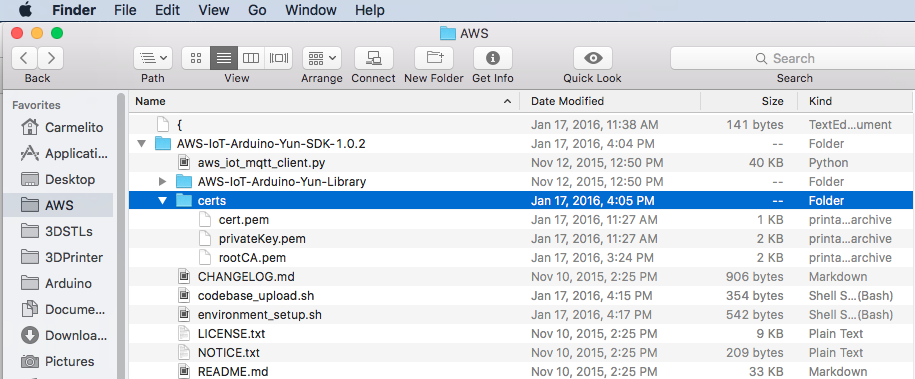
#7 Creating Certs
To create and activate the certificates that you will need , give the following command
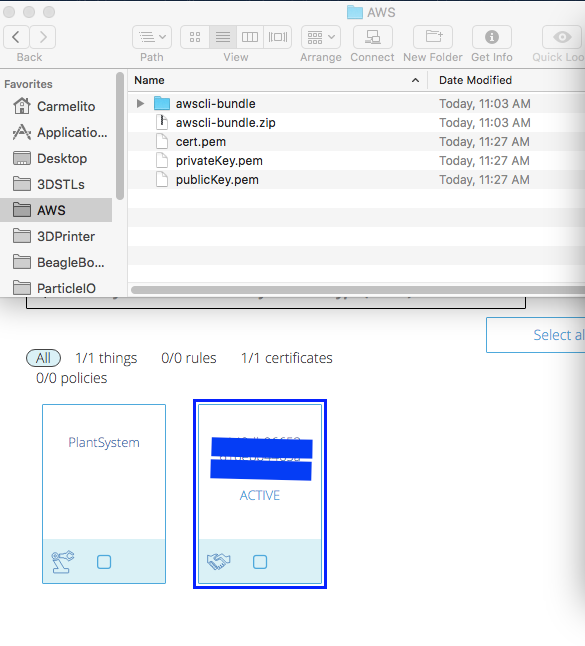
aws iot create-keys-and-certificate --set-as-active --certificate-pem-outfile cert.pem --public-key-outfile publicKey.pem --private-key-outfile privateKey.pem
this command will create the certificates(3 pem files) for you in the AWS folder as shown in the screen shot below
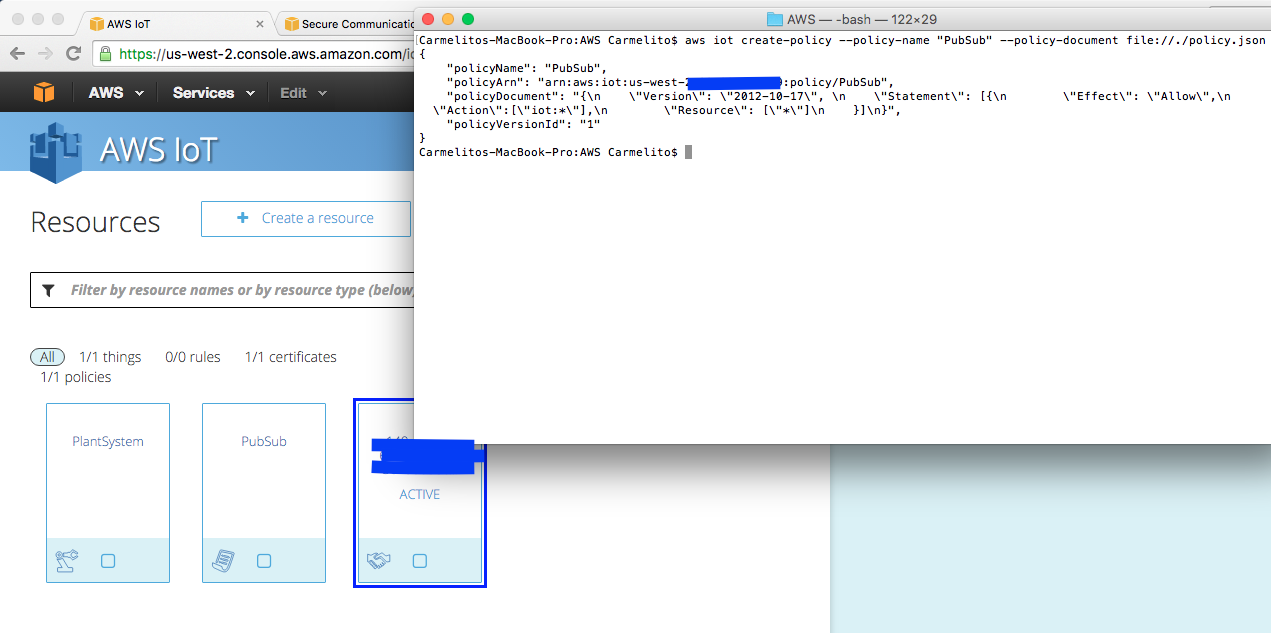
#8 Create and Attach an AWS IoT policy to your Certificates
Start of by creating a json file in the AWS folder, using you favorite text editor(i prefer sublime text 2) - name the file policy.json
{ "Version": "2012-10-17", "Statement": [{ "Effect": "Allow", "Action":["iot:*"], "Resource": ["*"] }]}
Then copy paste the following command in your text editor
aws iot create-policy --policy-name "PubSub" --policy-document file://./policy.json
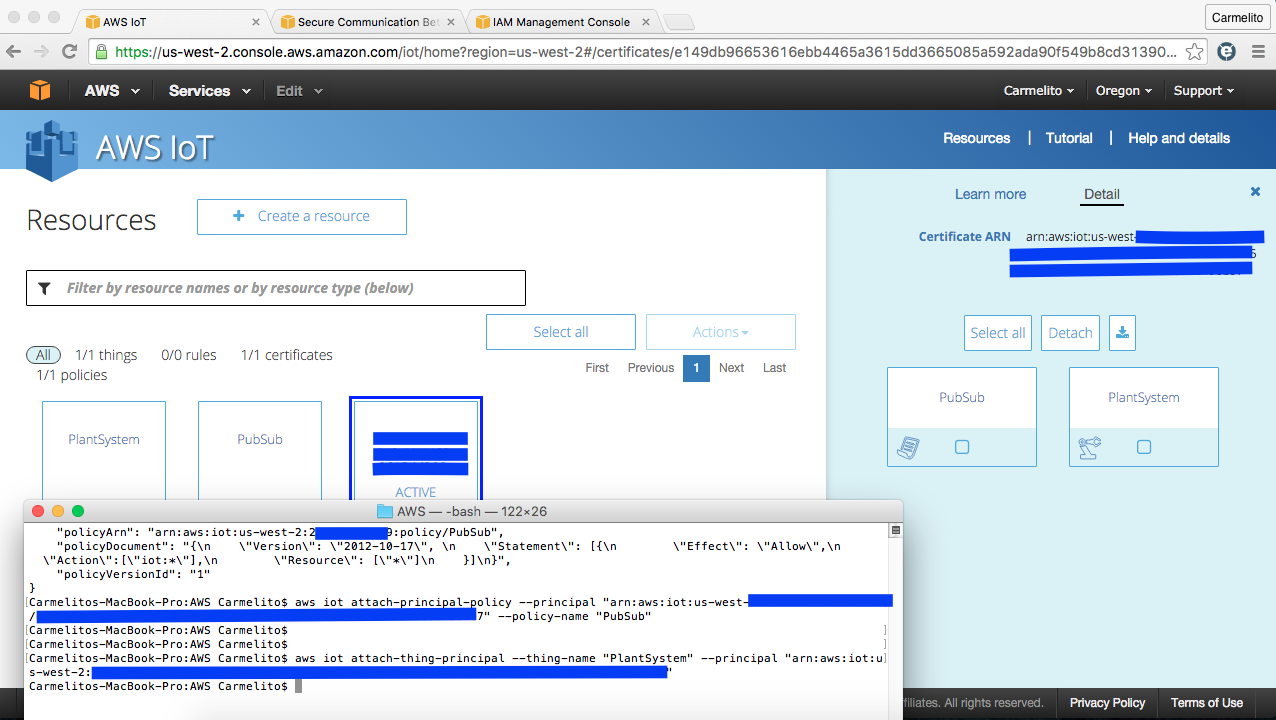
#9 Attach policy to certificate followed by attaching certificate to device
Give the commands below one after another
$aws iot attach-principal-policy --principal "arn:aws:iot:xxxxxxxxxxxxxxxxxxxxxxxx" --policy-name "PubSub"
$ aws iot attach-thing-principal --thing-name "PlantSystem" --principal "arn:aws:iot:xxxxxxxxxxxxxxxxxxxxxxxx"
Here an easy way to get your certificate arn if you have not noted it down is to go to the AWS IoT console click on you certificate and go to details on the right hand side of your screen. From here you can copy paste the arn to the teminal
For more info refer to the documentation on
http://docs.aws.amazon.com/iot/latest/developerguide/secure-communication.html
# 10 Verifying/testing your setup on your computer and test it using MQTT.fx
Now to claim that the setup is done on your computer , download and install MQTT.fx from link below to test if the setup is working and we are able to publish and suscribe for data via AWS IoT
http://mqttfx.jfx4ee.org/index.php/download
For more setup info and to download the root cert use the link below
http://docs.aws.amazon.com/iot/latest/developerguide/verify-pub-sub.html
- here in MQTT.fx you will have to setup your connection profile
- and link your certs which you downloaded as part of the steps above
Here is a quick video that show how you can test you setup on you computer which in my case is a MAC using MQTT.fx tool.
Once you have complete and tested that your setup is fine follow the steps below to upload the certificated to the Arduino Yun
#11 Setting up the Arduino Yun to communicate with AWS IoT cloud
Download the latest version of the Arduino Yun SDK from github and unzip into your Arduino "Libraries" folder
https://github.com/aws/aws-iot-device-sdk-arduino-yun
If you are using the Arduino Yun for the first time follow the setup instructions at
https://www.arduino.cc/en/Guide/ArduinoYun
Basically using the link you will learn how to set up the Arduino Yun to connect to home WiFi network.
Then load the Process Example sketch Arduino IDE to your YUN (File->Examples->Bridge -> Process), this will confirm that the Yun has access to the internet
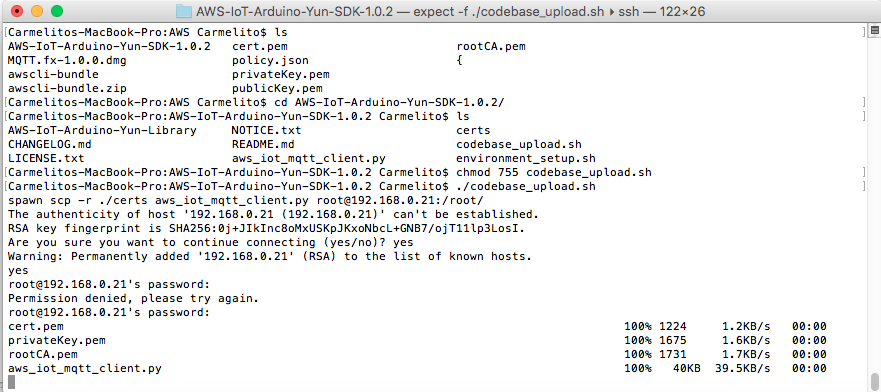
Put your rootCA file, private key and certificate into certs folder as shown in the screen shot below
Next modify codebase_upload.sh and environment_setup.sh and replace [your_boards_IP] with your board’s IP address and [your_boards_IP] with your password
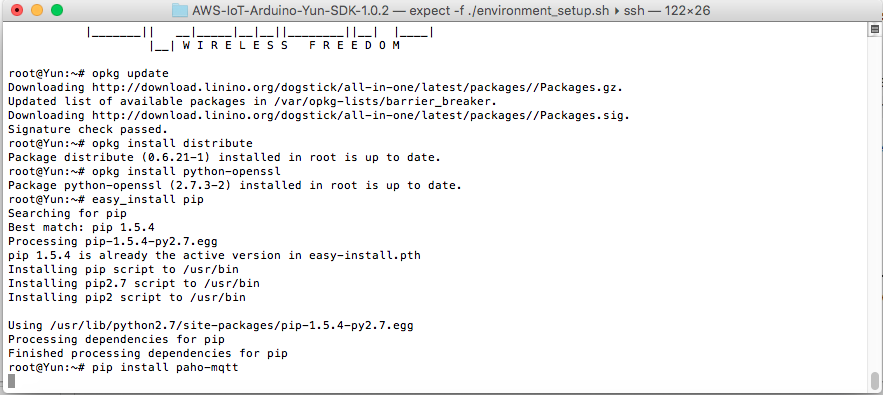
In the your terminal run the following commands to give permission to the .sh files ,this will take about 5-10 mins ,which moves the certs and installs distribute, python-openssl, pip, paho-mqtt on the Yun. These are the packages you need to communicate with the AWS cloud from your Yun(aka called the PlantSystem thing in our case)
$chmod 755 codebase_upload.sh
$./codebase_upload.sh

$chmod 755 environment_setup.sh
$./environment_setup.sh
For installation on Linux/Windows follow the link at
https://github.com/aws/aws-iot-device-sdk-arduino-yun#installation
Now as part of the next couple using AWS CLI we are going create a table in DynamoDB to post sensor data
#12 Creating an IAM role and granting permisions
Basically to enter data into the DynamoDB sensor table which we are going to create as part of the next step , we need to create a IoT rule that will act upon the MQTT message received by AWS, for this we need to create a role and grant it necessary permisions
Create a json file rolePolicy.json
{"Version": "2012-10-17", "Statement": [{ "Sid": "", "Effect": "Allow", "Principal": { "Service": "iot.amazonaws.com" }, "Action": "sts:AssumeRole" }]}
and to create the role run the following command in the terminal
aws iam create-role --role-name iot-actions-role --assume-role-policy-document file://./rolePolicy.json
Create another json file policy.json
{ "Version": "2012-10-17", "Statement": [{ "Effect": "Allow", "Action": [ "dynamodb:*", "lambda:InvokeFunction"], "Resource": ["*"] }]}
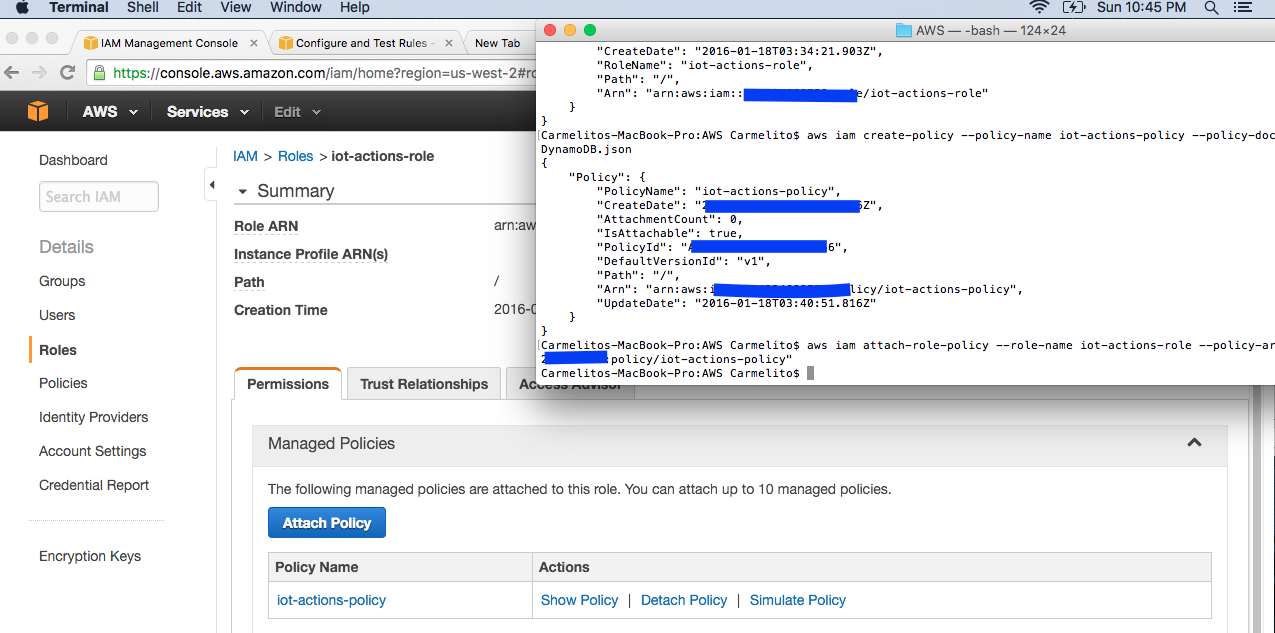
then call create-policy and specify the IAM policy document
aws iam create-policy --policy-name iot-actions-policy --policy-document file://./policy.json
And finally attach the policy to the role using - modify the policy-ARN to the ARN that you received as part of the previous step
aws iam attach-role-policy --role-name iot-actions-role --policy-arn "arn:aws:xxxxxxxxxxxxx:policy/iot-action-policy"
http://docs.aws.amazon.com/iot/latest/developerguide/config-and-test-rules.html
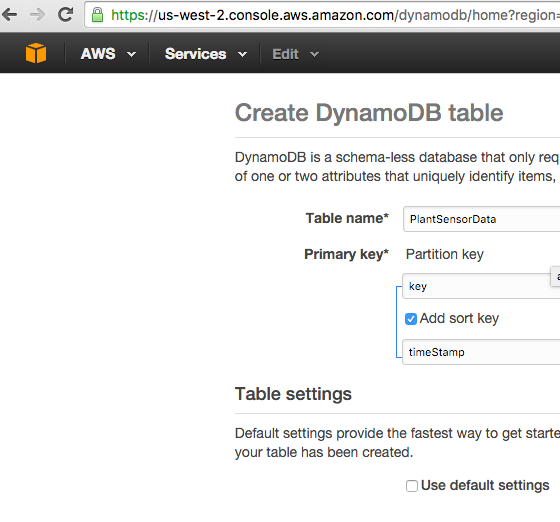
#13 Setting up table in DynamoDB in AWS console
As part of this step we are going to create a DynamoDB in the AWS console
Table Name : plantSensor
Partition key : key
Sort key : timestamp
and also set your Read capacity units and Write capacity to 1.
#14 Creating a rule to insert data into PlantSensor Table
Create a json file - plantdatarule.json (here modify the roleArn value in section below, go to IAM->Roles->iot-action-role to get the arn)
{
  "sql": "SELECT * FROM 'topic/plantdata'",
  "ruleDisabled": false,
  "actions": [{
      "dynamoDB": {
        "tableName": "plantSensor",
        "hashKeyField": "key",
        "hashKeyValue": "${topic(2)}",
        "rangeKeyField": "timestamp",
        "rangeKeyValue": "${timestamp()}",
        "roleArn": "arn:aws:iam::XXXXXXXXXXXX:role/iot-actions-role"
      }
    }]
}
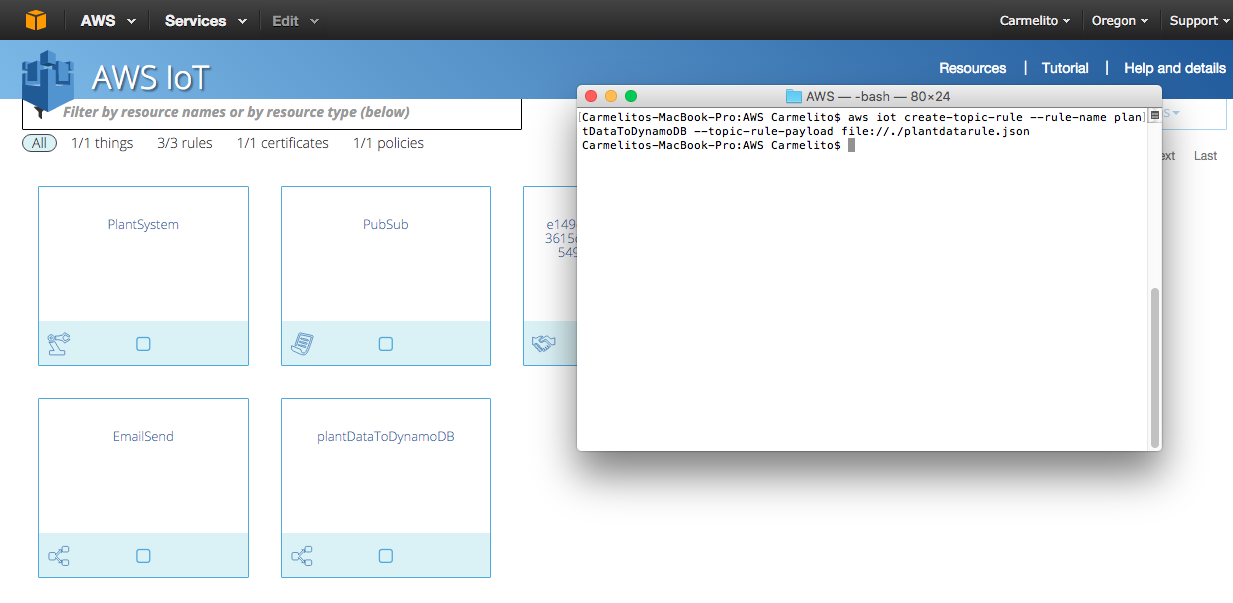
then run the following command on your terminal
aws iot create-topic-rule --rule-name plantDataToDynamoDB --topic-rule-payload file://./plantdatarule.json
Now if you go to the AWS IoT console you should see a rule created called "PlantDataToDynamoDB" as shown in the screen shot below('' ignore the email send rule this is coming as part of the steps below.)
using MQTT.FX run a quick test to see if records are getting created in the table created.
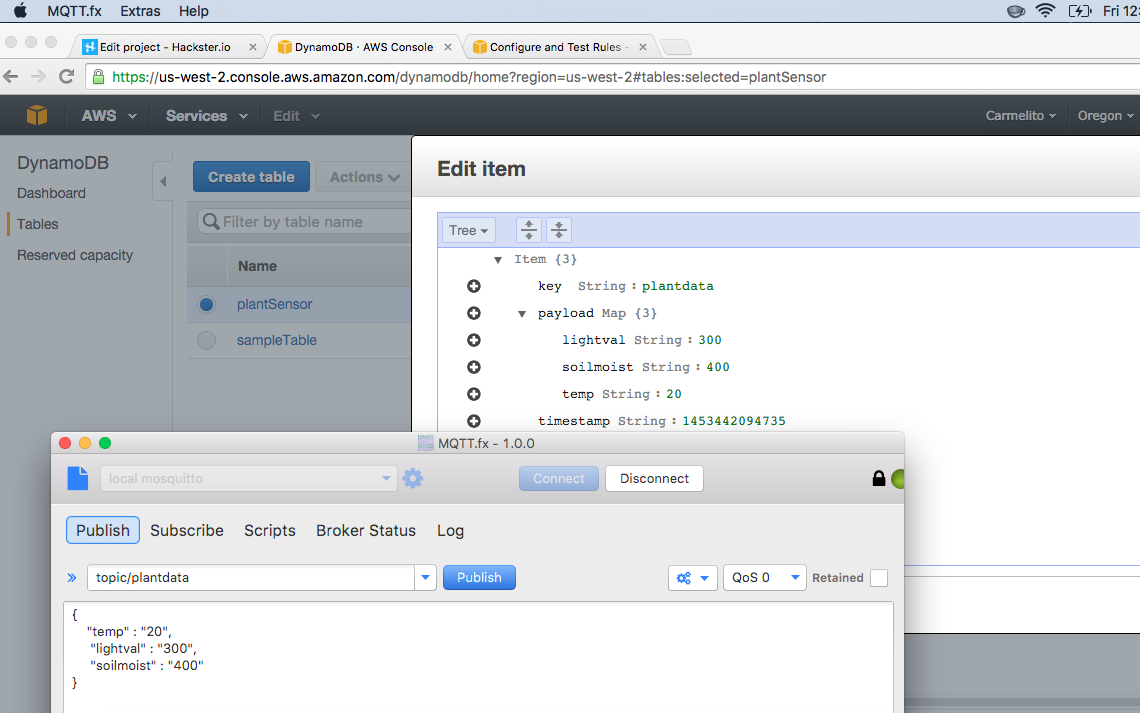
#15 Upload the Arduino sketch to publish data to AWS IoT from the Yun
Here first start of by downloading the ArduinoJSON library from github at
https://github.com/bblanchon/ArduinoJson
Now download the YunAWSIoTDynamoDB,ino and aws_iot_config.h files from the code section below and upload it to the Yun.
Open your Serial monitor and you should see the temperature, Light Value and soil moisture value posted to the DynamoDB.
If you have have been AWS you can do all kinds of awesome stuff by setting up Lambda function and posting data kinesis ...

Note: If you plan on making this a permanent setup, don't forget to increase the delay at the end of the loop , to increase the time interval of posting to DynamoDB so that you do not incur addition cost . For more on pricing refer to https://aws.amazon.com/iot/pricing/
#16 Setting up a AWS-IoT SNS rule to receive and email if your soil moisture value fall below a threshold.
Basically this step includes setting up a simple SNS notification base on AWS IoT rule.
Start of by assigning the following policies to the AWS role (iot-action-role) that you created in the previous step in the IAM console
-AmazonSNSRole
-AmazonSNSFullAccess
Once done in the SNS console create a Topic called sendMail and create a subscription and give your email configure on you phone to get notified when the soil moisture value is LOW.
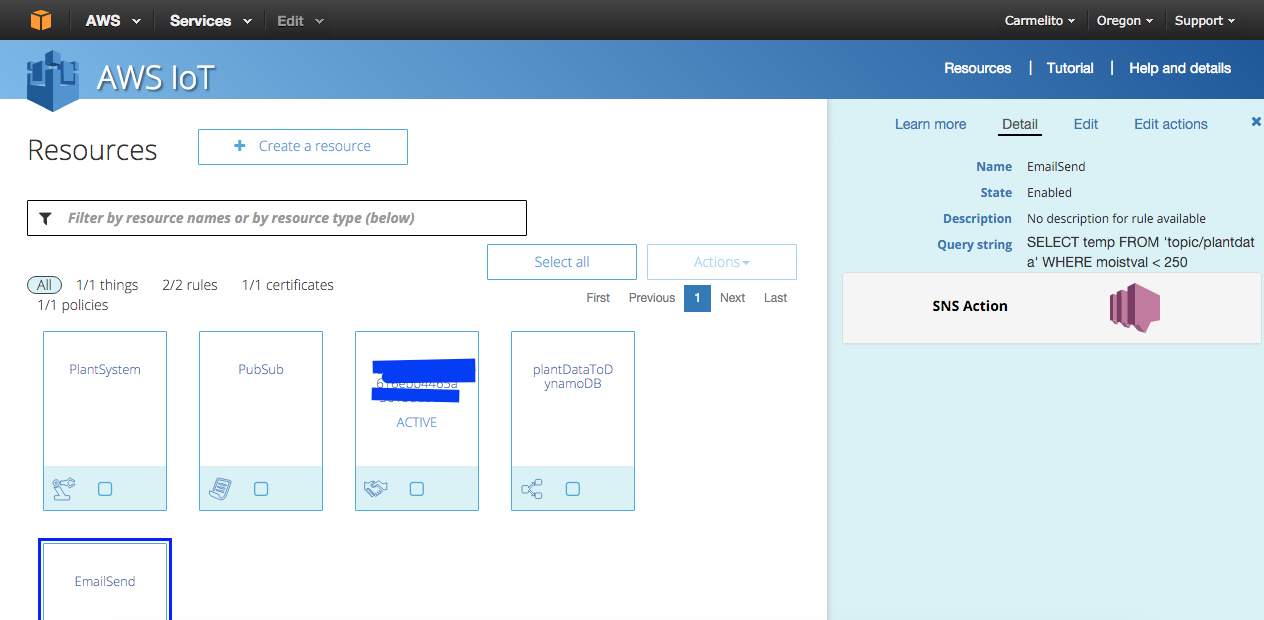
Now head back to the AWS IoT console and using the +Create Resource button create a rule called Email Send and provide the following info
- Name : EmailSend
- Attribute : mositValue(this should match the json value that you are posting as part of you topic in the Arduino code)
- Topic filter : topic/plantdata
- Condition : as moistval < 250 (this is the value that you determined in the first few steps of the tutorial)
- Choose Action : send message as push notification SNS
- SNS target : sendEmail
- Role: iot-action-role
Once done you console should look like the screen shot below
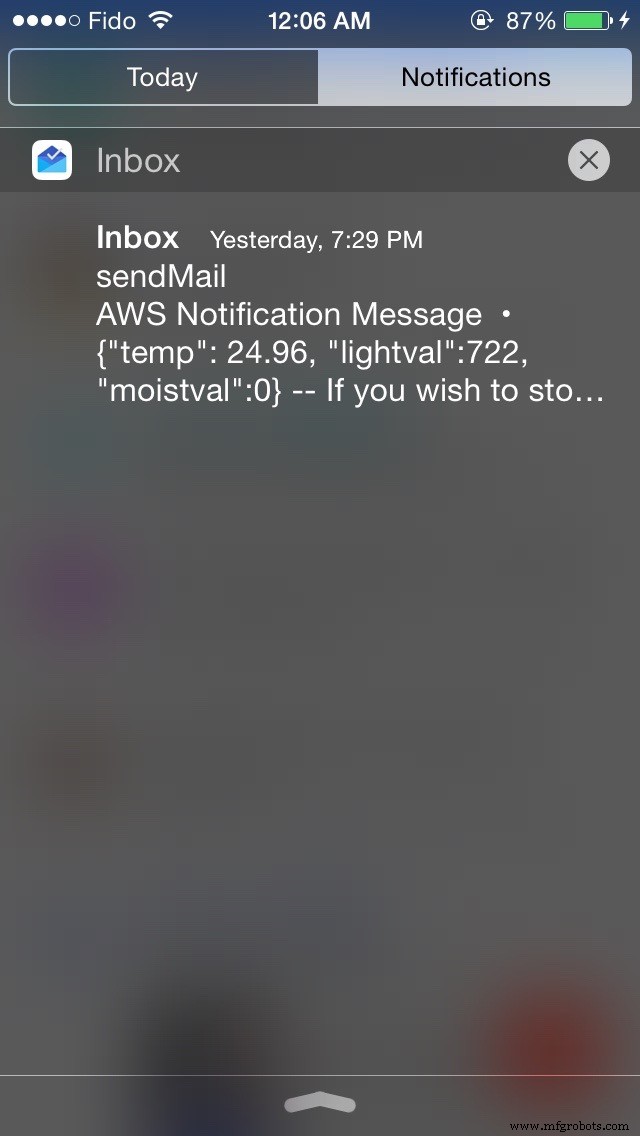
Here is an sample email I recived when I removed the soil moisture sensor from a glass of water
To read more about AWS-SNS
https://aws.amazon.com/sns/faqs/
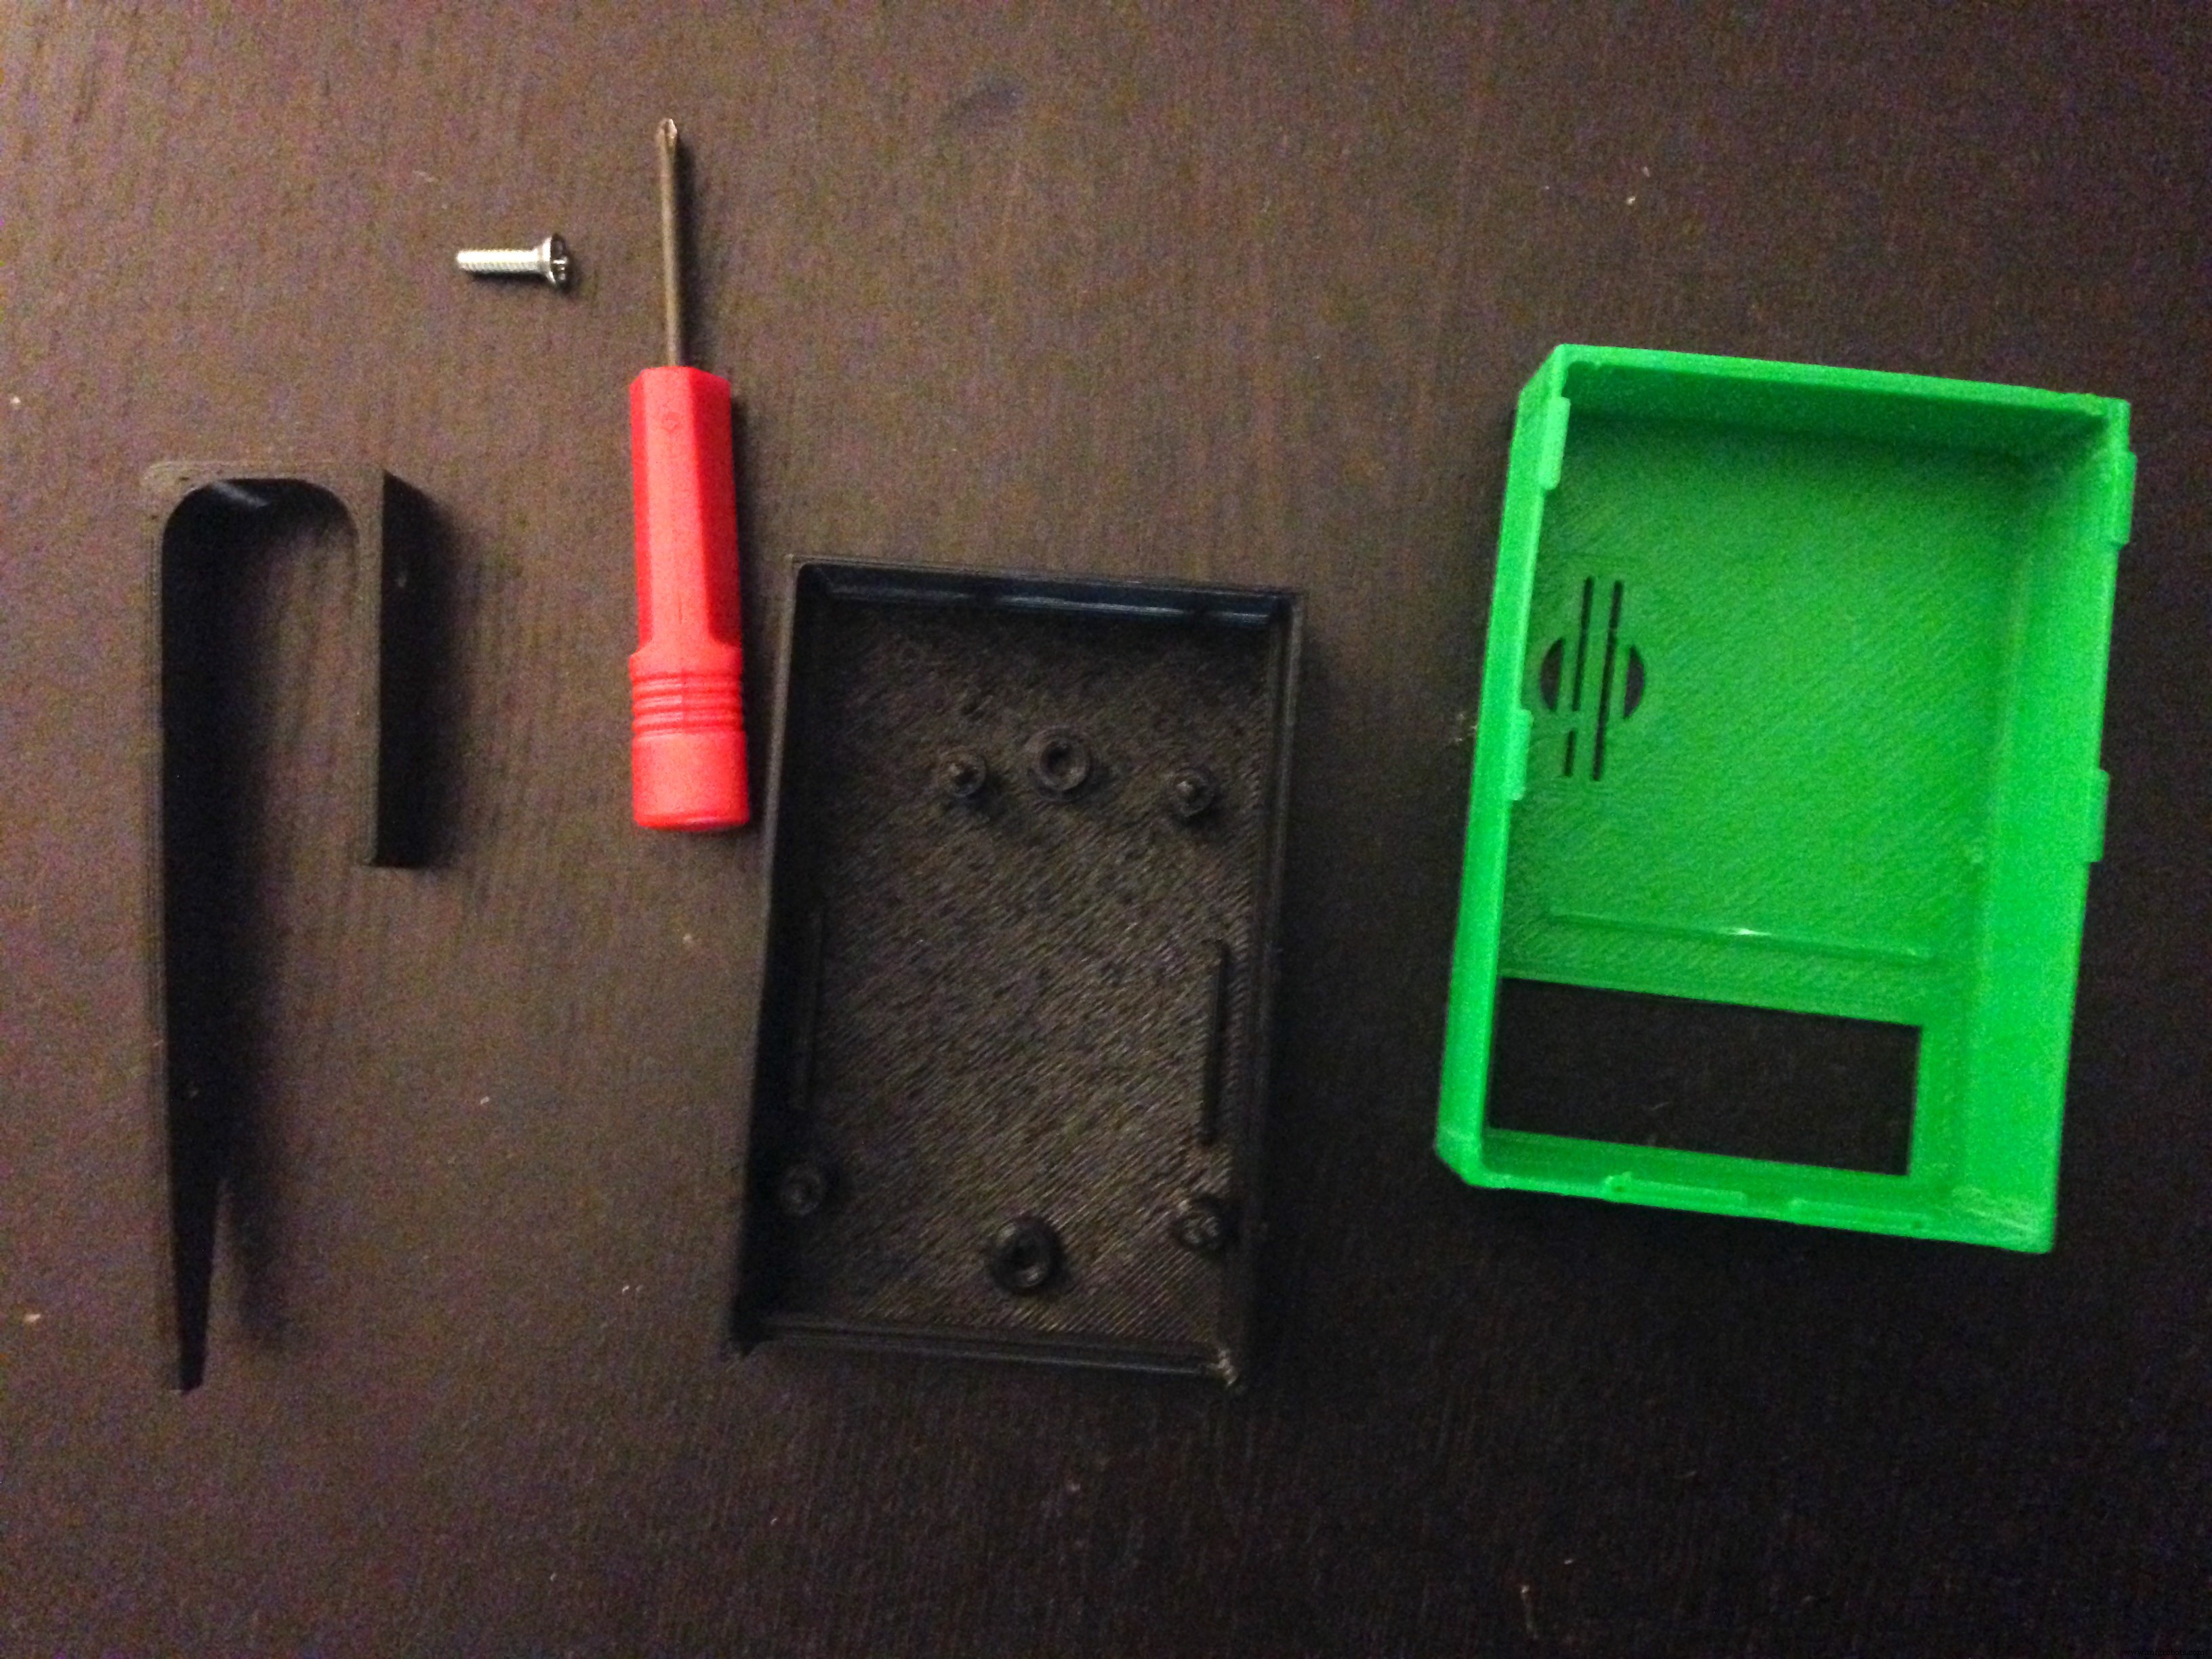
#15 Putting the 3D printed parts together and adding it to the pot.
You will need a 4x40 screw and nut to attach the black soil poker 3D printed part to the base part of the Arduino Yun
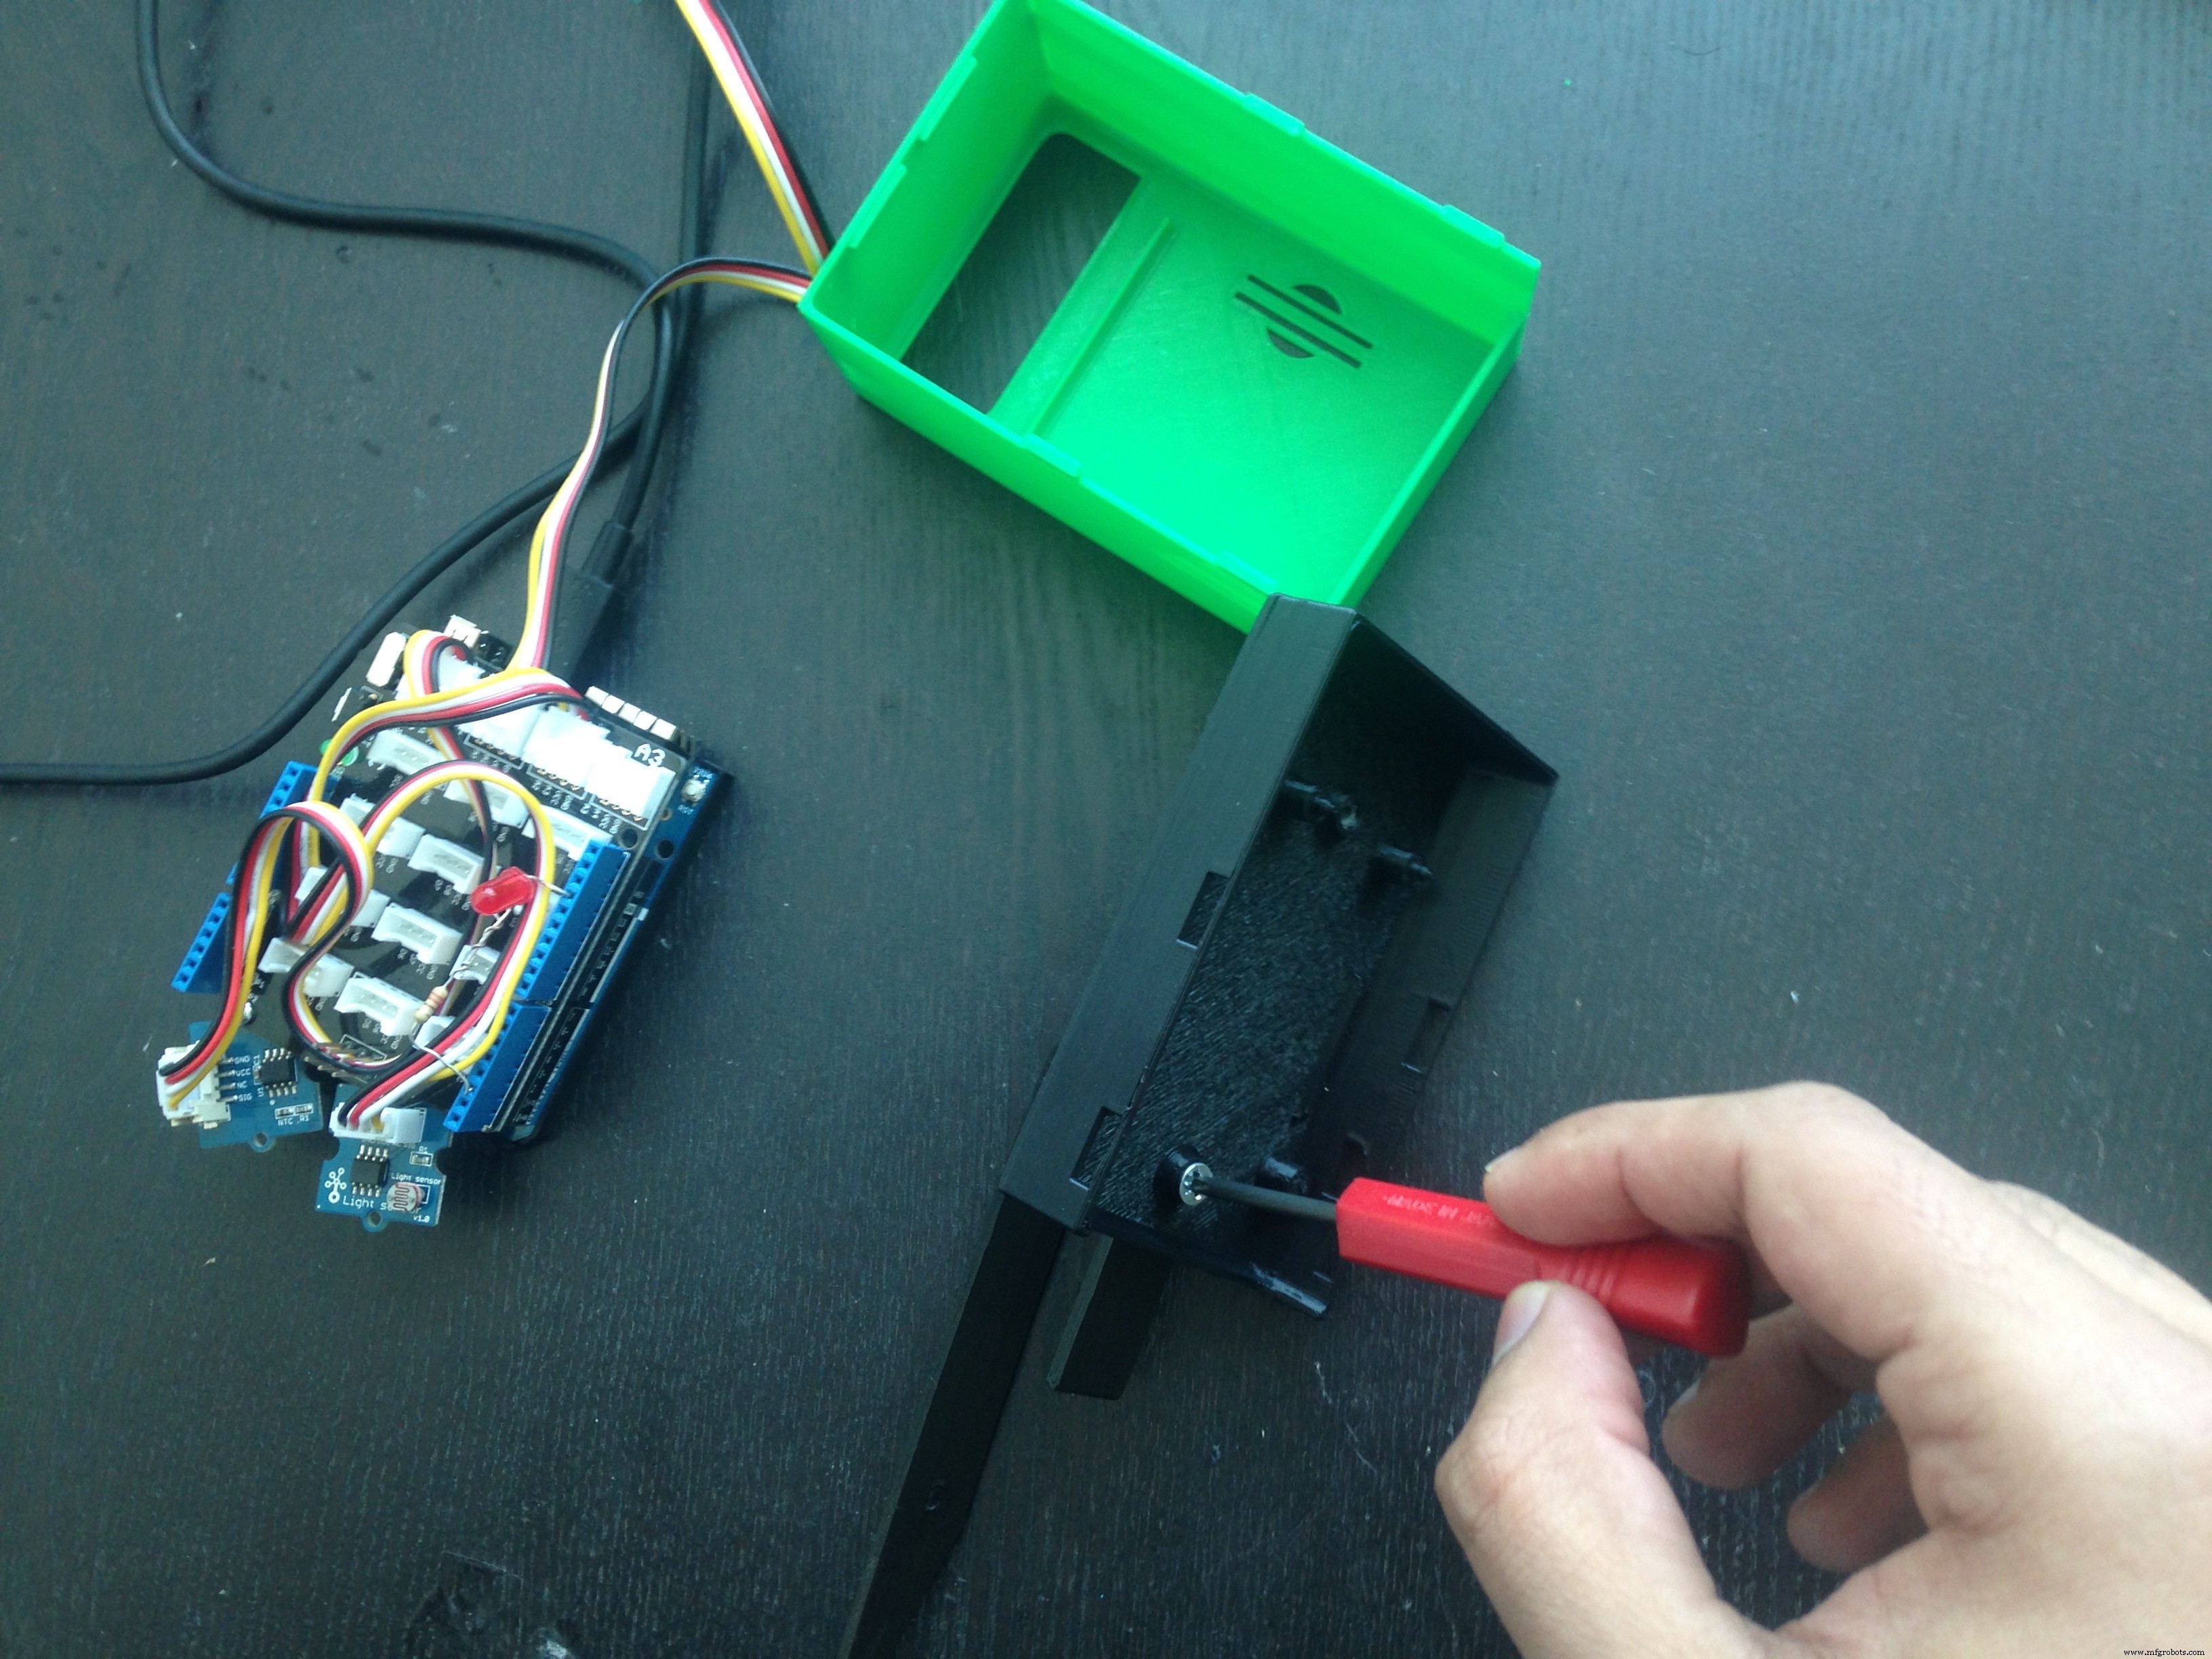
The top part just snap fits , here remember to point the top opening toward you window and poke the Soil moisture in the pot.And power the Yun with a micro usb cable plug to a wall outlet.
Please note, I am still exploring and learning about the awesome world of AWS, and awe'd by the features on the AWS console,so if you have been using AWS for quite some time, post a comment or suggestion for feature you would have liked to see/applicable to the plant monitoring project.Thanks ..
Code
- SoilMoistureValue
- ArduinoYunDweetio
- ArduinoYunAWSIoTDynamodb
- aws_iot_config.h
SoilMoistureValueArduino
Arduino sketch to determine the ideal Soil moisture value for your house plant//@CarmelitoA -House Plant Monitoring project determining soil moisture value
const int moisturePin = A1; // Grove Moisture sensor connected to A1 on the Grove Shield
const int ledPin = 2;
int moisturValue = 0;
int tooDryValue = 250;//change this value based on what you come up with
void setup() {
Serial.begin(9600);
pinMode(ledPin,OUTPUT);
digitalWrite(ledPin,LOW);
}
void loop() {
moisturValue = analogRead(moisturePin);
Serial.print("Moisture sensor = " );
Serial.println(moisturValue); //Check the Value for with Dry sand and then with Wet Sand
if(moisturValue < tooDryValue)
{
digitalWrite(ledPin,HIGH);
} else{
digitalWrite(ledPin,LOW);
}
delay(3000);
}
ArduinoYunDweetioArduino
Posting Sensor data to dweet.io using Arduino Yun//Created by @CarmelitoA for the House Plant Monitoring project - uploading data to dweet.io. (CC BY-SA https://creativecommons.org/licenses/by-sa/4.0/)
#include <Bridge.h>
#include <YunClient.h>
#define SITE_URL "www.dweet.io"
#include <math.h> //Added for temperature calculations
const int moisturePin = A1; // Grove Moisture sensor connected to A1 on the Grove Shield
const int ledPin = 2; //LED indicator
int moisturValue = 0; // variable to store the value coming from the sensor
const int tooDryValue = 500; //CHANGE this value based on you testing of how much moisture the soil should have, less then this value will turn the LED ON which means you need to water the plant
float tooLowTemp =20; //CHANGE ,temperature in degree C based on the type of your house plant, if the temperature is Lower than the value the LED will turn Red
//Temperature Sensor defs
const int B=4275; // B value of the thermistor
const int R0 = 100000; // R0 = 100k
const int pinTempSensor = A0; // Grove - Temperature Sensor connect to A5
//Light Sensor
const int lightPin = A2;
unsigned long lastConnectionTime = 0;
const unsigned long postingInterval = 10L * 1000L;
void setup()
{
Bridge.begin();
Serial.begin(9600);
pinMode(ledPin,OUTPUT);
digitalWrite(ledPin,LOW);
Serial.begin(9600);
while (!Serial); // wait for a serial connection- disable this after deployment
}
void loop()
{
YunClient c;
if (millis() - lastConnectionTime > postingInterval) {
moisturValue = analogRead(moisturePin);
Serial.print("sensor = " );
Serial.println(moisturValue); //Check the Value for with Dry sand and then with Wet Sand
//Calculating the Temperature in degress C
int a = analogRead(pinTempSensor);
float R = 1023.0/((float)a)-1.0;
R = 100000.0*R;
float temperature=1.0/(log(R/100000.0)/B+1/298.15)-273.15;//convert to temperature via datasheet ;
Serial.print("temperature = ");
Serial.println(temperature);
//calculating Light value
int lightValue = analogRead(lightPin);
Serial.print("light value = ");
Serial.println(lightValue);
//turning on the LED if the sensor value is than tooDryValue or tooLowTemp
if(moisturValue < tooDryValue || temperature < tooLowTemp )
{
digitalWrite(ledPin,HIGH);
}else
{
digitalWrite(ledPin,LOW);
}
// checking if we are conneted to dweet.io
if(c.connect(SITE_URL, 80))
{
Serial.println("connected");
// Make a HTTP request:
String s = "POST /dweet/for/PlantMonitorTorontoON?Temperature="; //CHANGE the location of you plant to keep it unique on dweet.io
s.concat(temperature);
s.concat("&LightValue=");
s.concat(lightValue);
s.concat("&SoilMoisture=");
s.concat(moisturValue);
Serial.println(s);
c.println(s);
c.println("Host: www.dweet.io");
c.println("Connection: close");
c.println();
lastConnectionTime = millis();
}
else{
Serial.println("disconnected from server");
}
}
}
ArduinoYunAWSIoTDynamodbArduino
sketch to post sensor data to AWS -DynamoDB , you will also need to add the aws_iot_config.h as a new tab in the Arduino IDE.//Created by @CarmelitoA 01-16-2016 for the House Plant Monitoring project.Feel free to remix and modify
#include <aws_iot_mqtt.h>
#include <aws_iot_version.h>
#include "aws_iot_config.h"
#include <ArduinoJson.h>
char data[80];
StaticJsonBuffer<200> jsonBuffer;
//#define SITE_URL "www.dweet.io" //combining the YunClient.h with this example to post to dweet causing confilicts, refer to ArduinoYunDweetio.ino
#include <math.h> //Added for temperature calculations
const int moisturePin = A1; // Grove Moisture sensor connected to A1 on the Grove Shield
const int ledPin = 2;
int moisturValue = 0; // variable to store the value coming from the sensor
const int tooDryValue = 250; //CHANGE this value based on you testing of how much moisture the soil should have, less then this value will turn the LED ON which means you need to water the plant
float tooLowTemp =20; //CHANGE ,temperature in degree C based on the type of your house plant, if the temperature is Lower than the value the LED will turn Red
//Temperature Sensor defs
const int B=4275; // B value of the thermistor
const int R0 = 100000; // R0 = 100k
const int pinTempSensor = A0; // Grove - Temperature Sensor connect to A5
//Light Sensor
const int lightPin = A2;
unsigned long lastConnectionTime = 0;
const unsigned long postingInterval = 10L * 1000L; //change this value to increase the posting interval
aws_iot_mqtt_client myClient; // init iot_mqtt_client
char msg[32]; // read-write buffer
int cnt = 0; // loop counts
int rc = -100; // return value placeholder
bool success_connect = false; // whether it is connected
// Basic callback function that prints out the message
void msg_callback(char* src, int len) {
Serial.println("CALLBACK:");
int i;
for(i = 0; i < len; i++) {
Serial.print(src[i]);
}
Serial.println("");
}
void setup()
{
//CJA Bridge.begin();
pinMode(ledPin,OUTPUT);
digitalWrite(ledPin,LOW);
Serial.begin(115200);
while (!Serial); // wait for a serial connection//Comment this out once your are ready to deploy
char curr_version[80];
sprintf(curr_version, "AWS IoT SDK Version(dev) %d.%d.%d-%s\n", VERSION_MAJOR, VERSION_MINOR, VERSION_PATCH, VERSION_TAG);
Serial.println(curr_version);
// check you connection info as part of the setup - this is based on the BasicPubSub example at https://github.com/aws/aws-iot-device-sdk-arduino-yun
if((rc = myClient.setup(AWS_IOT_CLIENT_ID)) == 0) {
// Load user configuration
if((rc = myClient.config(AWS_IOT_MQTT_HOST, AWS_IOT_MQTT_PORT, AWS_IOT_ROOT_CA_PATH, AWS_IOT_PRIVATE_KEY_PATH, AWS_IOT_CERTIFICATE_PATH)) == 0) {
// Use default connect: 60 sec for keepalive
if((rc = myClient.connect()) == 0) {
success_connect = true;
// Subscribe to "topic1" //we are not subscribing to any message as part of our Plant moniotring setup,
//but you could use this in a loop below if you were to build a feedback mechanism to water the plant with a pump
/* if((rc = myClient.subscribe("topic1", 1, msg_callback)) != 0) {
Serial.println("Subscribe failed!");
Serial.println(rc);
}*/
}
else {
Serial.println("Connect failed!");
Serial.println(rc);
}
}
else {
Serial.println("Config failed!");
Serial.println(rc);
}
}
else {
Serial.println("Setup failed!");
Serial.println(rc);
}
// Delay to make sure SUBACK is received, delay time could vary according to the server
delay(2000);
}
void loop()
{
moisturValue = analogRead(moisturePin);
Serial.print("sensor = " );
Serial.println(moisturValue); //Check the Value for with Dry sand and then with Wet Sand
//Calculating the Temperature in degress C
int a = analogRead(pinTempSensor);
float R = 1023.0/((float)a)-1.0;
R = 100000.0*R;
float temperature=1.0/(log(R/100000.0)/B+1/298.15)-273.15;//convert to temperature based on datasheet ;
Serial.print("temperature = ");
Serial.println(temperature);
//calculating Light value
int lightValue = analogRead(lightPin);
Serial.print("light value = ");
Serial.println(lightValue);
//turning on the LED if the sensor value is than tooDryValue or tooLowTemp
if(moisturValue < tooDryValue || temperature < tooLowTemp )
{
digitalWrite(ledPin,HIGH);
}else
{
digitalWrite(ledPin,LOW);
}
//Creating the JSON payload
String temp = "\"temp\": " + String(temperature) ;
String light = ", \"lightval\":" + String(lightValue) ;
String soilMoist = ", \"moistval\":" + String(moisturValue) ;
// Add both value together to send as one string.
String value = temp + light +soilMoist;
Serial.println(value);
String payload = "{" + value + "}";
payload.toCharArray(data, (payload.length() + 1));
//Publish data to AWS IoT using topic/plantdata,which in turn will fire the AWS IoT rule to write sensor data to Dynamo DB
if(success_connect) {
// Generate a new message in each loop and publish to "topic/plantdata"
if((rc = myClient.publish("topic/plantdata", data, strlen(data), 1, false)) != 0) {
Serial.println("Publish failed!");
Serial.println(rc);
}
// Get a chance to run a callback
if((rc = myClient.yield()) != 0) {
Serial.println("Yield failed!");
Serial.println(rc);
}
// Done with the current loop
sprintf(msg, "publish %d done", cnt++);
Serial.println(msg);
delay(10000);
}
// }//end if checking for time interval to post
delay(5000);
}
aws_iot_config.hArduino
Add as a new tab in the Arduino IDE/* * Copyright 2010-2015 Amazon.com, Inc. or its affiliates. All Rights Reserved. * * Licensed under the Apache License, Version 2.0 (the "License"). * You may not use this file except in compliance with the License. * A copy of the License is located at * * http://aws.amazon.com/apache2.0 * * or in the "license" file accompanying this file. This file is distributed * on an "AS IS" BASIS, WITHOUT WARRANTIES OR CONDITIONS OF ANY KIND, either * express or implied. See the License for the specific language governing * permissions and limitations under the License. */ //@carmelitoA modified the value for the plant monitoring project #ifndef config_usr_h #define config_usr_h // Copy and paste your configuration into this file //=============================================================== #define AWS_IOT_MQTT_HOST "XXXXXXXXXXX.iot.us-west-2.amazonaws.com" // your endpoint #define AWS_IOT_MQTT_PORT 8883 // your port #define AWS_IOT_CLIENT_ID "clientYun2" // your client ID #define AWS_IOT_MY_THING_NAME "PlantSystem" // your thing name #define AWS_IOT_ROOT_CA_FILENAME "rootCA.pem" // your root-CA filename #define AWS_IOT_CERTIFICATE_FILENAME "cert.pem" // your certificate filename #define AWS_IOT_PRIVATE_KEY_FILENAME "privateKey.pem" // your private key filename //=============================================================== // SDK config, DO NOT modify it #define AWS_IOT_PATH_PREFIX "./certs/" #define AWS_IOT_ROOT_CA_PATH AWS_IOT_PATH_PREFIX AWS_IOT_ROOT_CA_FILENAME // use this in config call #define AWS_IOT_CERTIFICATE_PATH AWS_IOT_PATH_PREFIX AWS_IOT_CERTIFICATE_FILENAME // use this in config call #define AWS_IOT_PRIVATE_KEY_PATH AWS_IOT_PATH_PREFIX AWS_IOT_PRIVATE_KEY_FILENAME // use this in config call #endif
Custom parts and enclosures
Schematics
Connect the sensors to the Grove starter kit that is- Temperature sensor to A0
- Soil Moisture sensor to A1
- Light sensor to A2
In addition, using a 220 Ohms resistor connect an LED to pin#2.
 Connect the
 Temperature sensor to A0
Soil Moisture sensor to A1
Light sensor to A2
And using a 220 Ohms resistor connect an LED to pin#2
Manufacturing process
- Mastering C# Using Statements: Imports, Aliases, and Static Directives
- Smart Plant IoT: Build a Connected Greenhouse with Arduino & Azure
- Smart Windows 10 IoT Plant Monitoring System
- Industrial IoT Monitoring: Essential Hardware Components and Setup Guide
- Advanced Smart Waste Monitoring with Arduino 101: BLE & WiFi Integration
- Smart Home Automation via Android App & IoT
- Advanced AI‑Powered IoT System for Early Forest Fire Detection & Tree Health Monitoring
- Revolutionizing Vineyard Operations: IoT-Driven Plant Monitoring System
- Boosting Fleet Efficiency with IoT‑Based Monitoring Solutions
- Smart IoT River Monitoring System Enhances Water Management & Flood Prevention