


Automatic Temperature Measurement with Voice Alerts
Components and supplies
 |
| × | 1 | |||
 |
| × | 1 |
About this project
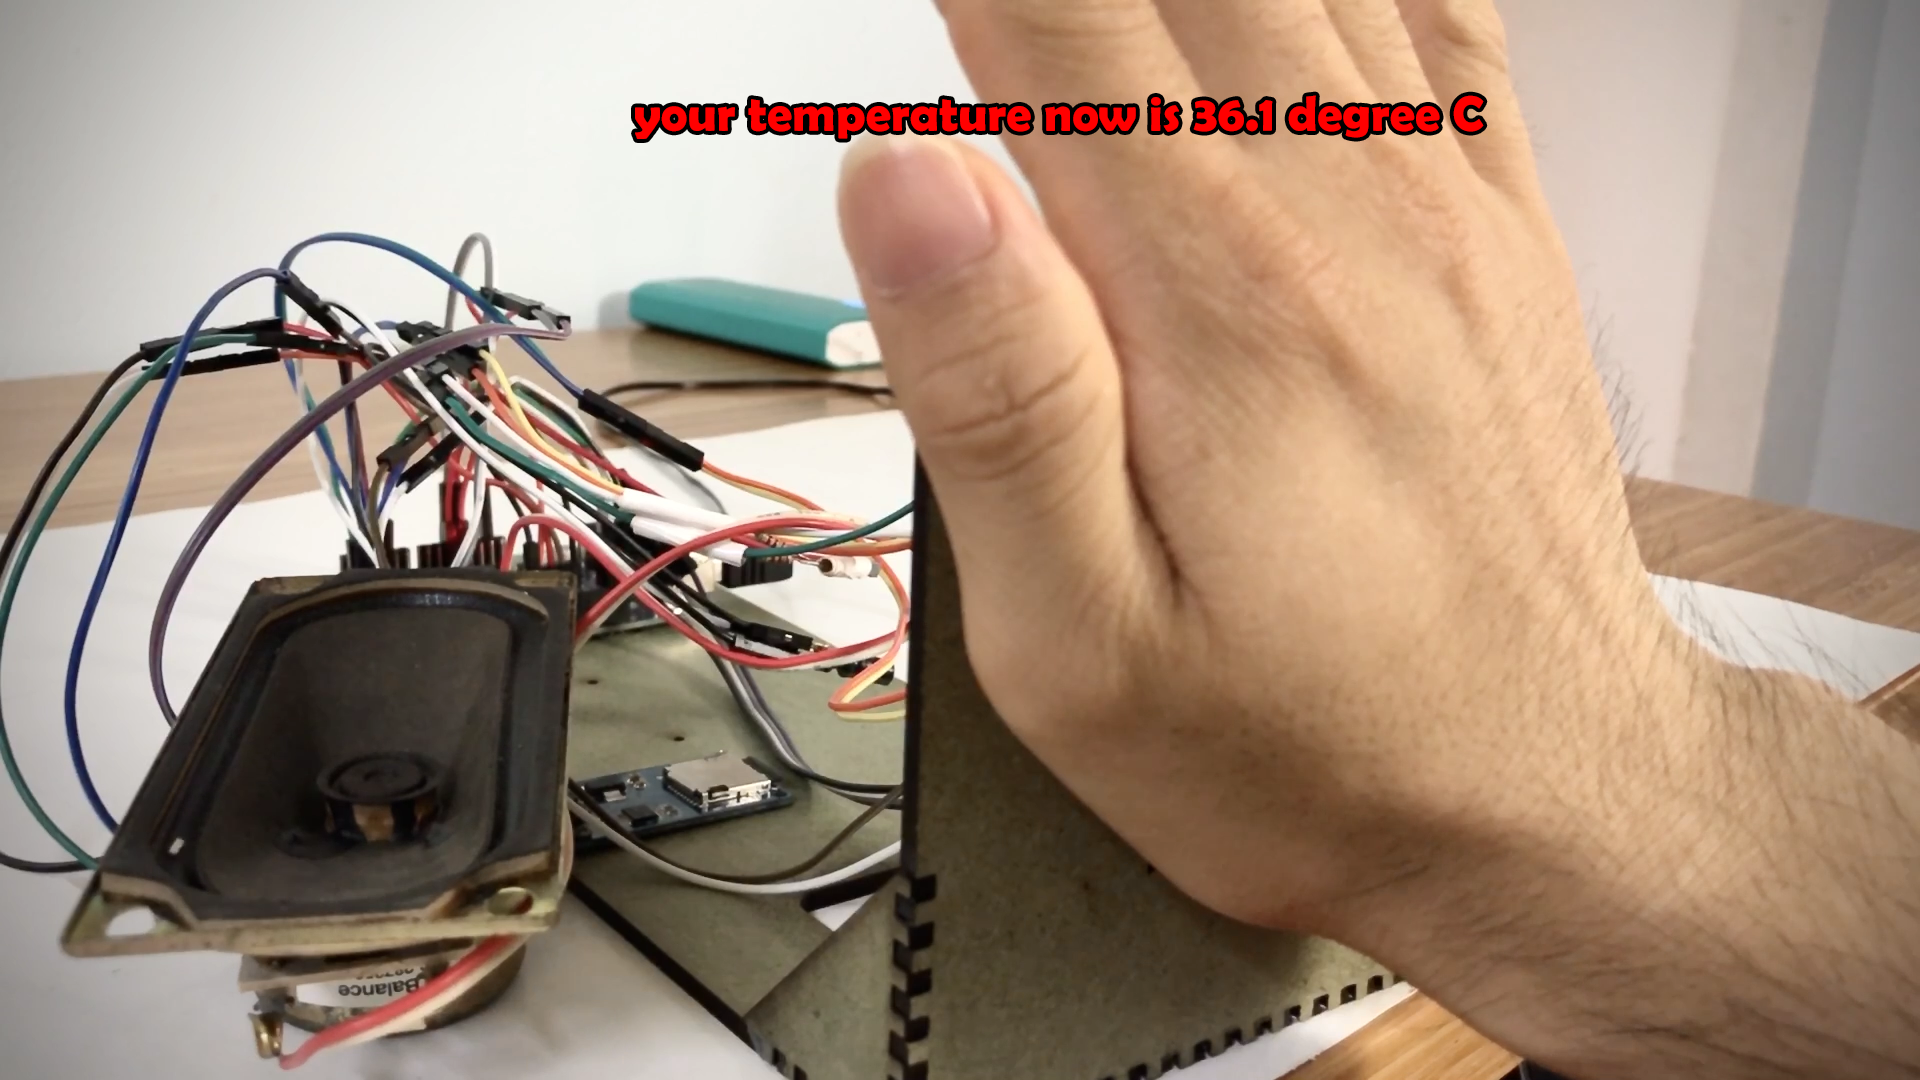
Recent day, whole world is struggling with virus Covid19. First checking for effected people (or suspect to be effected) is measuring body temperature. So this project is made to model that can measure body temperature automatically and inform by voice.
Let's start!
Step 1: Part ListComponent for the project:
1. Arduino UNO https://amzn.to/2P58O7s
2. SD card module https://amzn.to/2E1myhb
3. SD card 8GB https://amzn.to/2xTCz6i
4. Amplifier PAM8403 & speaker https://amzn.to/2E1myhb
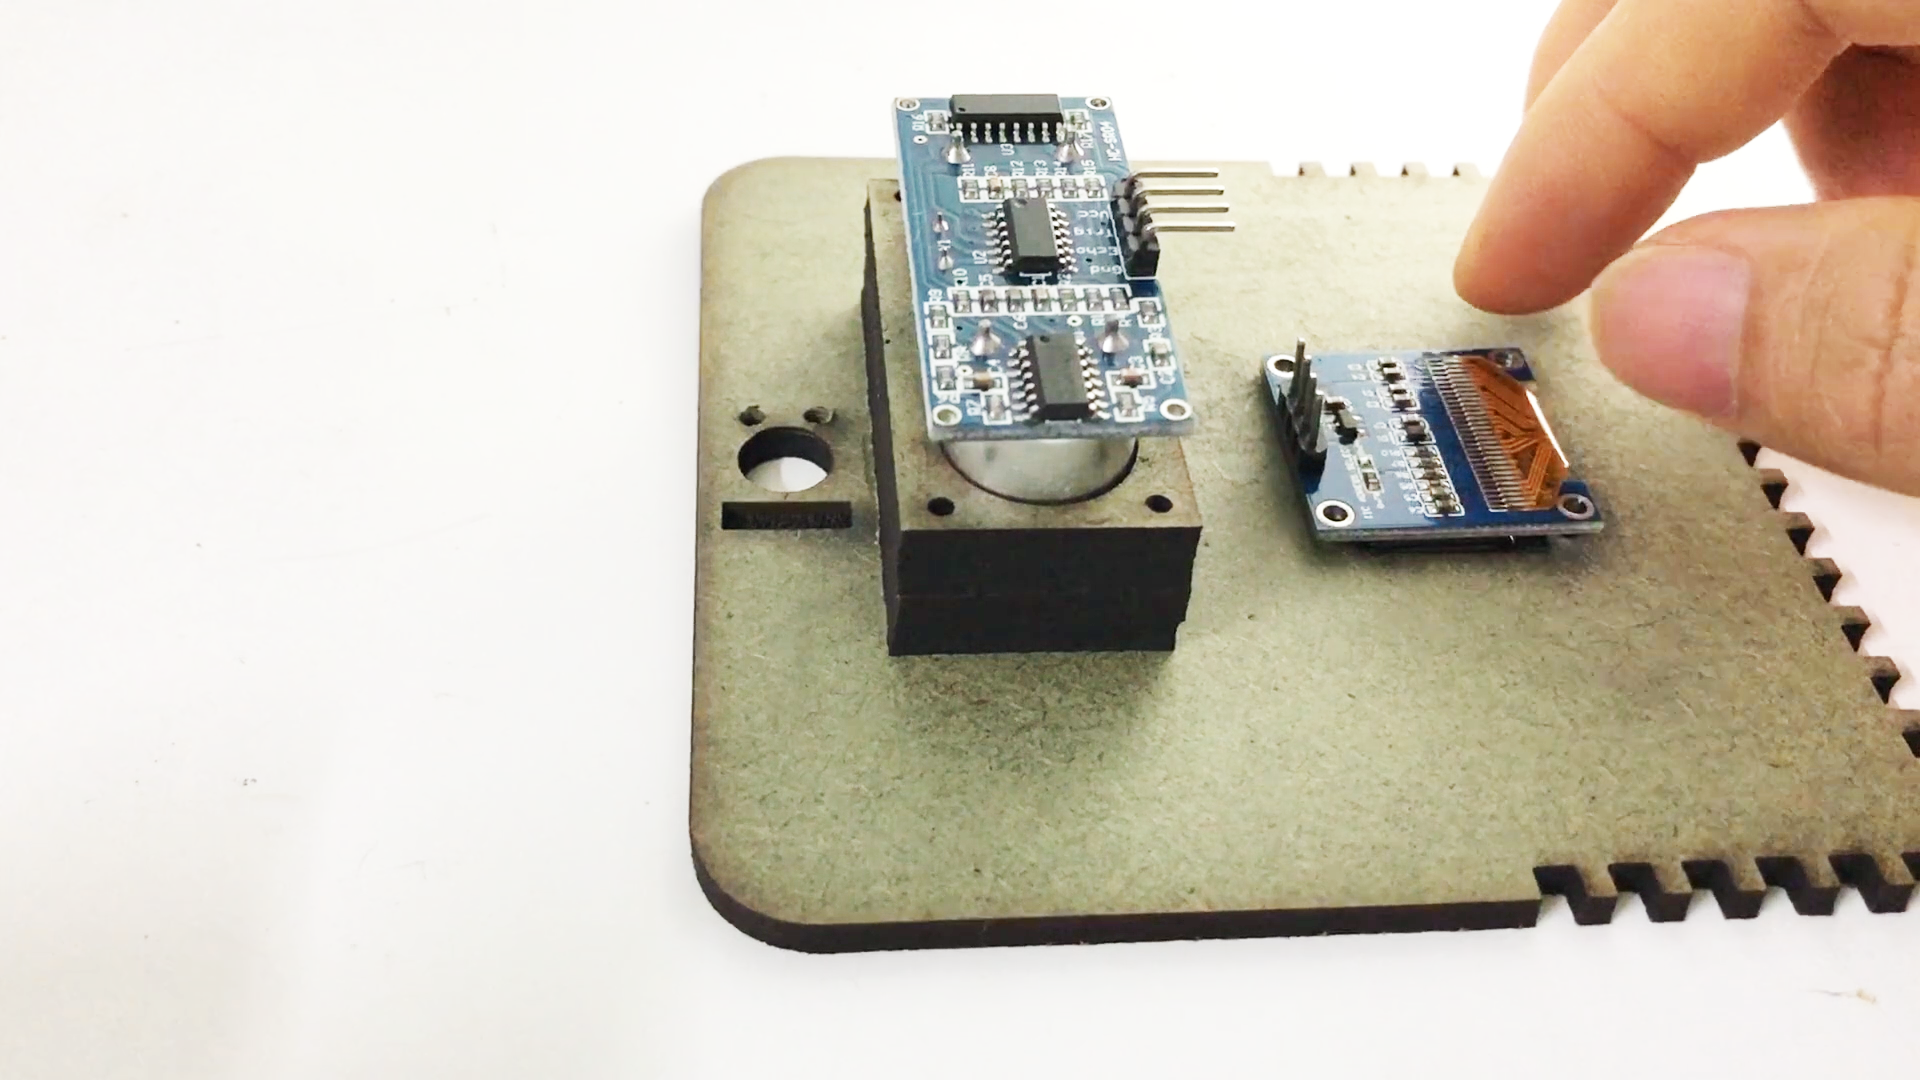
5. Ultrasonic sensor HC-SR04 https://amzn.to/2E1myhb
6. OLED 128x64 https://amzn.to/2E1myhb
7. Breadboard cables https://amzn.to/2E1myhb
8. Infrared thermometer GY-906 https://amzn.to/2Wlab5r
Buy electronic component on utsource.net
Note that: because of high demand infrared thermometer, sometimes you might not find the sensor GY-906 on market.
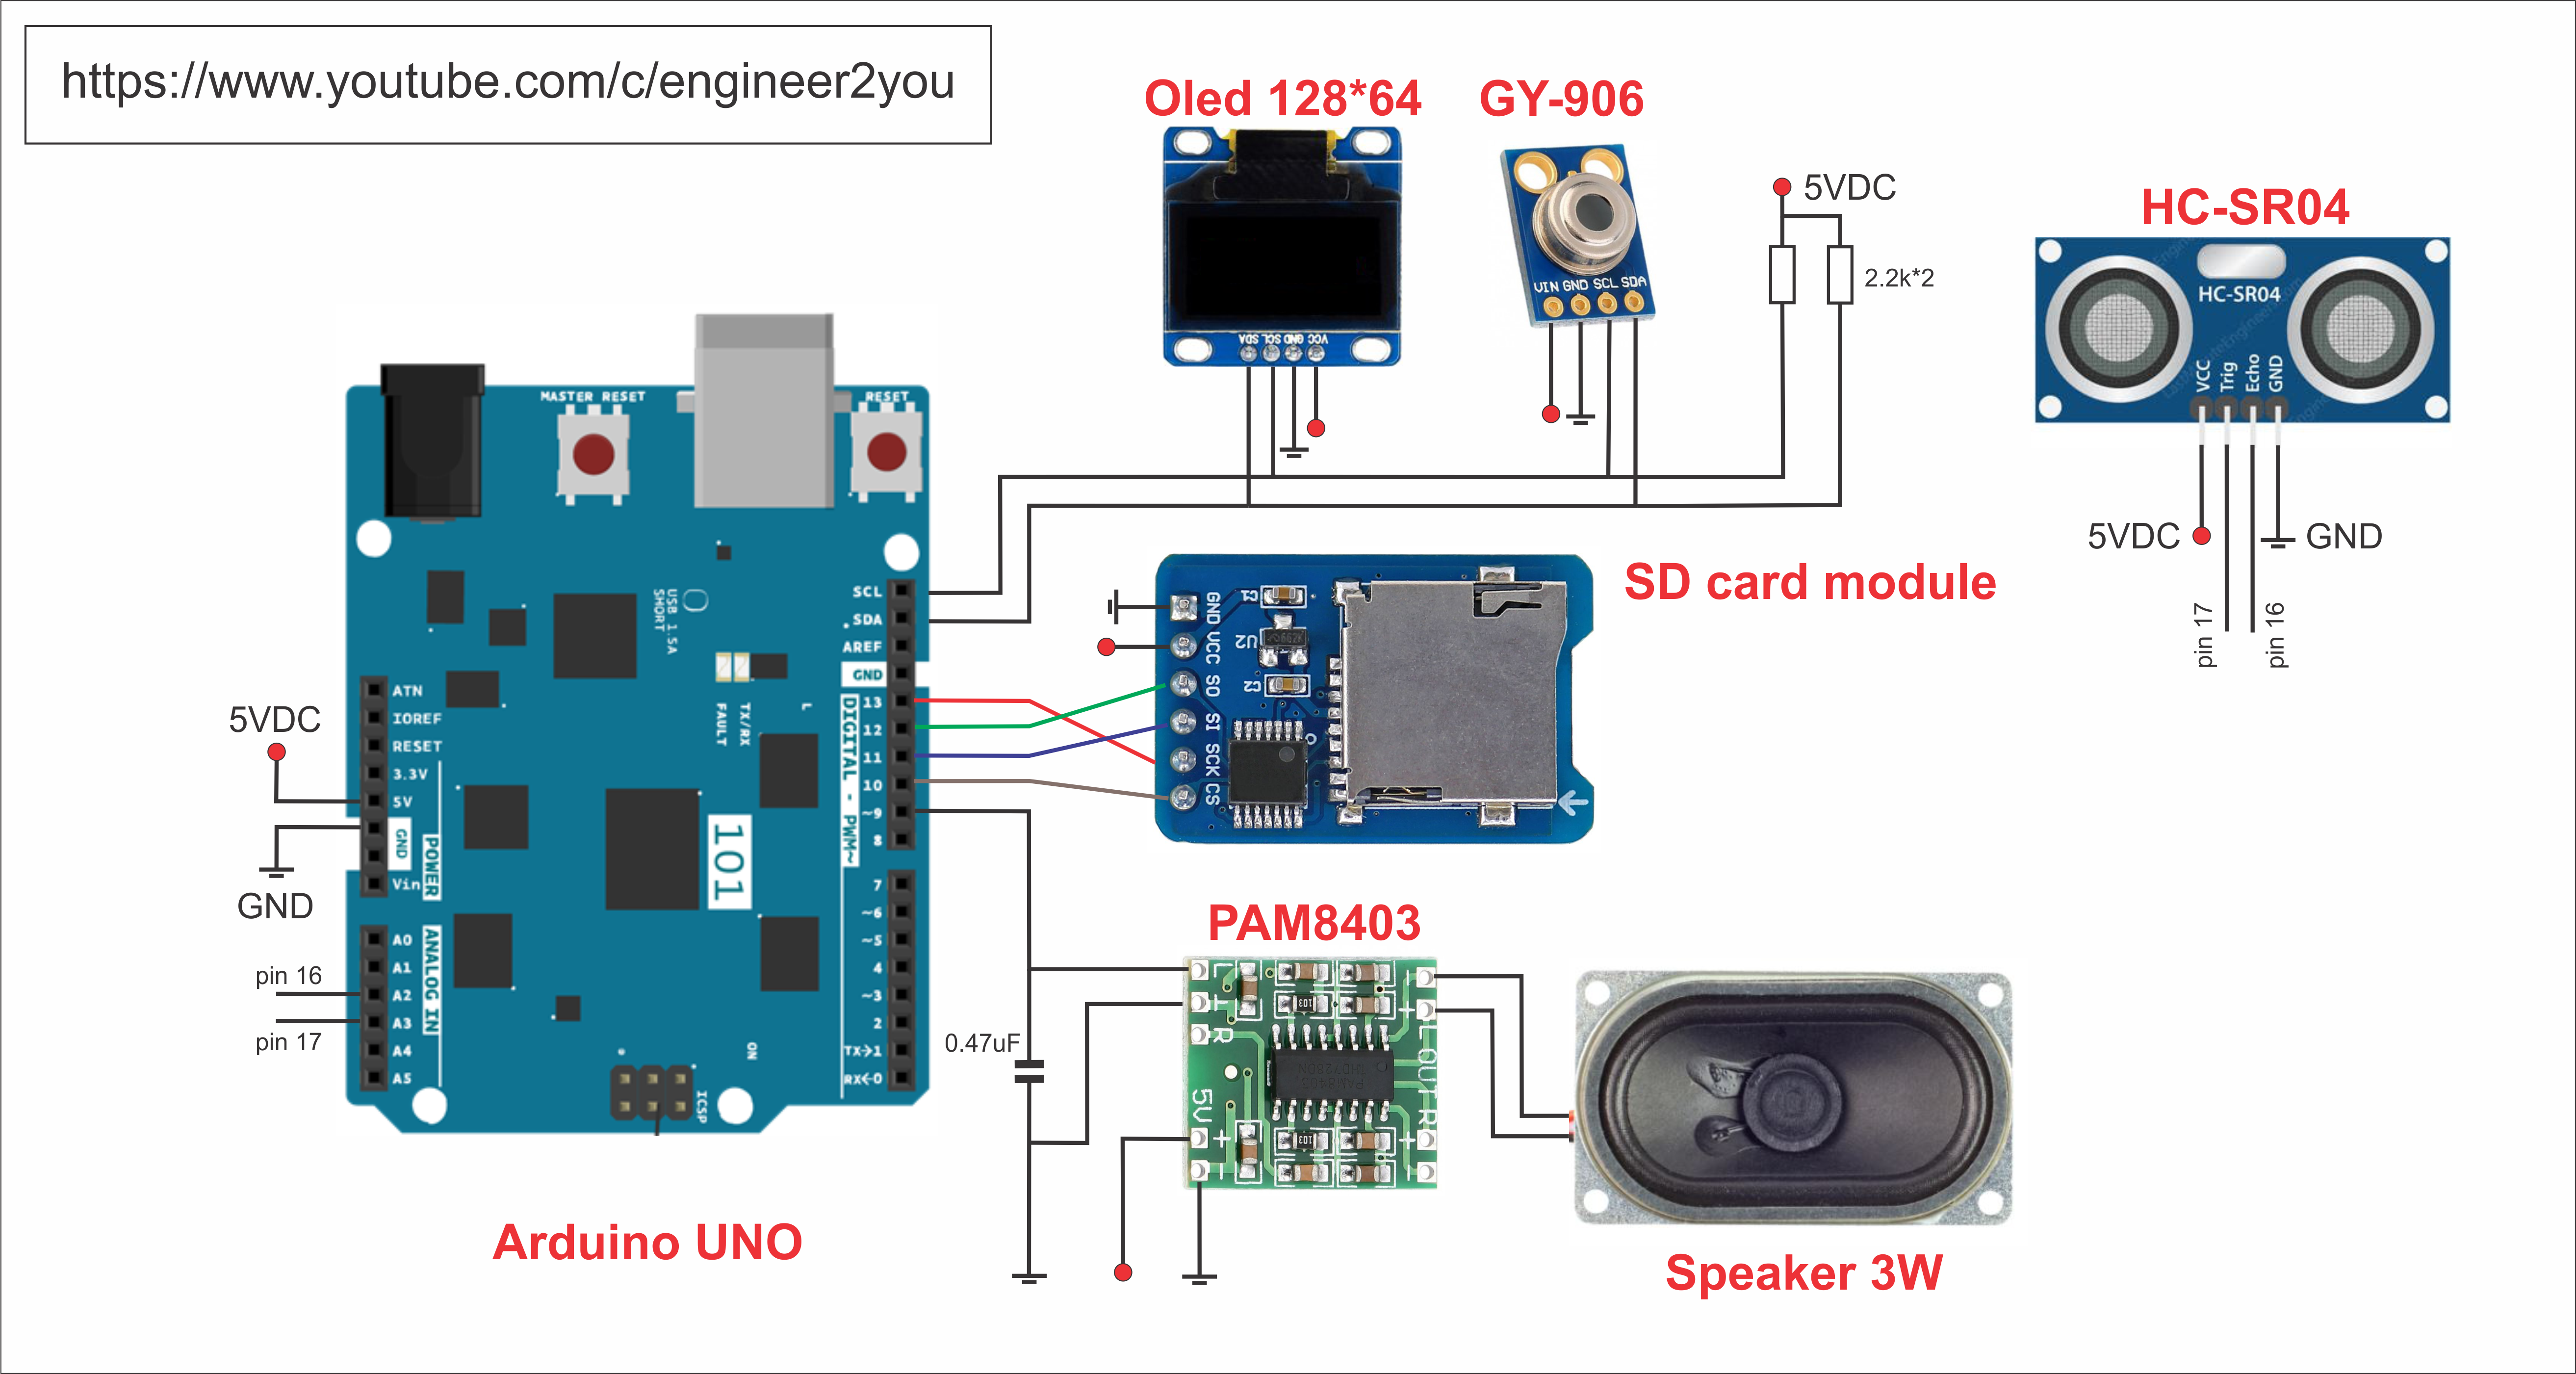
Step 2: Circuit DesignTake a look at circuit design.

Basically, it will measure temperature from infrared thermometer GY-906, then show result on Oled LCD 128*64. It also inform you the result temperature by voice via speaker. The speaker will take audio file from SD card, then play based on temperature result. The speaker need amplifer PAM8403 to make sound louder for us.
Main process for using like this:
1. We will wave hand at ultrasonic sensor (distance about 10cm)
2. Then it will greeting us by voice "welcome to temperature measuring system, please put your hand or forehead before sensor about 2cm"
3. We put hand or forehead before sensor for measuring temperature
4. It will sound temperature result, as well as show on LCD. For example, your temperature is 36.5dgC, it will speak "Your temperature is 36.5 degree C. Your temperature seems normal, so please keep healthy!"
Step 3: Make Frame and Do ConnectionThe frame is from MDF wood 3mm thickness, cut by laser. I hope some of you can support cnc laser machine to cut it. If not, you can cut cardboard for the frame. Design file can be downloaded here (Google share)
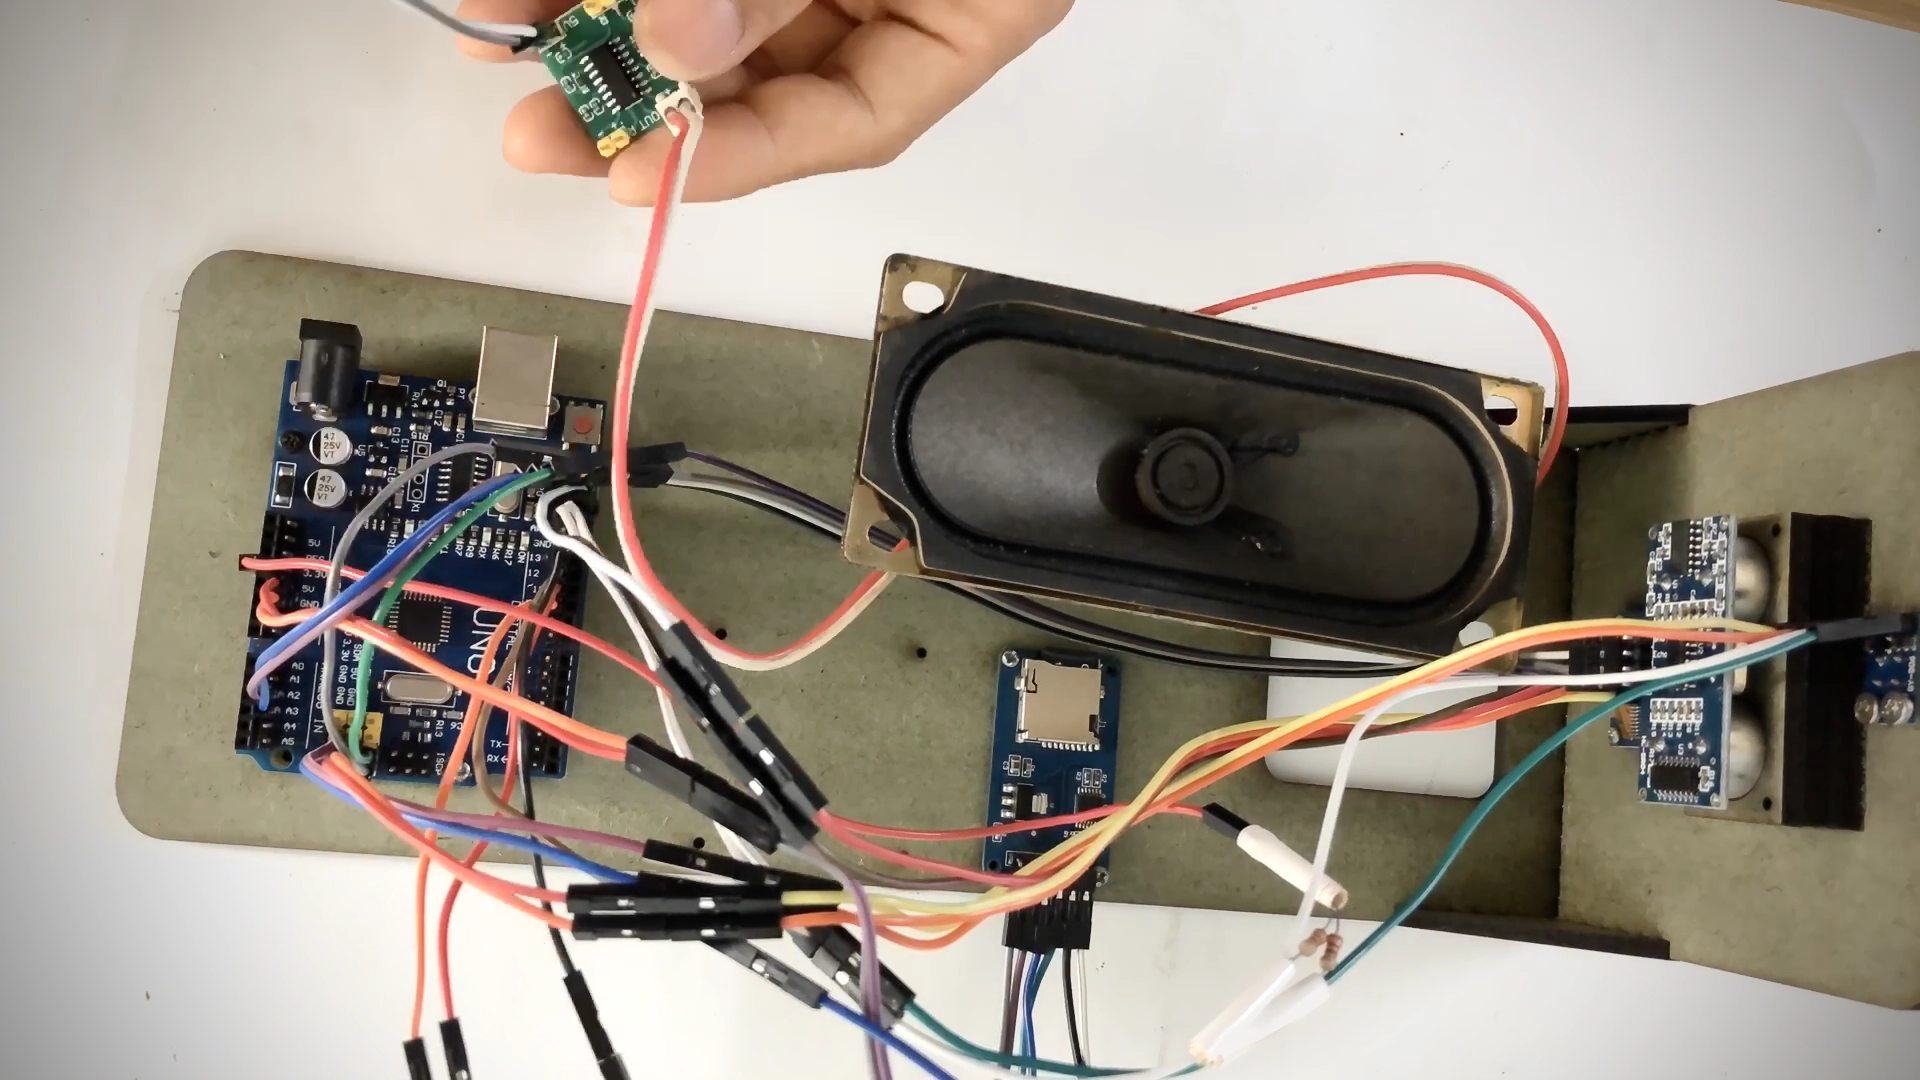
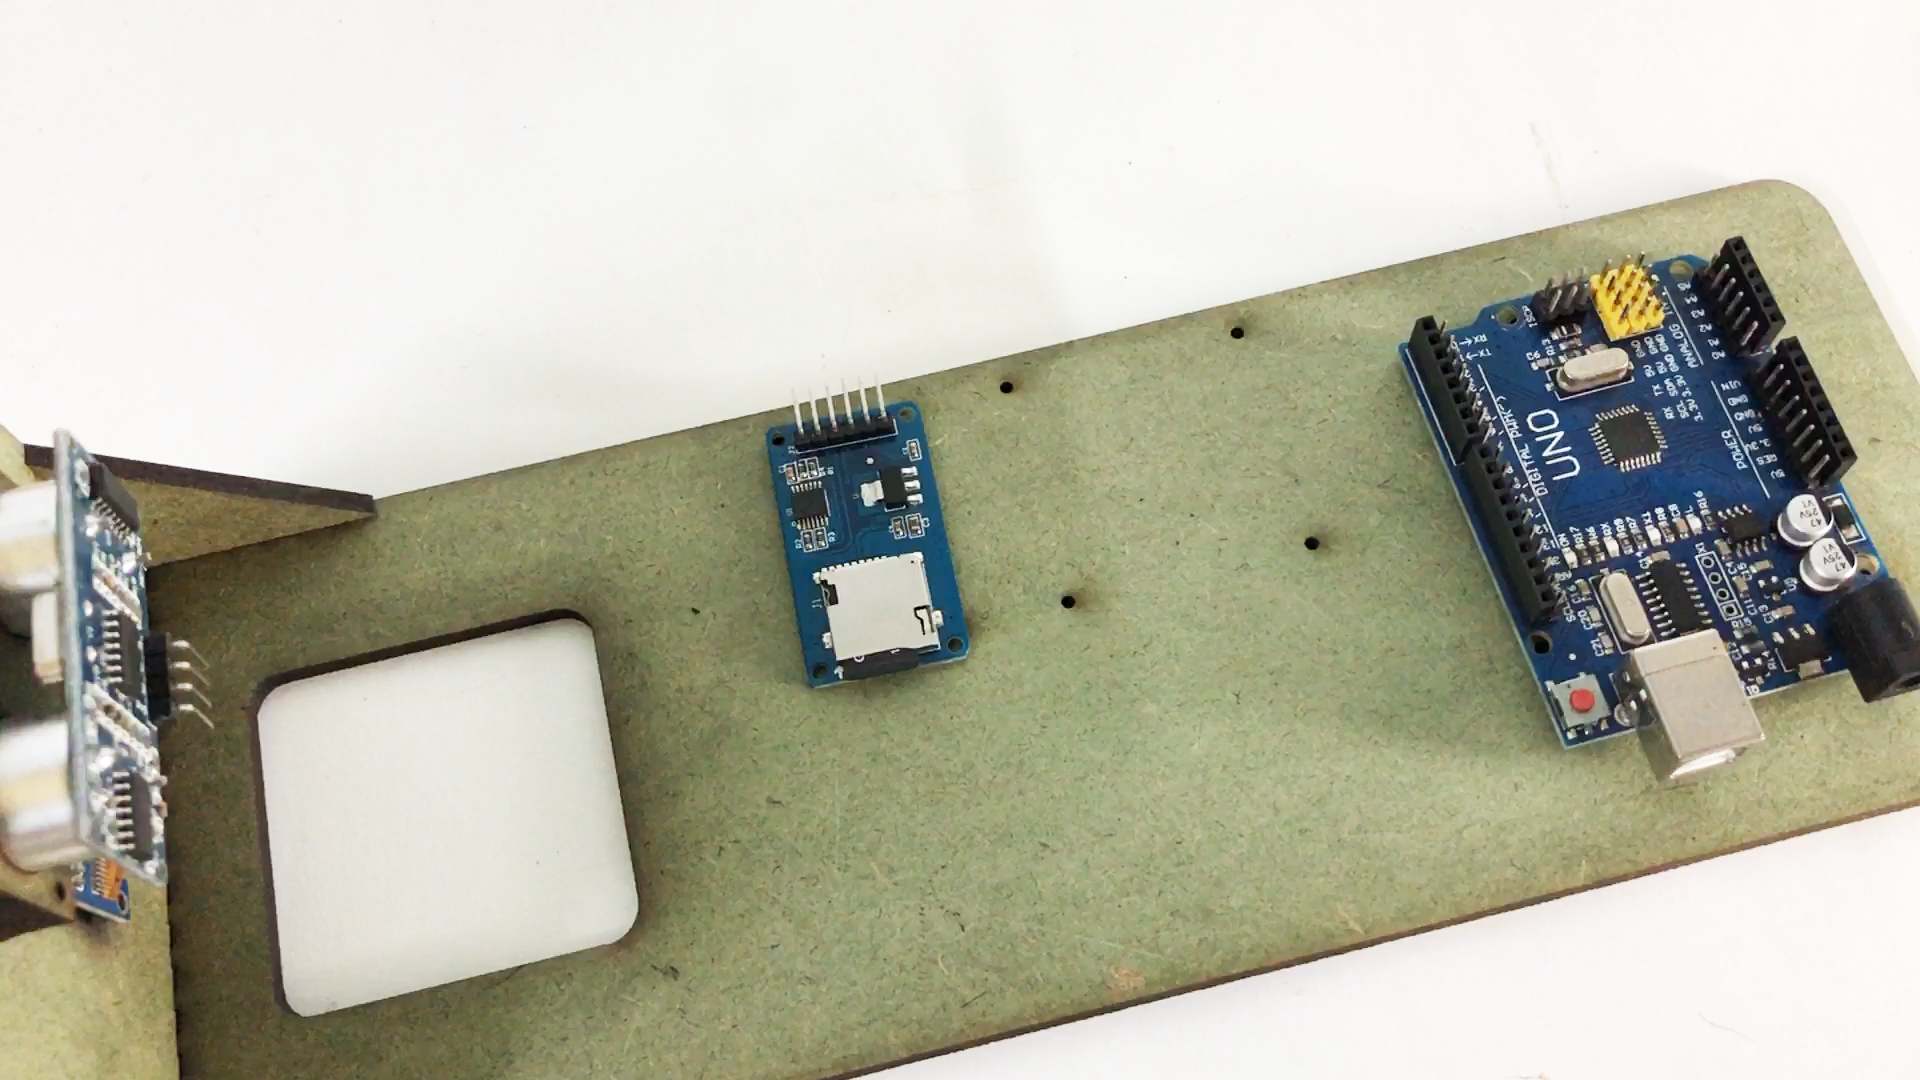
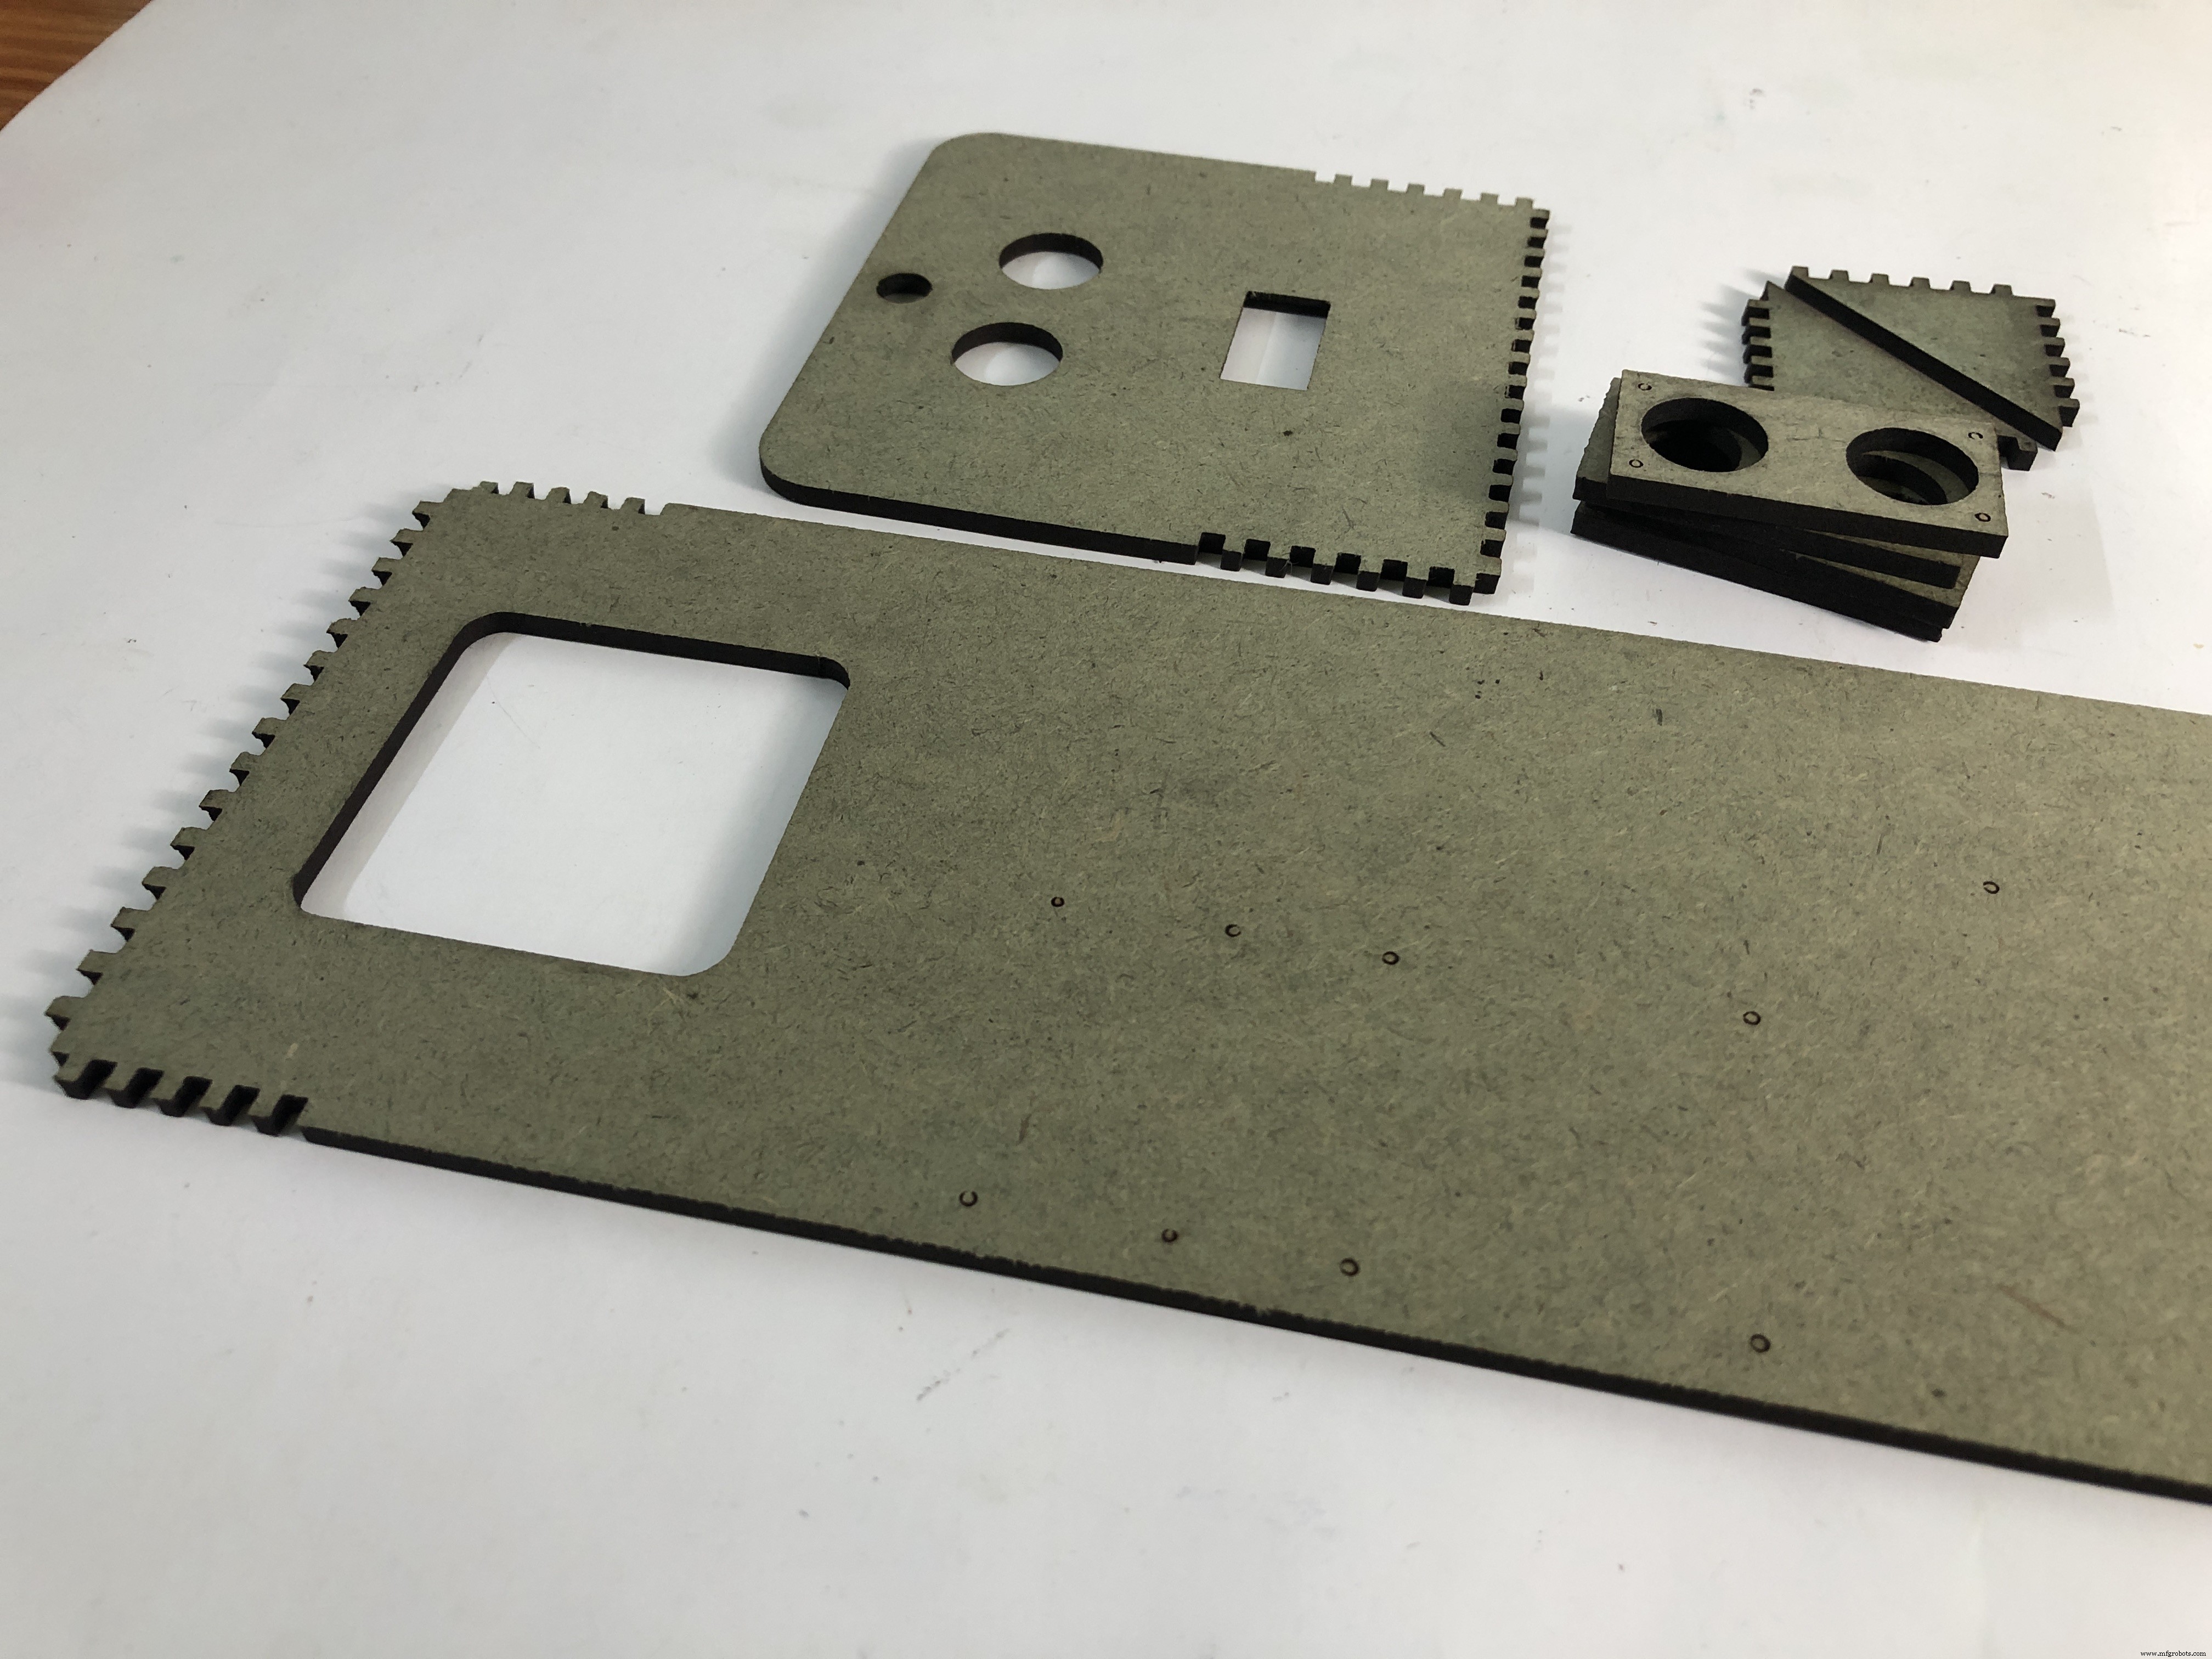
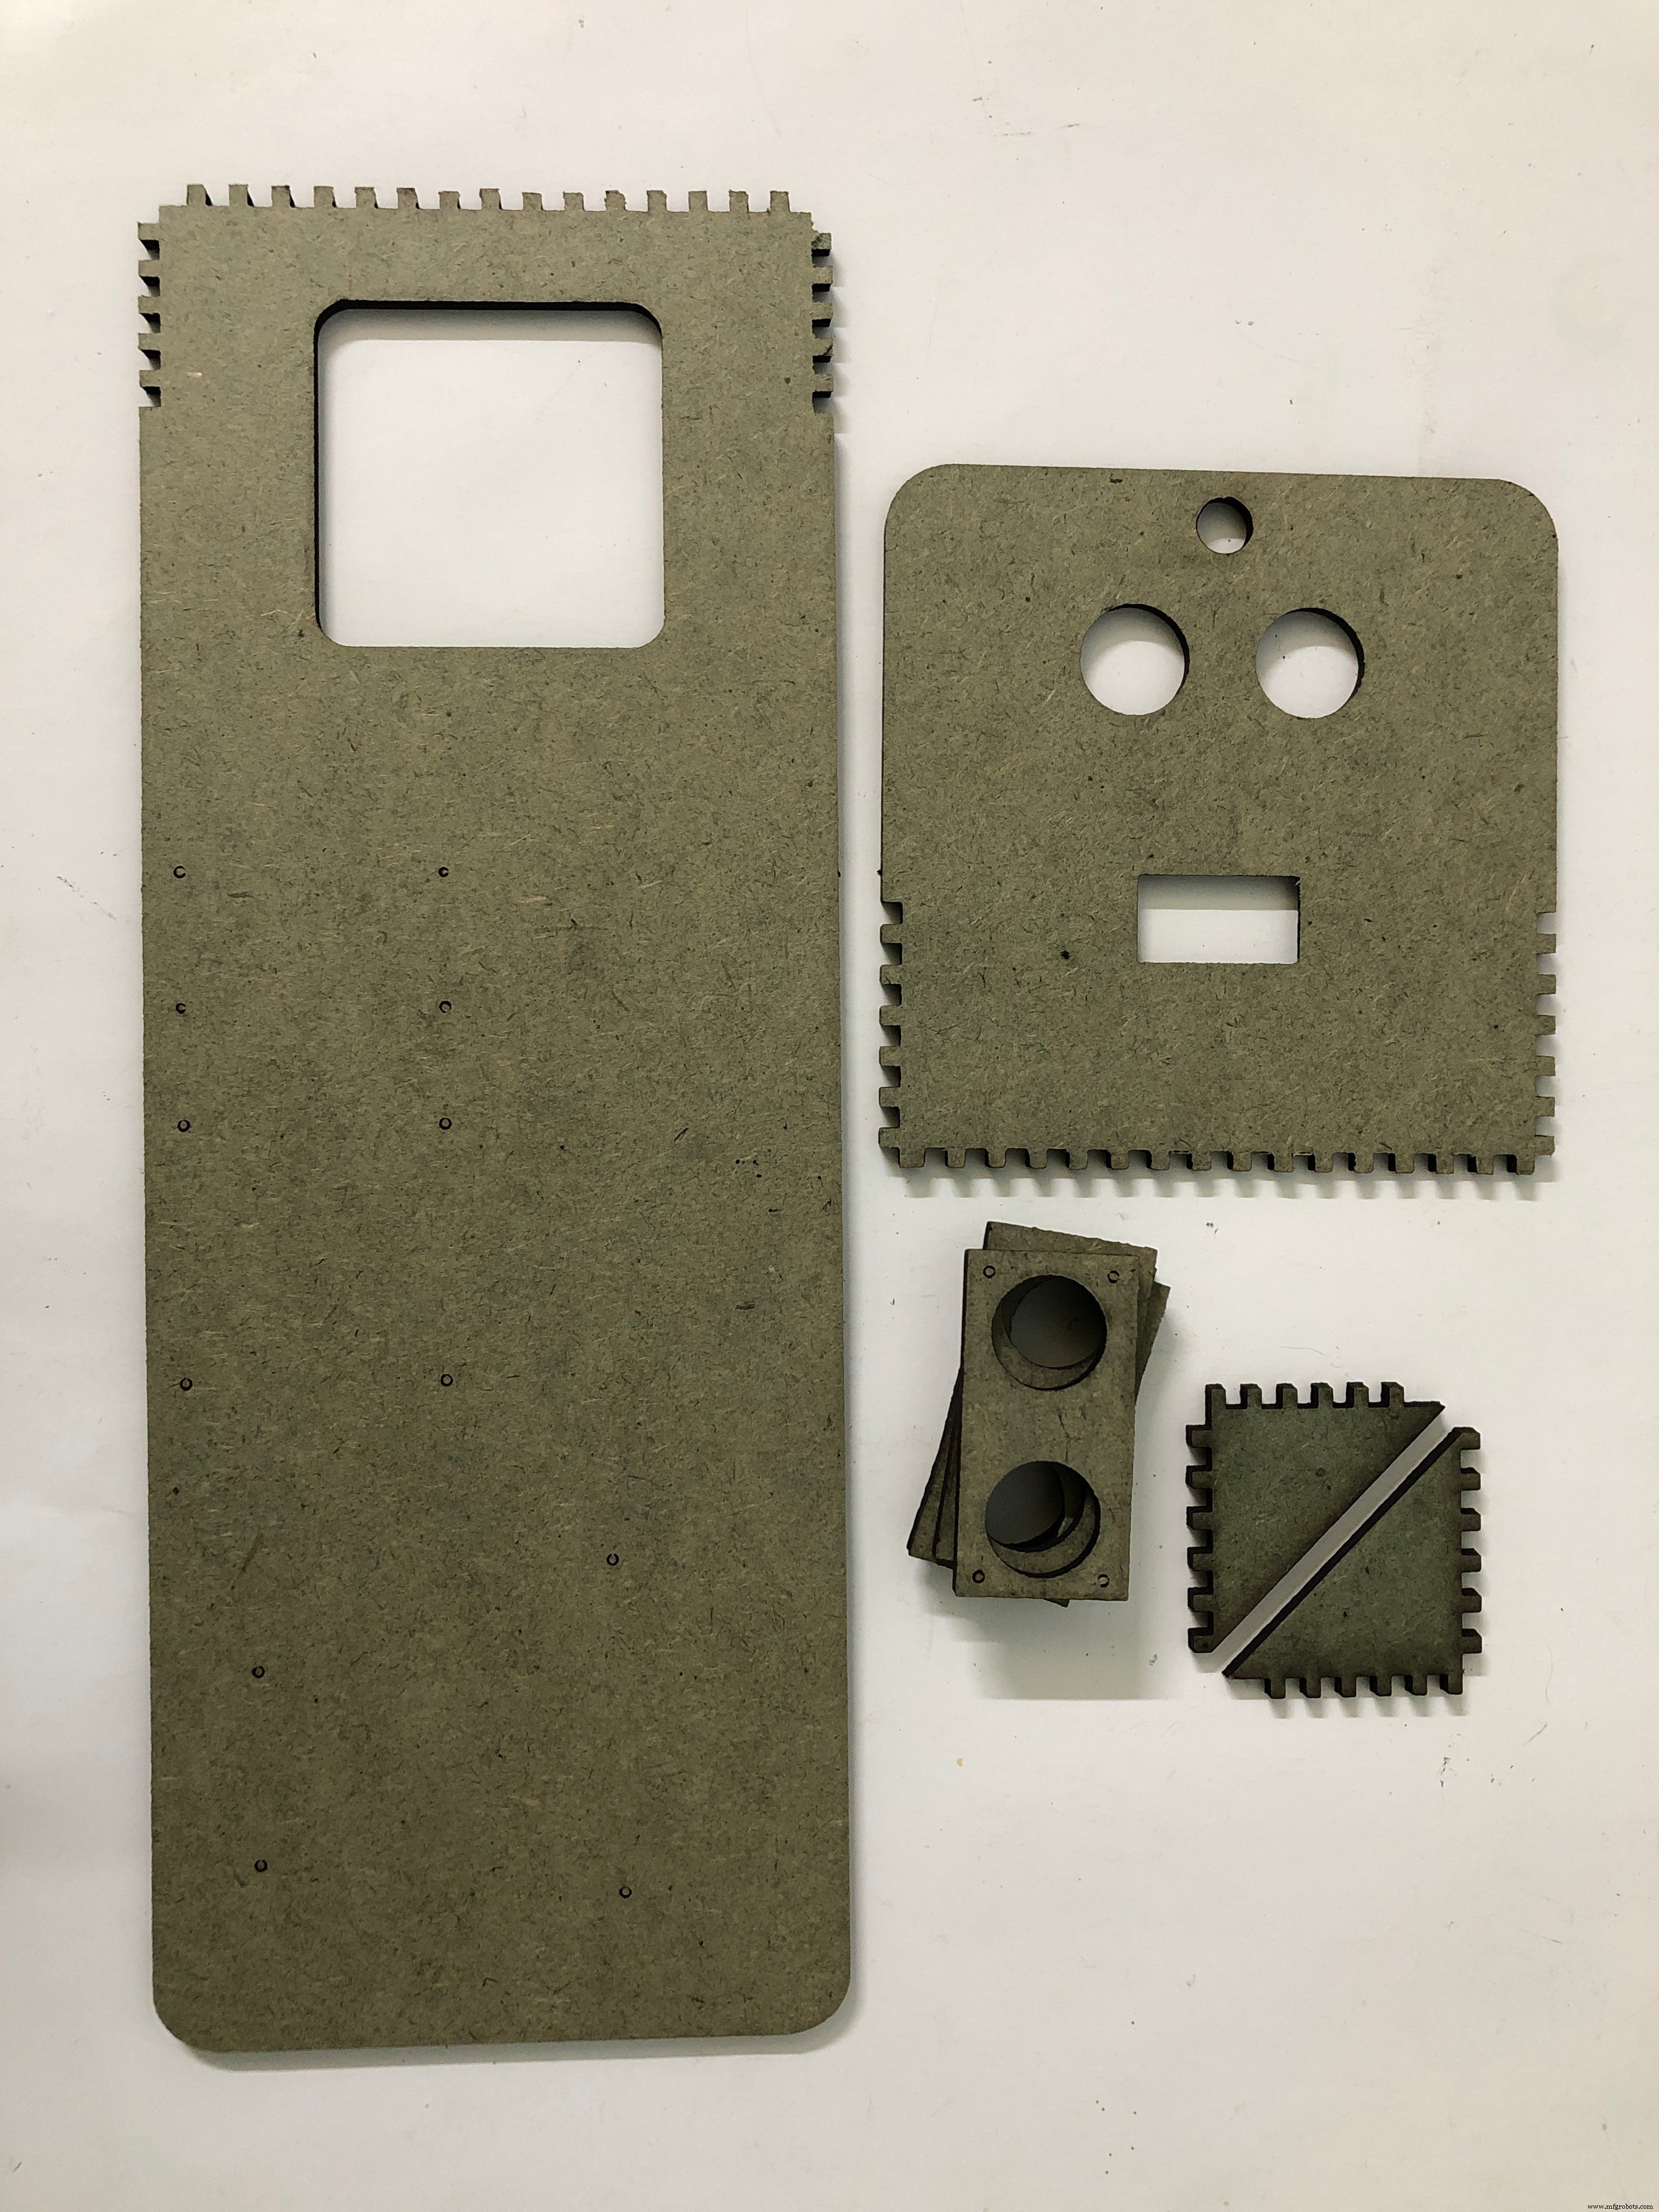
After cutting, you will need glue to make frame for it. It's not difficult to make the frame. Then we will install all parts into the frame, and make wiring as circuit design
Step 4: Code Works and DownloadThe arduino code will do the job:
1. Detect if there is people (obstacle) near the sensor, detected by ultrasonic sensor
2. Say welcome by speaker, inform user put hand or forehead near sensor about 2cm
3. Speak out result and comment about your temperature
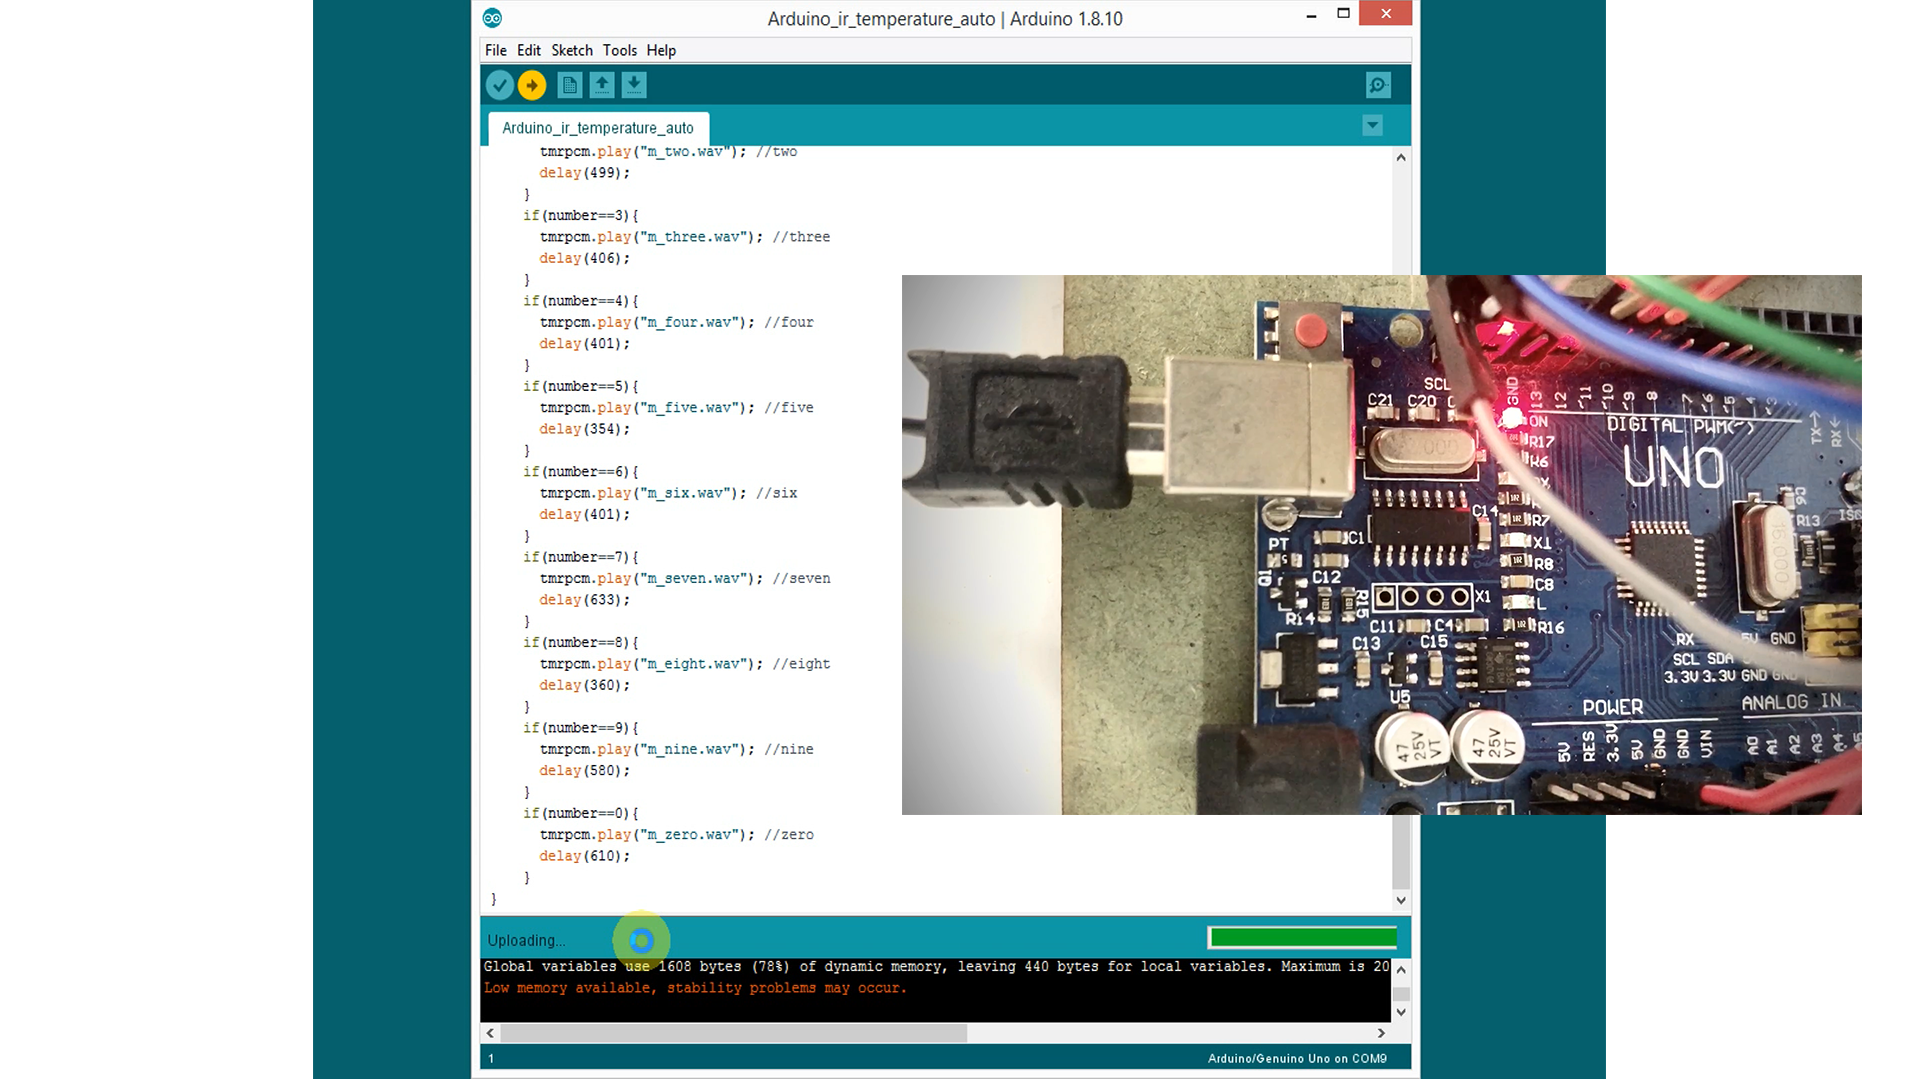
Code can be downloaded here
https://bit.ly/2Za1mjZ
Here is audio file, you should download it and save it into SD card
https://bit.ly/3aZpGWJ
Please note that, audio file is 8bit, mono type, 11025Hz. I record my voice by computer (or phone), then convert it by tool online (https://audio.online-convert.com/convert-to-wav)
Step 5: Test RunNow, we can plug in power and test it how it goes. Very interesting for system can measure your temperature and inform by voice.
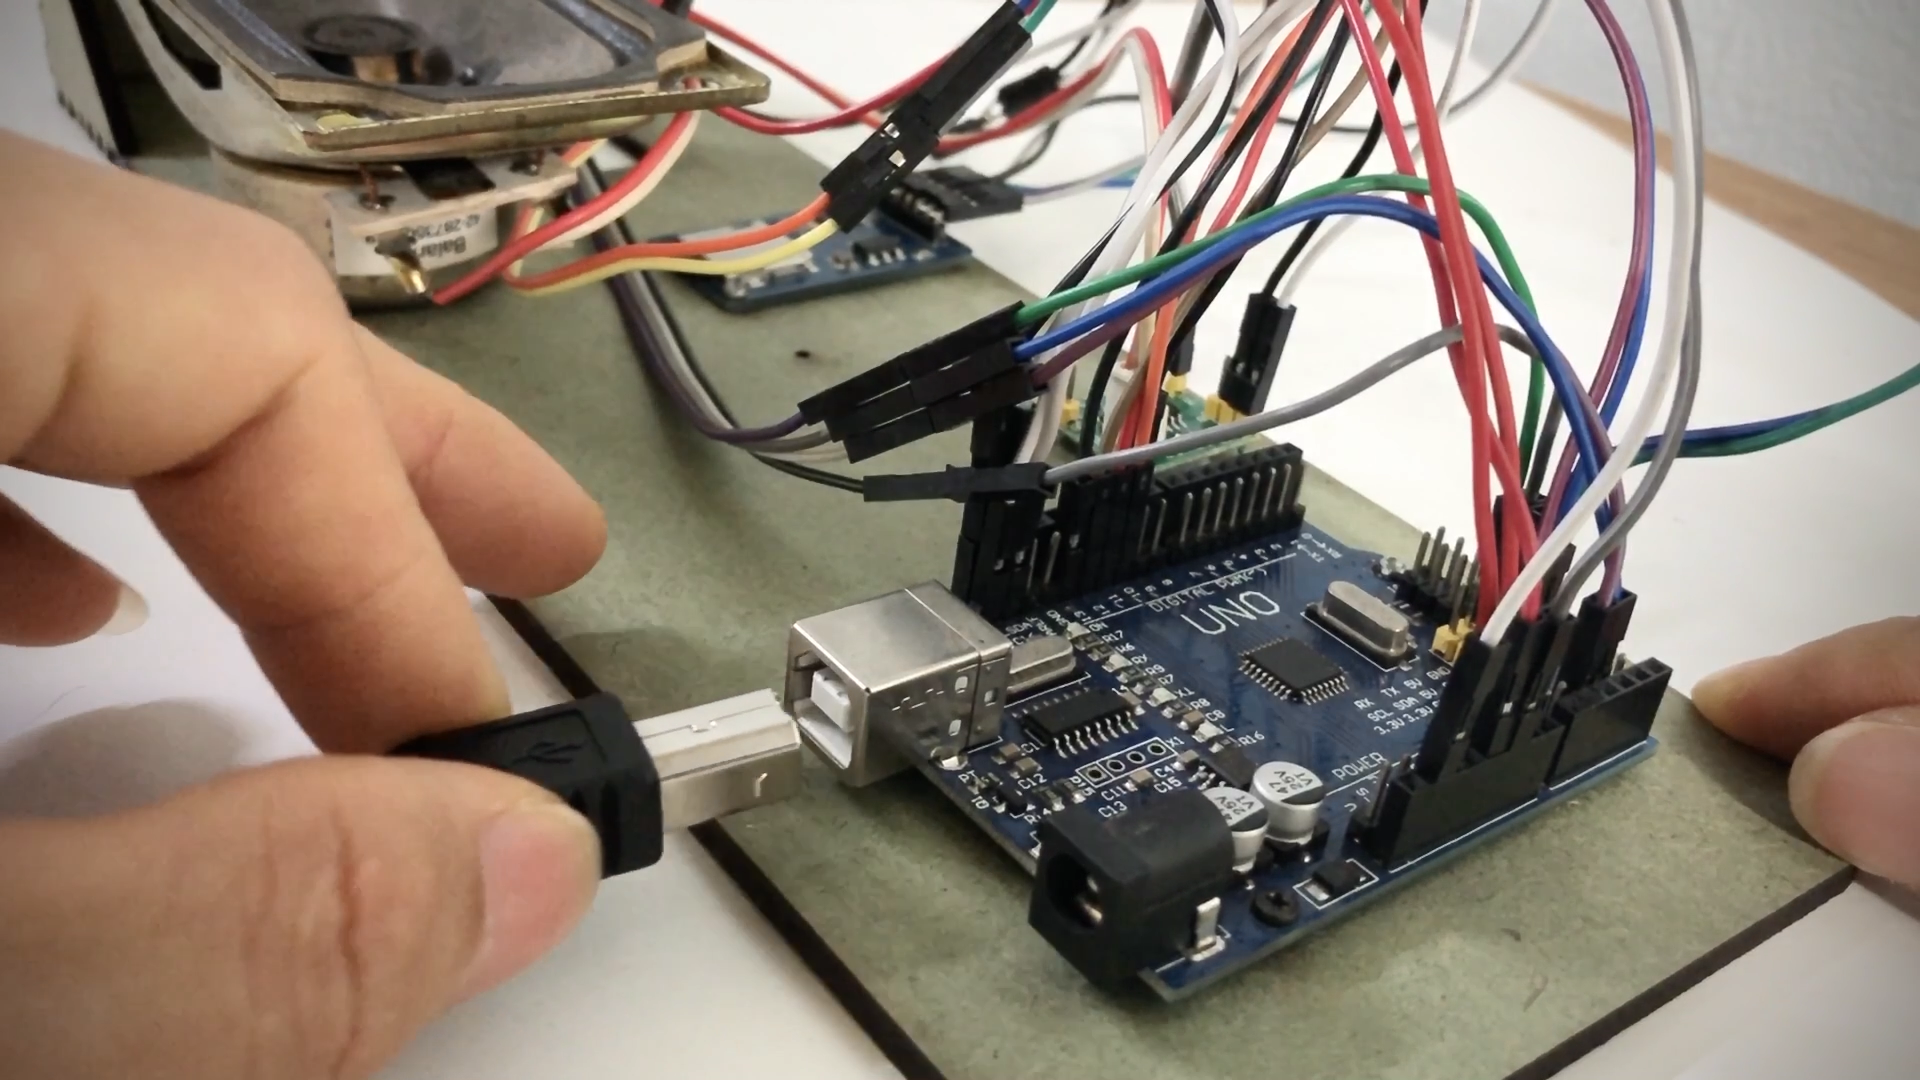
I hope you will like it :)
Thanks for your reading!https://bit.ly/2Za1mjZ
Code
- Arduino_ir_temperature_auto.ino
Arduino_ir_temperature_auto.inoArduino
// www.youtube.com/c/engineer2you
#include <SD.h>                 // for SD card
#define SD_ChipSelectPin 10     // for SD card
#include <TMRpcm.h>             // Lib to play wav file
#include <Adafruit_MLX90614.h>  // for infrared thermometer
//-------------------------------------- oled
#include "SSD1306Ascii.h"
#include "SSD1306AsciiAvrI2c.h"
#define I2C_ADDRESS 0x3C  // 0X3C+SA0 - 0x3C or 0x3D
#define RST_PIN -1  // Define proper RST_PIN if required.
//--------------------------------------- oled
Adafruit_MLX90614 mlx = Adafruit_MLX90614();  //for infrared thermometer
SSD1306AsciiAvrI2c oled;  // create an object for LCD
TMRpcm tmrpcm;            // create an object for music player

double temp;  // to save temperature value
const int trigPin = 17;  //ultrasonic
const int echoPin = 16;  //ultrasonic
long duration;
int distance;
int step1_judge = 0;

void setup(){
  //--------------------------------------- oled
  #if RST_PIN >= 0
    oled.begin(&Adafruit128x64, I2C_ADDRESS, RST_PIN);
  #else // RST_PIN >= 0
    oled.begin(&Adafruit128x64, I2C_ADDRESS);
  #endif // RST_PIN >= 0
  // Call oled.setI2cClock(frequency) to change from the default frequency.
    oled.setFont(Adafruit5x7);
  //-------------------------------------- oled

  tmrpcm.speakerPin = 9; //pin 9 for output audio
  Serial.begin(9600);
  if (!SD.begin(SD_ChipSelectPin)) {  // see if the card is present and can be initialized:
    Serial.println("SD fail");
    Serial.println("SD ok");
    oled.clear();
    oled.set1X();
    oled.println("SD card fail");
    return;   // don't do anything more if not
  }
  else{
    Serial.println("SD ok");
    oled.clear();
    oled.println("SD card ok");
  }
  delay(1000);
  tmrpcm.play("m_wel.wav"); //the sound file welcome will play each time the arduino powers up, or is reset
  tmrpcm.volume(1);
  oled.clear();
  oled.set2X();
  oled.println("");
  oled.println("  Welcome");

  pinMode(trigPin, OUTPUT); // Sets the trigPin as an Output
  pinMode(echoPin, INPUT); // Sets the echoPin as an Input
  mlx.begin();  //start infrared thermometer
  delay(10000);  //wait for welcome audio
}

void loop(){
  //------------reading distance
  // Sets the trigPin on HIGH state for 10 micro seconds
  digitalWrite(trigPin, HIGH);
  delayMicroseconds(10);
  digitalWrite(trigPin, LOW);
  // Reads the echoPin, returns the sound wave travel time in microseconds
  duration = pulseIn(echoPin, HIGH, 23529); //23529us for timeout 4.0m

  // Calculating the distance
  distance= duration*0.034/2;

  //speak_out(temp);
  Serial.print("distance is ");
  Serial.println(distance);
  if ((distance<10)&&(distance>0)) step1_judge++;
  else step1_judge=0;

  if (step1_judge>2){
    step1_judge=0;
    tmrpcm.play("m_wel.wav");
    delay(10000); //wait for welcome voice complete

    temp = mlx.readObjectTempC()+1.2;//---------------------reading temperature & show on LCD
    //temp = 37.4;  //for testing, comment this line for real reading
    oled.clear();
    oled.set2X();
    oled.println("");
    oled.print("  ");
    oled.print(temp,1);
    oled.println("dgC");

    tmrpcm.play("m_now.wav");
    delay(1380);

    if (temp<20){
      tmrpcm.play("m_b20.wav");  //speak out below 20 dgC
      delay(1700);               //wait for audio finish
      tmrpcm.play("m_nman.wav"); //speak out "you're not human"
      delay(2270);               //wait for audio finish
    }
    else{
      if (temp>50){
        tmrpcm.play("m_over50.wav"); //speak out over 50 dgC
        delay(1740);
        tmrpcm.play("m_nman.wav");   //speak out "you're not human"
        delay(2270);
      }
      else{
        speak_out(temp);  //speak out temperature (if it is from 20 to 50dgC)
        delay(1500);
        if((temp>36)&&(temp<37)){
          tmrpcm.play("m_normal.wav");  //speak out "normal temperature, keep healthy" if it is 36~37dgC
          delay(3268);
        }
        if(temp>37){
          tmrpcm.play("m_fever.wav"); //speak out "you got fever"
          delay(2728);
        }
      }
    }
  }
  delay(300);
}


void speak_out(double temperature_result){
  //this sub-program will speak out temperature
  temperature_result = temperature_result*10;
  temperature_result = round(temperature_result);
  int temp0 = temperature_result;
  int temp1 = temp0/10; //temperature value, xy digit (in xy.z dgC)
  int temp2 = temp1%10; //temperature value, y digit (in xy.z dgC)
  int temp3 = temp0%10; //temperature value, z digit (in xy.z dgC)

  if(temp1<20){
    tmrpcm.play("m_below20.wav"); //below 20dgC
    delay(1631);
  }
  if(temp1>50){
    tmrpcm.play("m_over50.wav"); //greater 50dgC
    delay(1747);
  }
  if((temp1>=20)&&(temp1<=29)){
    tmrpcm.play("m_twenty.wav"); //twenty
    delay(600);
  }
  if((temp1>=30)&&(temp1<=39)){
    tmrpcm.play("m_thirty.wav"); //thirty
    delay(500);
  }
  if((temp1>=40)&&(temp1<=49)){
    tmrpcm.play("m_fourty.wav"); //forty
    delay(691);
  }
  if (temp2!=0) speak_num(temp2); //temperature value, y digit (in xy.z dgC)
  if((temp1>=20)&&(temp1<=50)){
    tmrpcm.play("m_point.wav"); //point
    delay(319);
    speak_num(temp3); //temperature value, z digit (in xy.z dgC)
  }
  tmrpcm.play("m_dgc.wav"); //degree C
  delay(853);
  Serial.println(temp0);
  Serial.println(temp1);
  Serial.println(temp2);
  Serial.println(temp3);
}

void speak_num(int number){
  //this sub-program will be called in sub-program "speak_out()"
    if(number==1){
      tmrpcm.play("m_one.wav"); //one
      delay(453);
    }
    if(number==2){
      tmrpcm.play("m_two.wav"); //two
      delay(499);
    }
    if(number==3){
      tmrpcm.play("m_three.wav"); //three
      delay(406);
    }
    if(number==4){
      tmrpcm.play("m_four.wav"); //four
      delay(401);
    }
    if(number==5){
      tmrpcm.play("m_five.wav"); //five
      delay(354);
    }
    if(number==6){
      tmrpcm.play("m_six.wav"); //six
      delay(401);
    }
    if(number==7){
      tmrpcm.play("m_seven.wav"); //seven
      delay(633);
    }
    if(number==8){
      tmrpcm.play("m_eight.wav"); //eight
      delay(360);
    }
    if(number==9){
      tmrpcm.play("m_nine.wav"); //nine
      delay(580);
    }
    if(number==0){
      tmrpcm.play("m_zero.wav"); //zero
      delay(610);
    }
}
Schematics
Manufacturing process
- Integrated QR, RFID, and Temperature Verification Access Control System
- Measuring Temperature on Raspberry Pi with Maxim 1‑Wire Sensors and DS2482 I2C Bridge
- Build a Remote Temperature Sensor with Raspberry Pi and Python – Step‑by‑Step Guide
- Seamless Temperature & Humidity Monitoring on Raspberry Pi with EzTemp
- DIY Homebrew Temperature Control: Monitor & Regulate with Arduino
- Build a Multi‑Sensor Temperature & Light Monitoring System with Raspberry Pi & DS18B20
- Arduino-Powered ISD1820 Voice Recorder & Playback System
- Arduino Weather Clock – Real-Time Date, Time, Temperature & Humidity Display
- Arduino-Based Pressure Sensor & Data Logger for Accurate Air Pressure Monitoring
- Precise Temperature Monitoring Inside Composite Structures and Adhesive Bondlines