


Arduino-Based Pressure Sensor & Data Logger for Accurate Air Pressure Monitoring
Components and supplies
 |
| × | 1 | |||
 |
| × | 1 | |||
| × | 1 | ||||
| × | 1 | ||||
| × | 1 | ||||
| × | 1 | ||||
| × | 1 | ||||
 |
| × | 1 |
Apps and online services
 |
|
About this project
This project was the result of wanting to record air pressure as built in a reservoir to check the efficiency of a mechanical compressor.
Help from George Kontaxis
https://www.youtube.com/watch?v=AB7zgnfkEi4&feature=youtu.be
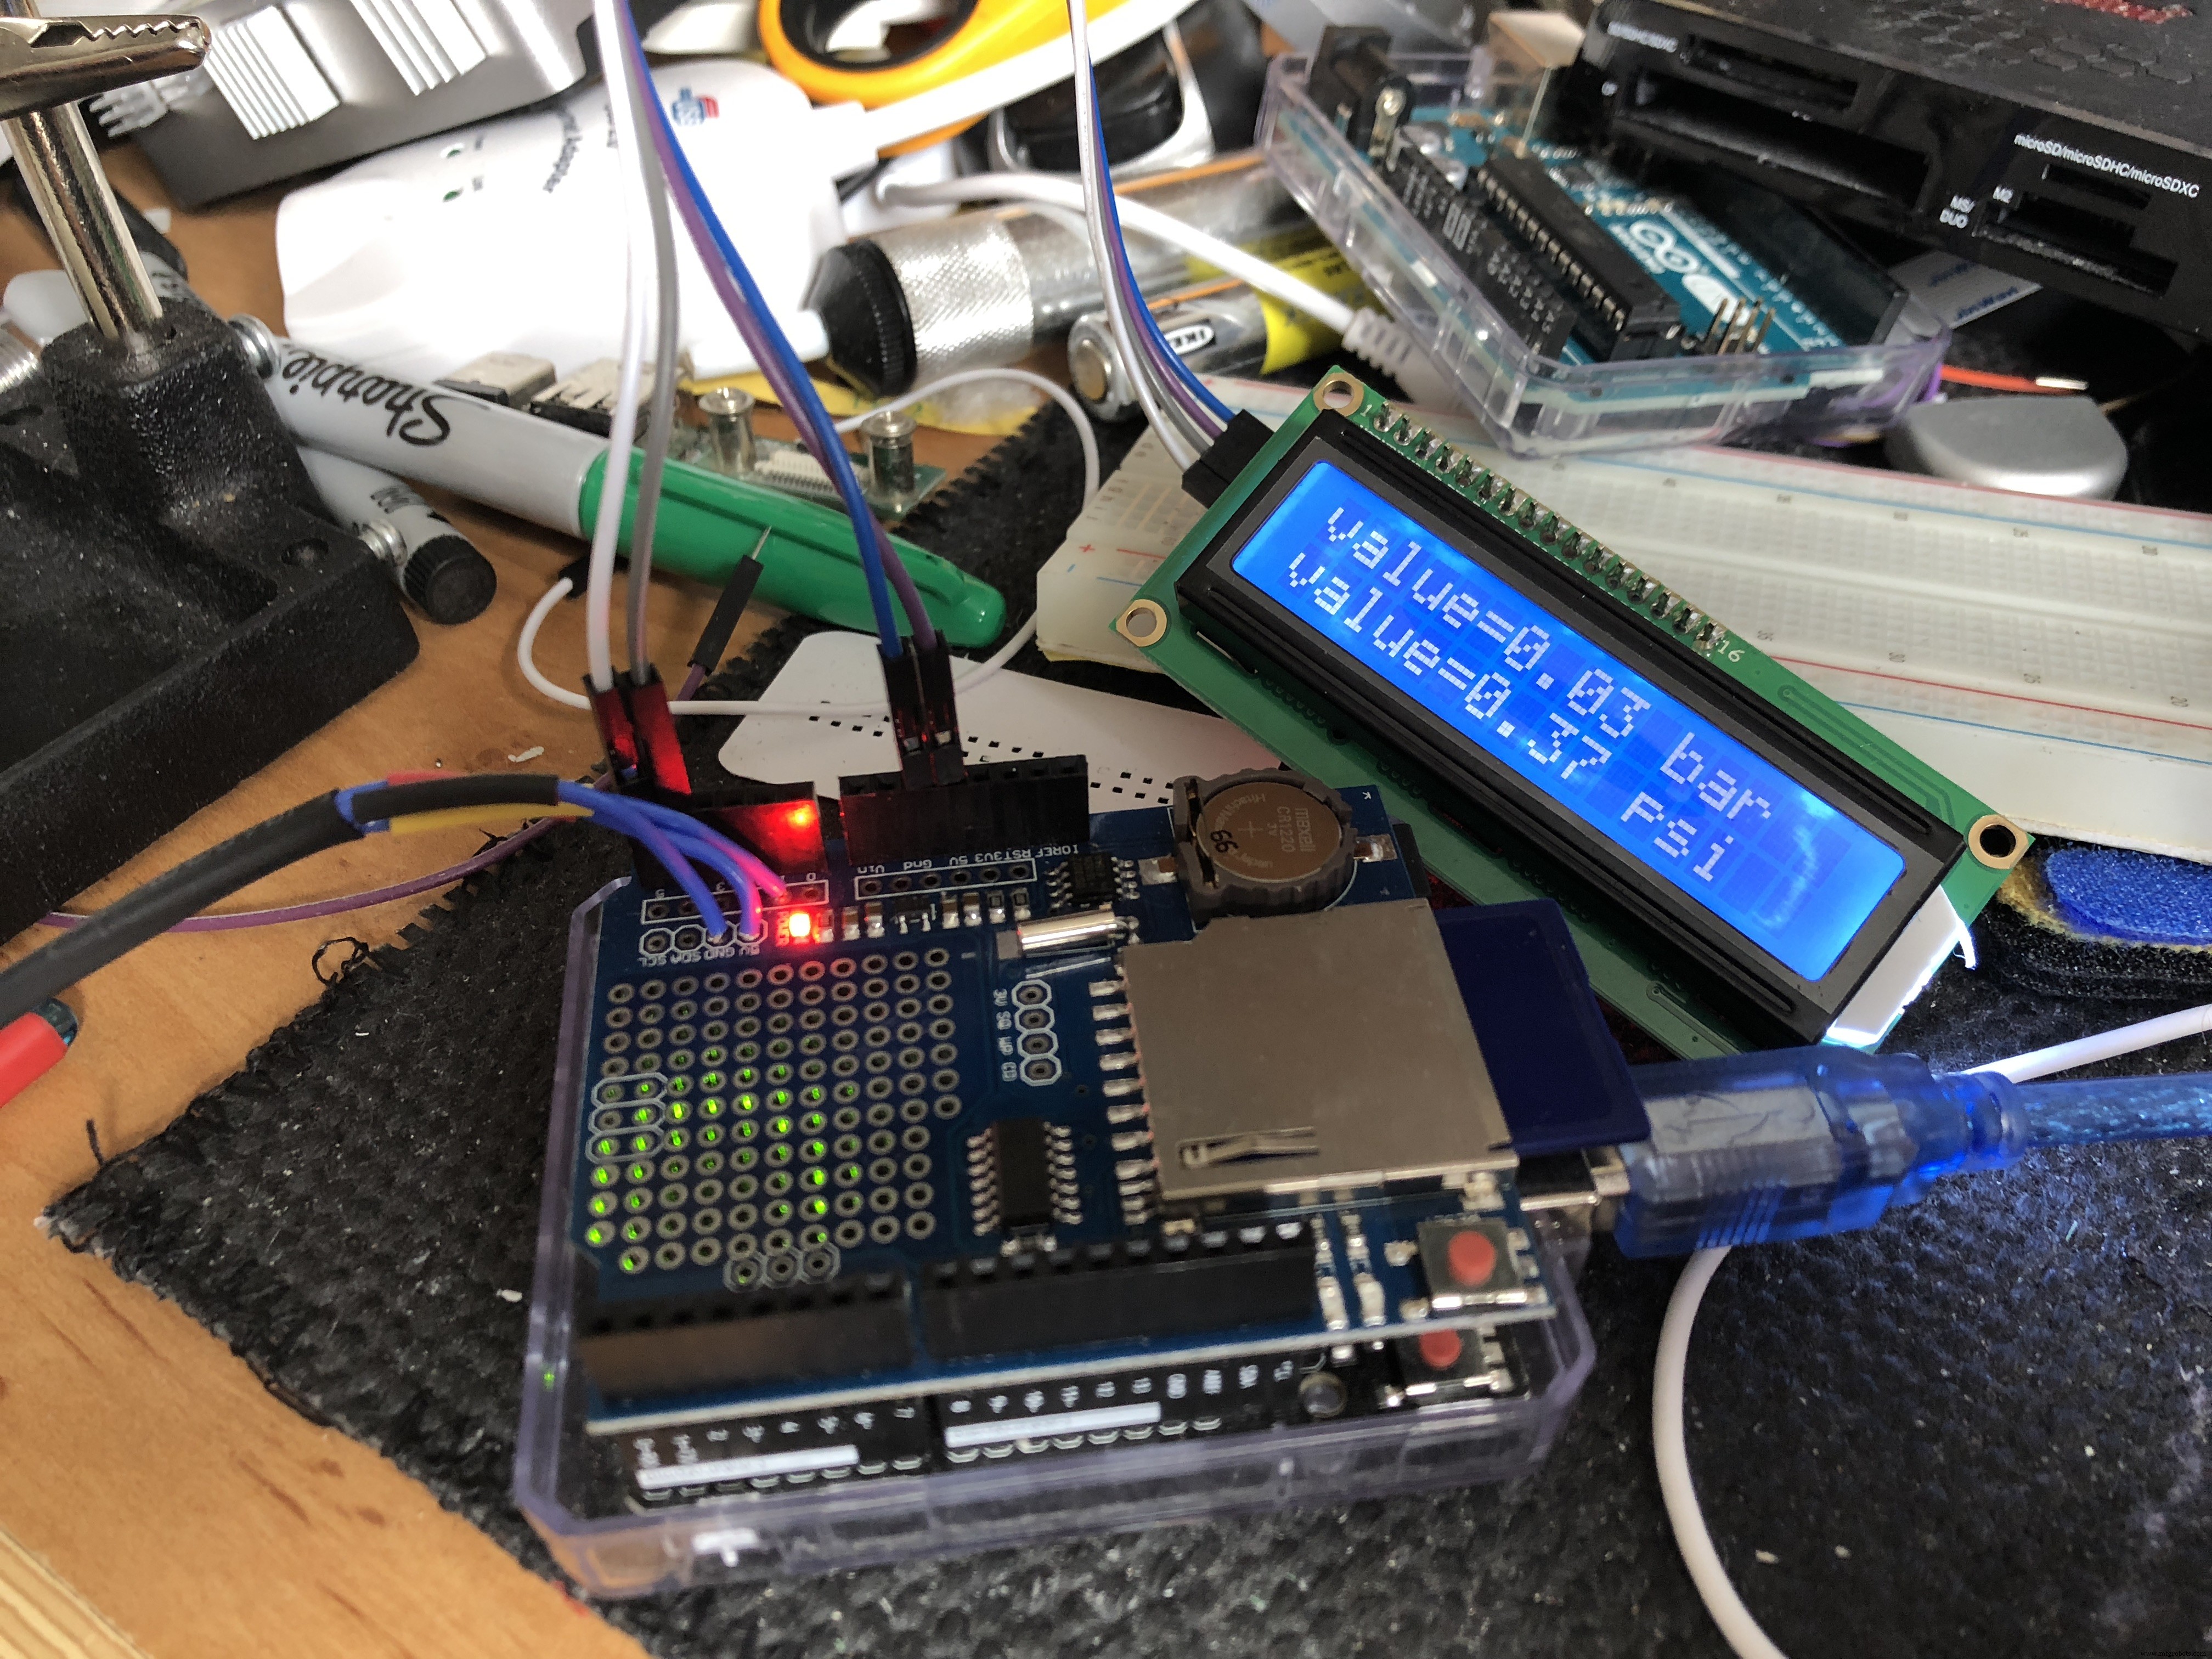
Display showing date and pressure in bar & PSI
Arduino pressure gauge. reading 3 pressuresCode
- SKU237545 Pressure Sensor with lcd realtime clock and data logging
- setting real time clock
SKU237545 Pressure Sensor with lcd realtime clock and data loggingC/C++
//created 12th August 2018 Philip Blayney & Jack Davidson using code from George //Kontaxis for the SKU237545 Pressure Sensor
//https://www.youtube.com/watch?v=AB7zgnfkEi4&feature=youtu.be

#include "LiquidCrystal_PCF8574.h"
#include "RTClib.h"         // real time clock
#include <SD.h>            // sd card


#define LCD_ADDRESS 0x27                                                                              // Define LCD characteristics
#define LCD_ROWS 2
#define LCD_COLUMNS 16
#define SCROLL_DELAY 150
#define BACKLIGHT 255                                                                                // object initialization
LiquidCrystal_PCF8574 lcdI2C;
RTC_DS1307 RTC; // define the Real Time Clock object
int n = 1;
int val;                                                                                             // A simple data logger for the Arduino analog pins
#define LOG_INTERVAL  1000 // mills between entries (reduce to take more/faster data)
                                                                                                     // how many milliseconds before writing the logged data permanently to disk
                                                                                                     // set it to the LOG_INTERVAL to write each time (safest)
                                                                                                     // set it to 10*LOG_INTERVAL to write all data every 10 datareads, you could lose up to
                                                                                                     // the last 10 reads if power is lost but it uses less power and is much faster!

#define SYNC_INTERVAL 10000 // mills between calls to flush() - to write data to the card 600000 = 10 minutes
uint32_t syncTime = 0; // time of last sync()

const int chipSelect = 10;                                                                           // for the data logging shield, we use digital pin 10 for the SD cs line


File logfile;

void error(char *str)
{
  Serial.print(F("error: "));
  Serial.println(str);
}


void setup(void)
{


  Serial.begin(9600);                                                                                 // start serial port
  Serial.println(F("pressure reading off SKU237545 SENSOR"));                                         //F = macro function to save dynamic memory
  lcdI2C.begin(LCD_COLUMNS, LCD_ROWS, LCD_ADDRESS, BACKLIGHT);
  lcdI2C.print(F("SKU237545 SENSOR" ));
  lcdI2C.setCursor(0,1);
  lcdI2C.print(F("  bar and psi " ));

delay (2000);


   // initialize the SD card
  Serial.print(F("Initializing SD card..."));
  // make sure that the default chip select pin is set to
  // output, even if you don't use it:
  pinMode(10, OUTPUT);


  if (!SD.begin(chipSelect)) {                                                                     // see if the card is present and can be initialized:
    error("Card failed, or not present");
  }
  Serial.println(F("card initialized."));


  char filename[] = "LOGGER00.CSV";                                                                // create a new file
  for (uint8_t i = 0; i < 100; i++) {
    filename[6] = i/10 + '0';
    filename[7] = i%10 + '0';
    if (! SD.exists(filename)) {
      // only open a new file if it doesn't exist
      logfile = SD.open(filename, FILE_WRITE);
      break;  // leave the loop!
    }
  }

  if (! logfile) {
    error("couldnt create file");
  }
  lcdI2C.clear();
  lcdI2C.setCursor(0,0);
  lcdI2C.print(F("File No " ));
  lcdI2C.print(filename);
  Serial.print(F("Logging to: "));
  Serial.println(filename);

  // connect to RTC

   if (!RTC.begin()) {
    logfile.println("RTC failed");
  #if ECHO_TO_SERIAL
    Serial.println(F("RTC failed"));
  #endif  //ECHO_TO_SERIAL
  }


  logfile.println("Date / Time ,pressure ,bar ,reading ,psi,reading ");
  delay(5000);
  lcdI2C.clear();

  // Clear LCD screen.
}


void loop(void)
{


int sensorVal=analogRead(A1);
//Serial.print("Sensor Value: ");
//Serial.print(sensorVal);

float voltage = (sensorVal*5.0)/1024.0;
//    Serial.print("Volts: ");
//    Serial.print(voltage);

  float pressure_pascal = (3.0*((float)voltage-0.475))*1000000.0;                       //calibrate here
  float pressure_bar = pressure_pascal/10e5;
  float pressure_psi = pressure_bar*14.5038;
    Serial.print("Pressure = ");
    Serial.print(pressure_bar);
    Serial.print(" bars  ");
    Serial.print ("psi ");
    Serial.print (pressure_psi);
    Serial.println();


 DateTime now;
 now = RTC.now();                                                                       // fetch the time
 delay((LOG_INTERVAL -1) - (millis() % LOG_INTERVAL));                                  // delay for the amount of time we want between sd card readings

 int H = now.hour();                                                                   // Get the hours right now and store them in an integer called h
 int M = now.minute();                                                                 // Get the minutes right now and store them in an integer called m
 int S = now.second();                                                                 // Get the seconds right now and store them in an integer called s

  logfile.print(now.year(), DEC);
  logfile.print("/");
  logfile.print(now.month(), DEC);
  logfile.print("/");
  logfile.print(now.day(), DEC);
  logfile.print(" ");
  if (H<10){                                                                             // Add a zero, if necessary, as above
  logfile.print(0);
 }
  logfile.print(now.hour(), DEC);
  logfile.print(":");
  if (M<10){                                                                           // Add a zero, if necessary, as above
  logfile.print(0);
 }
  logfile.print(now.minute(), DEC);
  logfile.print(":");
  if (S<10){                                                                          // Add a zero, if necessary, as above
  logfile.print(0);
 }
  logfile.print(now.second(), DEC);
 // logfile.print('"');


  Serial.println();
  Serial.print(now.year(), DEC);
  Serial.print("/");
  Serial.print(now.month(), DEC);
  Serial.print("/");
  Serial.print(now.day(), DEC);
  Serial.print(" ");
  if (H<10){                                                                         // Add a zero, if necessary, as above
  Serial.print(0);
 }
  Serial.print(now.hour(), DEC);
  Serial.print(":");
  if (M<10){                                                                          // Add a zero, if necessary, as above
  Serial.print(0);
 }
  Serial.print(now.minute(), DEC);
  Serial.print(F(":"));
  if (S<10){   // Add a zero, if necessary, as above
  Serial.print(0);
 }
  Serial.print(now.second(), DEC);

  Serial.println();


   lcdI2C.setCursor(0,0);

   lcdI2C.print(pressure_bar);                                   // Print String to LCD on first line
   lcdI2C.print ("bar ");

   lcdI2C.print (pressure_psi);
   lcdI2C.print ("psi   ");


  lcdI2C.setCursor(0,1);
 //lcdI2C.print(now.year(), DEC);                               // lcd doesnt have enough character spaces to show the year
 // lcdI2C.print("/");

  lcdI2C.print(now.day(), DEC);
  lcdI2C.print("/");
  lcdI2C.print(now.month(), DEC);

  lcdI2C.print(" ");
  if (H<10){                                                                             // Add a zero, if necessary, as above
  lcdI2C.print(0);
 }
  lcdI2C.print(now.hour(), DEC);
  lcdI2C.print(":");
  if (M<10){                                                                           // Add a zero, if necessary, as above
  lcdI2C.print(0);
 }
  lcdI2C.print(now.minute(), DEC);
  lcdI2C.print(":");
  if (S<10){                                                                          // Add a zero, if necessary, as above
  lcdI2C.print(0);
 }
  lcdI2C.print(now.second(), DEC);

   logfile.print(", ");
   logfile.print(" Pressure = ");
   logfile.print(",");
   logfile.print(pressure_bar);
   logfile.print(",");
   logfile.print(" bar  ");
   logfile.print(",");
   logfile.print(pressure_psi);
   logfile.print(",");
   logfile.print("psi");
   logfile.println();

if ((millis() - syncTime) < SYNC_INTERVAL) return;
  syncTime = millis();


  logfile.flush();


    delay(10);
}
setting real time clockC/C++
//Code by tronixstuff


#include "Wire.h"
#define DS3231_I2C_ADDRESS 0x68
// Convert normal decimal numbers to binary coded decimal
byte decToBcd(byte val)
{
  return( (val/10*16) + (val%10) );
}
// Convert binary coded decimal to normal decimal numbers
byte bcdToDec(byte val)
{
  return( (val/16*10) + (val%16) );
}
void setup()
{
  Wire.begin();
  Serial.begin(9600);
  // set the initial time here:
  // DS3231 seconds, minutes, hours, day, date, month, year
  setDS3231time(00,43,14,3,14,8,18);                                                            // set required time here
}
void setDS3231time(byte second, byte minute, byte hour, byte dayOfWeek, byte
dayOfMonth, byte month, byte year)
{
  // sets time and date data to DS3231
  Wire.beginTransmission(DS3231_I2C_ADDRESS);
  Wire.write(0); // set next input to start at the seconds register
  Wire.write(decToBcd(second)); // set seconds
  Wire.write(decToBcd(minute)); // set minutes
  Wire.write(decToBcd(hour)); // set hours
  Wire.write(decToBcd(dayOfWeek)); // set day of week (1=Sunday, 7=Saturday)
  Wire.write(decToBcd(dayOfMonth)); // set date (1 to 31)
  Wire.write(decToBcd(month)); // set month
  Wire.write(decToBcd(year)); // set year (0 to 99)
  Wire.endTransmission();
}
void readDS3231time(byte *second,
byte *minute,
byte *hour,
byte *dayOfWeek,
byte *dayOfMonth,
byte *month,
byte *year)
{
  Wire.beginTransmission(DS3231_I2C_ADDRESS);
  Wire.write(0); // set DS3231 register pointer to 00h
  Wire.endTransmission();
  Wire.requestFrom(DS3231_I2C_ADDRESS, 7);
  // request seven bytes of data from DS3231 starting from register 00h
  *second = bcdToDec(Wire.read() & 0x7f);
  *minute = bcdToDec(Wire.read());
  *hour = bcdToDec(Wire.read() & 0x3f);
  *dayOfWeek = bcdToDec(Wire.read());
  *dayOfMonth = bcdToDec(Wire.read());
  *month = bcdToDec(Wire.read());
  *year = bcdToDec(Wire.read());
}
void displayTime()
{
  byte second, minute, hour, dayOfWeek, dayOfMonth, month, year;
  // retrieve data from DS3231
  readDS3231time(&second, &minute, &hour, &dayOfWeek, &dayOfMonth, &month,
  &year);
  // send it to the serial monitor
  Serial.print(hour, DEC);
  // convert the byte variable to a decimal number when displayed
  Serial.print(":");
  if (minute<10)
  {
    Serial.print("0");
  }
  Serial.print(minute, DEC);
  Serial.print(":");
  if (second<10)
  {
    Serial.print("0");
  }
  Serial.print(second, DEC);
  Serial.print(" ");
  Serial.print(dayOfMonth, DEC);
  Serial.print("/");
  Serial.print(month, DEC);
  Serial.print("/");
  Serial.print(year, DEC);
  Serial.print(" Day of week: ");
  switch(dayOfWeek){
  case 1:
    Serial.println("Sunday");
    break;
  case 2:
    Serial.println("Monday");
    break;
  case 3:
    Serial.println("Tuesday");
    break;
  case 4:
    Serial.println("Wednesday");
    break;
  case 5:
    Serial.println("Thursday");
    break;
  case 6:
    Serial.println("Friday");
    break;
  case 7:
    Serial.println("Saturday");
    break;
  }
}
void loop()
{
  displayTime(); // display the real-time clock data on the Serial Monitor,
  delay(1000); // every second
}
LiquidCrystal_PCF8574.h
required library, under sketch , include library and add .zip, then select where the zip was downloadedhttps://github.com/mathertel/LiquidCrystal_PCF8574RTClib.h
library, real time clock, unzip the zip first. then add the remaining zip file to your libraryhttps://github.com/mechasolution/RTClib.hSchematics
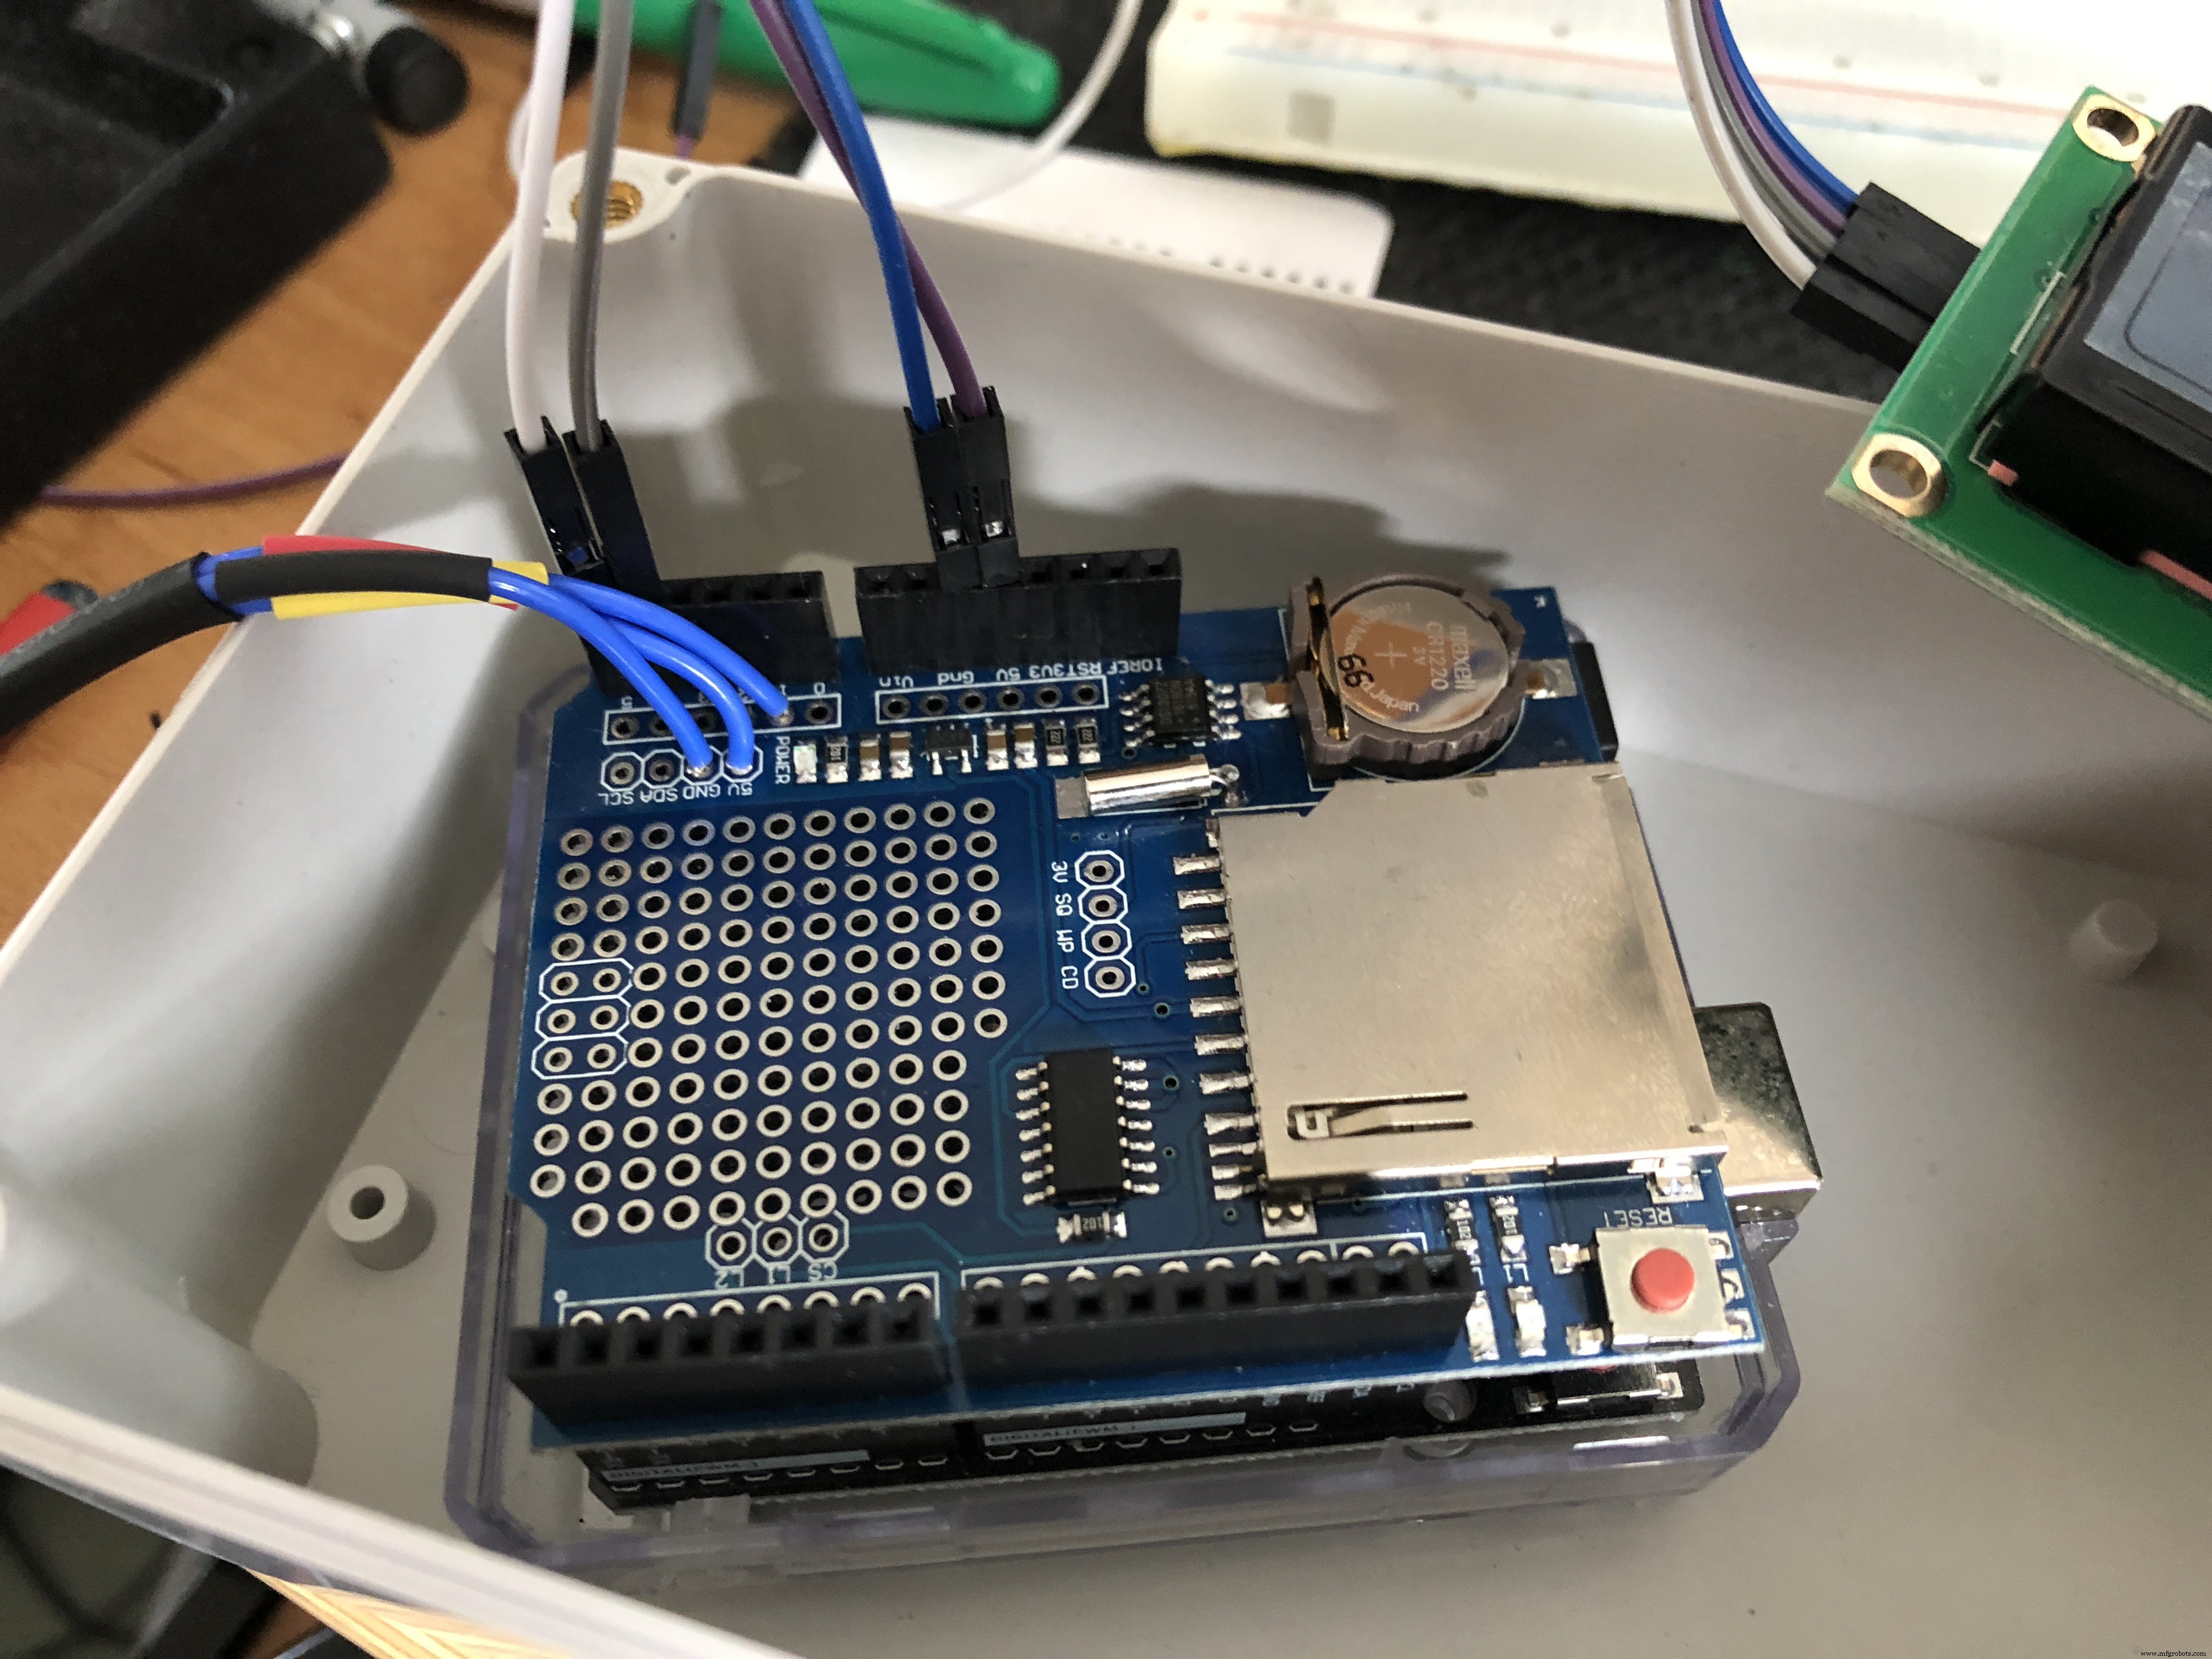 A5 to SCL
A4 to SDA
5 volts to VCC
GND to GND
 yellow wire to A1
black wire to GND
red wire to 5 volts

 connect to pc and confirm correct performance
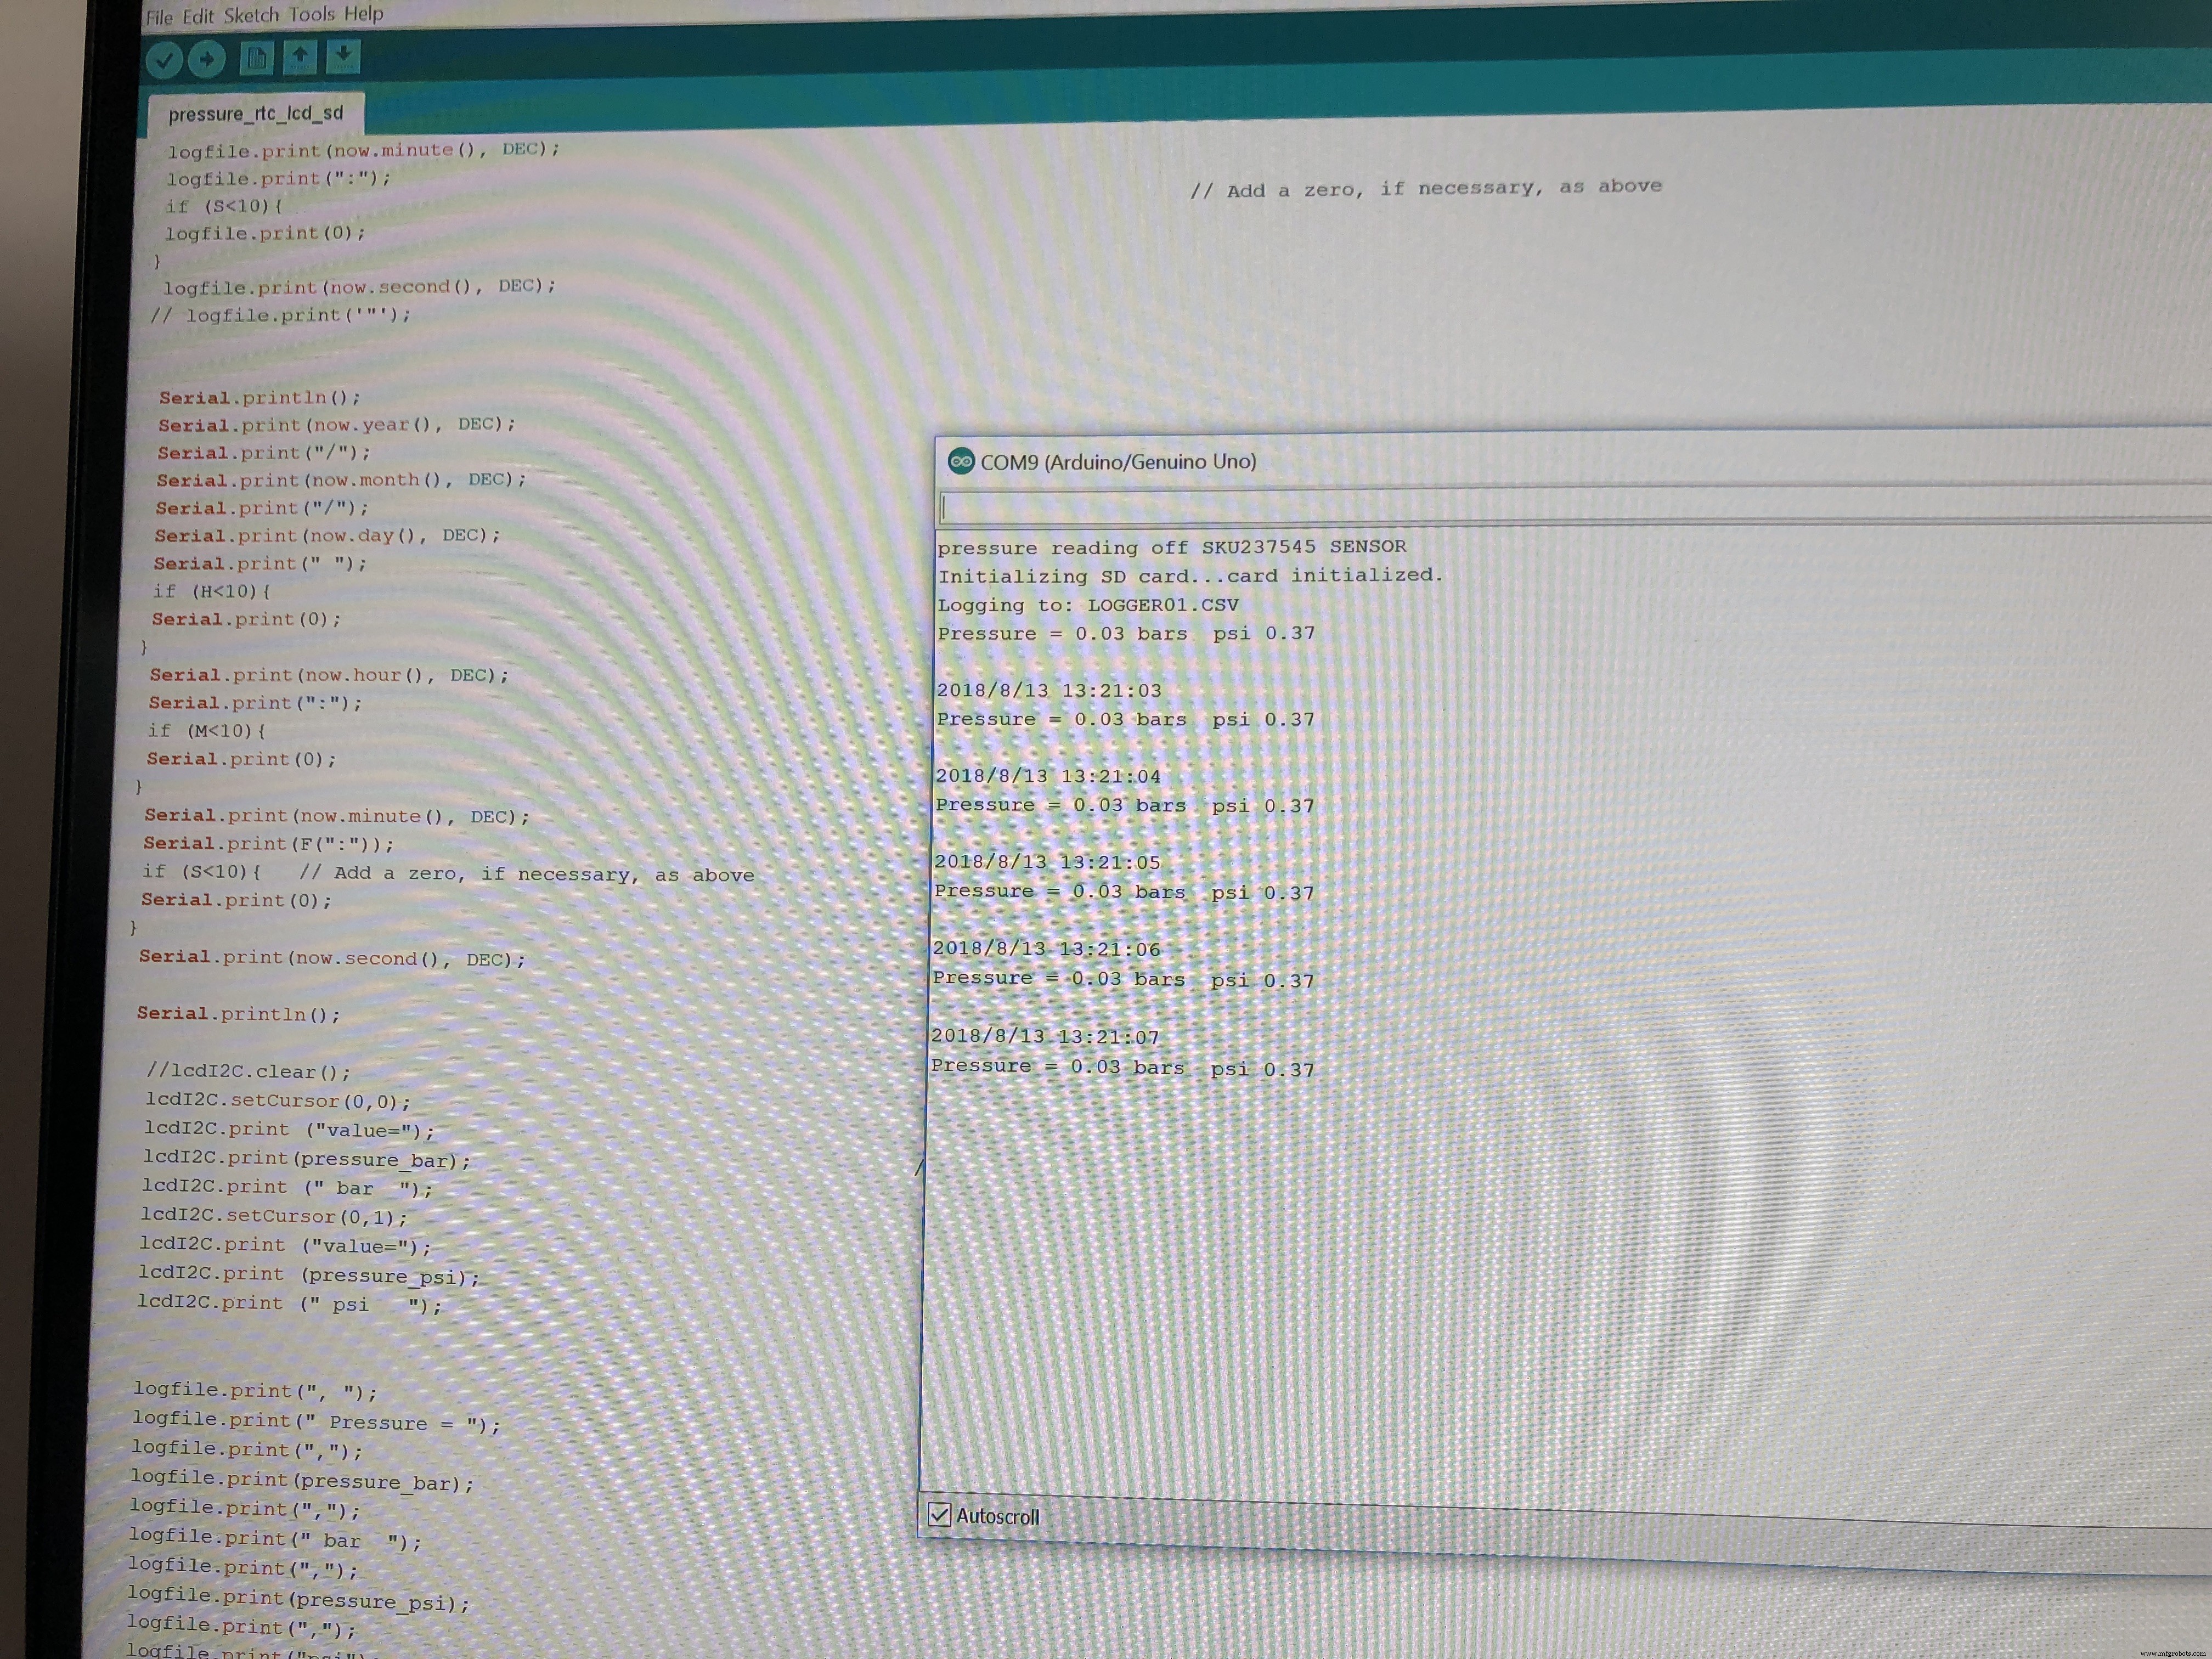
Real‑Time Environmental Monitoring with Arduino MKR1000 & Environment Click Sensors
Premium Walnut‑Case Humidity & Temperature Sensor Kit – Arduino + NeoPixel + TFT Display
Manufacturing process
- Smart Self‑Lacing Shoes with Built‑In Energy Harvesting
- Display BME280 Temperature, Humidity & Pressure on a Nextion Touchscreen
- Real-Time Distance Measurement with Arduino Sonar & Processing Visualization
- Build a Precise DIY Measuring Wheel with Arduino Nano & Rotary Encoder
- Seamless LED Brightness Control Using Bolt IoT and Arduino UNO
- Precision Air Pressure Monitor: Arduino UNO & Nano Barometer with Dual Dials
- Smart AC Lighting with Arduino UNO and Relay – Automatic Control
- Build a Raspberry Pi 3 & Arduino Laptop: Step‑by‑Step Guide
- Building an IoT Device with ESP8266‑01 and Arduino Nano: A Complete Guide
- Arduino Data Logging with SD Card & DS3231 RTC – Step‑by‑Step Tutorial