


Verify Your Extruder’s Compatibility with an E3D Nozzle V6: A Quick Guide
When changing the nozzle of the 3D printer for an E3D Original nozzle, doubts may arise if they are interchangeable. The vast majority of 3D printers if they are compatible with the nozzle v6 Originals since their measurement is the most used M6x1.
If the user is not sure of the measurement of the current nozzle, then two methods of how to check if they are compatible are explained, but before you can extract the nozzle from the 3D printer. For this you need to first remove the Hot End filament, heat it to the printing temperature and then remove it. So the Hot End is at room temperature, it will unscrew the nozzle using the 7 mm E3D wrench.
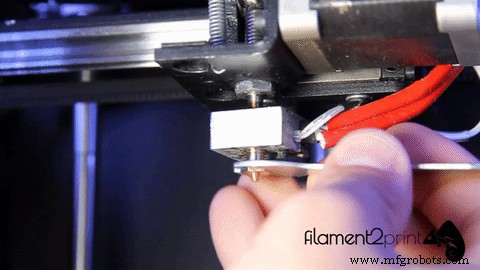
Gif 1: Unscrew the nozzle
Once removed, the measurement is checked in the following ways:
1. If we have an original E3D nozzle, we can compare it directly with the 3D printer to be exchanged. It is only necessary to put the two nozzles in contact with the thread and check that they fit perfectly between them, seeing that the light does not pass between the union.

Image 1: Comparasion of nozzles
2. In case the original E3D nozzle is not available, we need a caliper to measure both diameter and thread pitch. The diameter is measured by the outside of the thread and must be 6 mm. The thread pitch is measured between two thread crests and this value should be 1 mm. The measures may be somewhat minor in some cases.
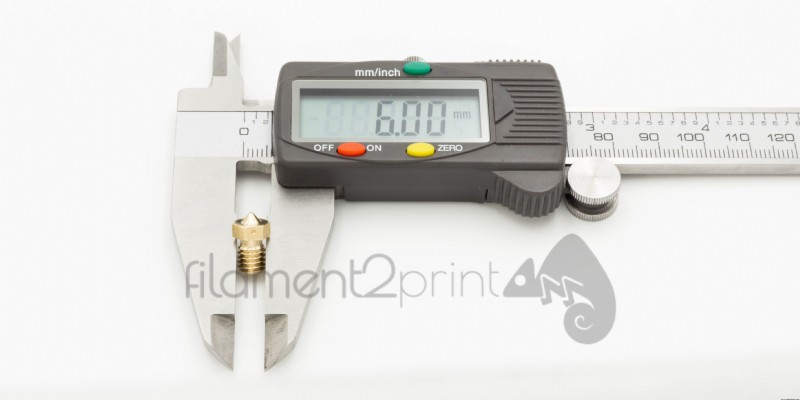
Image 2: Diameter of nozzle
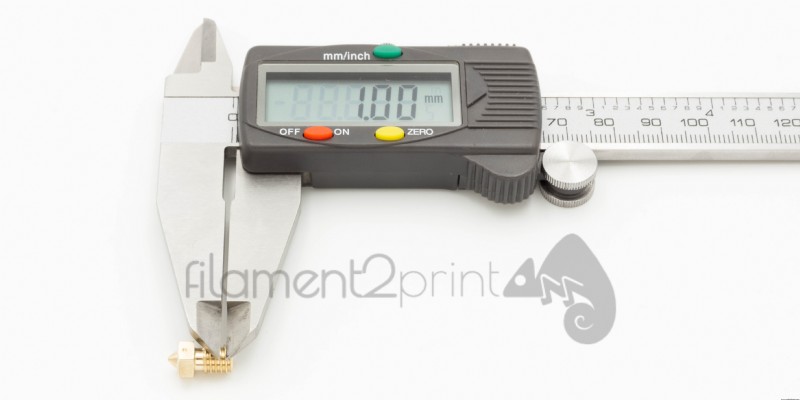
Image 3: Thread pich of nozzle
When screwing the nozzle into the block, it is recommended to first screw it in by hand and finish the process by pressing the E3D wrench. Once the process is finished, it is advisable to level the base to ensure 3D printing without errors.
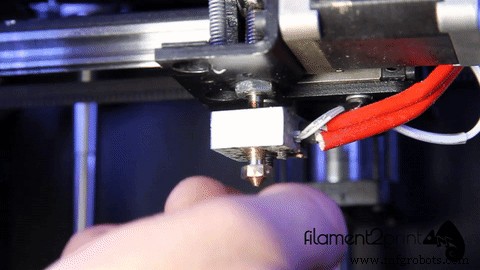
Gif 2: Srewing the nozzle
After these simple steps no user will have doubts about whether their 3D printer is compatible with the original E3D v6 nozzles.
3D printing
- Connecting GrabCAD Print to Your Stratasys 3D Printer – A Step‑by‑Step Guide
- Launching Your Business with a Laser Cutter: A Proven Step‑by‑Step Guide
- Master Electrical Design: Optimize Projects with E3.schematic Features
- Accurately Calculate Employee Costs with Overhead: A Complete Guide
- Transform Your Supply Chain with Digital Manufacturing Solutions
- Outperform Competitors with Digital Work Instructions
- Step-by-Step Guide to Cleaning Your 3D Printer Nozzle for Optimal Performance
- Build a Reliable Water Sensor Circuit to Protect Devices from Water Damage
- How to Spot and Repair Bad Hydraulic Fluid in Your Vehicle
- Check If Your 3D Printer Supports Advanced Materials