


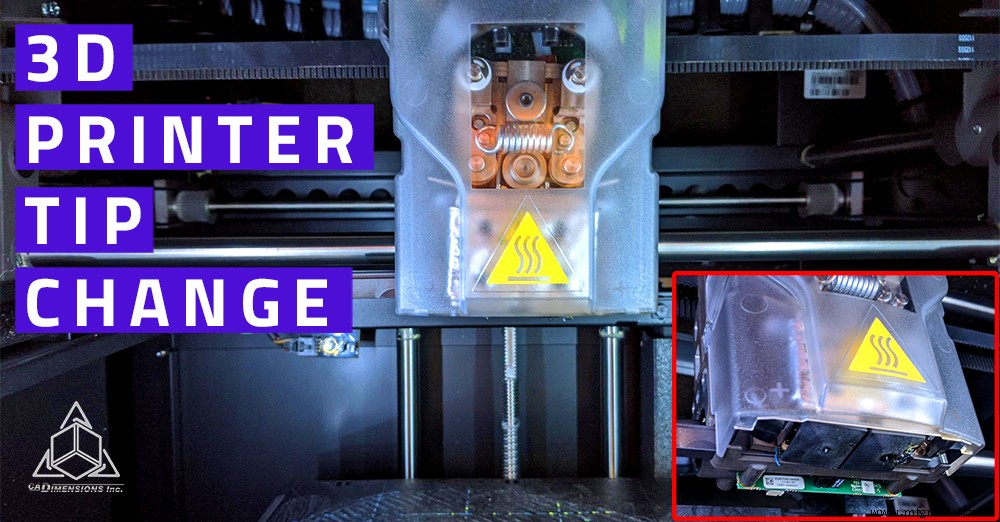
Step‑by‑Step Guide to Replacing Nozzle Tips on Your Stratasys 3D Printer
Occasionally a print may look fine on the build tray but crumble under light stress, or the machine may repeatedly report a “failure to load” error. The most common solution is to replace the print‑head tips. For Stratasys models such as the UPrint, Dimension 1200, and Fortus 250, a tip change every 2,000 print hours is recommended to maintain consistent part quality.
Below is a concise, expert‑approved walkthrough that works on all three machines.
Initiate the Tip‑Change Procedure
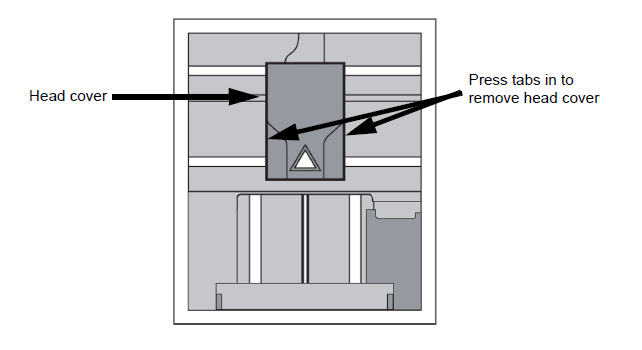
1. From the main menu, select Maintenance → Machine. The printer will calibrate and position the head in the service spot. 2. Once positioned, choose Tips → Replace. The machine will unload any material, heat the tips, and return to the service position. Wear heat‑resistant gloves because the chamber becomes very hot. 3. Remove the clear cover by pressing the sides and pulling it away from the head.
Remove the Old Tips
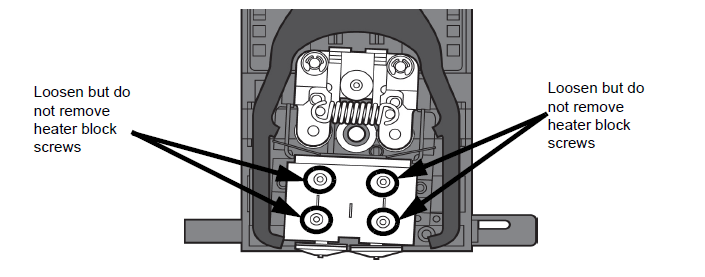
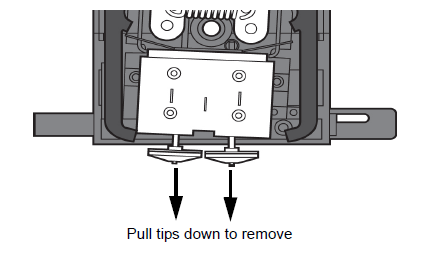
4. Use a yellow 7/64" T‑handle Allen key to loosen the two screws on each tip; do not remove them entirely. Loosening releases the clamp pressure. 5. With needle‑nose pliers, grasp the tip shield and pull down the tip to extract it. Repeat for both the support and model tips.
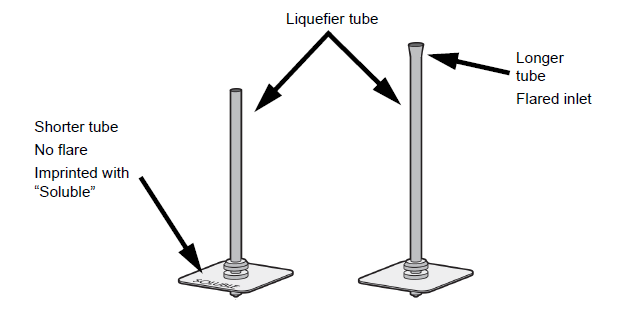
Identify Support and Model Tips
For non‑BST models, the support tip will have the word soluble printed on it and should be installed on the left side of the head. The model tip is longer, features a flared inlet, and goes on the right side. BST printers use identical tips on both sides.
Slide each tip fully into its shield so it seats in the cutout. The shield’s tab should face the rear of the machine. Insert the tip’s inlet into the heater‑block groove, then tighten the screws until the T‑handle shows slight flex. Replace the cover and close the door.
The display will prompt “tips replaced?”—confirm with Yes. This resets the printer’s tip‑counter. Next, insert both the model and support material cartridges and select Load Both.
Run the Tip Calibration
1. After both materials load, choose Start Part. The printer will auto‑calibrate the Z‑offset and print an XY calibration test. 2. Once finished, remove the tray and inspect the part. The support road should be centered between the model roads on both the X and Y axes. A magnifying glass can aid inspection. 3. On the printer’s screen, enter the measured offsets using Increment or Decrement for both axes, then press Done. 4. A final Done returns the printer to idle mode, completing the tip change.
Conclusion
Nozzle tips are a consumable component that must be replaced regularly to maintain print quality. If parts remain weak after a tip change, other components may need inspection. For assistance, contact Stratasys Support at 1‑800‑801‑6491.
Need Help Changing the Tips on Your Stratasys 3D Printer?
Contact us for assistance.
3D printing
- Maintaining Your 3D Printer’s Extruder: Best Practices for Optimal Performance
- Transforming Maintenance Culture: Strategies for Reliability & Accountability
- Connecting GrabCAD Print to Your Stratasys 3D Printer – A Step‑by‑Step Guide
- Locating Stratasys Service Documents for All 3D Printer Models – A Complete Guide
- How Often Should You Level Your 3D Printer Bed for Optimal Print Quality?
- Quick Guide to Untangling Knotted 3D Printer Filament Spools
- Effective 3D Printer Ventilation: Safeguard Against VOCs & UFPs
- Master 3D Printer Bed Leveling: A Simple, Proven Step-by-Step Guide
- How Quickly Can a 3D Printer Produce Parts? Understanding Print Speed Factors
- Step-by-Step Guide to Cleaning Your 3D Printer Nozzle for Optimal Performance