



Expert Guide: Splitting and Cutting Parts in PrusaSlicer
Mastering the art of separating and cutting 3D models in PrusaSlicer can dramatically improve your printing workflow. This guide walks you through each step, from importing your file to applying custom settings for individual parts.
Why Separate Parts?
In many assemblies, designers merge multiple shells into a single STL to reduce file size or printing time. However, this approach can limit flexibility:
- Limited ability to print on a smaller bed.
- Inability to adjust settings for individual components.
- Risk of misalignment when parts need to be printed separately.
PrusaSlicer provides a straightforward way to break these assemblies into manageable pieces, enabling independent editing and printing.
Step‑by‑Step: Splitting a Model
1. Import Your Model
- Drag the file onto the virtual build plate or press Ctrl + I to browse.
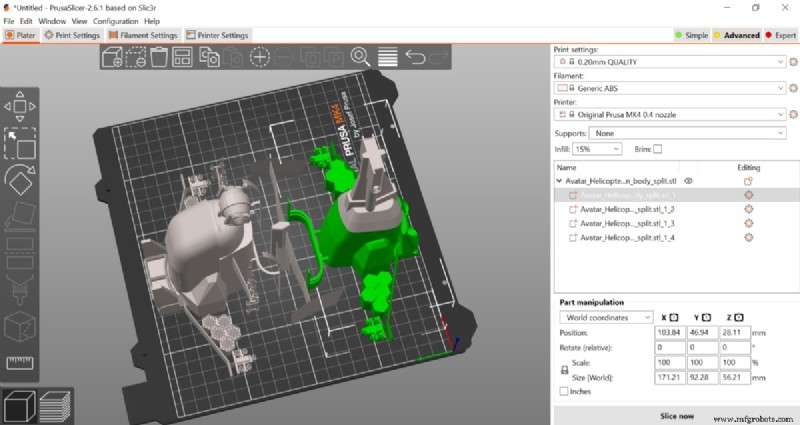
- For demonstration, we’ll use a three‑piece helicopter model from the Avatar movies.
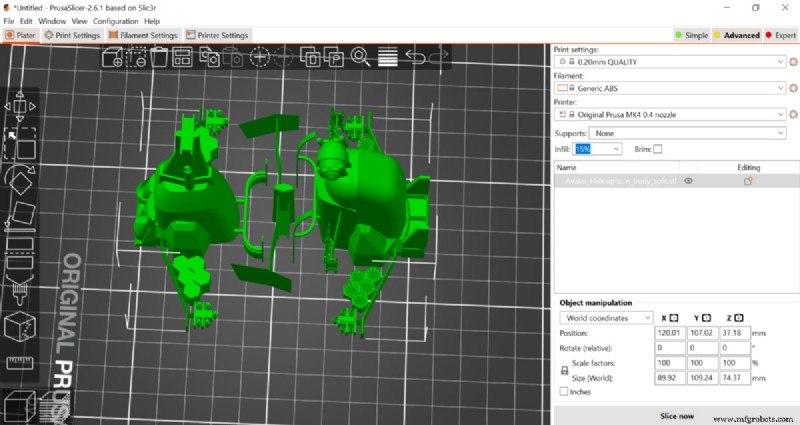
2. Access the Object List
- Ensure Expert mode is active.
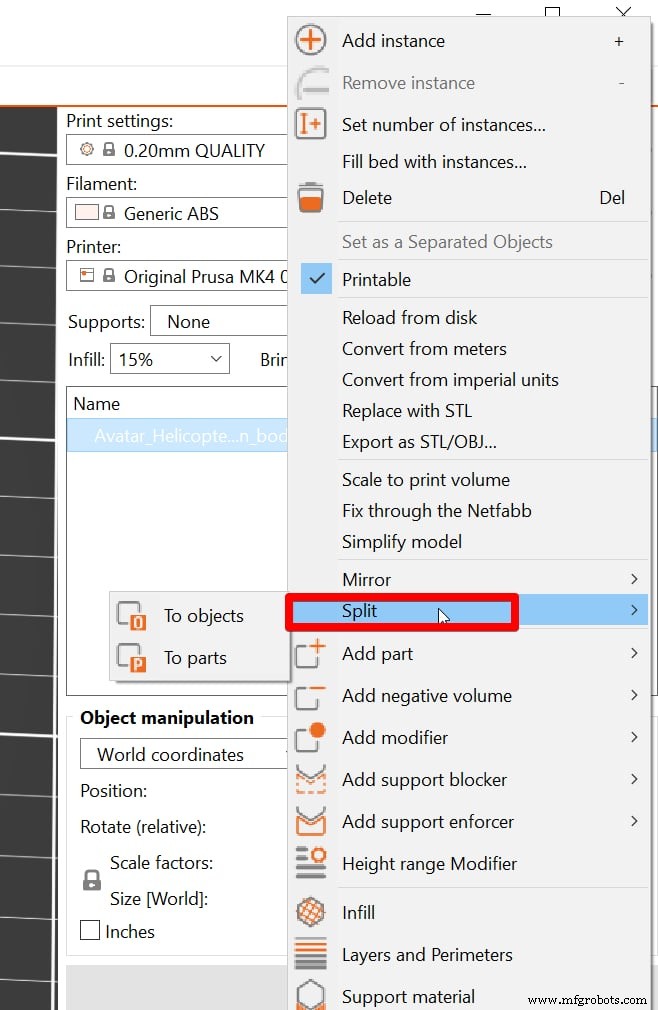
- Right‑click the model’s name in the list.
3. Choose a Split Method
- Select Split from the context menu.
- Decide between To objects or To parts.
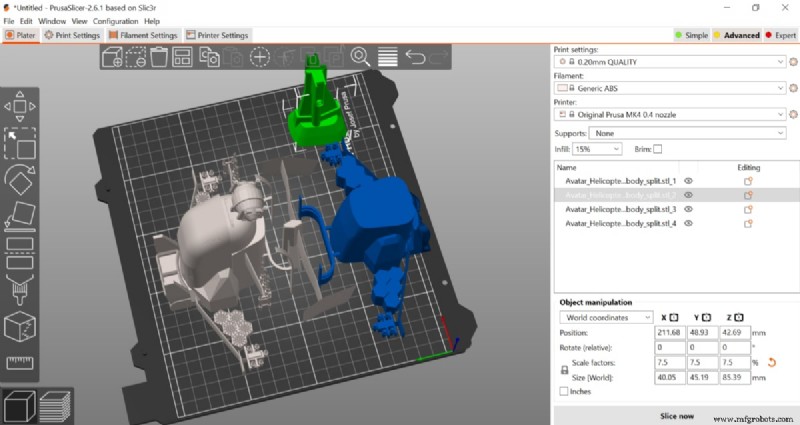
- To objects places each shell on the build plate as a separate object.
- To parts preserves the original assembly layout while still separating the shells.
4. Manage Individual Pieces
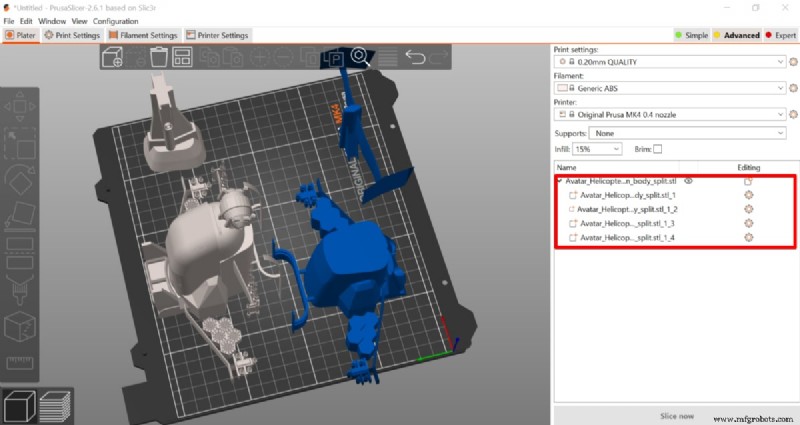
- Check the object list to confirm multiple parts appear.
- Move, rotate, or apply distinct print settings to each piece.
- Delete or save individual parts as needed.
Split to Parts vs. Split to Objects
Choosing the right split mode depends on your printing goals.
- Split to Objects is ideal when you need each component on its own, especially for separate prints or when reorienting pieces.
- Split to Parts keeps the assembly intact, which is beneficial if you want to maintain relative positioning after the split.
Cutting a Part in PrusaSlicer
Unlike splitting, cutting allows you to slice a model along a defined plane, optionally adding connectors for easy reassembly.
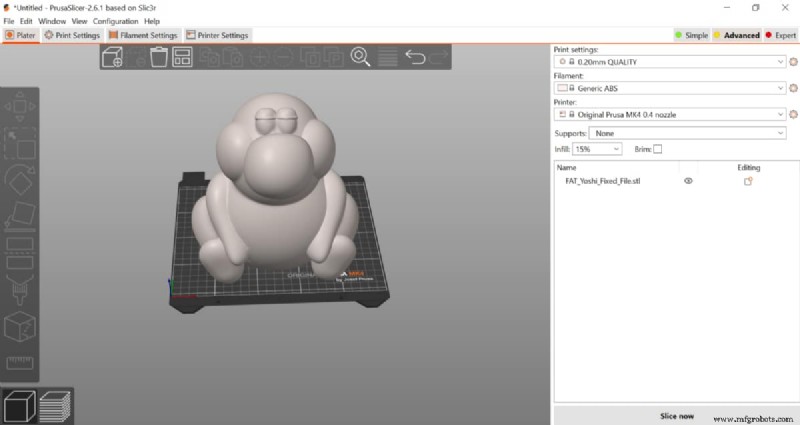
1. Import the Model
- Use Ctrl + I or drag‑and‑drop.
2. Define the Cutting Plane
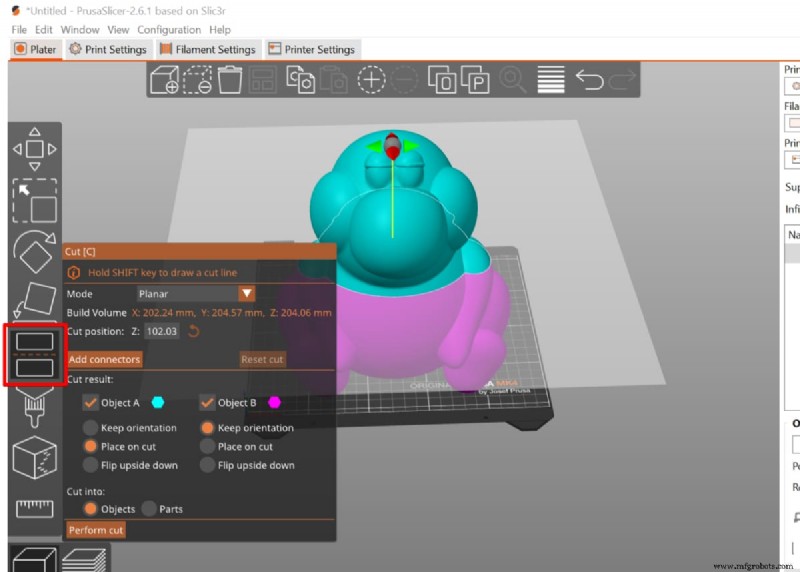
- Press C or click the cut icon.
- Move the ball‑shaped handle to set the plane’s position and orientation.
3. Add Connectors (Optional)
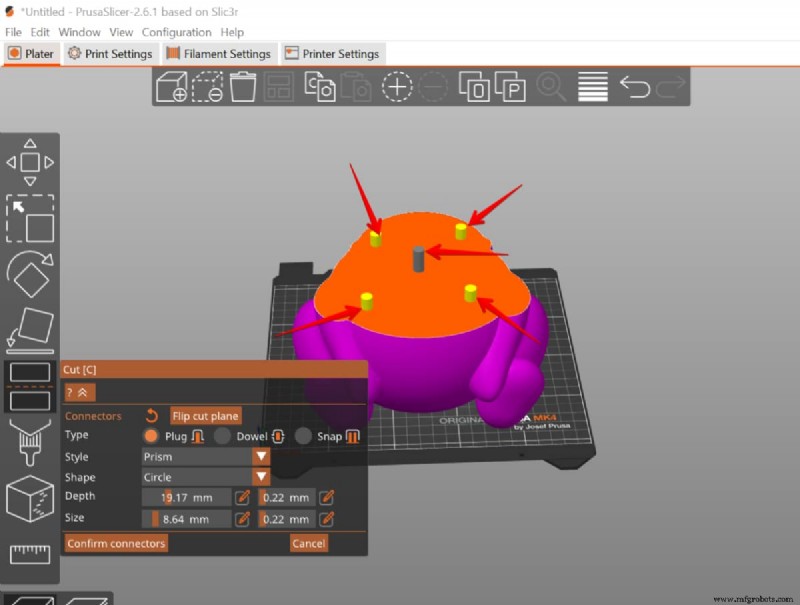
- Select Add Connectors in the cut menu.
- Choose shape, size, and placement on the model.
- Confirm to lock the connectors in place.
4. Finalize Cutting Settings
- Decide which half(s) to keep.
- Choose whether to output as objects or parts.
- Adjust orientation if necessary.
- Click Cut to apply changes.
5. Prepare for Printing
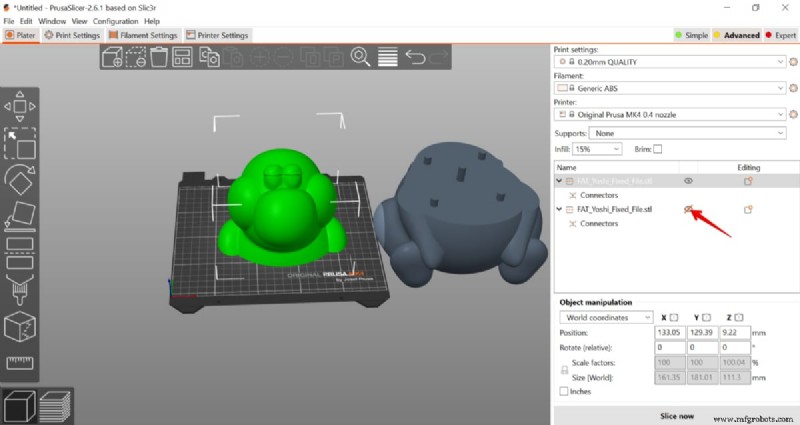
- Use the eye icon to hide unnecessary halves.
- Reorient or move remaining parts to optimize the build.
Final Thoughts
Whether you’re tackling complex assemblies or fine‑tuning individual components, the split and cut functions in PrusaSlicer empower you to print more efficiently and with greater precision. Apply these techniques to streamline your workflow and achieve professional‑grade results.
For deeper dives into model manipulation across different platforms, explore our guide on Splitting & Cutting STL Models for 3D Printing.

Michael Dwamena
Michael Dwamena is the founder of 3D Printerly, a platform dedicated to simplifying 3D printing for hobbyists and professionals alike. With ownership of over 20 filament and resin printers, Michael brings hands‑on experience to the field. He has authored more than 900 articles, guiding millions through the evolving world of 3D printing.
3D printing
- The Ultimate Guide to 3D Printing: Benefits, Drawbacks, and Key Technologies
- Designing with Markforged Composite Filaments: Minimum Feature Sizes for Optimal Reinforcement
- When to Replace Your 3D Printer Nozzle: A Practical Guide
- Food‑Safe 3D Printing: The Comprehensive Guide for Safe, Custom Food Containers
- PLA vs ABS vs Nylon: Choosing the Right 3D Printing Filament
- Convert SolidWorks SLDPRT to STL: Step‑by‑Step Guide for Accurate Mesh Files
- AION500 MK3: The Fastest FFF 3D Printer for Small‑Batch Manufacturing
- Accelerate Additive Manufacturing with Real‑Time 3D Printer Monitoring
- Ender 3 Nozzle Cleaning: Quick, Easy Unclogging for Reliable Prints
- Material Jetting 3D Printers: Comprehensive Overview of Process, Components, and Materials