


Essential Injection‑Molding Strategies for Mechanical Engineers
In product development, mechanical engineers bridge the gap between an industrial designer’s vision and a manufacturable, cost‑effective part. The outer enclosure—often a smooth‑finished plastic—must look premium while staying within tight budgets. For high‑volume production, injection‑molded engineered plastics are the standard, and seasoned engineers have developed a toolbox of proven tactics to guarantee quality and reliability.
Many teams now believe that simply handing over 3‑D CAD files of the enclosure’s outer surfaces is enough for the overseas tooler and molder to add tolerances, draft angles, and finish specifications. That assumption is risky. Without explicit design intent—critical features, alignment strategies, and assembly sequences—the tooling may prioritize its own cycle‑time efficiency over your product’s functional requirements. The result is often a part that requires costly post‑processing or, worse, a redesign that delays launch.
Early collaboration is the first and most powerful trick. By sharing detailed, intent‑driven CAD files and drawings before the tooling stage, you create a contract of expectations that all parties can reference. This proactive approach saves time, reduces budget overruns, and builds a foundation for a strong partnership with the mold shop.
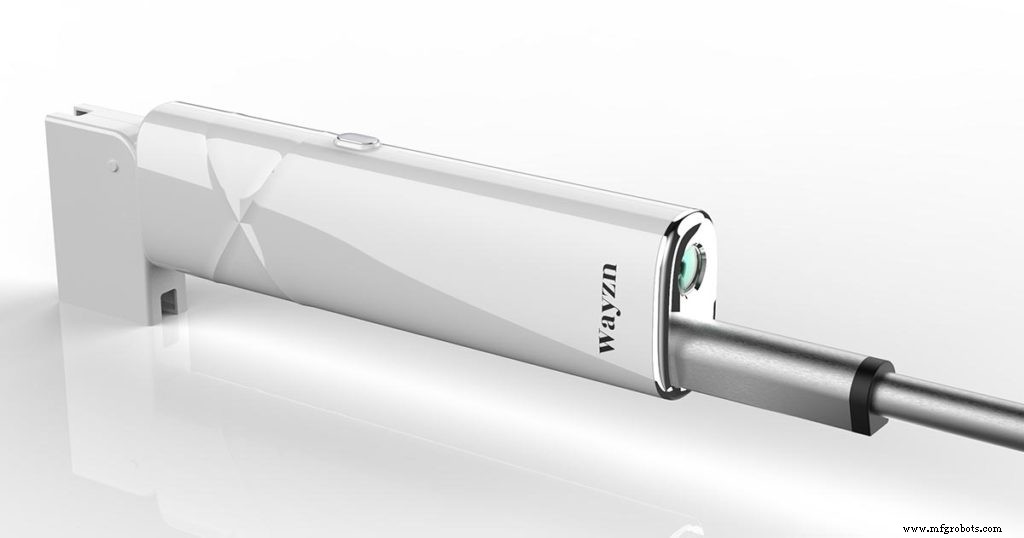
Question every “shiny” detail. In early industrial design, it’s tempting to add subtle curvatures or high‑gloss finishes to enhance visual appeal. However, features like an 18‑inch side panel domed by 0.080 in with a 628‑inch radius can increase tooling complexity without adding functional value. A slight face bow can keep a panel from appearing to droop, but it must be justified by structural or assembly benefits. Neglecting these considerations can lead to hidden manufacturing challenges and unexpected costs.
Features that look attractive on screen—such as a decorative bezel bump—may require a $4,000 lifter in the mold and add no tangible benefit to the user. By scrutinizing every element against functional, manufacturability, cost, and aesthetic criteria, you can eliminate non‑essential features early and keep the design lean.
When plastic parts deform or warp after injection, the “cool” look disappears, and the cost savings vanish. Warping arises from geometry, variable wall thickness, and suboptimal molding parameters. Adding the right amount of internal ribs, lips, or bosses can lock parts in place and guide proper fit‑ups, while proper coring reduces material where it’s not needed, preventing sink marks and surface blemishes.
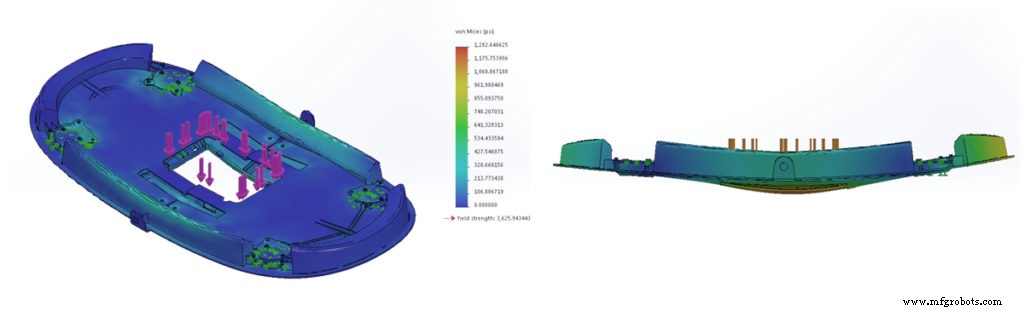
Even if individual parts come out clean, the assembly can still suffer from misalignments, requiring extra time and tooling adjustments. By designing with alignment features—such as recessed mounting pins or keyways—and planning for a realistic tolerance stack, you avoid last‑minute changes that inflate costs and delay the product launch.
Embrace subtlety over gloss. A sleek outer skin is desirable, but it must not compromise the internal structure. Excessive material in critical areas can create sinks and surface defects. Below are practical techniques that seasoned engineers use to balance aesthetics and manufacturability:
- Segment wide ribs into skeletonized sub‑ribs to maintain strength while reducing material.
- Pocket screw bosses near the base, creating a moat that thins the outer wall and reduces the risk of sink marks.
- Apply selective draft to long ribs, ensuring top thickness is adequate and bottom thickness is not excessive.
- Core corners where housing walls meet to eliminate thick diagonal sections that cause bowing or blush.
- Use 3‑D CAD tools early to identify thick sections and perform coring before the mold flow analysis.
- Apply these same principles to prototypes, whether they are injection‑molded or 3‑D printed, to avoid costly redesigns.
- Keep the final fabrication method in mind throughout the design cycle; this makes prototypes more representative and saves material in additive manufacturing.
These tips apply not only to injection molding but also to structural foam and other advanced materials. Even when a material promises fewer sink marks, the same design constraints often apply, and ignoring them can still compromise cosmetic quality.
When selecting a mold shop, confirm they understand your objectives. Use CAD visualizations to illustrate your expectations; if a shop cannot grasp the requirements, it may be time to consider another partner.
By integrating these proven tricks and fostering collaboration from day one, you’ll produce cleaner, more reliable plastic parts, reduce costs, and accelerate time‑to‑market. Build a personal “toolbox” of techniques and let it guide every future product development effort.
Manufacturing process
- Wi‑Fi Standards Every Engineer Needs to Know – From 802.11a to 802.11ad, AF, and HaLow
- Essential Machine Tool Tips Every Machinist Should Master
- Essential Quality Foundations for Manufacturers: Boost Engagement, Control, and Customer Delight
- Four Key Robot Types Manufacturers Must Understand
- QR Codes vs. Barcodes: Key Distinctions Every Manufacturer Needs to Understand
- Key Supply‑Chain Insights Every CEO Must Master
- Essential Mechanical Properties Every Mechanical Engineer Must Master
- Essential Insights Into Plastic Injection Molding: Process, Benefits, and Quality Assurance
- Mastering Microcircuit Boards: Essential Design Tips & Tricks
- Swiss Machining Explained: A Must-Know Guide for Product Designers