


Portable Voting System with GSM Connectivity
Components and supplies
 |
| × | 1 | |||
| × | 1 | ||||
 |
| × | 1 | |||
| × | 2 | ||||
 |
| × | 3 |
Apps and online services
 |
| |||
 |
|
About this project
BackgroundI'm fascinated by how differently each of us processes information and comes to conclusions. I'm equally fascinated by how peer pressure and groupthink influences or outright changes a persons response.
So I wondered, what if I could build a machine that would give me the ability to ask questions to groups of anonymous and random crowds? It would need to be un-intimidating (simple) and in an environment free of peer pressure or other external influences.
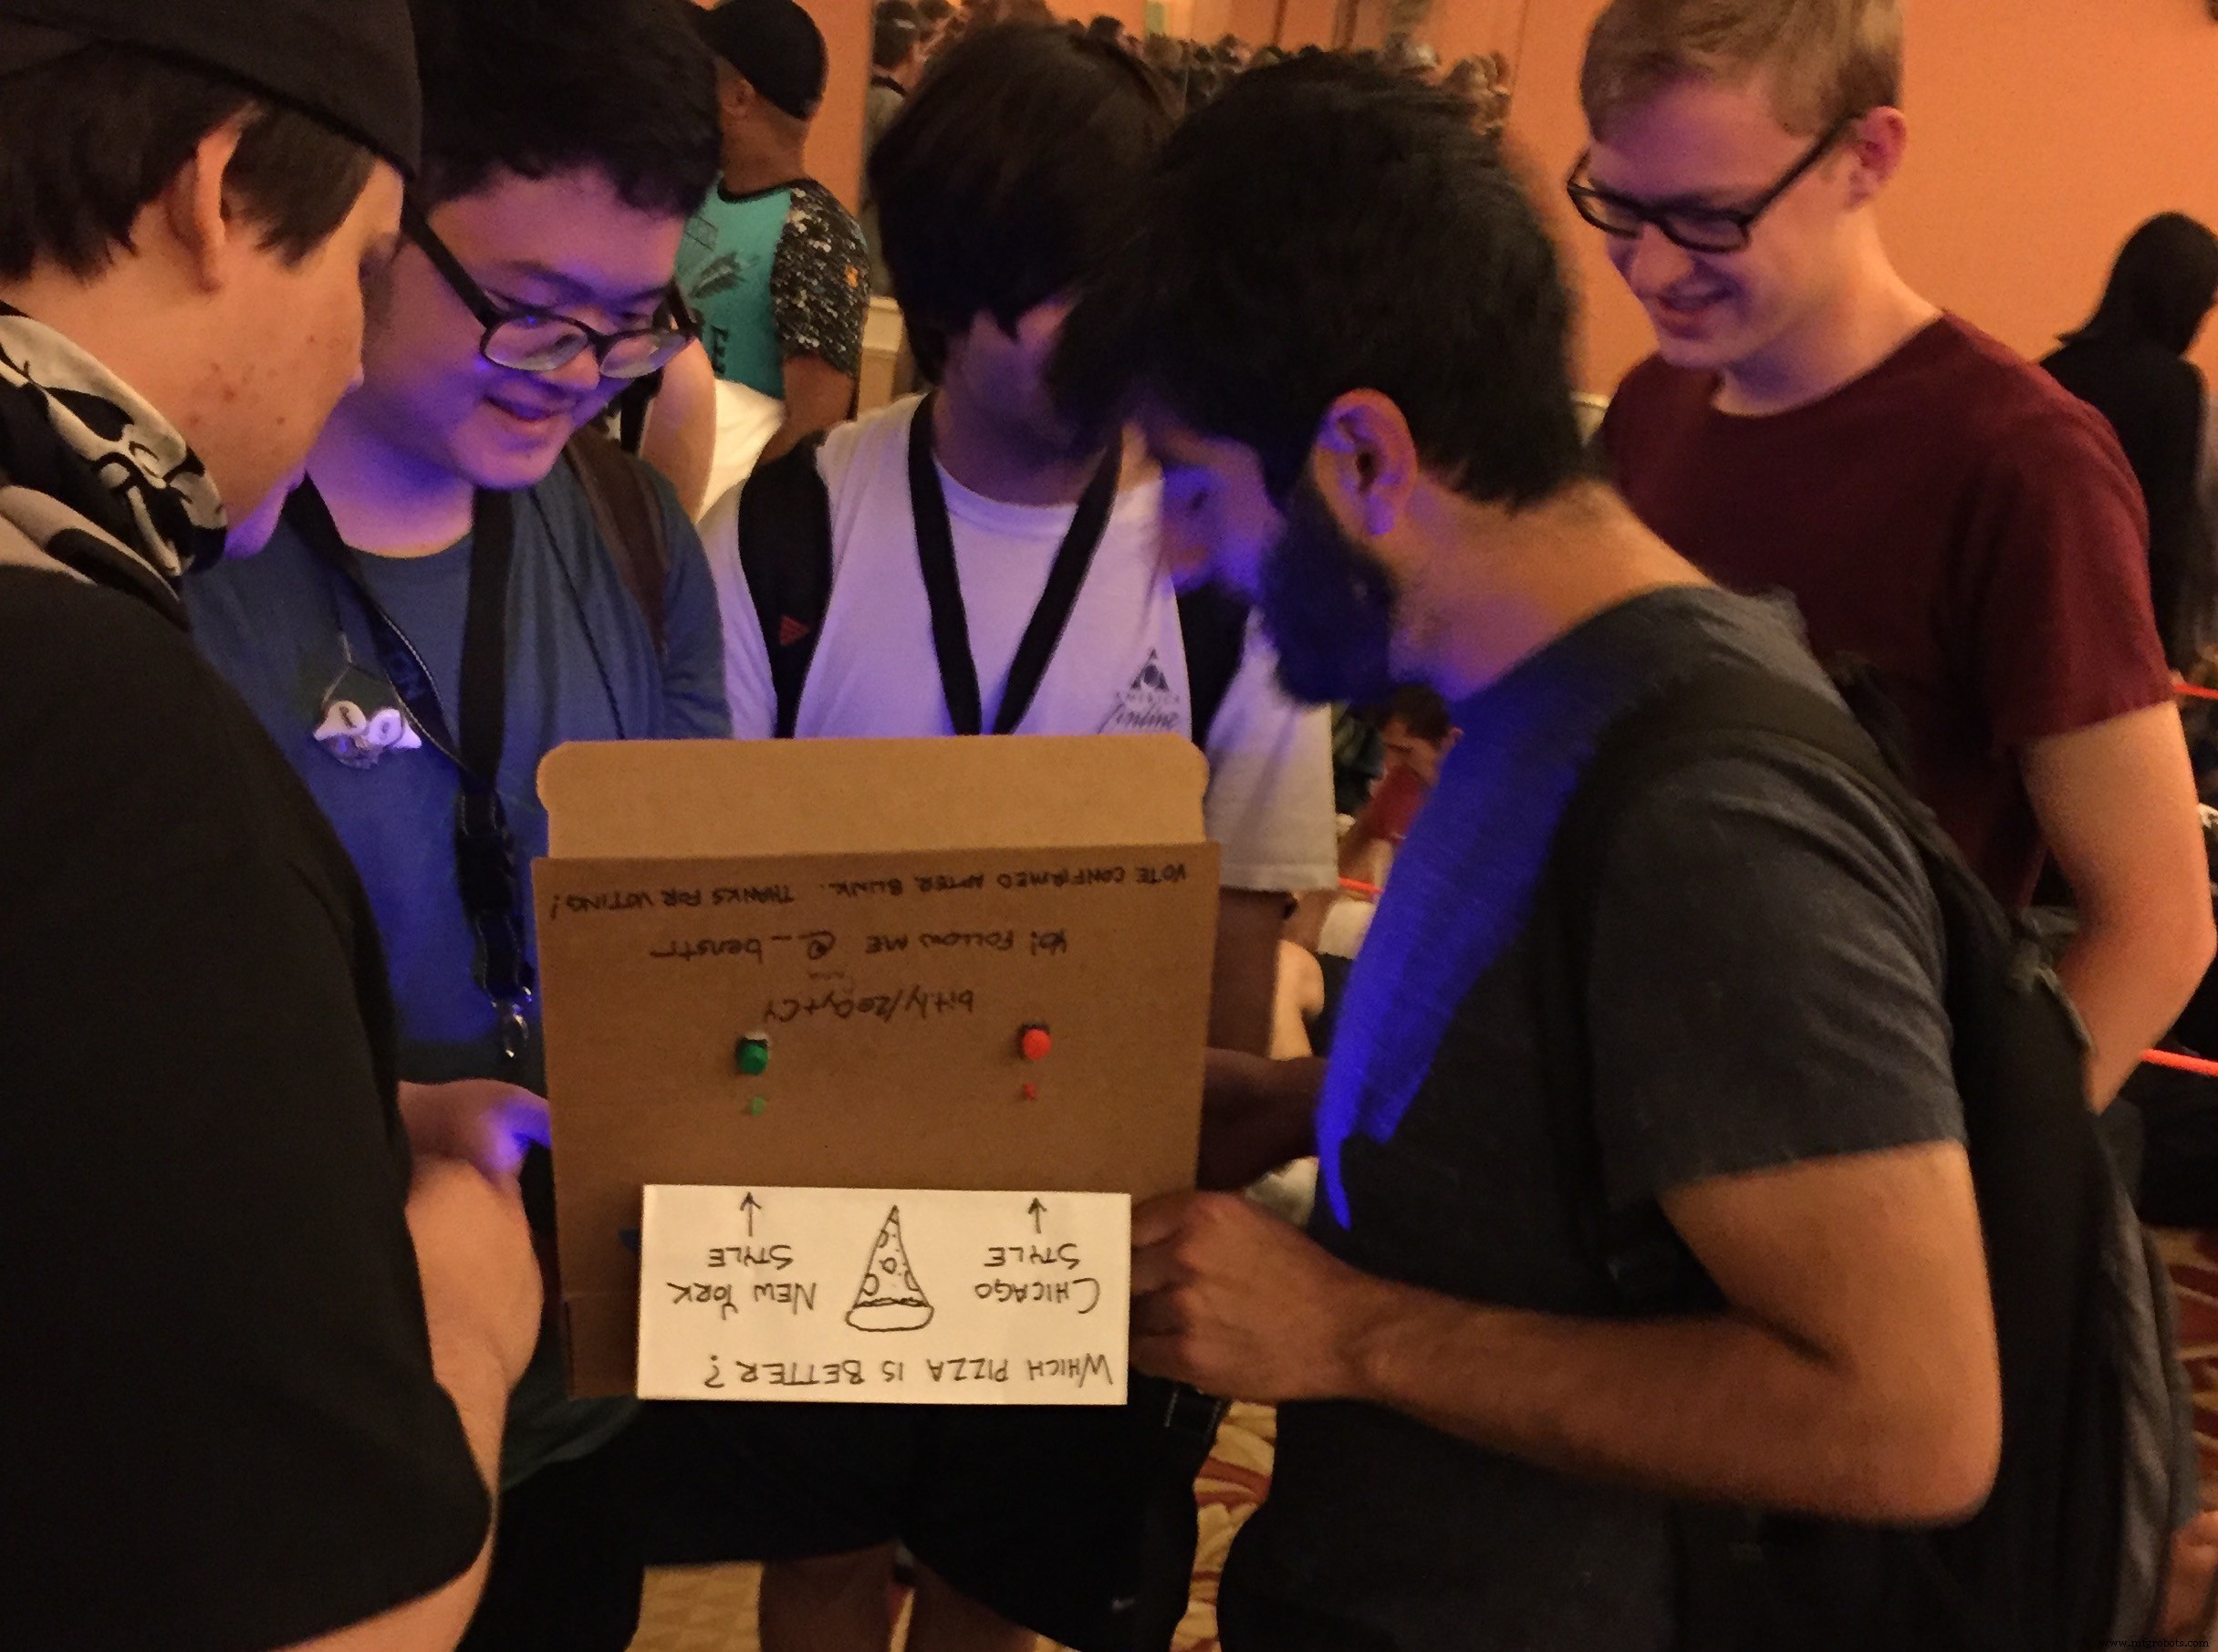
This project is my MVP to the challenge, I call it the Mobile Vote Box. For my first experiment I asked a simple yet passion invoking question.
I placed the Mobile Vote Box in random places around Chicago and Las Vegas. You can see everyone's responses here.
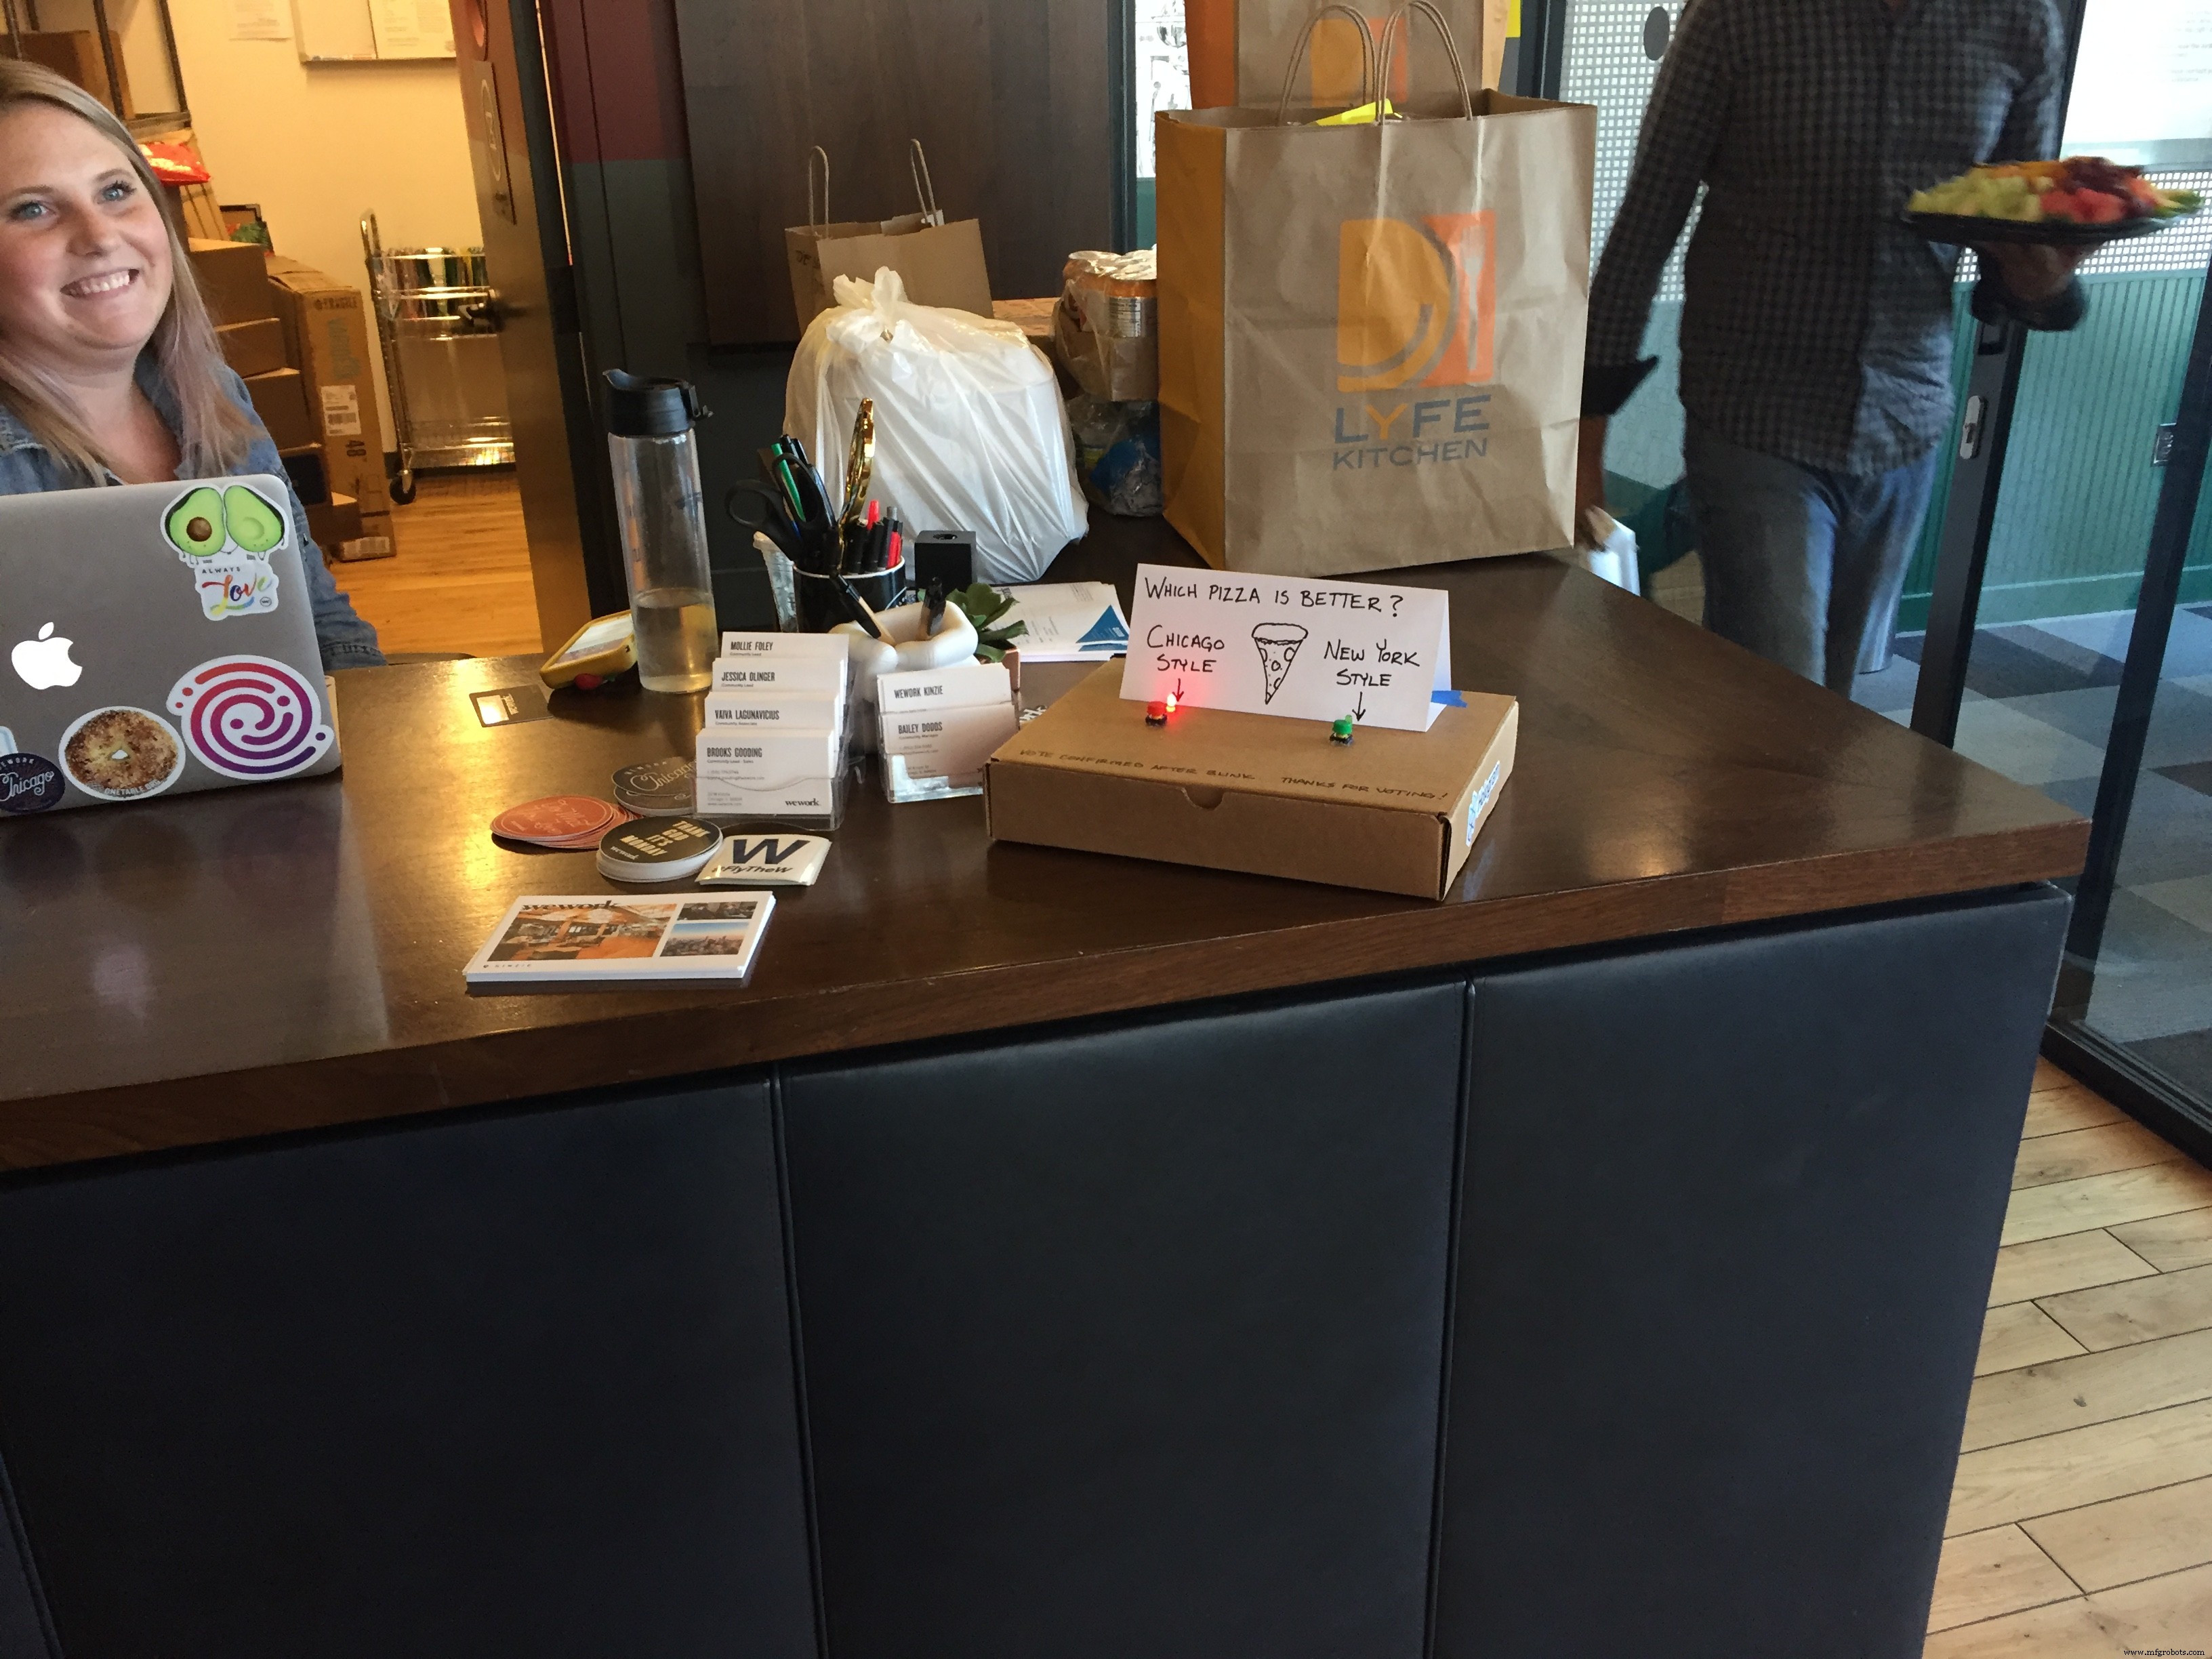
The Mobile Vote Box runs on battery and transmits every vote through cellular, making it extremely easy to set-and-forget. Parts cost about $50 but could be built for as cheap as $6 if you sourced everything through AliExpress.
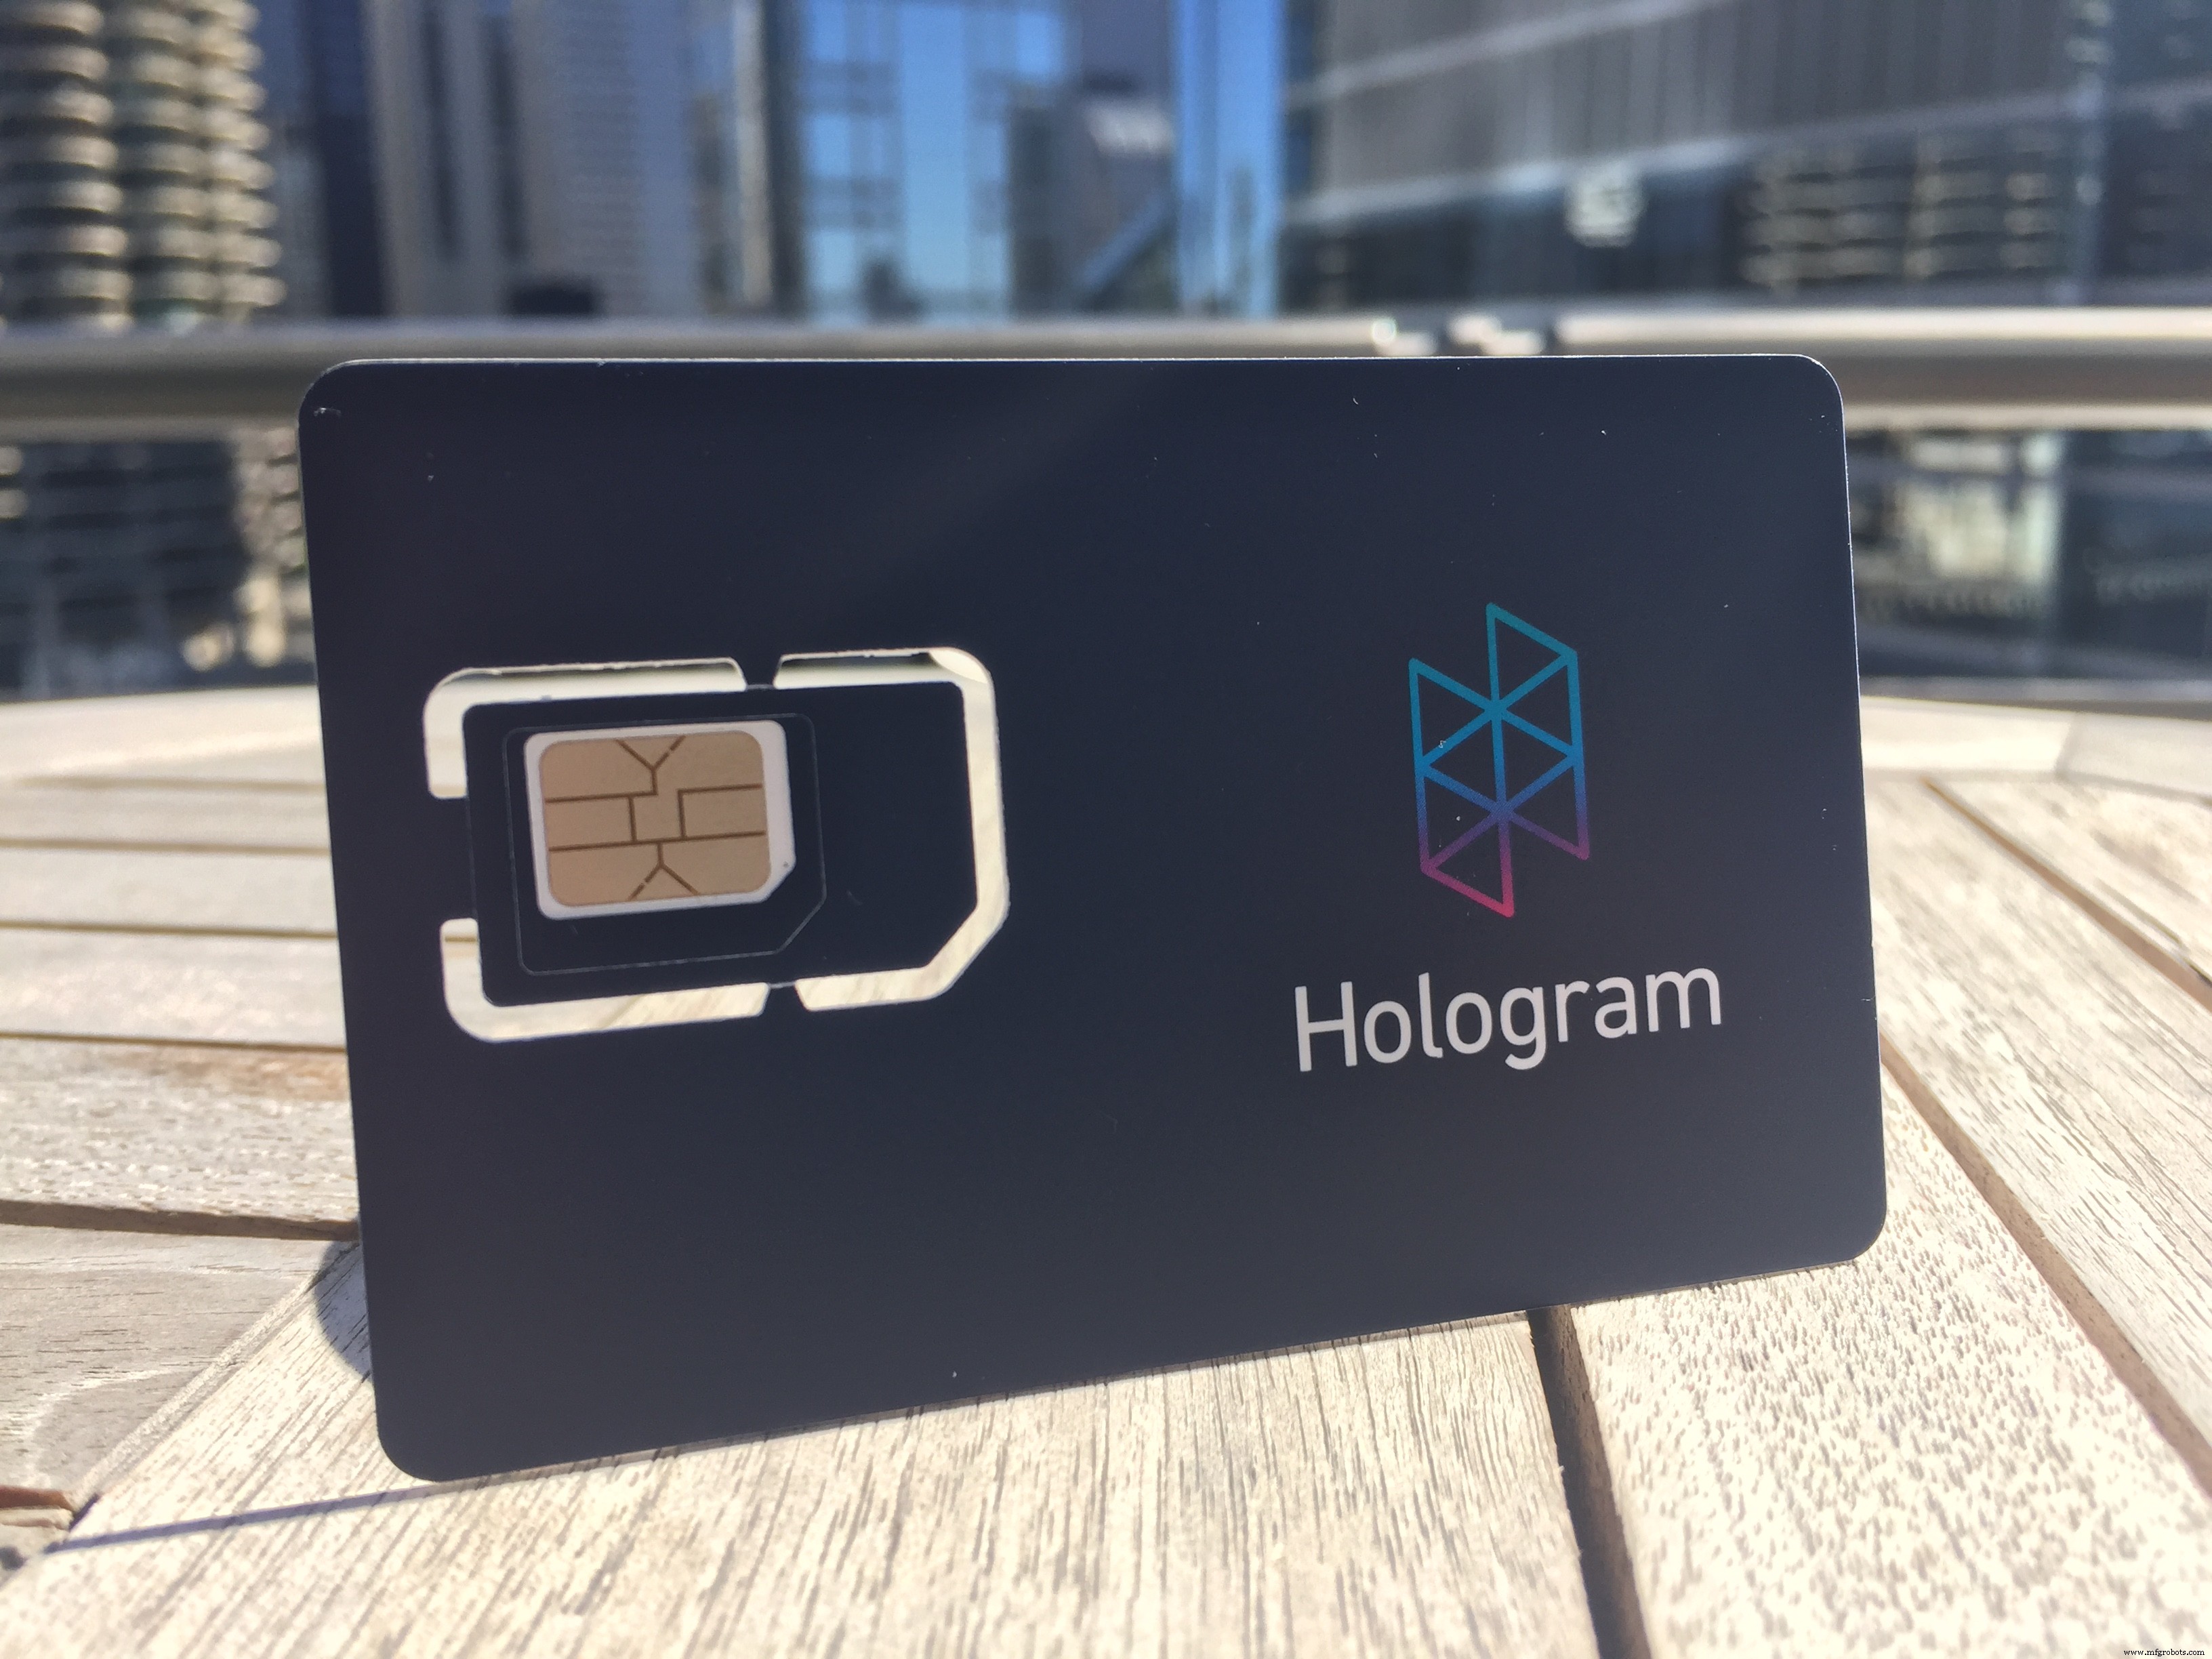
Cellular connectivity is free from Hologram.io. Their Developer Plan allows me to get a free global SIM card plus 1MB of free data per month (that equates to about 2,000 free vote data packets per month). Order your free Developer SIM today, use promo code BUDS-WITH-BENSTR for free shipping and a few $$ of credit.
**Full disclosure: I work for Hologram so you'll see me make a bunch of IoT tuts based around cellular connectivity.**

It would be amazing to iterate upon the idea and eventually come to a design robust enough that we could have a couple hundred Mobile Vote Boxes around the globe, asking the world a new question everyday and making the data publicly available.
How we'll build the Mobile Vote BoxFrom a high level we'll work backwards - starting from the egress, working our way to the ingress.
- First we'll make an IFTTT Applet to push data into a Google Spreadsheet.
- Next we'll activate our SIM, setup our data route, and verify with mock data.
- Last, we'll wire our hardware and flash the device.
- Now ask an intriguing question and put the box in a public place.
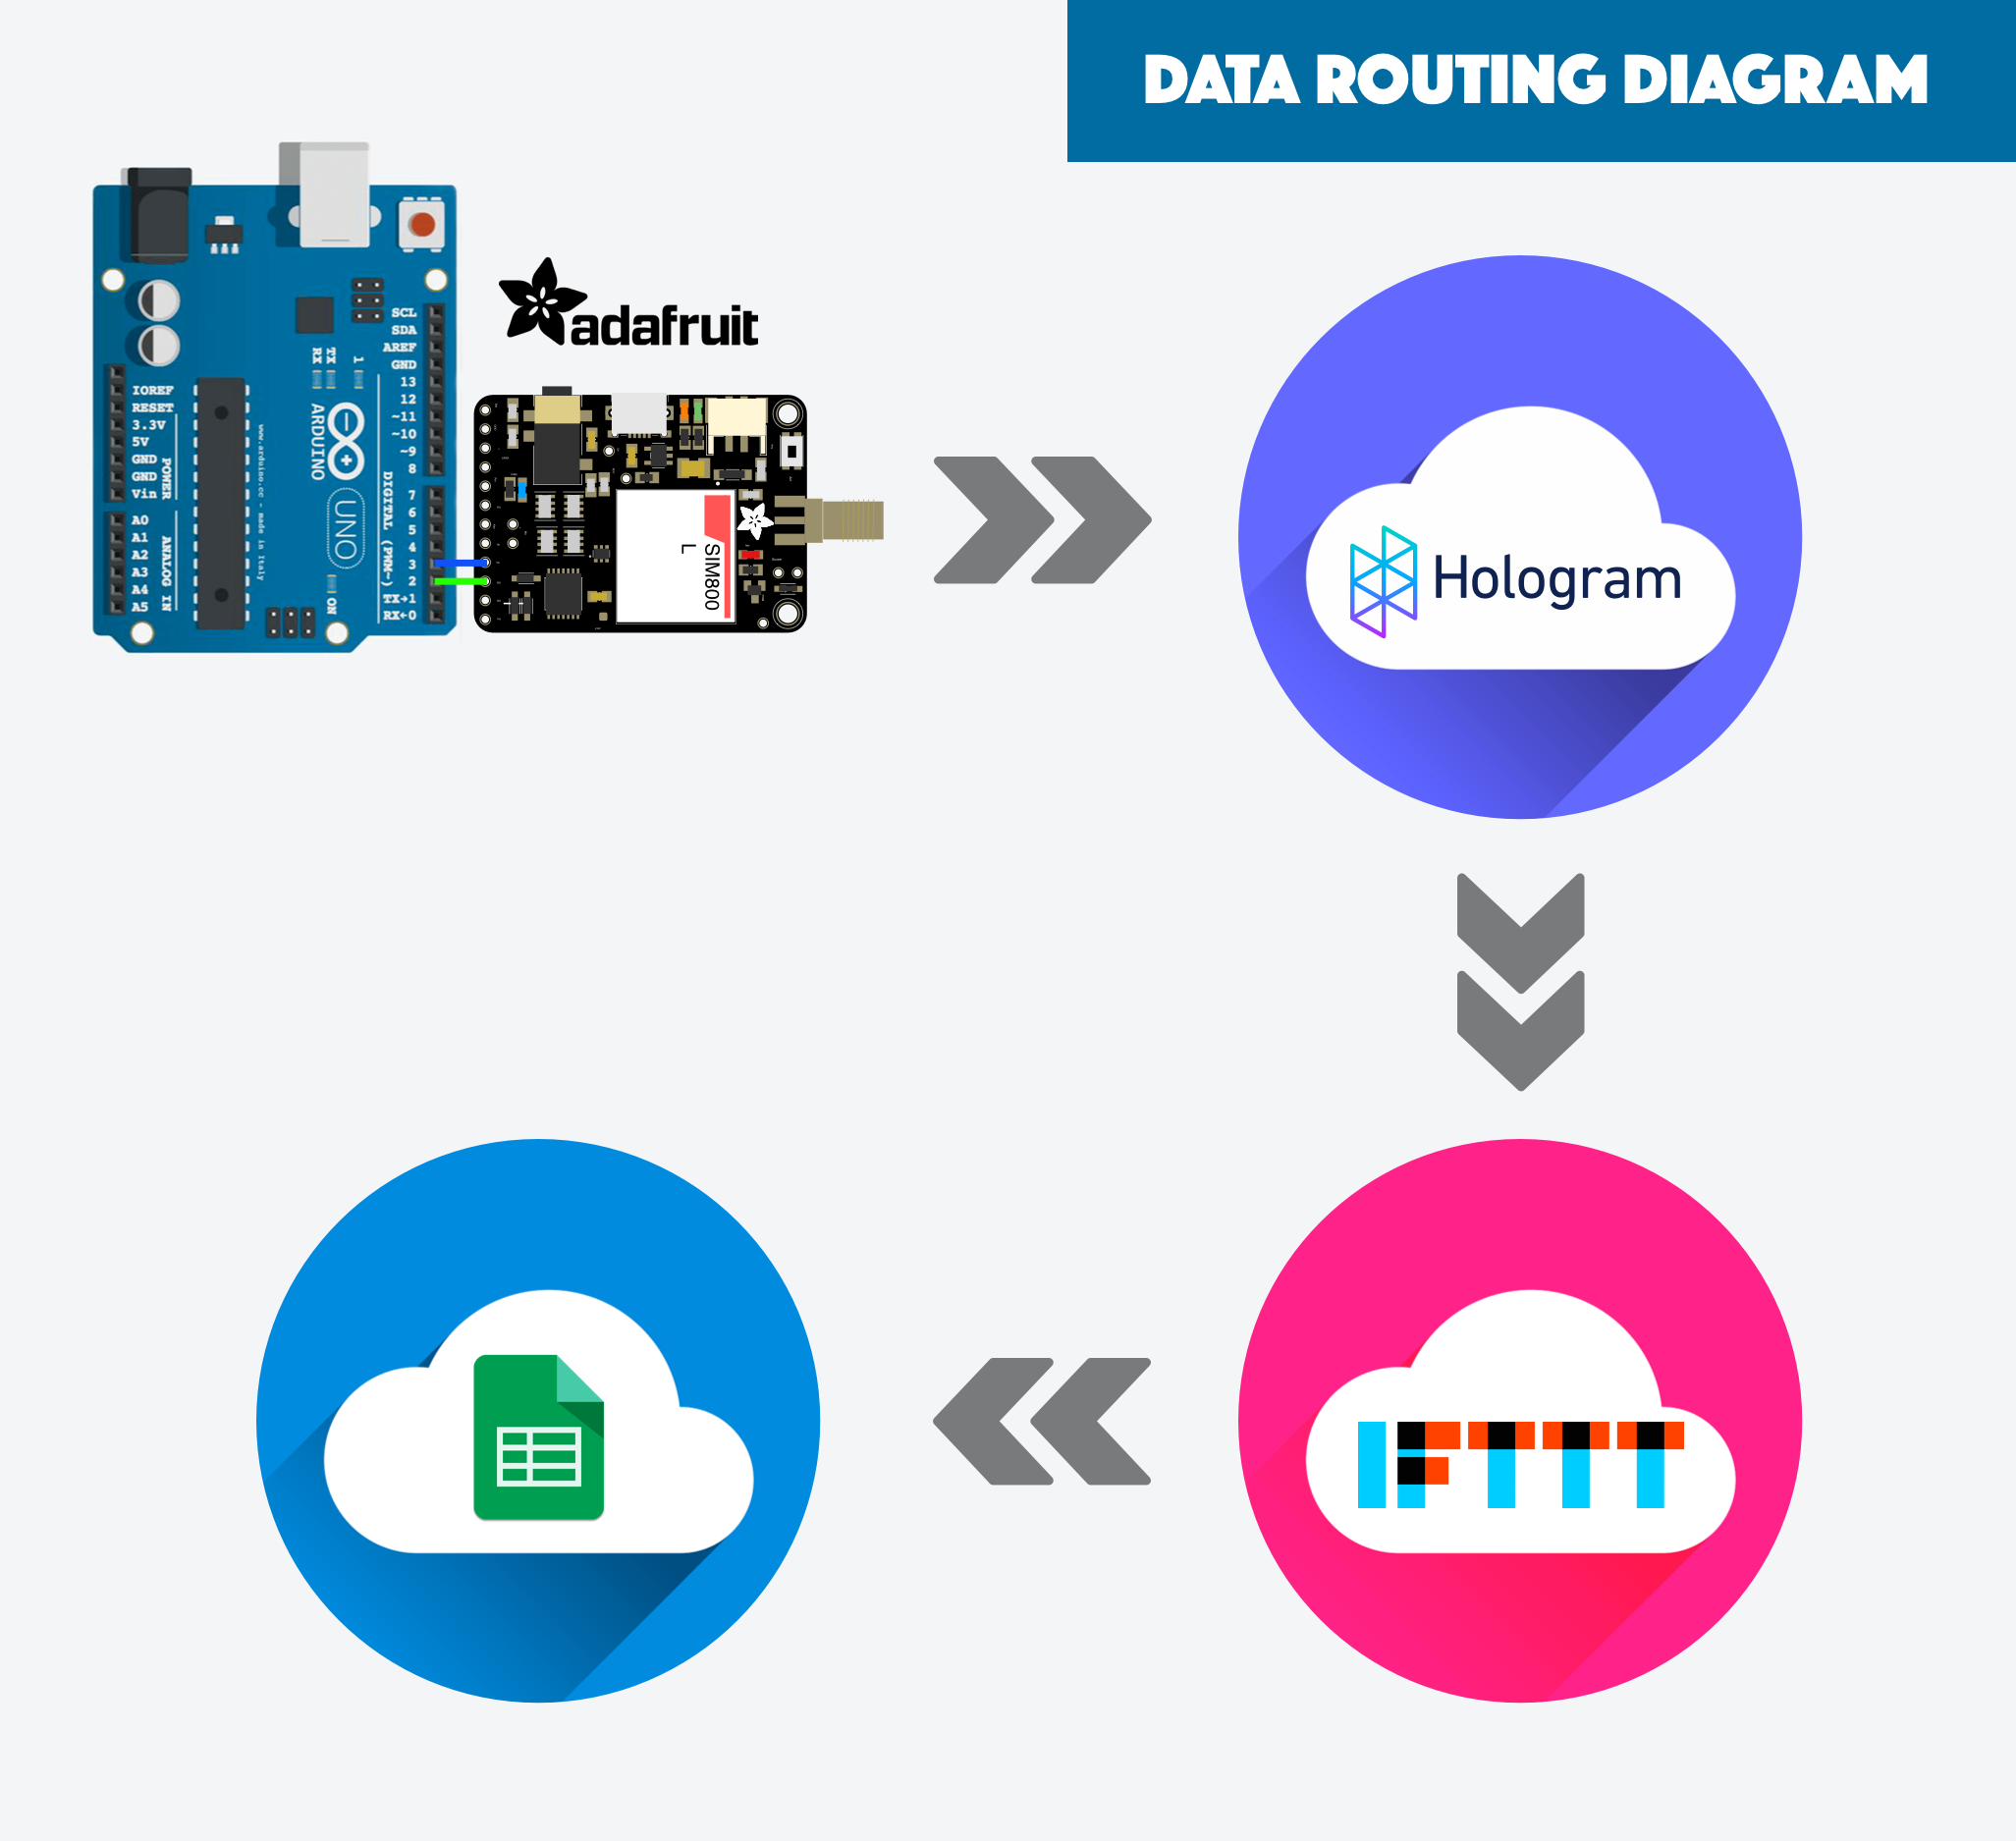
Every time a vote is recorded our device sends a data String to the Hologram Data Router. The Data Router inflates/manipulates the String into a JSON object and sends it to a IFTTT Webhook. IFTTT appends each vote to a Google Sheet.
At first glance it may look excessive but each element serves an unique and important role.
- Hologram Data Store is used because it does a great job abstracting the complexity of sending data fro a SIMCom module to the cloud.
- Hologram Data Router is used because it does a great job manipulating my minimal String data into the JSON format IFTTT requires. It also gives me the freedom to add other integrations without needing to modify my device code.
- IFTTT is used because it's awesome at abstracting away complex integrations to other clouds, in our case Google Sheets.
- Google Sheets is used just because.

- Goto IFTTT, login or create an account
- Create a new Applet
- 1 of 6: Select the Webhook service
- 2 of 6: Select Receive a Web Request trigger, name the event "vote" and create the trigger.
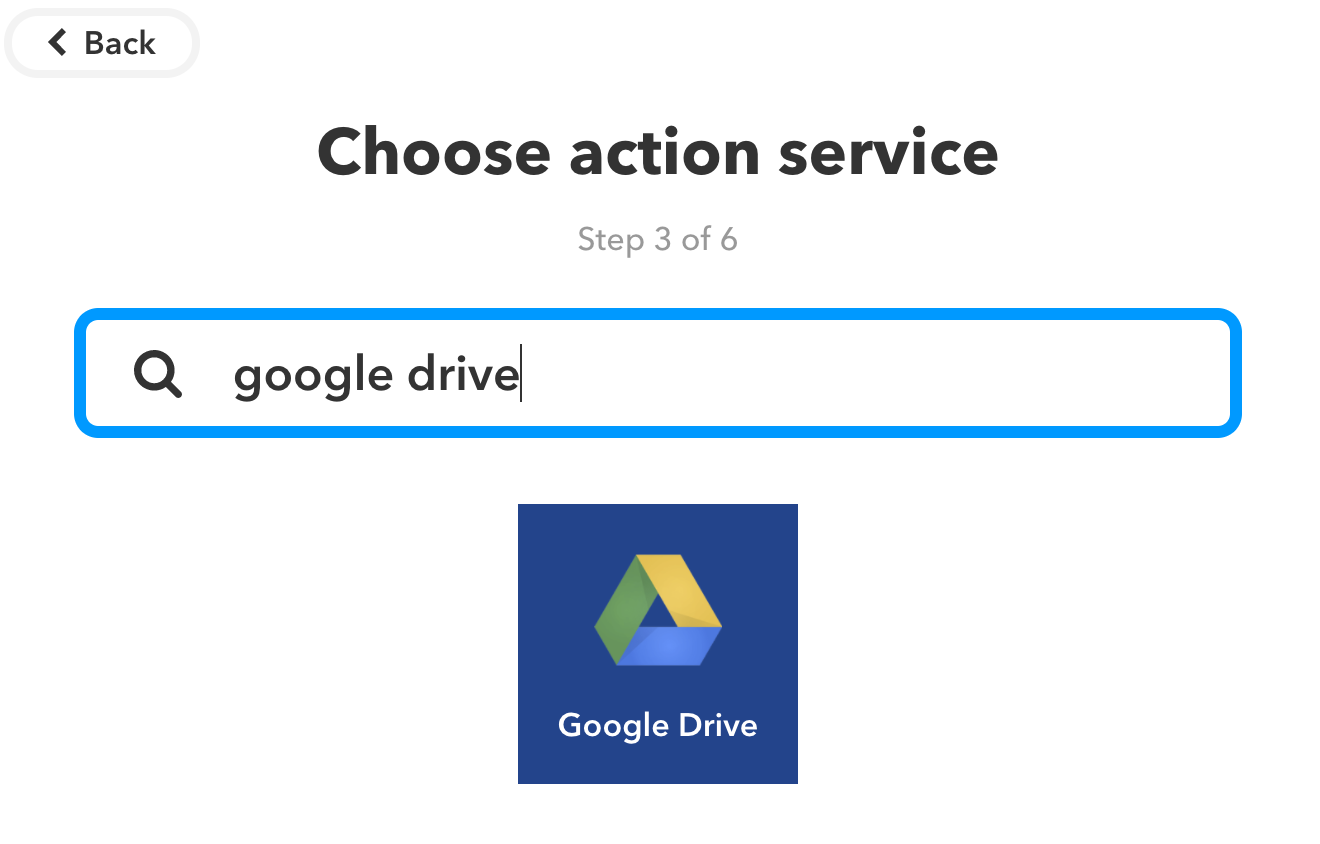
- 3 of 6: Select the Google Drive service
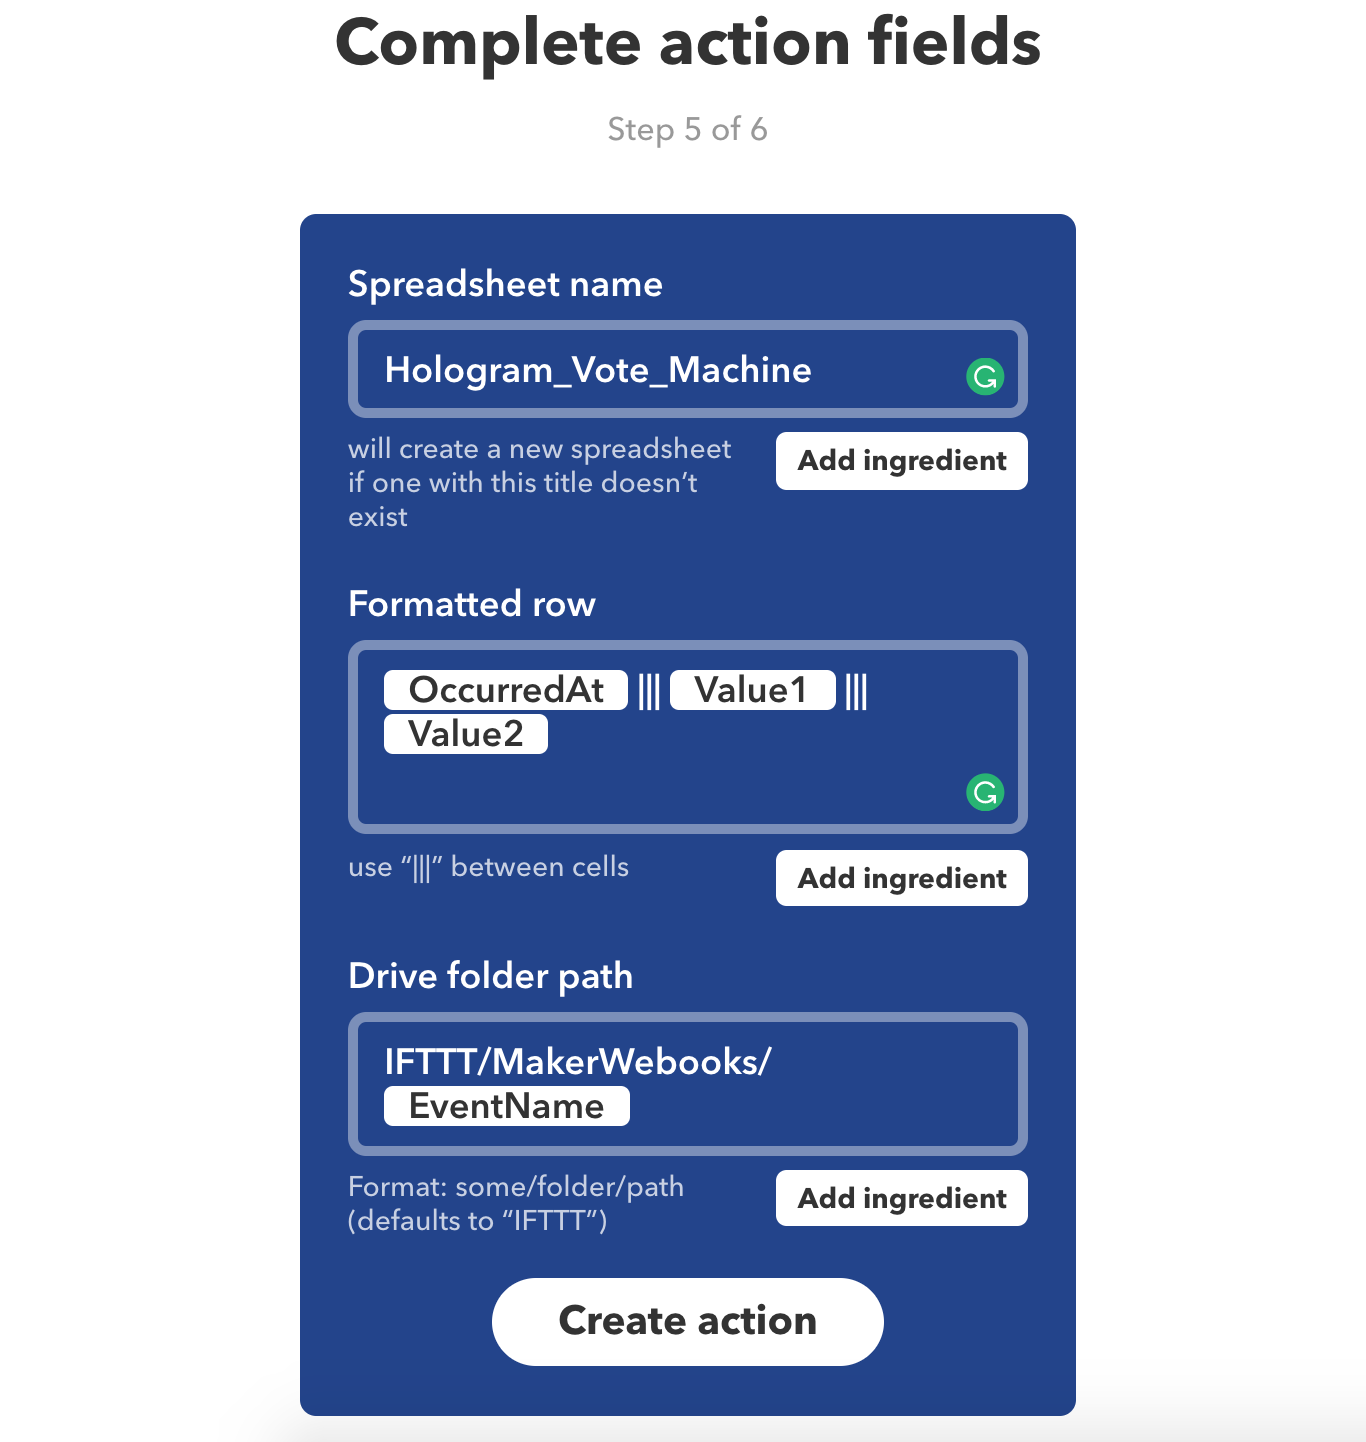
- 4 of 6: Choose the action Add Row to Spreadsheet
- 5 of 6: Complete the action fields, check out the image below (if you ignore this everything will still work fine).
- 6 of 6: Finish Applet!
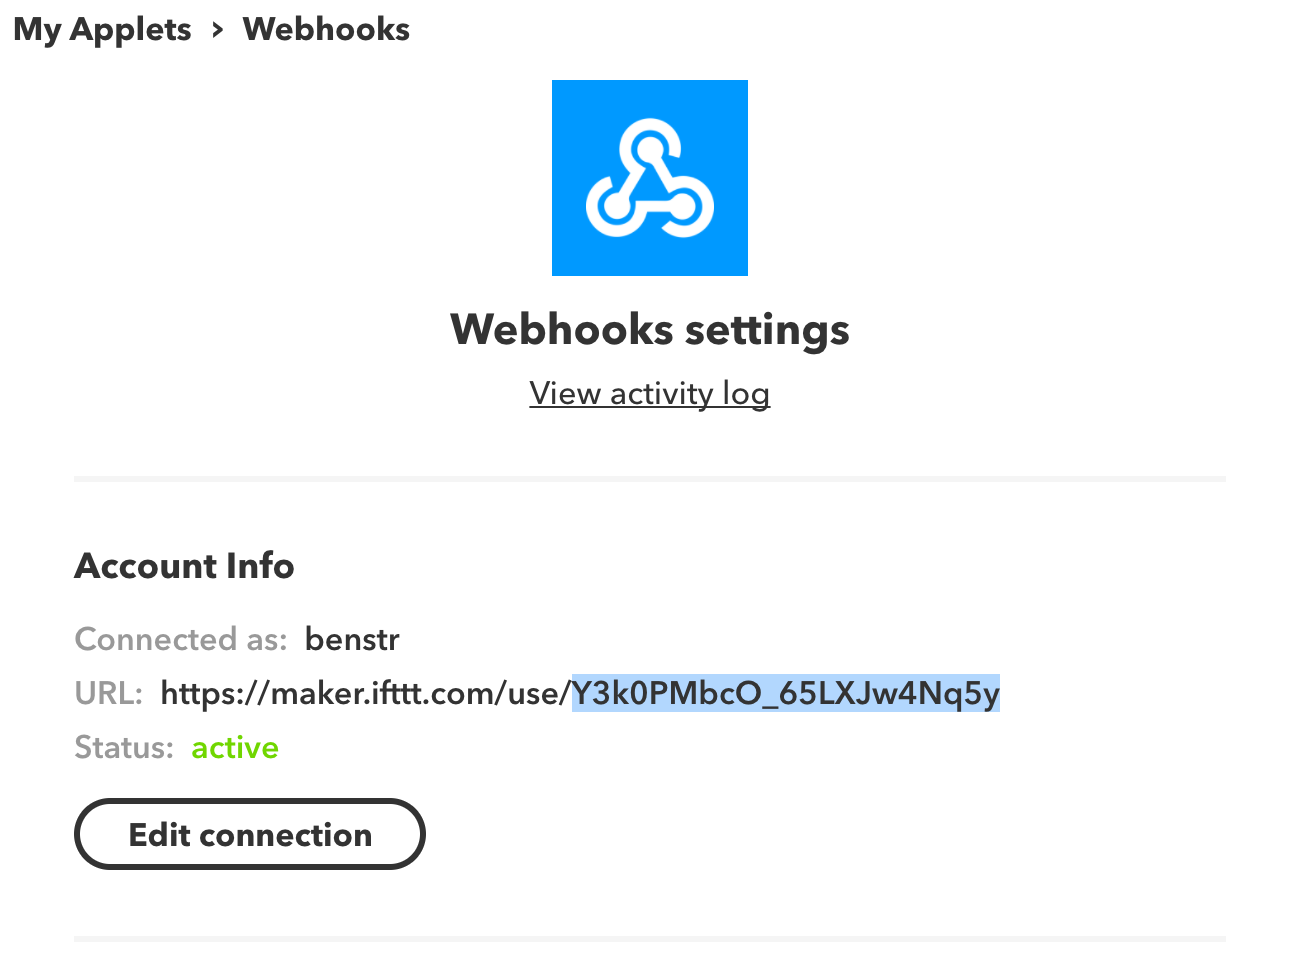
- IMPORTANT - Copy your webhook key (last part of the URL). Find your unique IFTTT webhook key here: https://ifttt.com/services/maker_webhooks/settings
Create a new device
- Go to Hologram.io, login or create an account
- Activate your SIM or select an existing Device
- Note: activating a new SIM will automatically create a new device
- Name the device anything you want, maybe Vote Btn #1
Create a new Data Route
- In the left nav select Routes and add a New Route
- IN: enter topic "vote"
- OUT: select IFTTT Maker Webhook
- Webhook Key: paste your IFTTT webhook key into this field (last step in IFTTT instructions above)
- Event: vote
- Data:
{"value1": "Pizza: Chicago or New York Style?", "value2": "<<decdata>>"}
- Create Route
- Go to Devices > select your device > Messaging > Simulate from Device
- Send data chicago to topic vote
- The hologram console should pop up and show a successful route
- If you go to Google Drive and open the spreadsheet, a new entry should appear.
- If you have any errors or the data does not arrive then review above details.
- If you cannot get it to work ask for help at https://community.hologram.io
- Grab your Data Router Device Key from the Hologram dashboard.
- Devices > select device > Configure > Show CSR Credentials
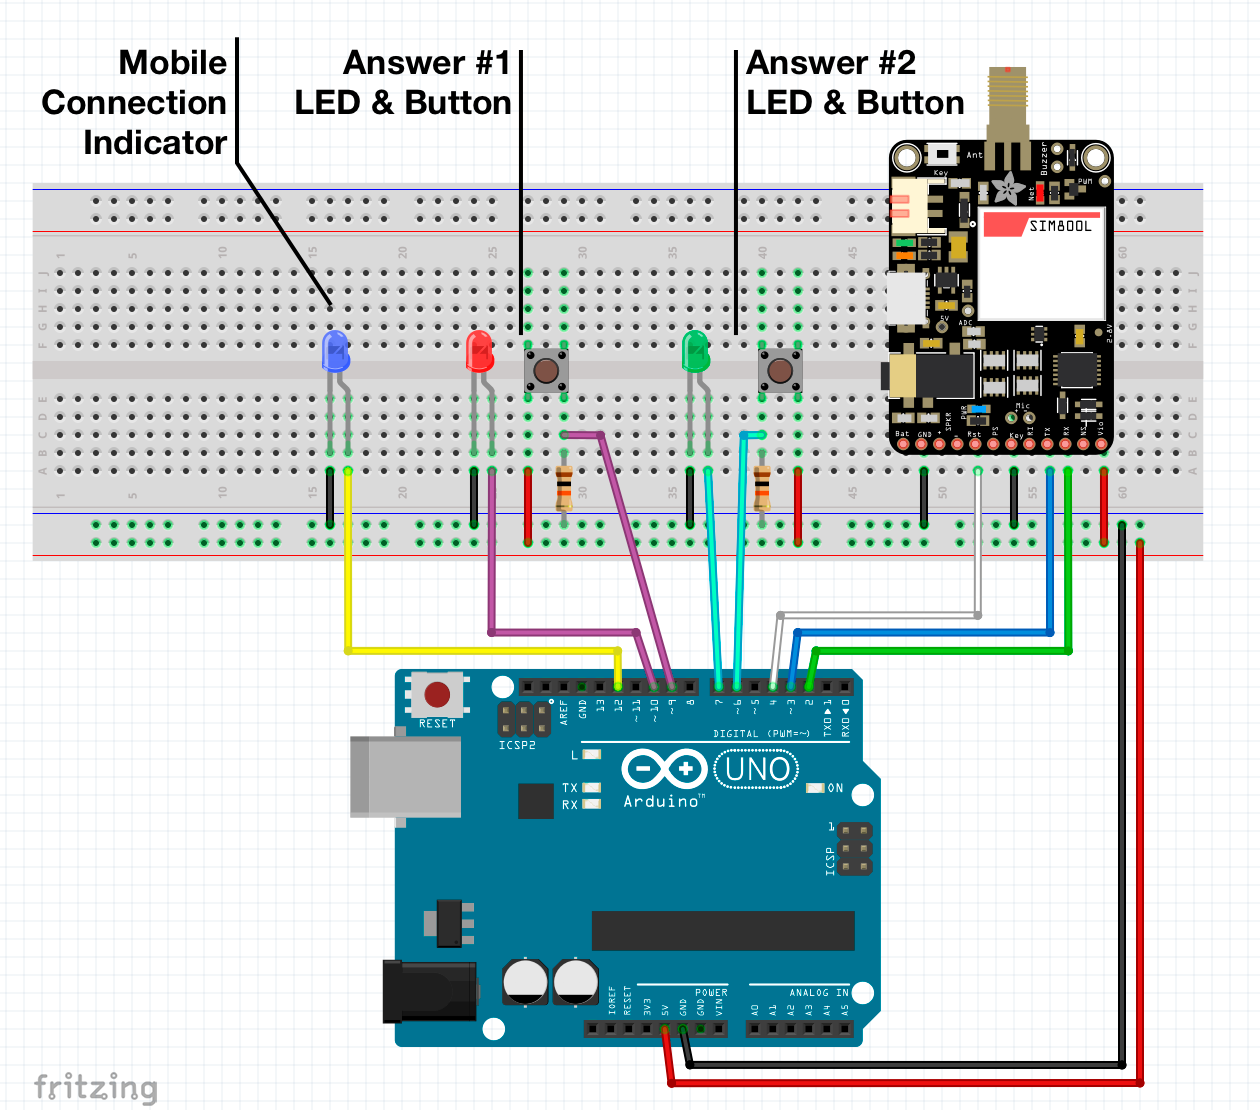
- Check out the schematic and sketch code below.
- Make sure to replace the Device Key in the global variable.
Enjoy!
Code
- Mobile Vote Box Arduino code - v1
Mobile Vote Box Arduino code - v1C/C++
You'll need to manually add the HologramSIMCOM library to your Arduino IDE - https://github.com/hologram-io/hologram-SIMCOM#include <HologramSIMCOM.h>
#define RX_PIN 2 //SIMCom RX - MCU TX
#define TX_PIN 3 //SIMCom TX - MCU RX
#define RESET_PIN 4 //SIMCom reset
#define HOLO_KEY "########" //replace w/your SIM key
#define CONNECT_LED 12
#define VOTE1_BTN_PIN 6
#define VOTE1_LED_PIN 7
#define VOTE2_BTN_PIN 9
#define VOTE2_LED_PIN 10
HologramSIMCOM Hologram(TX_PIN, RX_PIN, RESET_PIN, HOLO_KEY); // Instantiate Hologram
String VOTE1_VALUE = "chicago";
String VOTE2_VALUE = "newYork";
String HOLOGRAM_TOPIC = "vote";
void setup() {
Serial.begin(19200);
while(!Serial);
// Start modem and connect to Hologram's global network
Hologram.debug();
//set modes for used pins
pinMode(CONNECT_LED, OUTPUT);
pinMode(VOTE1_BTN_PIN, INPUT);
pinMode(VOTE1_LED_PIN, OUTPUT);
pinMode(VOTE2_BTN_PIN, INPUT);
pinMode(VOTE2_LED_PIN, OUTPUT);
bool cellConnected = Hologram.begin(19200, 8888); // set baud to 19200 and start server on port 8888
if(cellConnected) {
digitalWrite(CONNECT_LED, HIGH);
}
}
void loop() {
Hologram.debug();
if(digitalRead(VOTE1_BTN_PIN) == HIGH) {
sendVote(VOTE1_VALUE,VOTE1_LED_PIN);
}
if(digitalRead(VOTE2_BTN_PIN) == HIGH) {
sendVote(VOTE2_VALUE,VOTE2_LED_PIN);
}
}
void sendVote(String VOTE_VALUE, const int VOTE_LED) {
digitalWrite(VOTE_LED, HIGH);
// send to the Hologram Data Router
if(Hologram.send(VOTE_VALUE, HOLOGRAM_TOPIC)) {
// blink LED if vote was successful
// this is crappy code, consider refactoring
digitalWrite(VOTE_LED, LOW);
delay(100);
digitalWrite(VOTE_LED, HIGH);
delay(100);
digitalWrite(VOTE_LED, LOW);
delay(100);
digitalWrite(VOTE_LED, HIGH);
delay(100);
digitalWrite(VOTE_LED, LOW);
} else {
digitalWrite(VOTE_LED, LOW);
}
}
Schematics
Manufacturing process
- The Juice Box Revolution: History, Design, and Environmental Impact
- Black Box Flight Recorders: From Early Prototypes to Future Integrated Designs
- DIY Wall‑E Inspired Raspberry Pi CD‑Box Robot
- UnifiedWater v1 – Complete Arduino Water Quality Sensor Kit
- Modern Jukebox: Raspberry Pi & Arduino LED Music Player
- DIY Arduino Smartwatch: Build Your Own Apple Watch‑Style Timepiece
- Smart Pill Dispenser: Precision Medication Management System
- KITtyBot: DIY Smart Robot Kit with Arduino Pro Mini, Servos, IR Control & Power Supply
- Build a Reliable FM Radio with SparkFun & Arduino Components
- Track ME: Arduino Mega 2560 Car Tracker Prototype with GPS & GPRS