


Real‑Time Swimming Pool Monitoring with Arduino MKR1000 & Samsung ARTIK Cloud
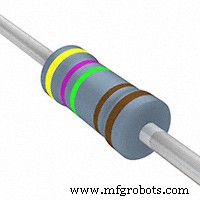
Components and supplies
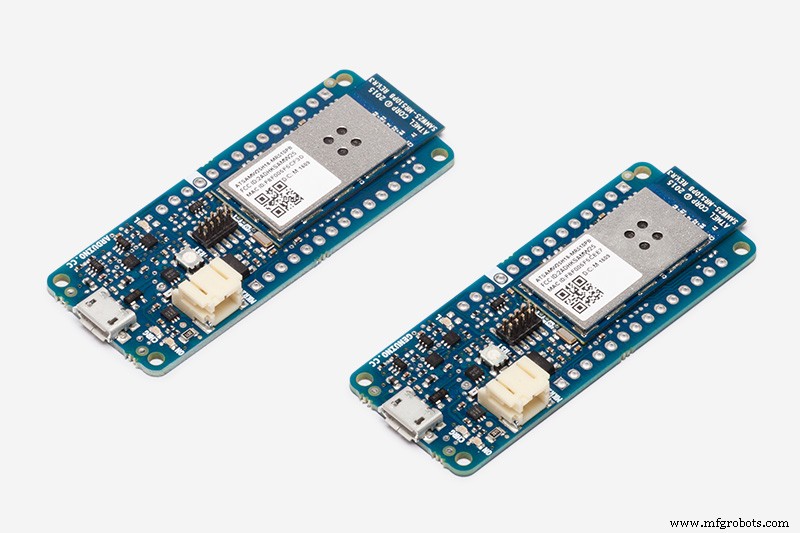 |
| × | 1 | |||
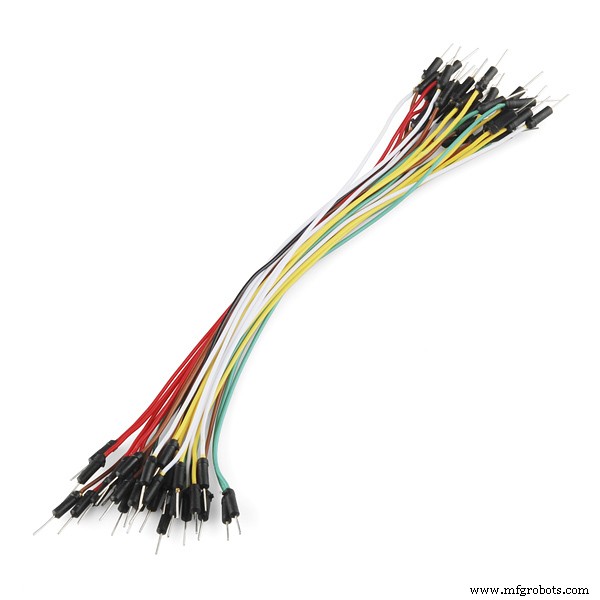 |
| × | 1 | |||
| × | 1 | ||||
 |
| × | 1 | |||
| × | 1 |
Apps and online services
 |
| |||
 |
|
About this project
I. ObjectiveThe primary objective of this project is to use Samsung ARTIK Cloud to monitor the pH and temperature levels of swimming pools.
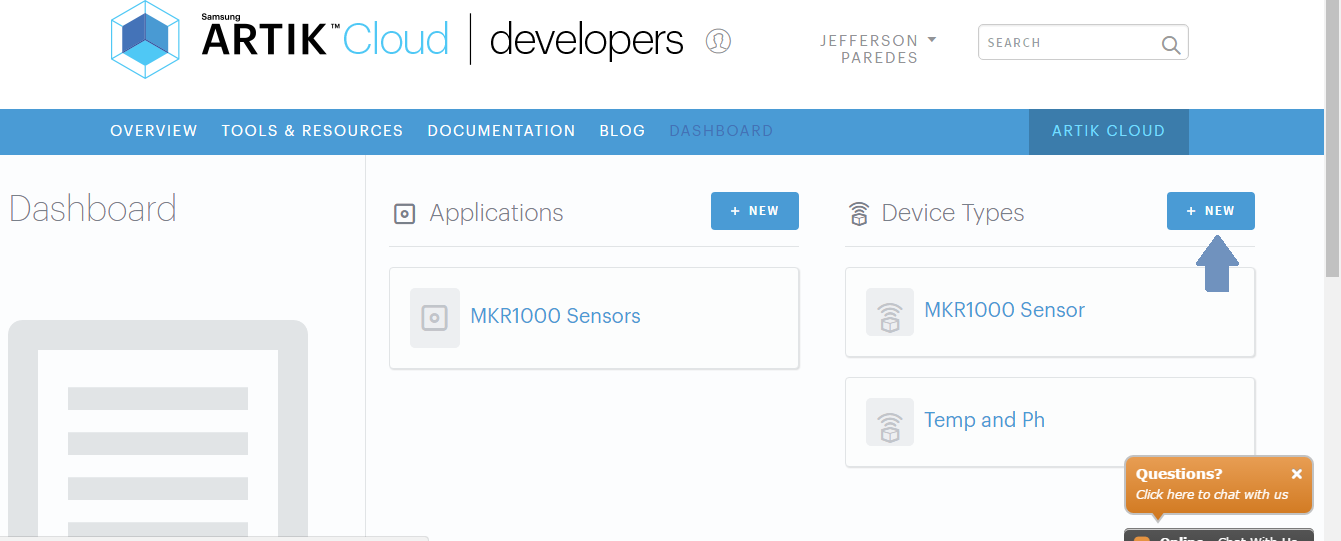
II. ARTIK Cloud SetupStep 1. Creating your new deviceSign up with ARTIK Cloud. Go to developer site and create new "device type".
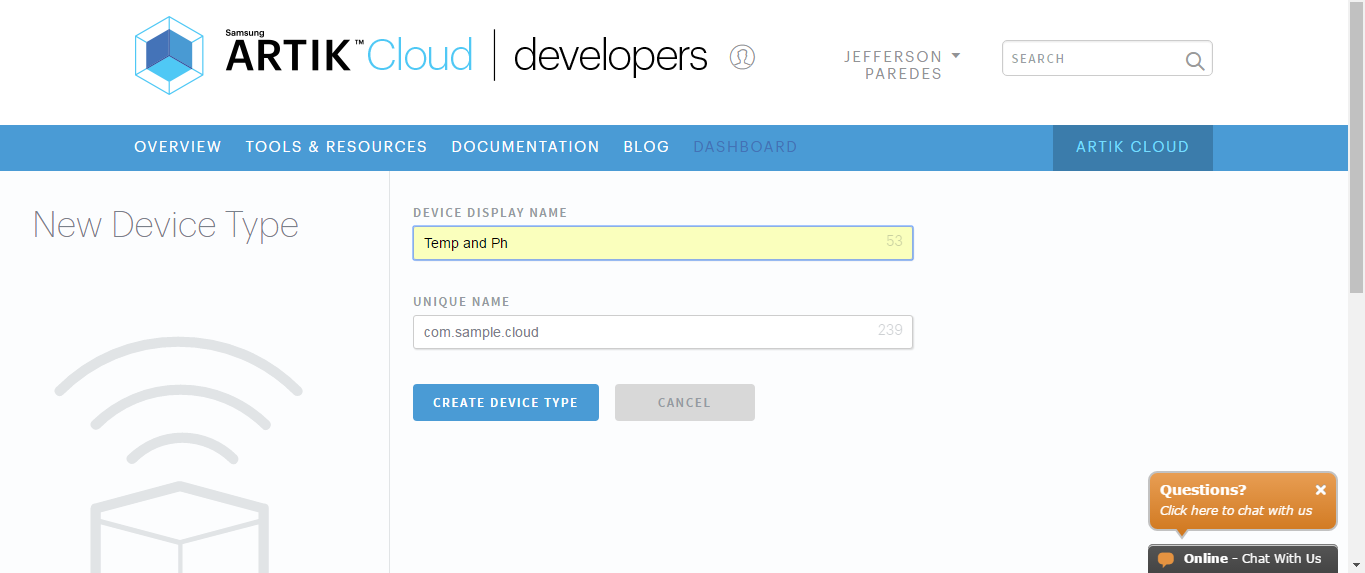
Enter your desired display and unique name.
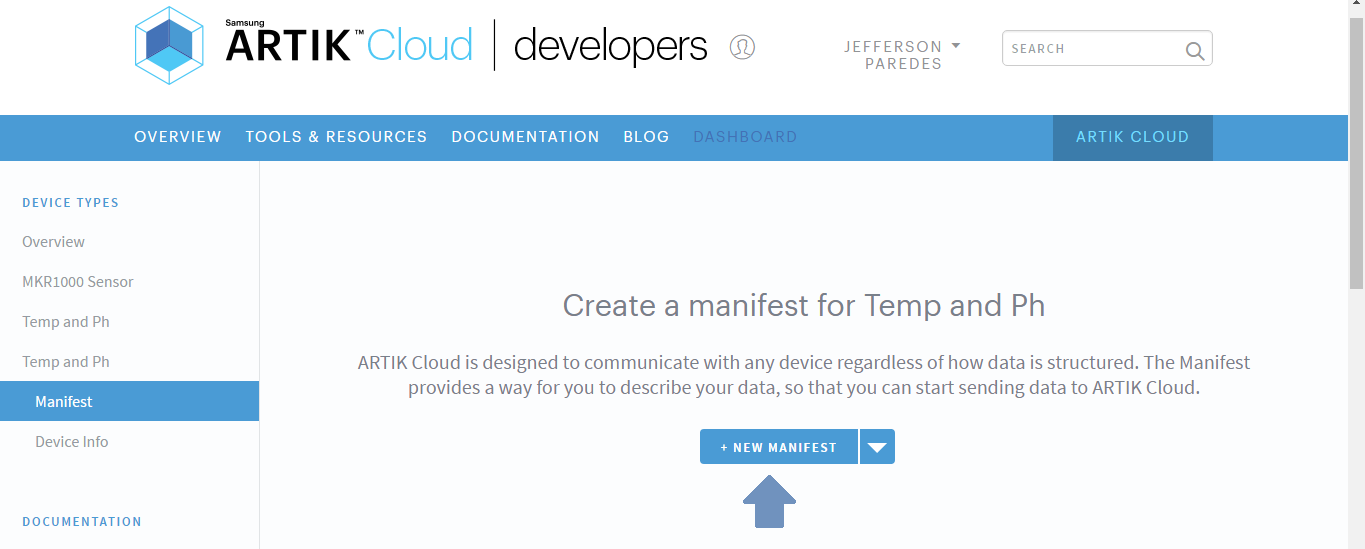
Create new Manifest
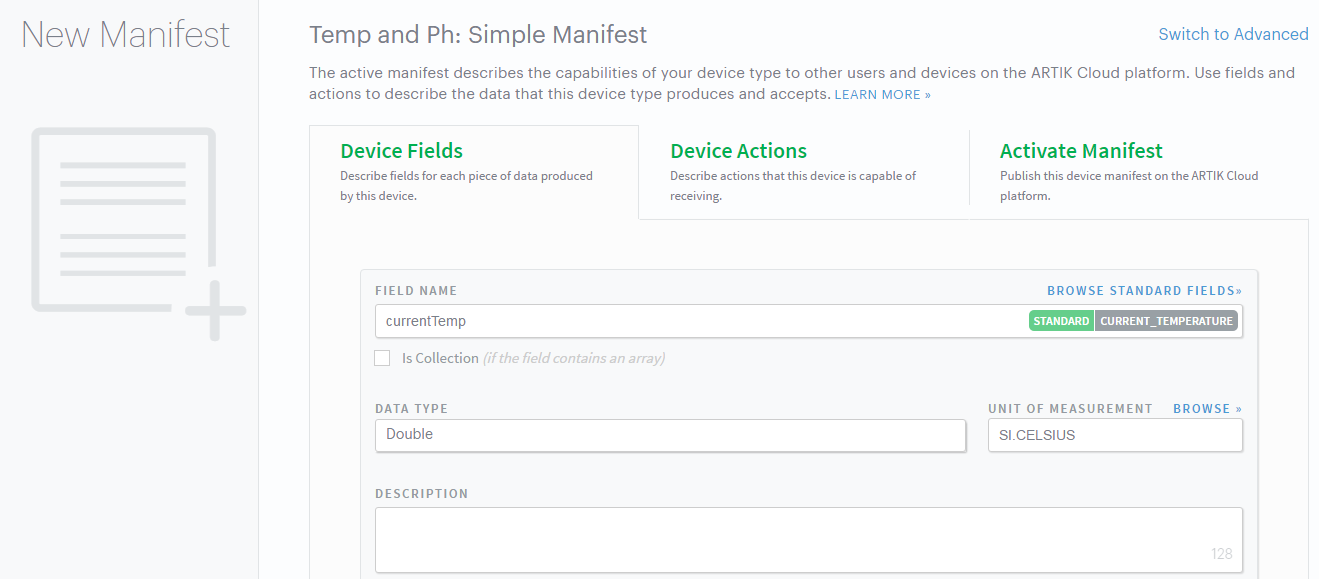
Enter field name and other description
Click Save and then navigate to Activate Manifest Tab
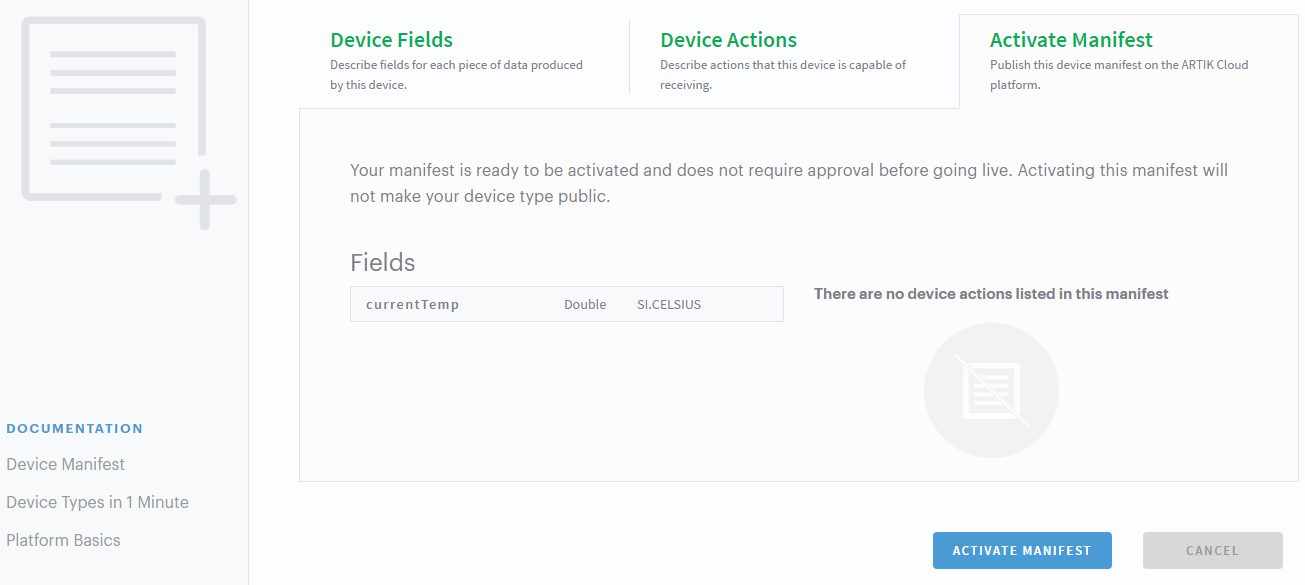
Click the ACTIVE MANIFEST Button to finish and you will be redirected here
Done creating device type!
Now lets create your application that will use that device.
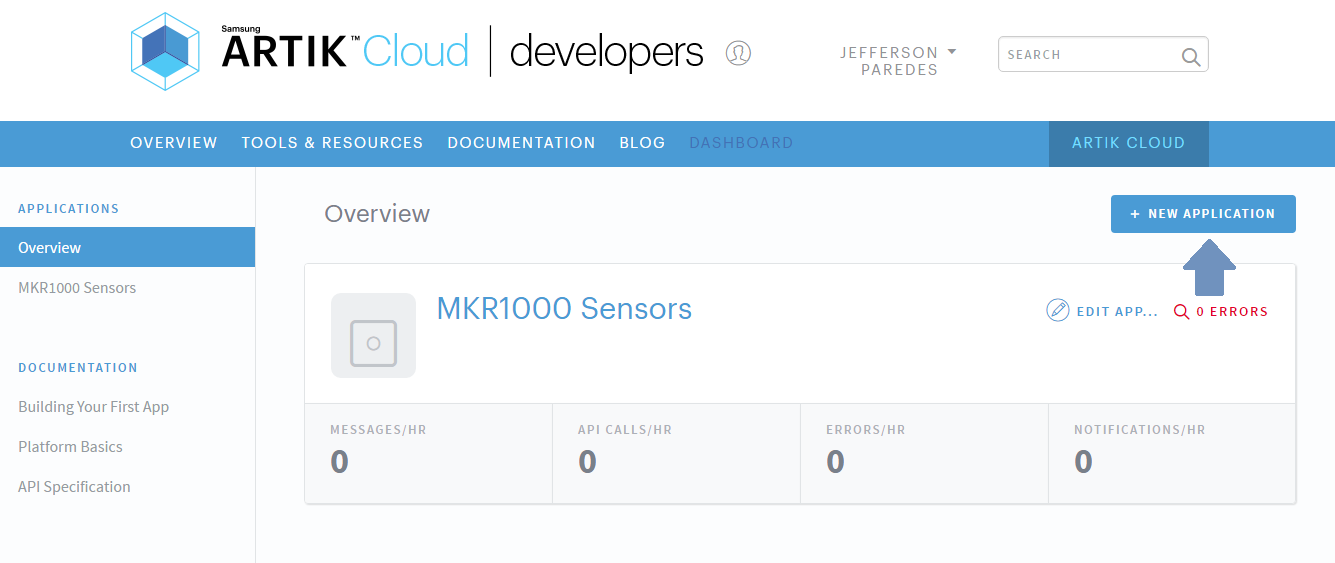
Step 2. Creating your applicationNavigate to ARTIK Cloud Applications.
Click new application
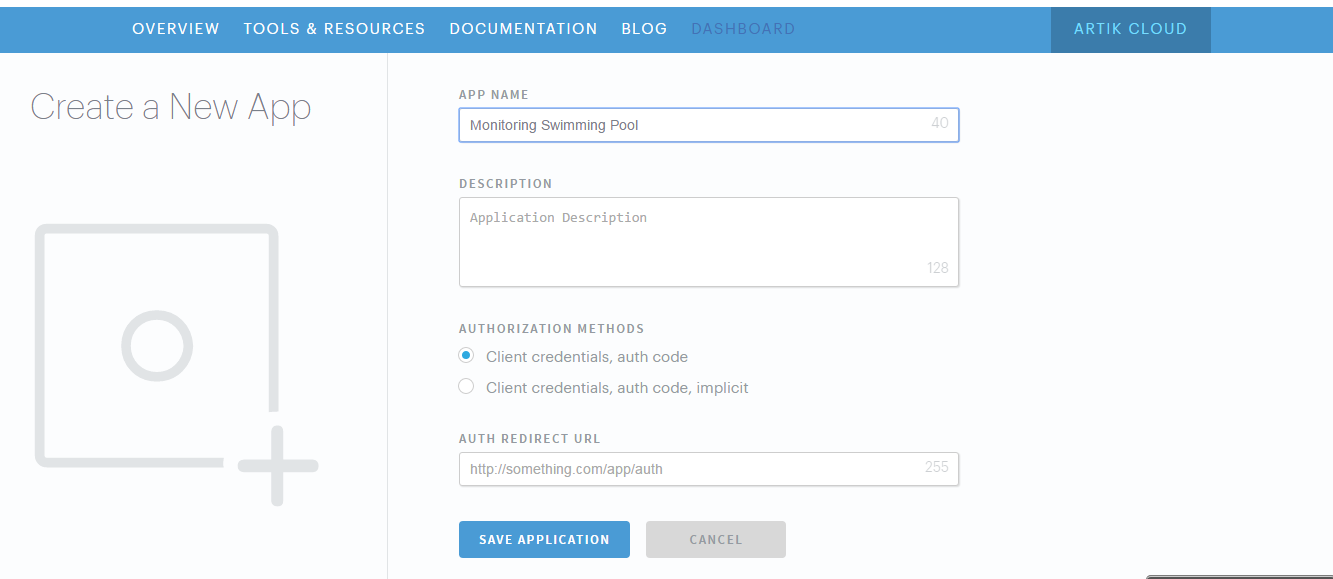
Enter your desired application name and authentication redirect url.
Note that the authentication redirect url is required. It is used to authenticate the users of this application hence will redirect to this url if in need of login.
We used http://localhost/index/ for sample.
Now set your application permission to read and write, navigate to your device then save.

Congratulation you now have your application!

Now lets connect that application.
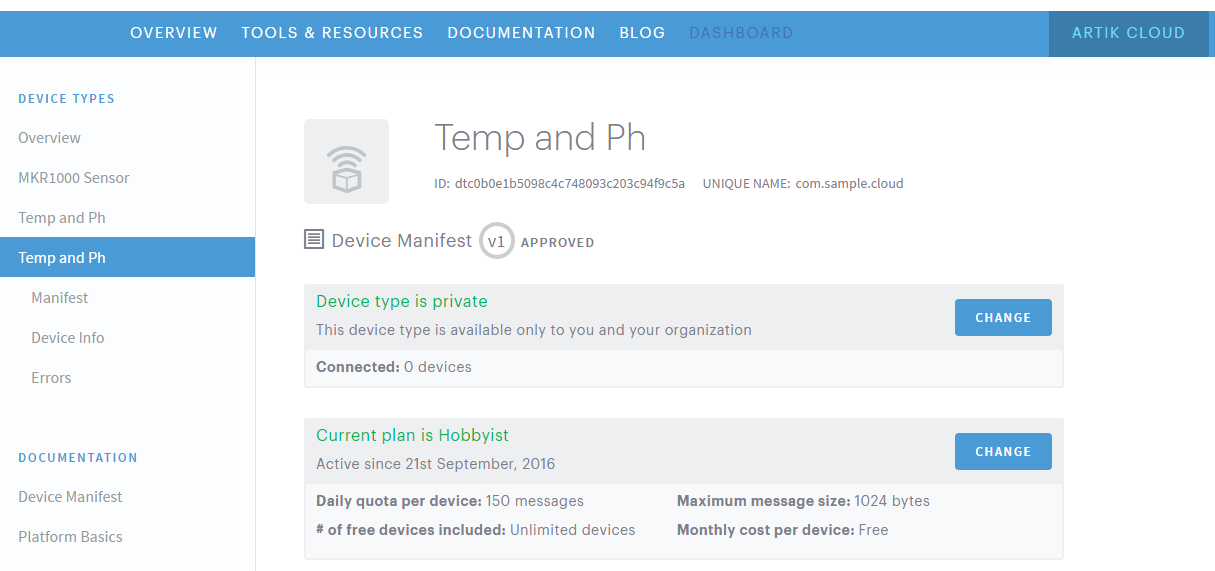
Step 3. Connect your deviceNavigate to my devices and click connect another device.
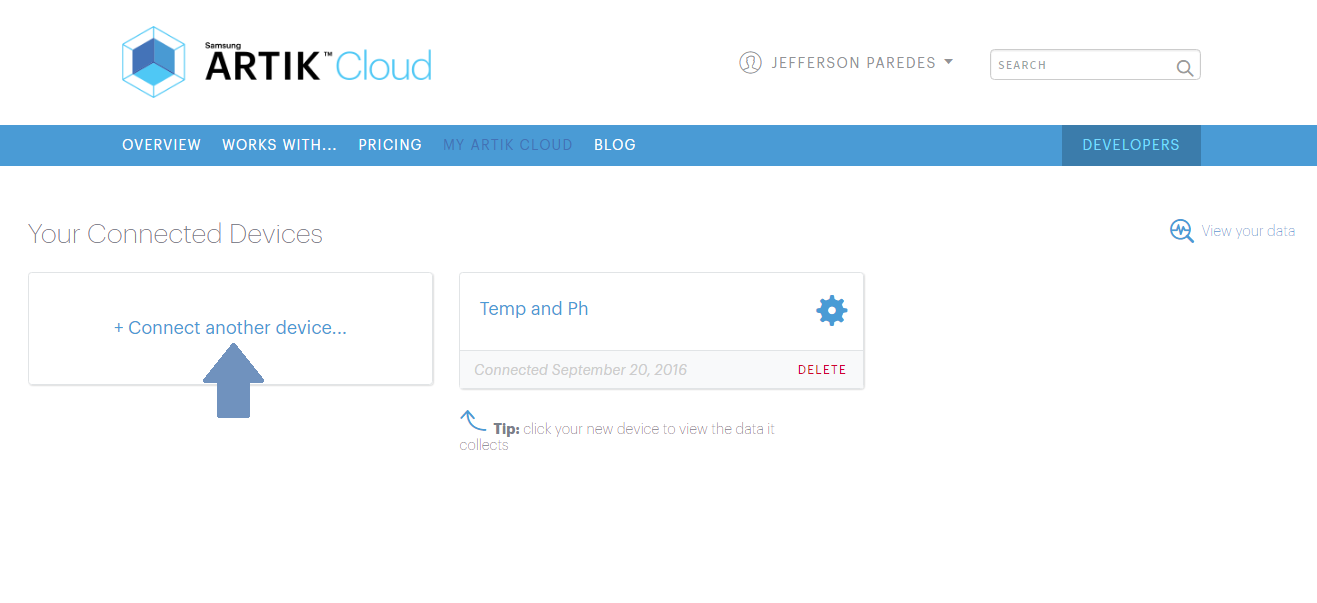
Click your new device type created earlier then click connect device.
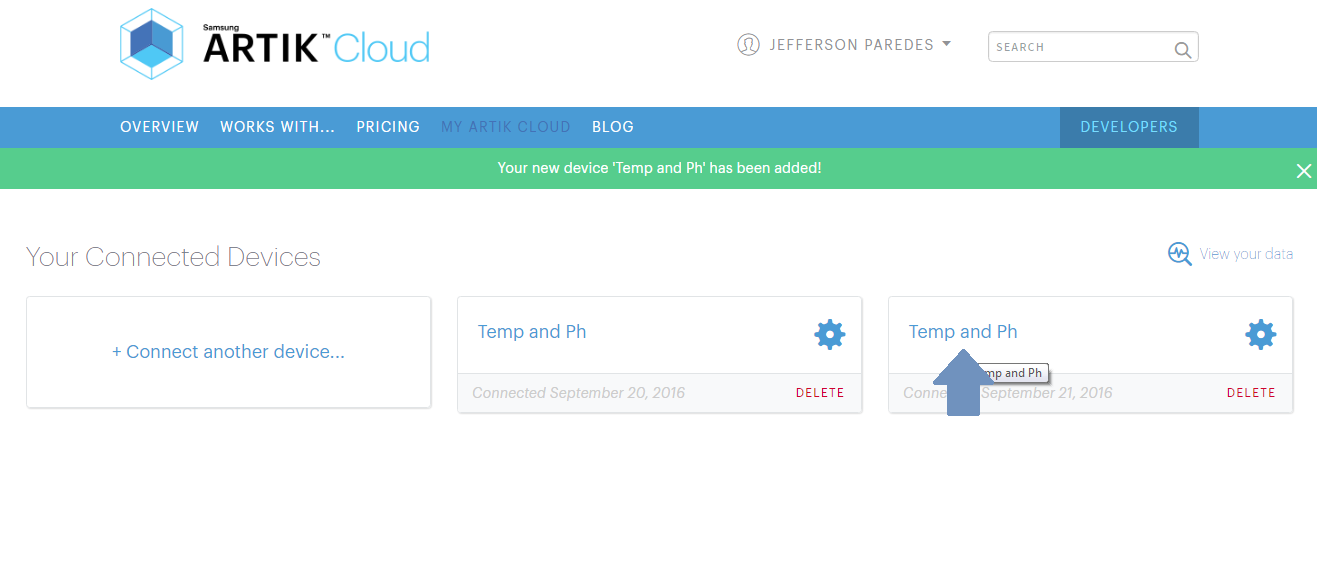
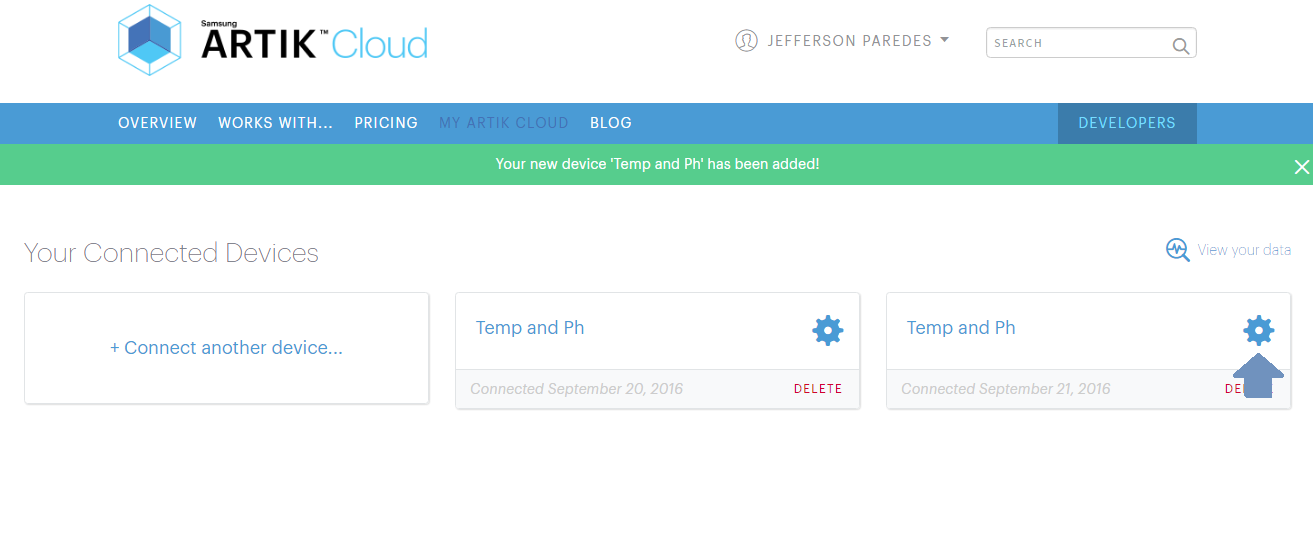
Click your connected device settings.
Take note of these info as you will needed it on the program.
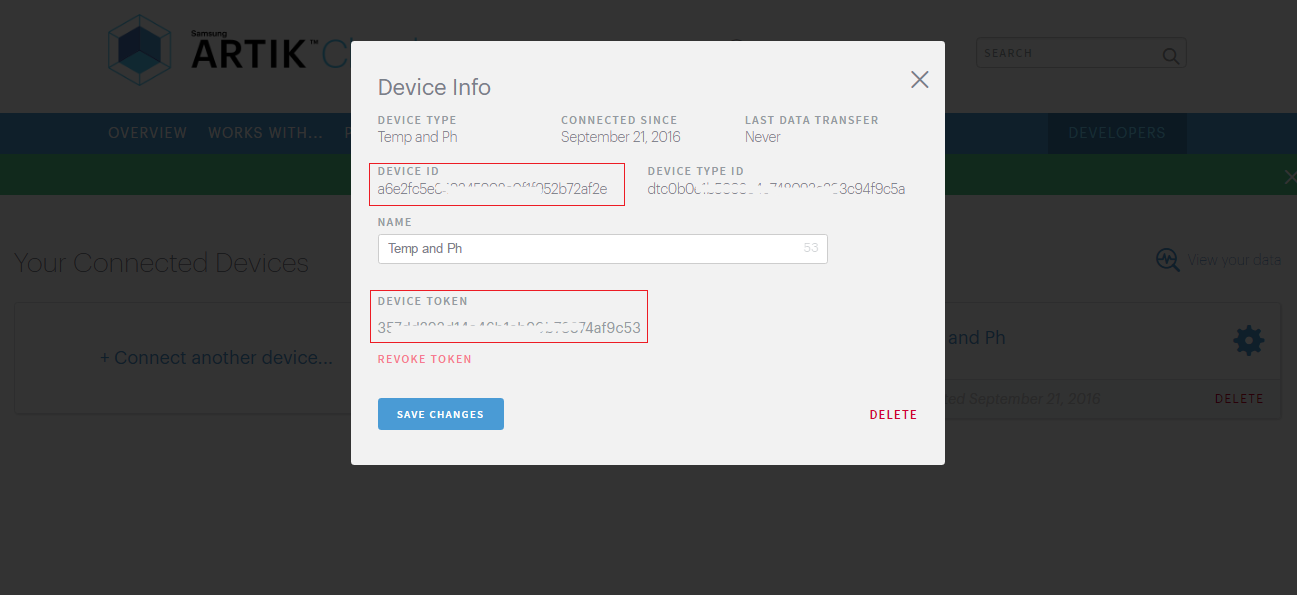
Now navigate to your connected device
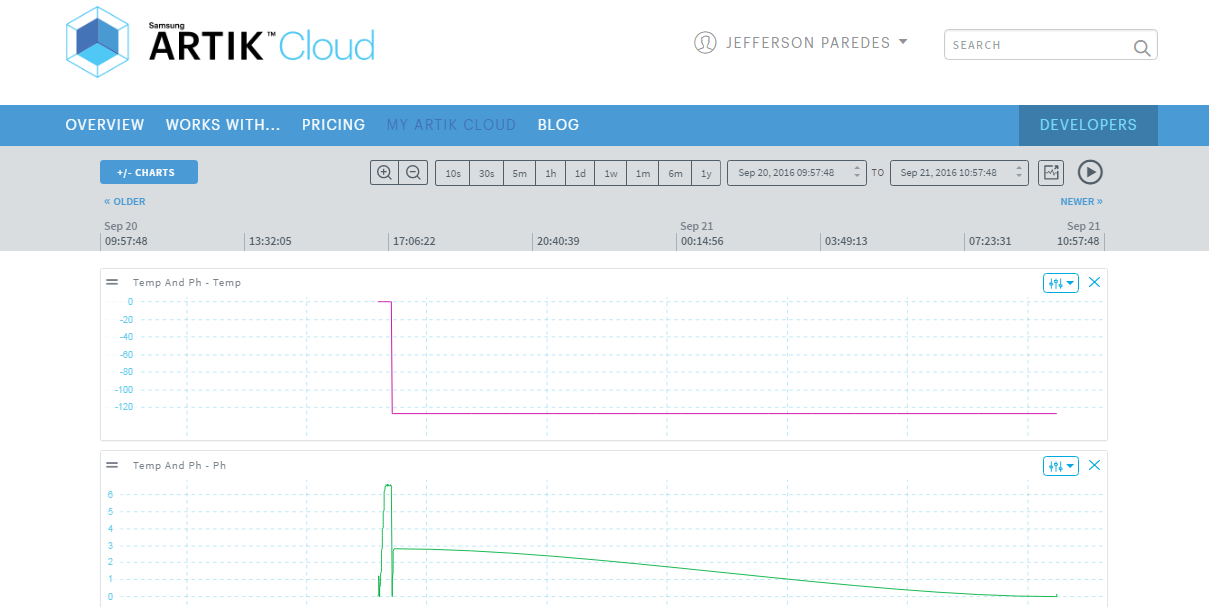
Done for ARTIK Cloud setup. Once your hardware is up, the chart will have data.
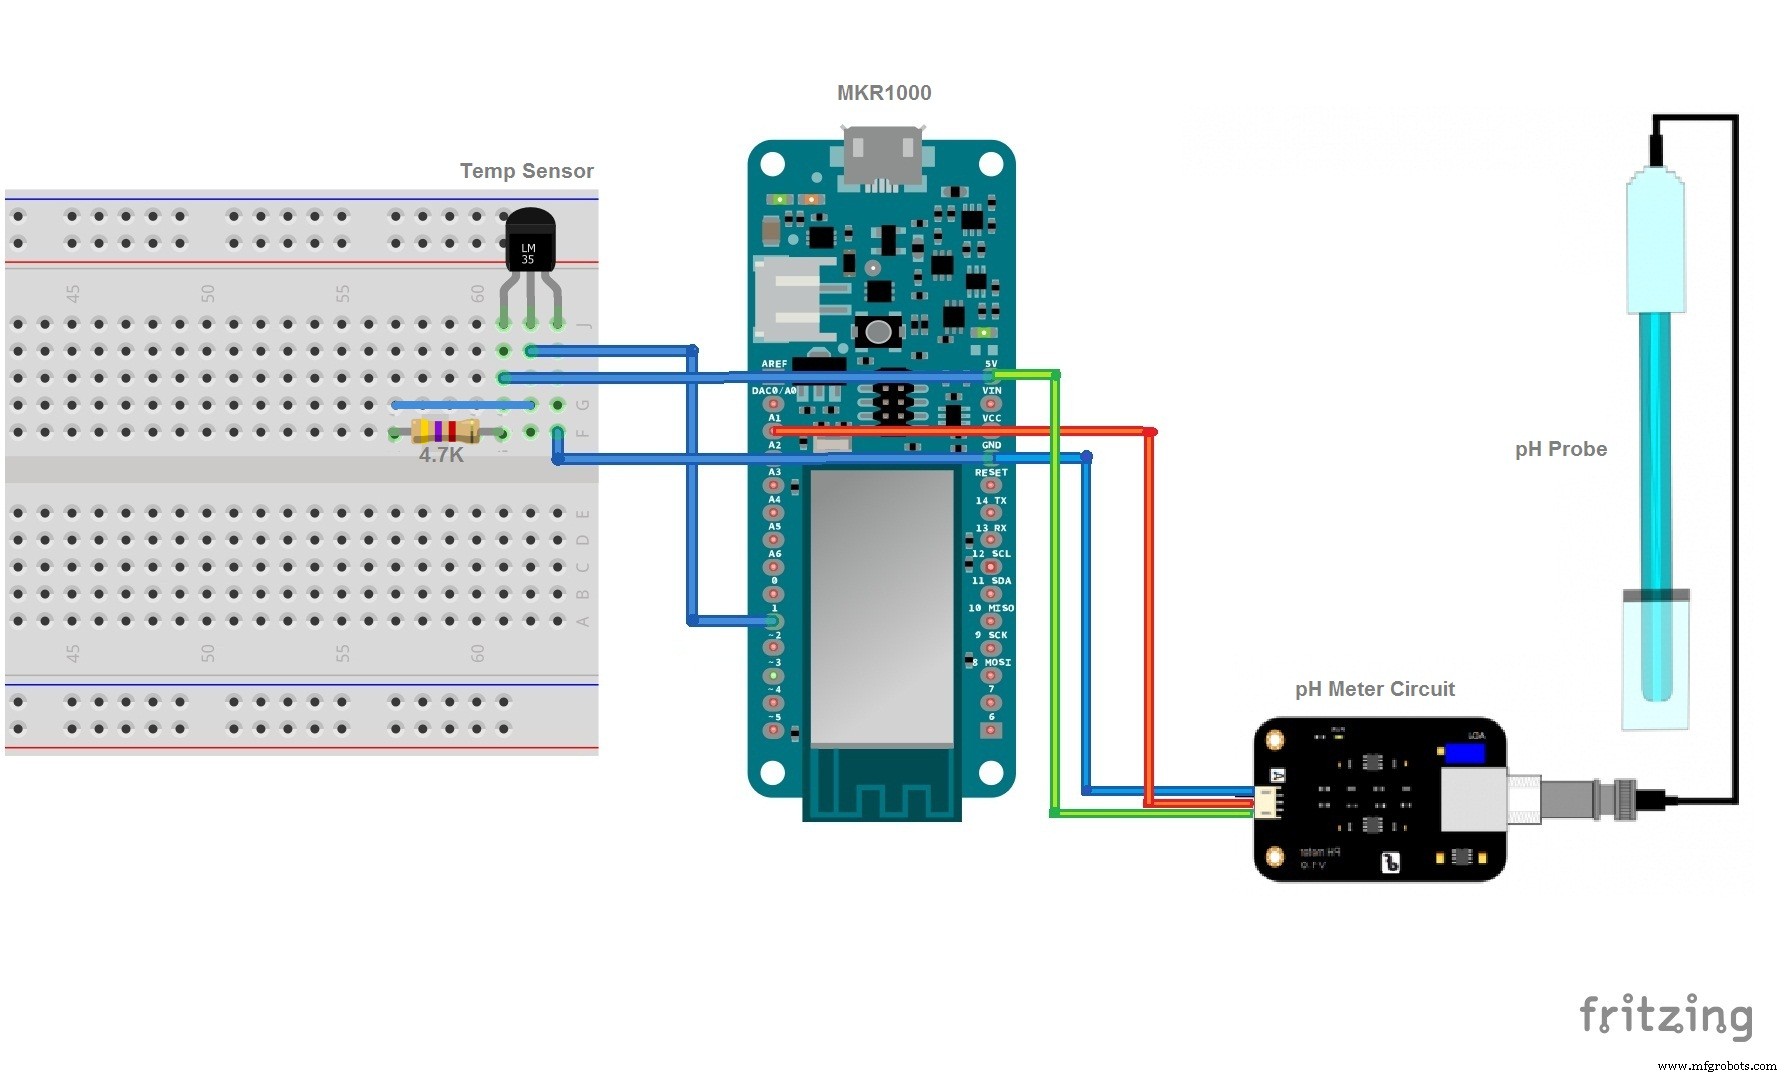
Here's the diagram:
- Temp GND to MRK1000 GND
- Temp OUT to MKR1000 Digital pin 1
- Temp VCC to MKR1000 5V
- Connect a 4.7K resistor to Temp VCC and Temp OUT
- pH GND to MRK1000 GND
- pH OUT to MKR1000 Analog pin 1
- pH VCC to MKR1000 5V
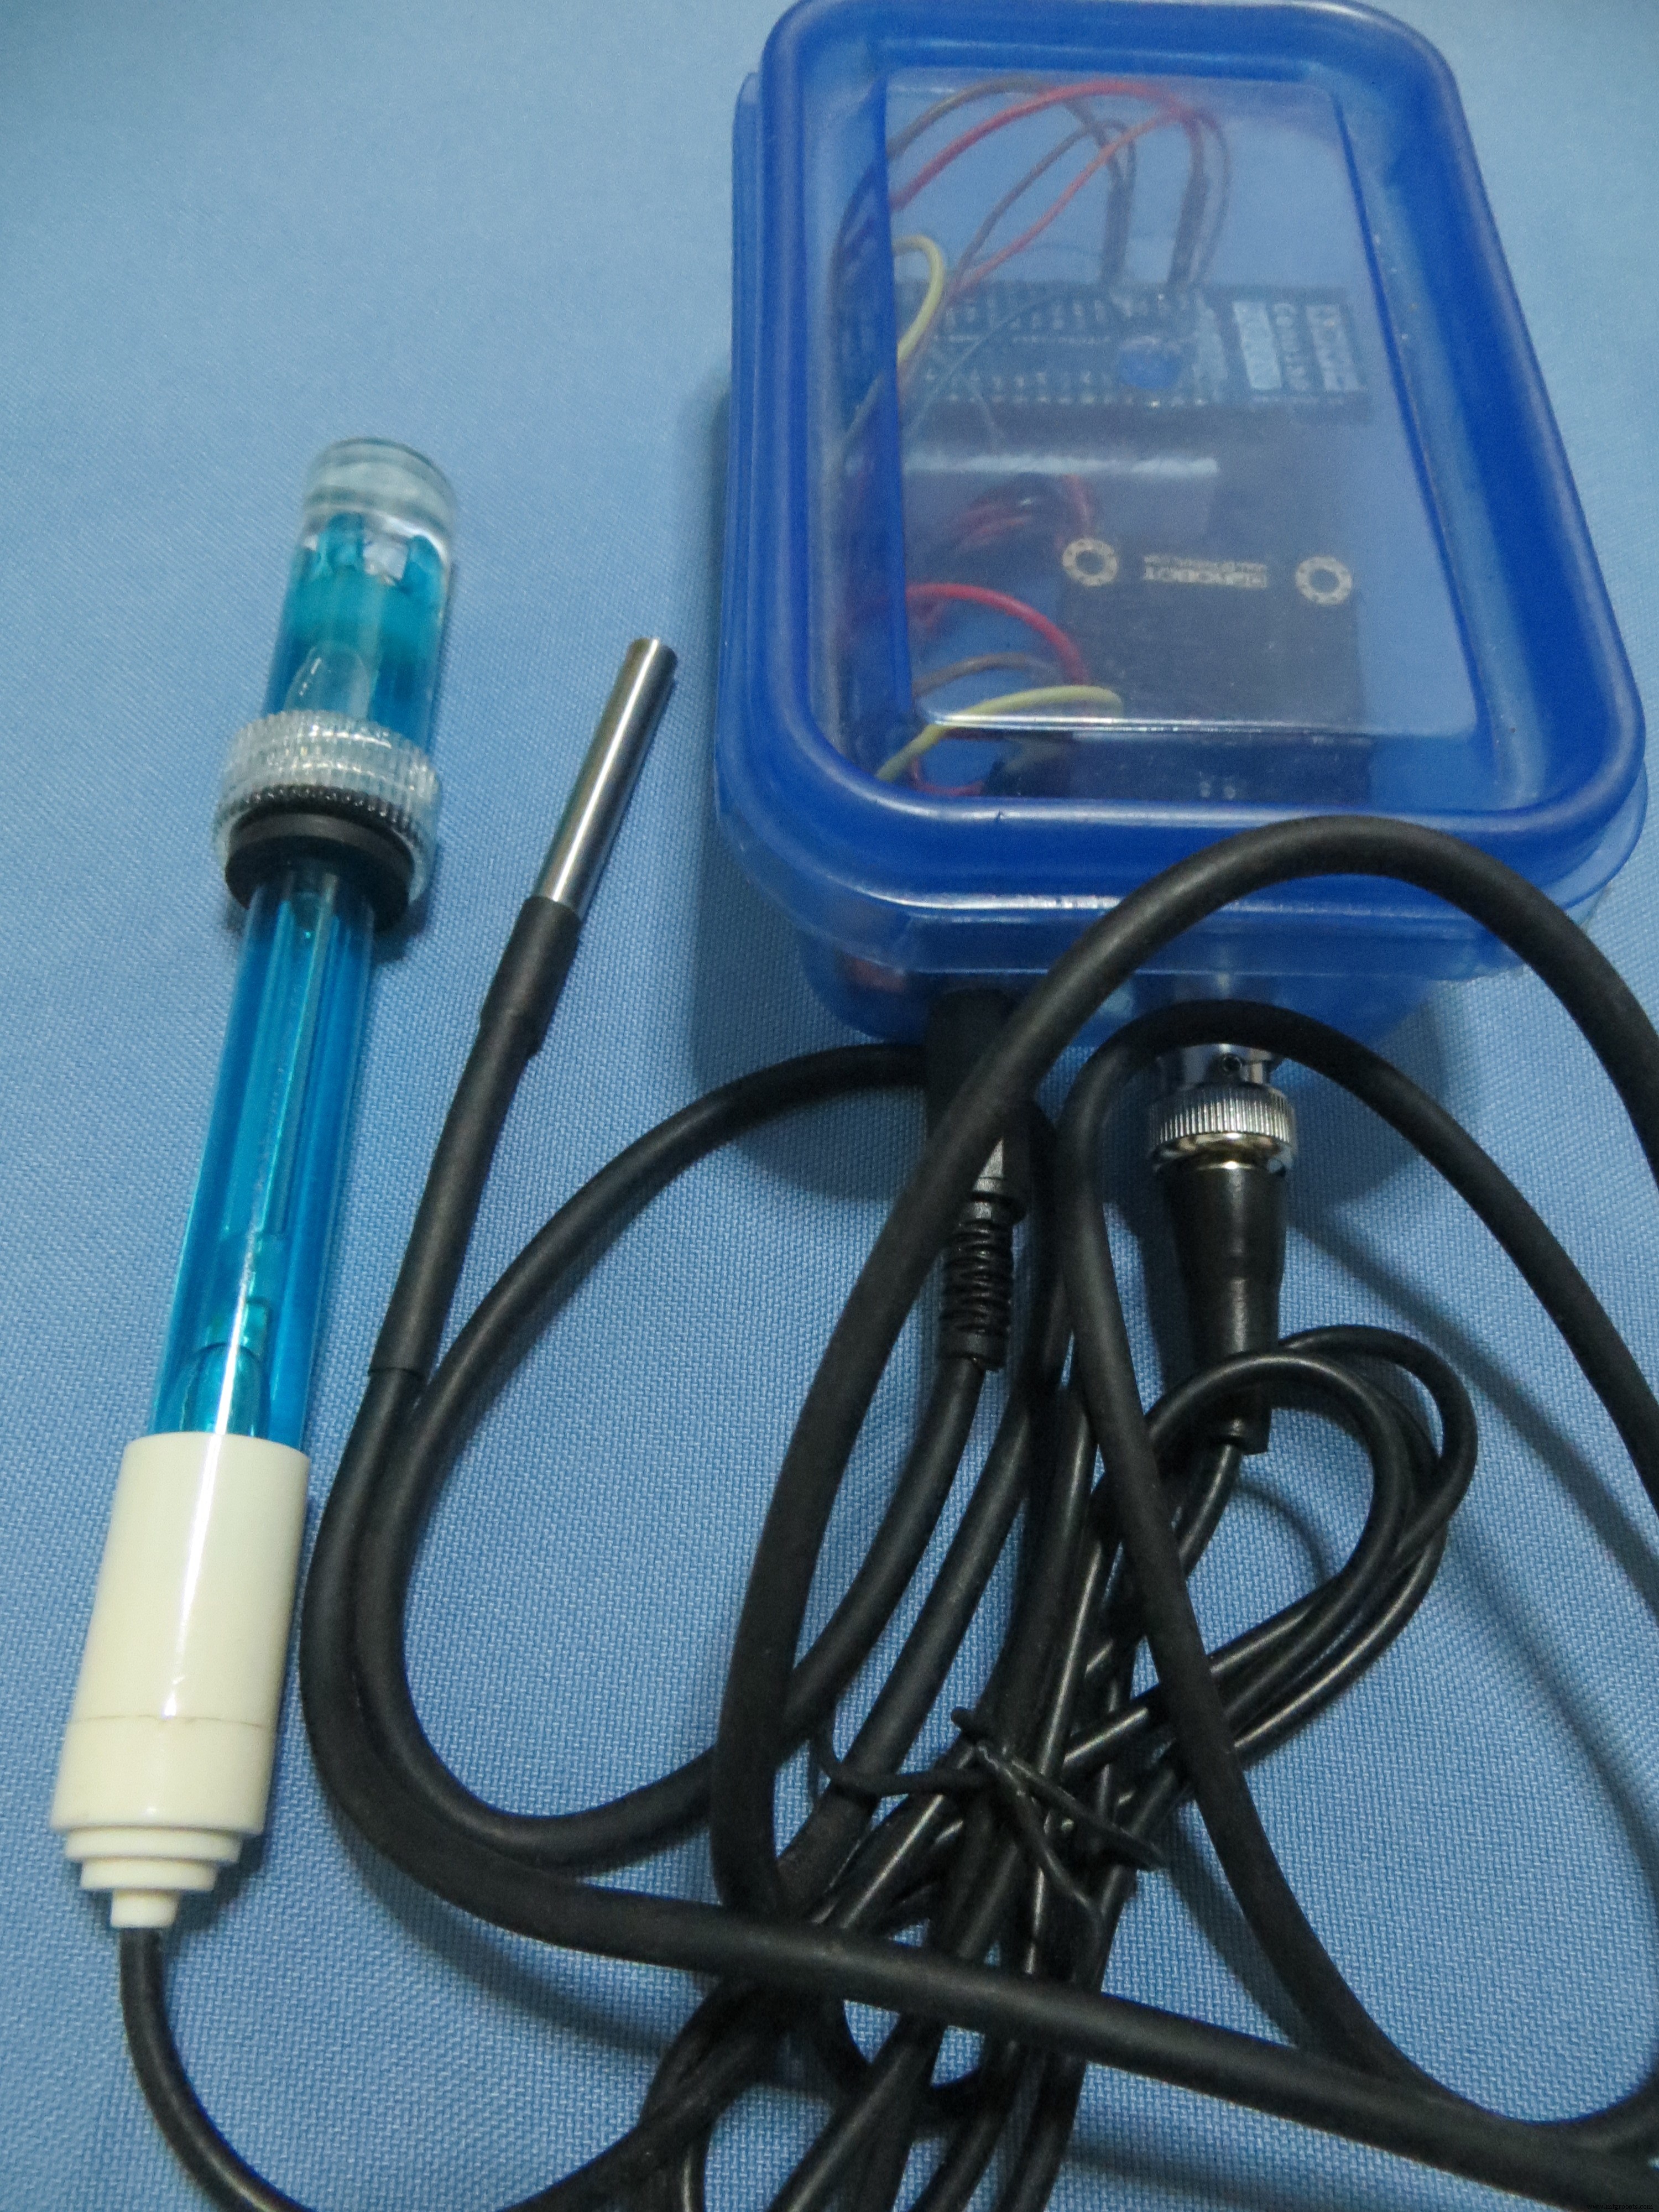
Here's my sample wiring

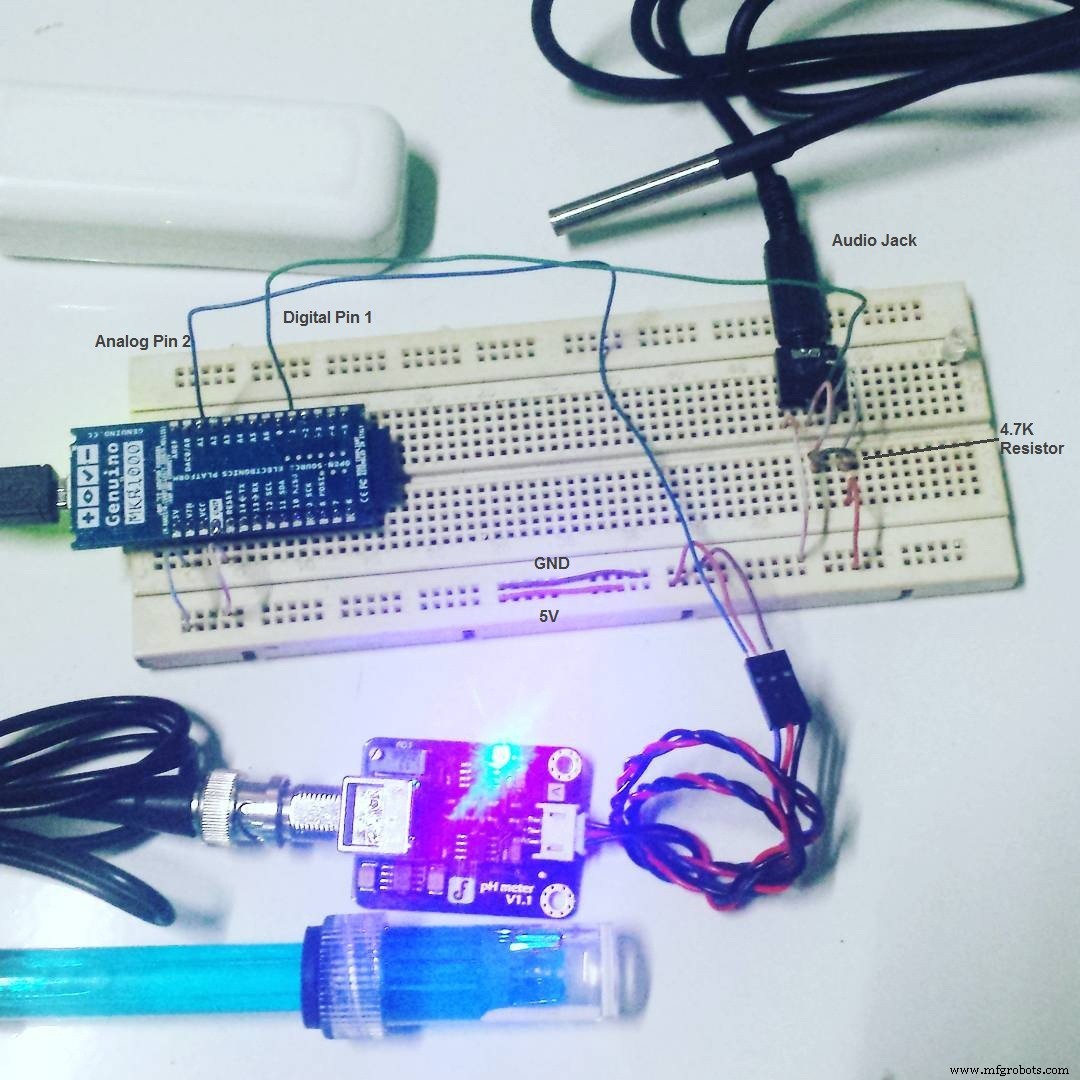
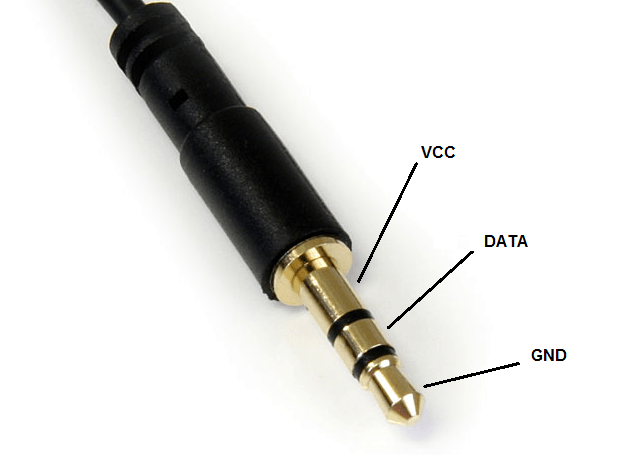
If you noticed we added an Audio Jack for easy detaching of temperature sensor. But this is optional.
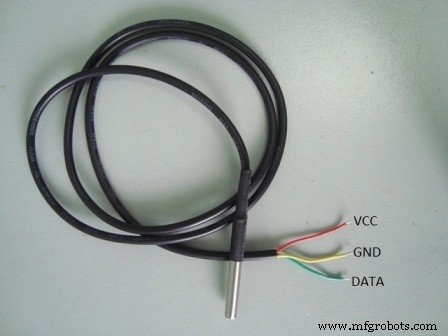
Here's the connection of temperature sensor to the jack.
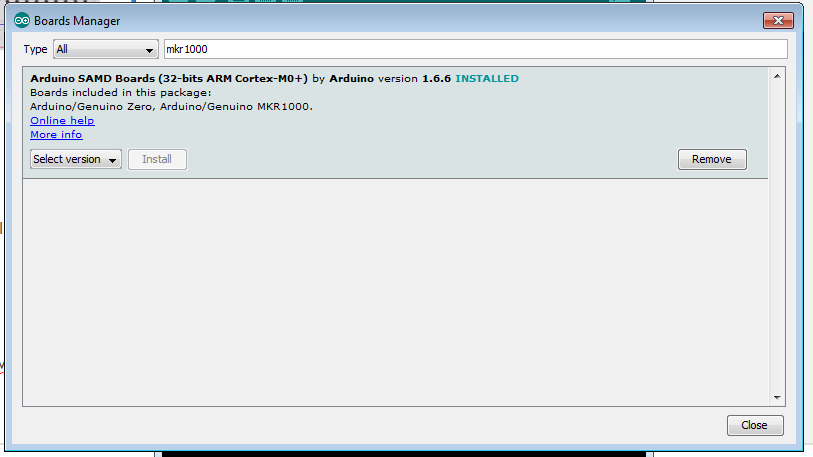
Go to Arduino IDE and add the MKR1000 board.

Search mkr1000 and click install
Add required library
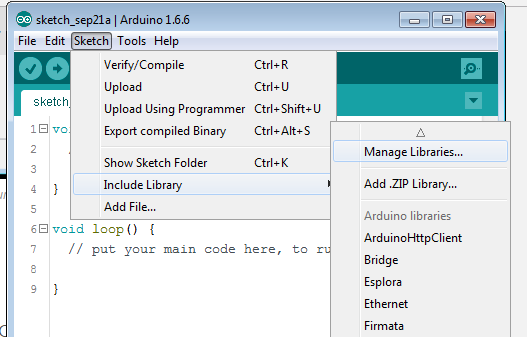
Search for libraries to install:
- ArduinoJson - we'll be using this to send JSON data to ARTIK Cloud
- ArduinoHttpClient - host for connecting to API
- OneWire - needed to read digital input from Temperature sensor
- DallasTemperature - Dallas Temperature sensor required library
Finish adding required software!
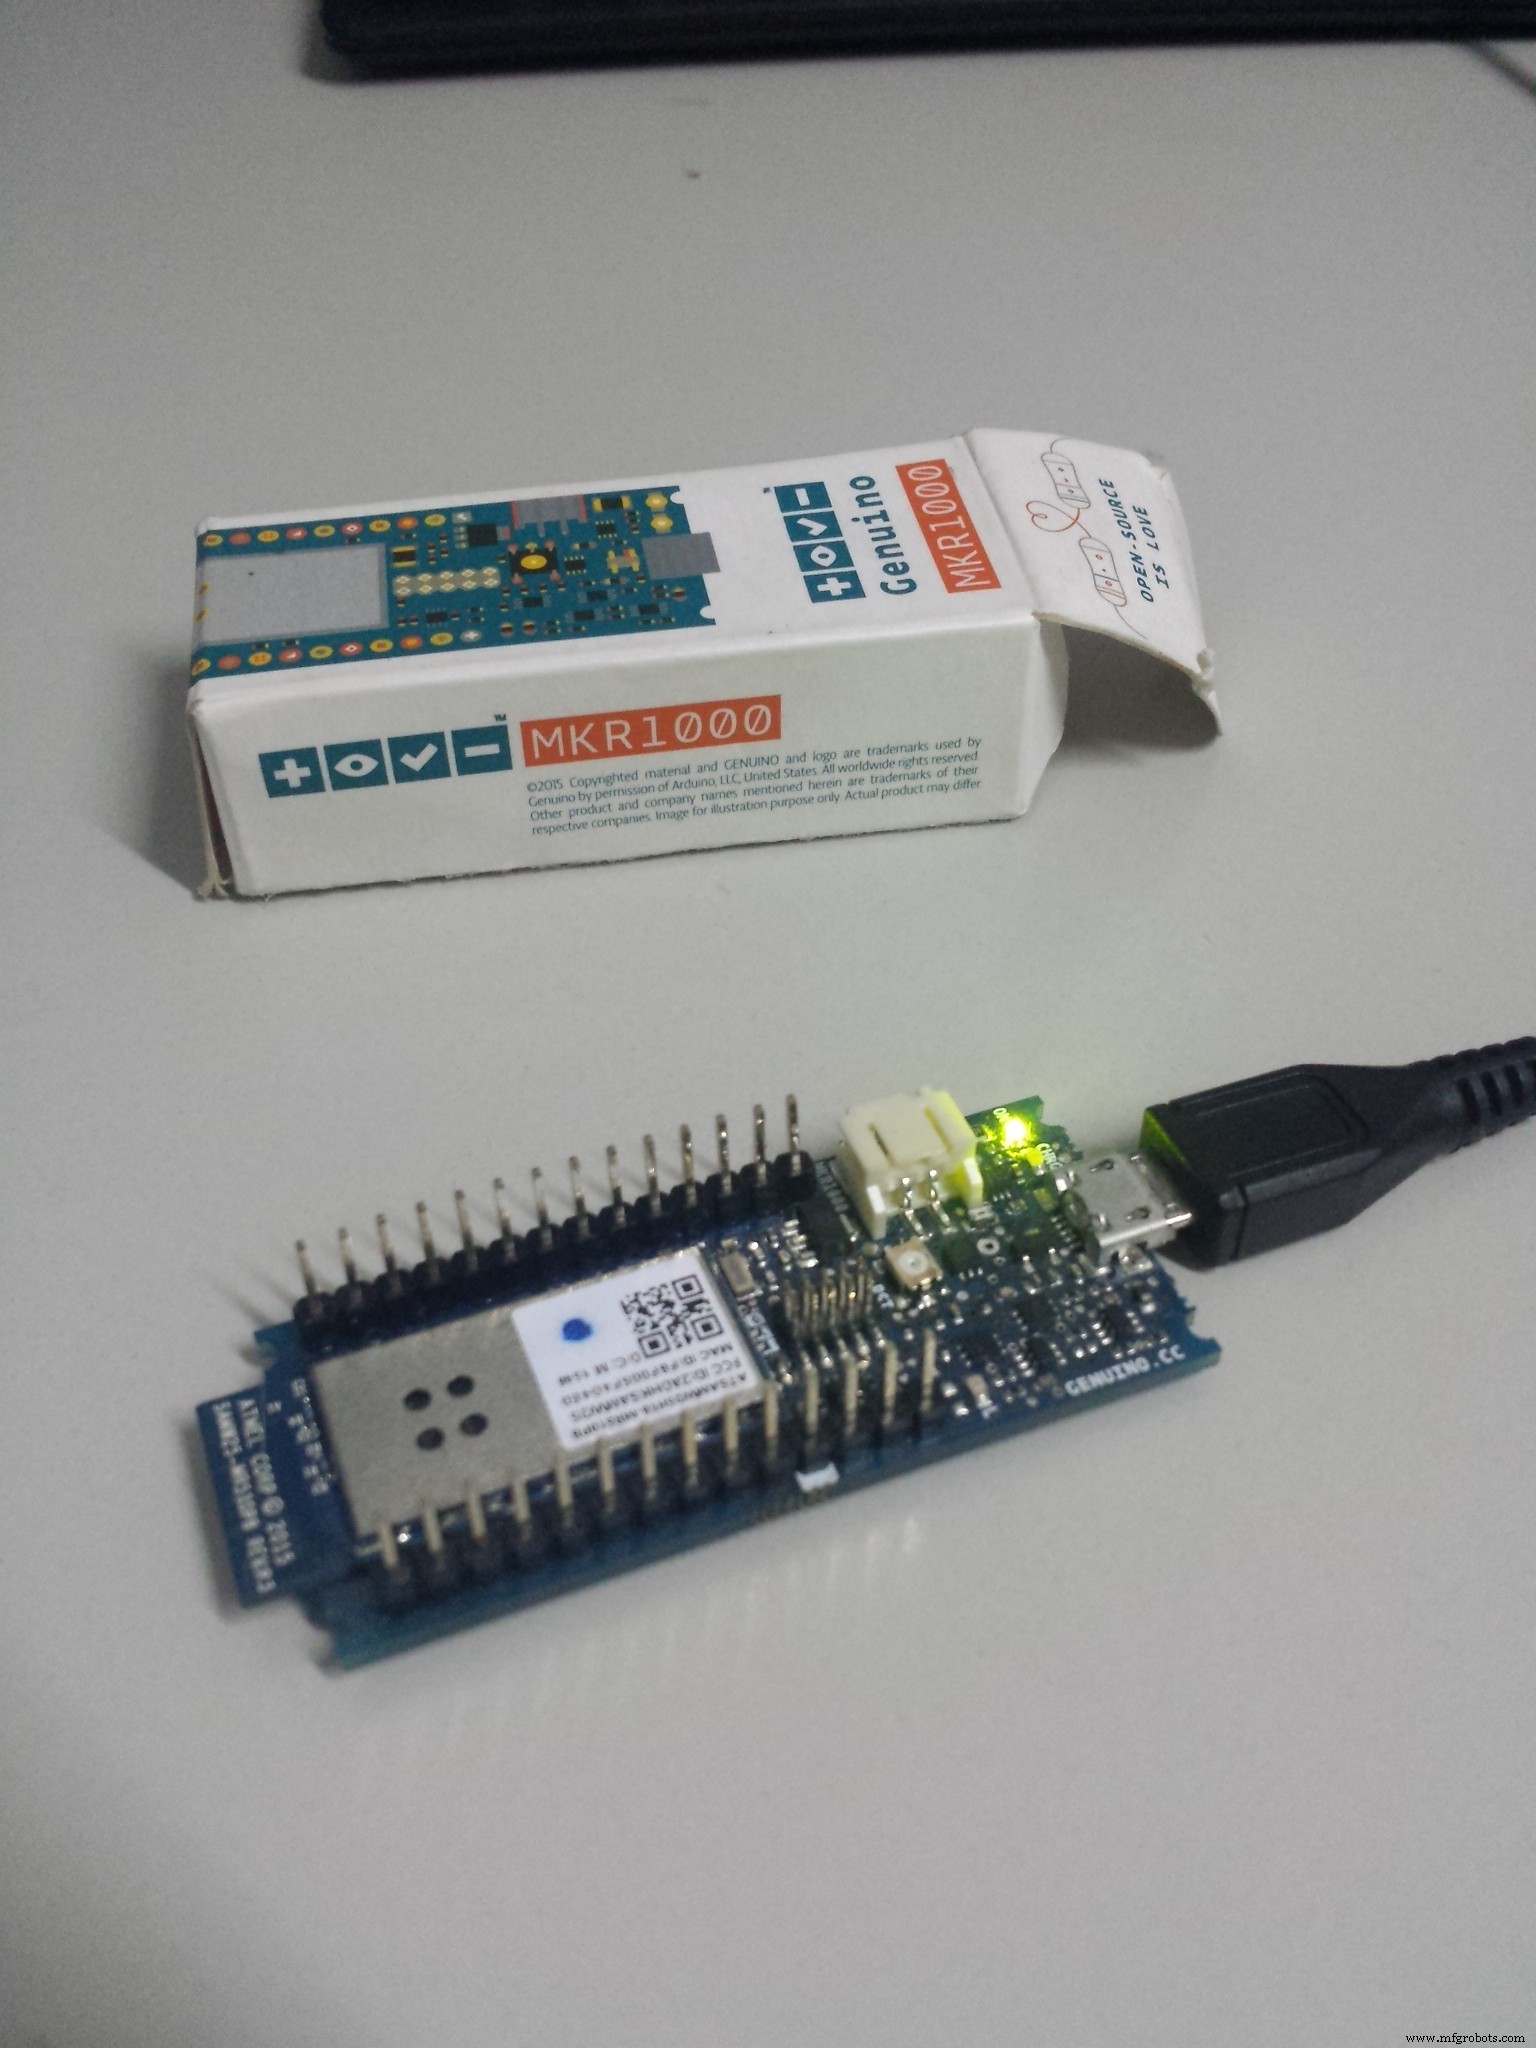
Step 3. Upload the programNow plug the MKR1000 to your PC/Laptop.
Download the software on GitHub here
Change the following info:
Then Upload the Software Code to MKR1000 and start monitoring.
Note: Your WiFi must have internet connection.

We have tested the hardware sensor to Private, Public and School Swimming Pool. Collecting the data from these respondents' pool enabled us to analyze the capability of the hardware.
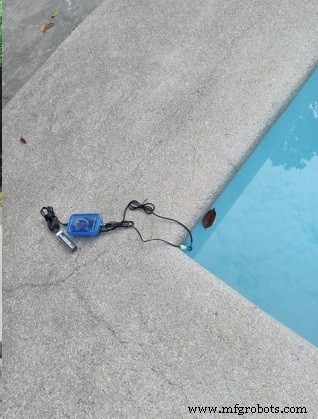
You can place the MKR1000 and sensor on a box and put it on your swimming pool away from water contamination. By doing this, you can monitor the quality of your water and normalize them by placing the desired chemicals.
Soon we will upload the tutorial on how to put all the circuits inside this box and the actual footage of testing.
V. ResultsHope this tutorial helps people to build their own DIY swimming pool water quality monitoring device. May there will be an increased awareness regarding the continuous degradation of the swimming pool water quality as people tend to focus more on the amenities that are offered instead of checking how safe they are. They also intend to contribute to the community by being able to provide a means to make water quality testing more efficient and effective without the unnecessary sacrifice of resources.
Happy building! :)
Code
- Arduino MKR1000 Codes
Arduino MKR1000 CodesC/C++
Upload this codes to your Arduino MKR1000Visit this on GitHub > https://github.com/imjeffparedes/iot-water-quality-artik
/********************
Here's my Code for Water Quality Device Monitoring published in
https://www.hackster.io/animo/water-quality-moniroting-840fea
********************/
#include <WiFi101.h>
#include <WiFiClient.h>
#include <ArduinoJson.h>
#include <ArduinoHttpClient.h>
#include <SPI.h>
#include <OneWire.h>
#include <DallasTemperature.h>
/**Temperature Sensor Initialization**/
#define ONE_WIRE_BUS 1 // Data wire is plugged into digital port 1 of Arduino
OneWire oneWire(ONE_WIRE_BUS); // Setup a oneWire instance to communicate with any OneWire
//devices (not just Maxim/Dallas temperature ICs)
DallasTemperature sensors(&oneWire); // Pass our oneWire reference to Dallas Temperature.
/** ARTIK Cloud REST Initialization **/
char server[] = "api.artik.cloud"; // Samsung ARTIK Cloud API Host
int port = 443; // 443 for HTTPS
char buf[200]; // body data to store the JSON to be sent to the ARTIK cloud
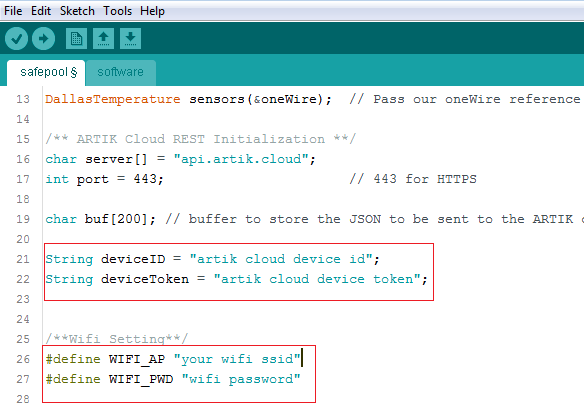
String deviceID = "artik cloud device id"; // put your device id here created from tutorial
String deviceToken = "artik cloud device token"; // put your device token here created from tutorial
/**pH meter initialization**/
#define SensorPin A1 // pH meter Analog output to Arduino Analog Input 1
#define Offset 0.00 // deviation compensate
#define samplingInterval 20
#define ArrayLenth 40 // times of collection
int pHArray[ArrayLenth]; // Store the average value of the sensor feedback
int pHArrayIndex=0;
int status = -1;
int millis_start;
/**Wifi Setting**/
#define WIFI_AP "your wifi ssid"
#define WIFI_PWD "wifi password"
WiFiSSLClient wifi;
HttpClient client = HttpClient(wifi, server, port);
void setup(void) {
millis_start = millis();
Serial.begin(9600);
startWifi(); //start connecting to wifi
}
void loop(void) {
/*Aquiring current temperature*/
float celsius = 0;
sensors.requestTemperatures(); // Send the command to get temperatures
celsius = sensors.getTempCByIndex(0);
sensors.requestTemperatures(); // Send the command to get temperatures
celsius = sensors.getTempCByIndex(0);
/*Aquiring current pH value*/
static unsigned long samplingTime = millis();
static unsigned long printTime = millis();
static float pHValue,voltage;
if(millis()-samplingTime > samplingInterval)
{
pHArray[pHArrayIndex++]=analogRead(SensorPin);
if(pHArrayIndex==ArrayLenth)pHArrayIndex=0;
voltage = avergearray(pHArray, ArrayLenth)*5.0/1024;
pHValue = 3.5*voltage+Offset;
samplingTime=millis();
}
Serial.println("===========================================");
Serial.println("We will send these json data");
//print to json format
Serial.println("data: { ");
Serial.print("ph: ");
Serial.print(pHValue);
Serial.print(" , temp: ");
Serial.print(celsius);
Serial.println("} ");
Serial.println("");
Serial.println("Start sending data");
String contentType = "application/json";
String AuthorizationData = "Bearer " + deviceToken; //Device Token
int len = loadBuffer(celsius,pHValue);
Serial.println("Sending temp: "+String(celsius) +" and ph: "+String(pHValue) );
Serial.println("Send POST to ARTIK Cloud API");
client.beginRequest();
client.post("/v1.1/messages"); //, contentType, buf
client.sendHeader("Authorization", AuthorizationData);
client.sendHeader("Content-Type", "application/json");
client.sendHeader("Content-Length", len);
client.endRequest();
client.print(buf);
// print response from api
int statusCode = client.responseStatusCode();
String response = client.responseBody();
Serial.println("");
Serial.print("Status code: ");
Serial.println(statusCode);
Serial.print("Response: ");
Serial.println(response);
delay(1000); // delay of update
}
/*Init Connection to Wifi*/
void startWifi(){
Serial.println("Connecting MKR1000 to network...");
// WiFi.begin();
// attempt to connect to Wifi network:
while ( status != WL_CONNECTED ) {
Serial.print("Attempting to connect to WPA SSID: ");
Serial.println(WIFI_AP);
WiFi.begin(WIFI_AP, WIFI_PWD);
// wait 10 seconds for connection:
delay(10000);
status = WiFi.status();
}
}
/*DfRobot pH Meter Source*/
double avergearray(int* arr, int number){
int i;
int max,min;
double avg;
long amount=0;
if(number<=0){
Serial.println("Error number for the array to avraging!/n");
return 0;
}
if(number<5){ //less than 5, calculated directly statistics
for(i=0;i<number;i++){
amount+=arr[i];
}
avg = amount/number;
return avg;
}else{
if(arr[0]<arr[1]){
min = arr[0];max=arr[1];
}
else{
min=arr[1];max=arr[0];
}
for(i=2;i<number;i++){
if(arr[i]<min){
amount+=min; //arr<min
min=arr[i];
}else {
if(arr[i]>max){
amount+=max; //arr>max
max=arr[i];
}else{
amount+=arr[i]; //min<=arr<=max
}
}//if
}//for
avg = (double)amount/(number-2);
}//if
return avg;
}
/*Buffer to send on REST*/
int loadBuffer(float temp, float ph ) {
StaticJsonBuffer<200> jsonBuffer; // reserve spot in memory
JsonObject& root = jsonBuffer.createObject(); // create root objects
root["sdid"] = deviceID;
root["type"] = "message";
JsonObject& dataPair = root.createNestedObject("data"); // create nested objects
dataPair["temp"] = temp;
dataPair["ph"] = ph;
root.printTo(buf, sizeof(buf)); // JSON-print to buffer
return (root.measureLength()); // also return length
}
Schematics
Breadboard connection of MKR1000 and sensors
Manufacturing process
- Expanding Cloud Horizons: New Zones, Containers, and Multicloud Strategies
- Mastering Cloud Application Monitoring: Insights for IT Leaders
- Why Cloud Linux Boosts Security, Stability, and Performance in Shared Hosting
- Home Energy Centre: Monitoring Solar PV, Thermal Panels, and Room Temperatures with Raspberry Pi and Moteino
- Smart Indoor Air Quality & Waste Monitoring System
- Control Your TV with Alexa via Arduino IoT Cloud – Step‑by‑Step Guide
- Real‑Time Swimming Pool Monitoring with Arduino MKR1000 & Samsung ARTIK Cloud
- WaterPi: Intelligent Remote Watering & Monitoring for Houseplants
- Real‑Time Water Quality Monitoring System with Arduino & GPRS/GPS
- Master Cloud Monitoring: Unlock Performance, Reliability, and Proactive Insights