


Accurate Temperature, Pressure, and Altitude Measurement with BMP280 and Arduino UNO
Components and supplies
 |
| × | 1 | |||
| × | 1 | ||||
| × | 1 |
About this project
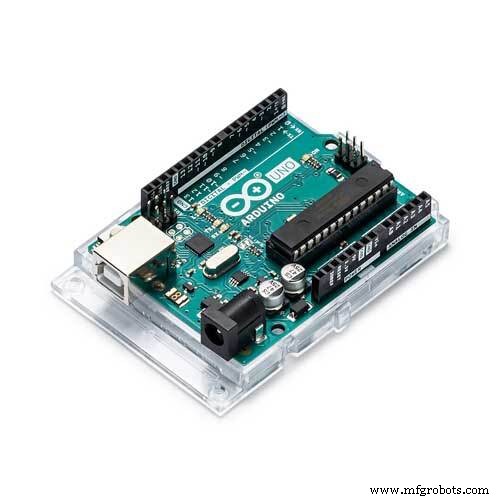
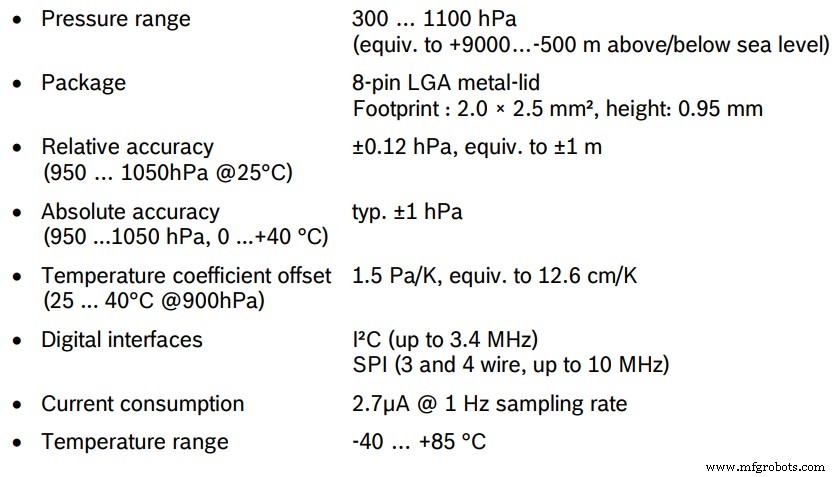
Hello, and welcome to this tutorial where I use the BMP280 to measure temperature, pressure and also altitude, with the help of an Arduino UNO board and an OLED display. Here are some of the BMP280 key parameters from its datasheet:
So for this project, we gonne use the module to measure all these stuff in both metric and imperial systems as usual, I’m not quiet sure about the units but you can always convert them through the code, and here are the components we gonna use:
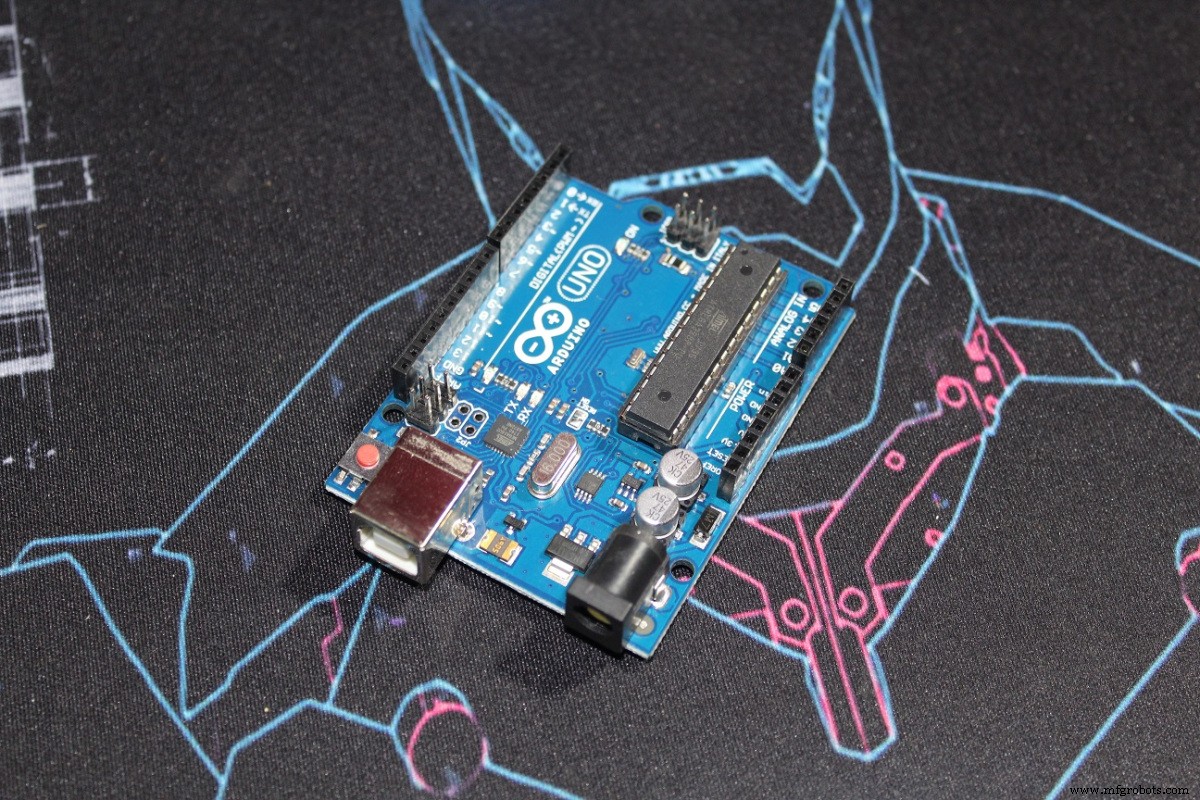

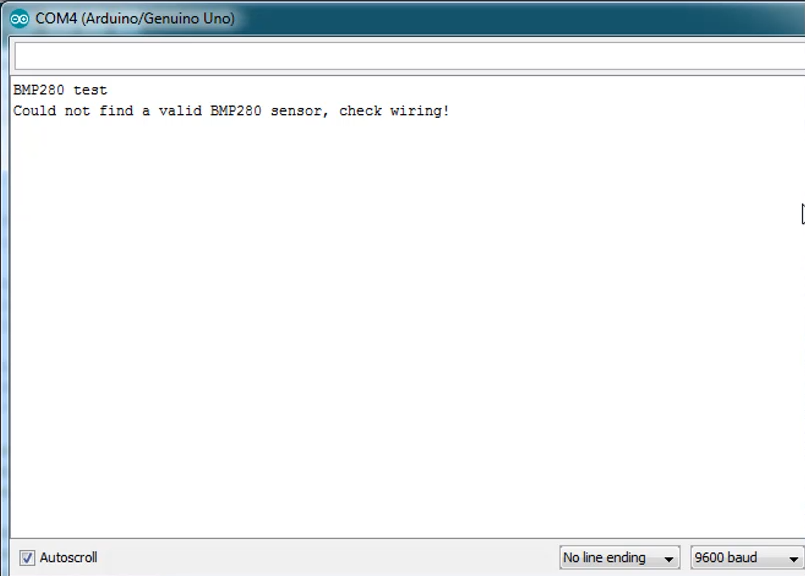
After wiring your module, it’s better to test the code from the library example its name is “BMP280test”, if your module isn’t detected like in the picture below:
You can run the i²c scanner code (But unplung any other i²c device like a LCD or OLED), and if your module is not broken, or doesn’t have a solder problem, you’ll see that the device is detected by the scanner:
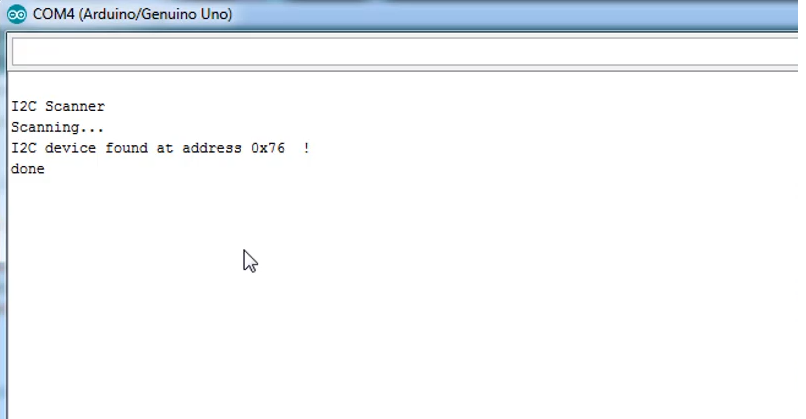
Now note that address and go to your library c++ file, library is usually installed in the “Documents/Arduino/Libraries”:
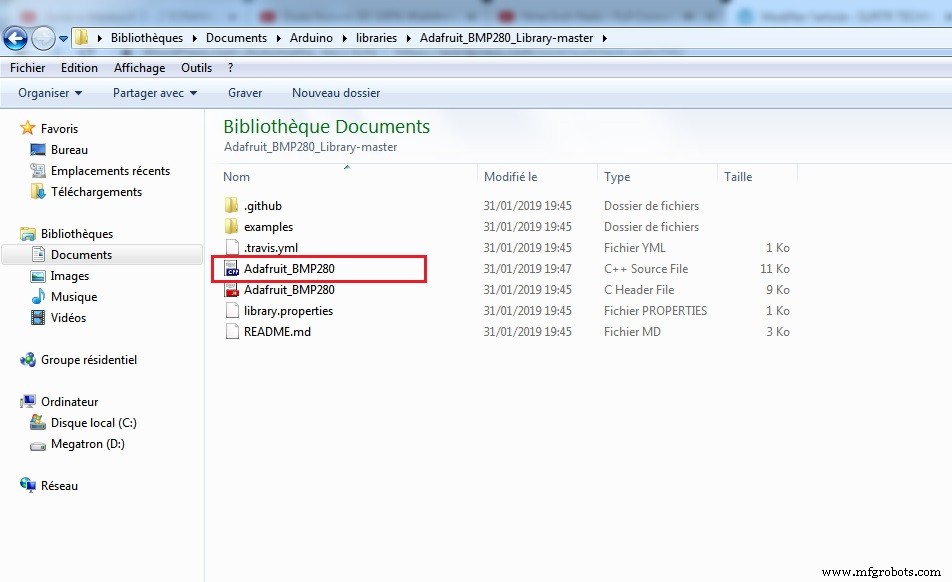
And open it with a proper editor, I’m using Dev c++
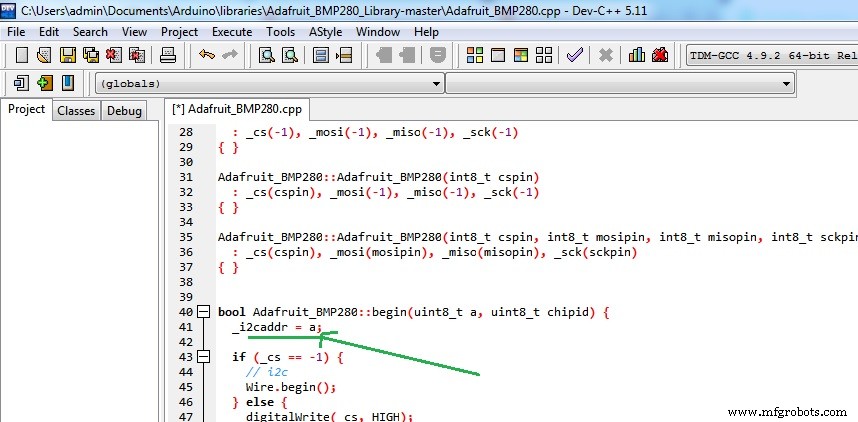
Then go to the line “41” and _i2caddr change the “a” with the address you found on the serial monitor:
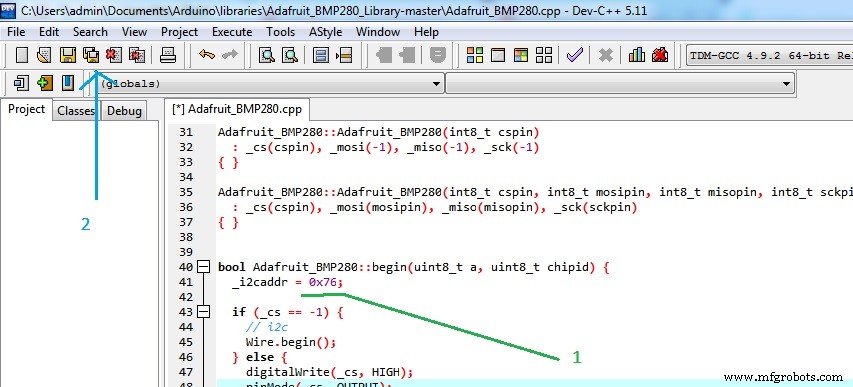
Save all and close, the library is meant to work with modules that have 0x77 as i²c address but the one I’m using has 0x76.
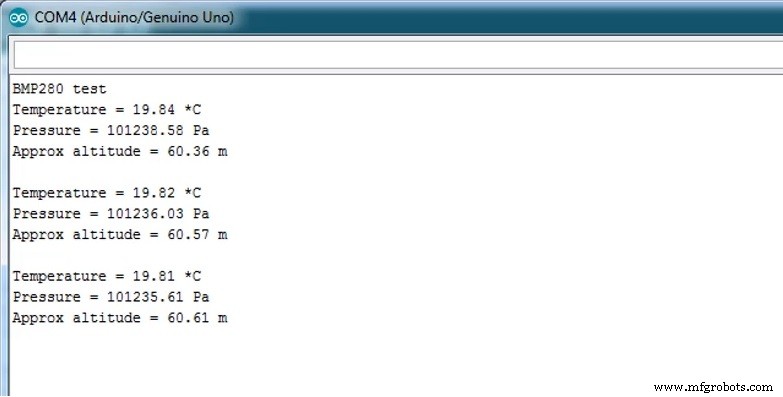
Run the test code again:
I hope it works for you, and if you have any problem leave it in a comment.
Code
- bmp280_Serial_metric.ino
- bmp280_Serial_Imperial.ino
- bmp280_OLED_m.ino
- bmp280_OLED_US.ino
bmp280_Serial_metric.inoArduino
/* This code is to use with Adafruit BMP280           (Metric)
 * It measures both temperature and pressure and it displays them on the Serial monitor with the altitude
 * It's a modified version of the Adafruit example code
 * Refer to www.surtrtech.com or SurtrTech Youtube channel
 */

#include <Adafruit_BMP280.h>

Adafruit_BMP280 bmp; // I2C Interface

void setup() {
  Serial.begin(9600);
  Serial.println(F("BMP280 test"));

  if (!bmp.begin()) {
    Serial.println(F("Could not find a valid BMP280 sensor, check wiring!"));
    while (1);
  }

  /* Default settings from datasheet. */
  bmp.setSampling(Adafruit_BMP280::MODE_NORMAL,     /* Operating Mode. */
                  Adafruit_BMP280::SAMPLING_X2,     /* Temp. oversampling */
                  Adafruit_BMP280::SAMPLING_X16,    /* Pressure oversampling */
                  Adafruit_BMP280::FILTER_X16,      /* Filtering. */
                  Adafruit_BMP280::STANDBY_MS_500); /* Standby time. */
}

void loop() {
    Serial.print(F("Temperature = "));
    Serial.print(bmp.readTemperature());
    Serial.println(" *C");

    Serial.print(F("Pressure = "));
    Serial.print(bmp.readPressure()/100); //displaying the Pressure in hPa, you can change the unit
    Serial.println(" hPa");

    Serial.print(F("Approx altitude = "));
    Serial.print(bmp.readAltitude(1019.66)); //The "1019.66" is the pressure(hPa) at sea level in day in your region
    Serial.println(" m");                    //If you don't know it, modify it until you get your current altitude

    Serial.println();
    delay(2000);
}
bmp280_Serial_Imperial.inoArduino
/* This code is to use with Adafruit BMP280   (Imperial)
 * It measures both temperature and pressure and it displays them on the Serial monitor with the altitude
 * It's a modified version of the Adafruit example code
 * Refer to www.surtrtech.com or SurtrTech Youtube channel
 */

#include <Adafruit_BMP280.h>

Adafruit_BMP280 bmp; // I2C

void setup() {
  Serial.begin(9600);
  Serial.println(F("BMP280 test"));

  if (!bmp.begin()) {
    Serial.println(F("Could not find a valid BMP280 sensor, check wiring!"));
    while (1);
  }

  /* Default settings from datasheet. */
  bmp.setSampling(Adafruit_BMP280::MODE_NORMAL,     /* Operating Mode. */
                  Adafruit_BMP280::SAMPLING_X2,     /* Temp. oversampling */
                  Adafruit_BMP280::SAMPLING_X16,    /* Pressure oversampling */
                  Adafruit_BMP280::FILTER_X16,      /* Filtering. */
                  Adafruit_BMP280::STANDBY_MS_500); /* Standby time. */
}

void loop() {

    float f = bmp.readTemperature()*9/5 + 32 ; //Conversion from C to F
    Serial.print(F("Temperature = "));
    Serial.print(f);
    Serial.println(" *F");

    float P = bmp.readPressure()/3386.39;   //displaying the Pressure in inches of mercury, you can change the unit
    Serial.print(F("Pressure = "));
    Serial.print(P);
    Serial.println(" inHg");

    float A = bmp.readAltitude(1019.66)*3.28084;   //The "1019.66" is the pressure(hPa) at sea level in day in your region
    Serial.print(F("Approx altitude = "));        //If you don't know it, modify it until you get your current altitude
    Serial.print(A);
    Serial.println(" ft");

    Serial.println();
    delay(2000);
}
bmp280_OLED_m.inoArduino
/* This code is to use with Adafruit BMP280 and OLED screen (Metric)
* It measures both temperature and pressure and it displays them on the OLED display with the altitude
* It's a modified version of the Adafruit example code
* Refer to www.surtrtech.com or SurtrTech Youtube channel
*/
#include <Adafruit_GFX.h> //Libraries for the OLED and BMP280
#include <Adafruit_SSD1306.h>
#include <Adafruit_BMP280.h>
#define SCREEN_WIDTH 128 // OLED display width, in pixels
#define SCREEN_HEIGHT 32 // OLED display height, in pixels
#define OLED_RESET -1 // Reset pin # (or -1 if sharing Arduino reset pin)
Adafruit_SSD1306 display(SCREEN_WIDTH, SCREEN_HEIGHT, &Wire, OLED_RESET); //Declaring the display name (display)
Adafruit_BMP280 bmp;
void setup() {
bmp.begin(); //Start the bmp
display.begin(SSD1306_SWITCHCAPVCC, 0x3C); //Start the OLED display
display.clearDisplay();
display.display();
display.setTextColor(WHITE);
display.setTextSize(1);
display.print("SurtrTech"); //Show the name, you can remove it or replace it
display.setCursor(32,12);
display.setTextSize(2);
display.println("BMP280");
display.display();
delay(2000);
}
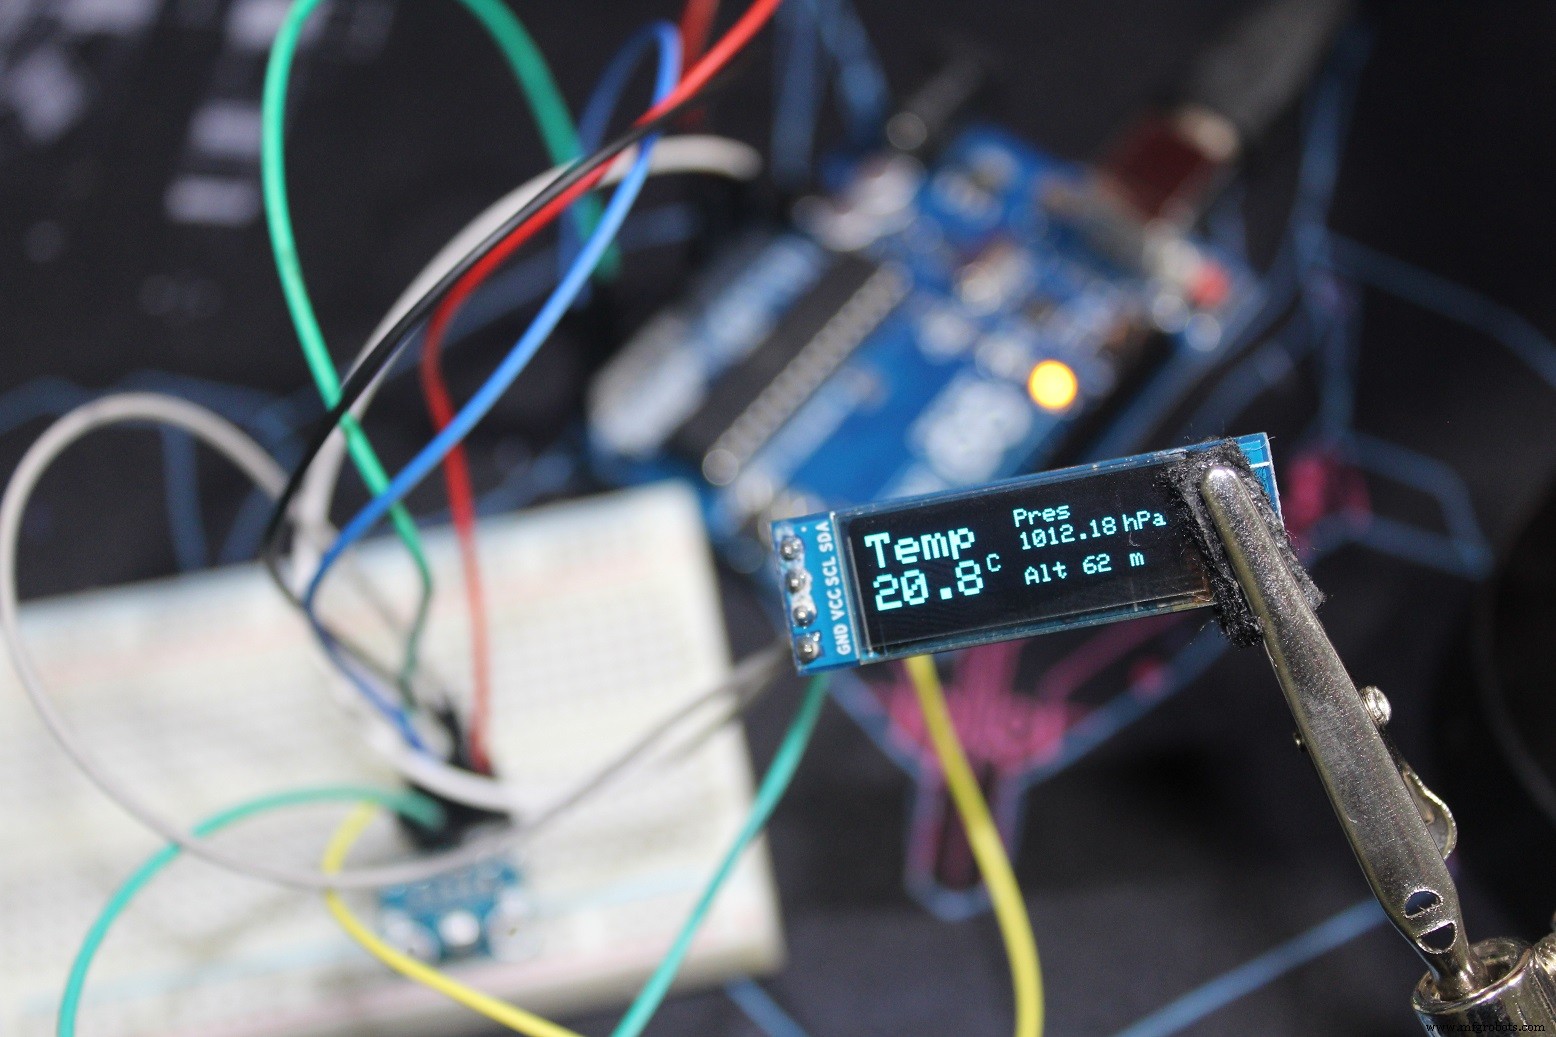
void loop() {
display.clearDisplay();
float T = bmp.readTemperature(); //Read temperature in C
float P = bmp.readPressure()/100; //Read Pressure in Pa and conversion to hPa
float A = bmp.readAltitude(1019.66); //Calculating the Altitude, the "1019.66" is the pressure in (hPa) at sea level at day in your region
//If you don't know it just modify it until you get the altitude of your place
display.setCursor(0,0); //Oled display, just playing with text size and cursor to get the display you want
display.setTextColor(WHITE);
display.setTextSize(2);
display.print("Temp");
display.setCursor(0,18);
display.print(T,1);
display.setCursor(50,17);
display.setTextSize(1);
display.print("C");
display.setTextSize(1);
display.setCursor(65,0);
display.print("Pres");
display.setCursor(65,10);
display.print(P);
display.setCursor(110,10);
display.print("hPa");
display.setCursor(65,25);
display.print("Alt");
display.setCursor(90,25);
display.print(A,0);
display.setCursor(110,25);
display.print("m");
display.display();
delay(2000);
}
bmp280_OLED_US.inoArduino
/* This code is to use with Adafruit BMP280 and OLED screen (Imperial)
* It measures both temperature and pressure and it displays them on the OLED display with the altitude
* It's a modified version of the Adafruit example code
* Refer to www.surtrtech.com or SurtrTech Youtube channel
*/
#include <Adafruit_GFX.h> //Libraries for the OLED and BMP280
#include <Adafruit_SSD1306.h>
#include <Adafruit_BMP280.h>
#define SCREEN_WIDTH 128 // OLED display width, in pixels
#define SCREEN_HEIGHT 32 // OLED display height, in pixels
#define OLED_RESET -1 // Reset pin # (or -1 if sharing Arduino reset pin)
Adafruit_SSD1306 display(SCREEN_WIDTH, SCREEN_HEIGHT, &Wire, OLED_RESET); //Declaring the display name (display)
Adafruit_BMP280 bmp;
void setup() {
bmp.begin(); //Start the bmp
display.begin(SSD1306_SWITCHCAPVCC, 0x3C); //Start the OLED display
display.clearDisplay();
display.display();
display.setTextColor(WHITE);
display.setTextSize(1);
display.print("SurtrTech"); //Show the name, you can remove it or replace it
display.setCursor(32,12);
display.setTextSize(2);
display.println("BMP280");
display.display();
delay(2000);
}
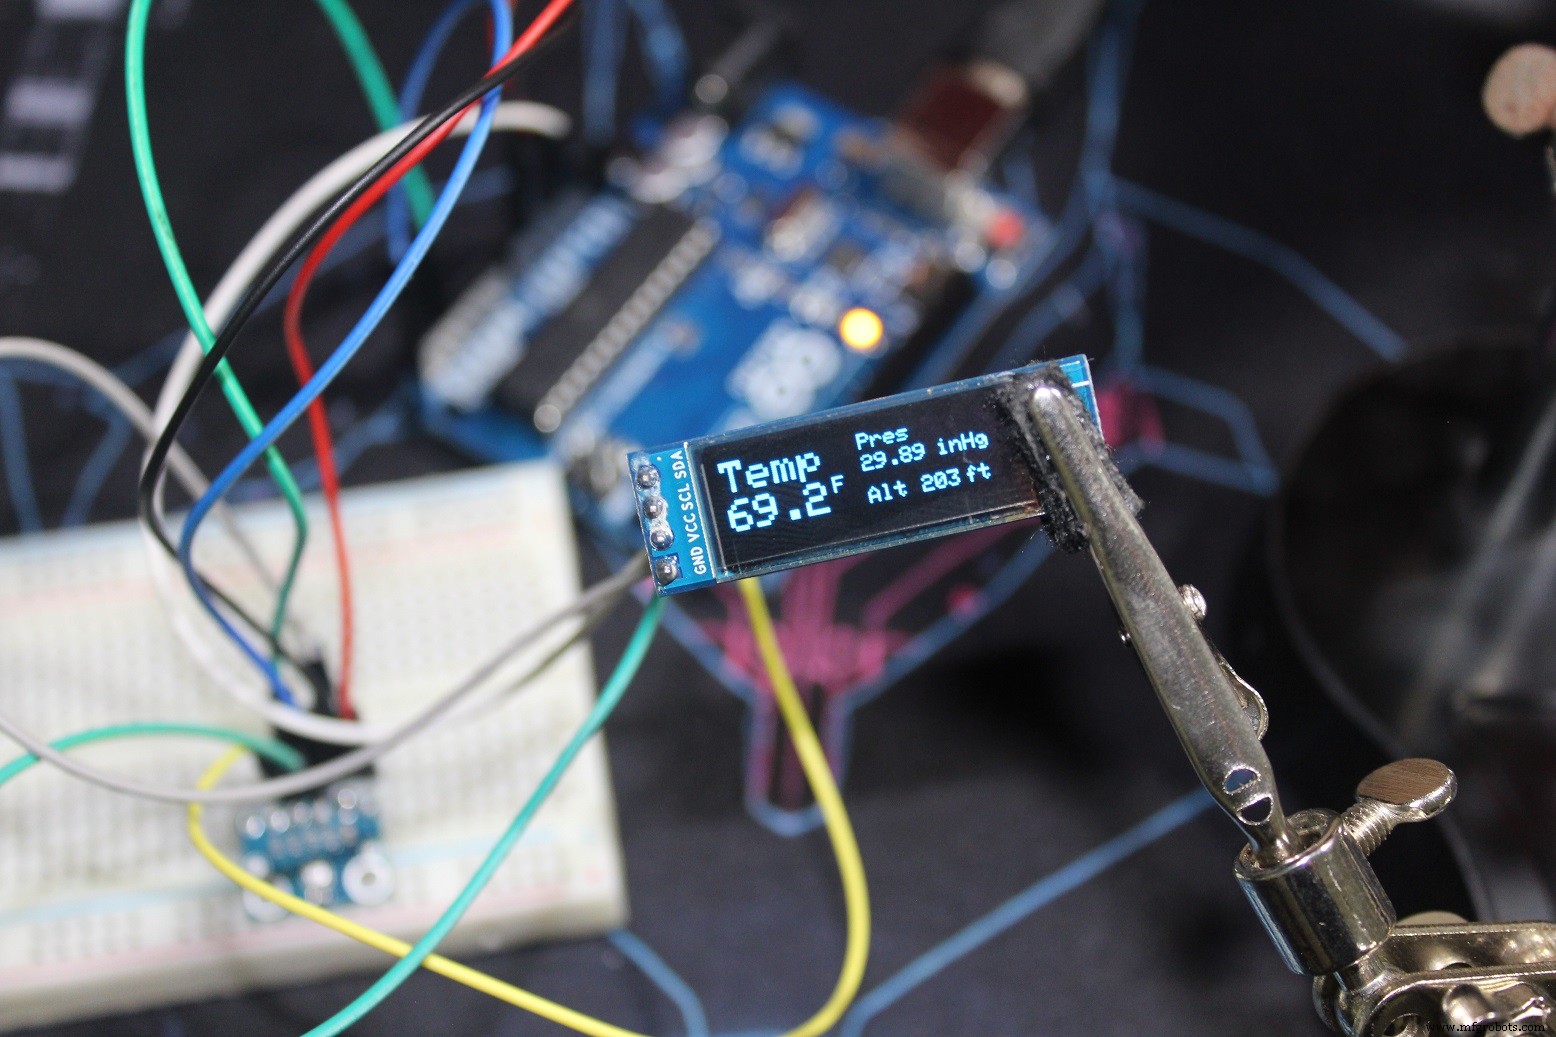
void loop() {
display.clearDisplay();
float T = bmp.readTemperature()*9/5 + 32; //Read temperature in C and conversion to F
float P = bmp.readPressure()/3386.39; //Read Pressure in Pa and conversion to inches of mercury
float A = bmp.readAltitude(1019.66)*3.28084; //Calculating the Altitude, the "1019.66" is the pressure in(hPa) at sea level at day in your region
//If you don't know it just modify it until you get the altitude of your place
display.setCursor(0,0); //Oled display, just playing with text size and cursor to get the display you want
display.setTextColor(WHITE);
display.setTextSize(2);
display.print("Temp");
display.setCursor(0,18);
display.print(T,1);
display.setCursor(50,17);
display.setTextSize(1);
display.print("F");
display.setTextSize(1);
display.setCursor(65,0);
display.print("Pres");
display.setCursor(65,10);
display.print(P);
display.setCursor(100,10);
display.print("inHg");
display.setCursor(65,25);
display.print("Alt");
display.setCursor(90,25);
display.print(A,0);
display.setCursor(110,25);
display.print("ft");
display.display();
delay(2000);
}
BMP280_Adafruit_library
You may want to change things like in the tutorialhttps://github.com/adafruit/Adafruit_BMP280_LibraryAdafruit GFX library
https://github.com/adafruit/Adafruit-GFX-LibraryAdafruit SSD1306
https://github.com/adafruit/Adafruit_SSD1306Schematics
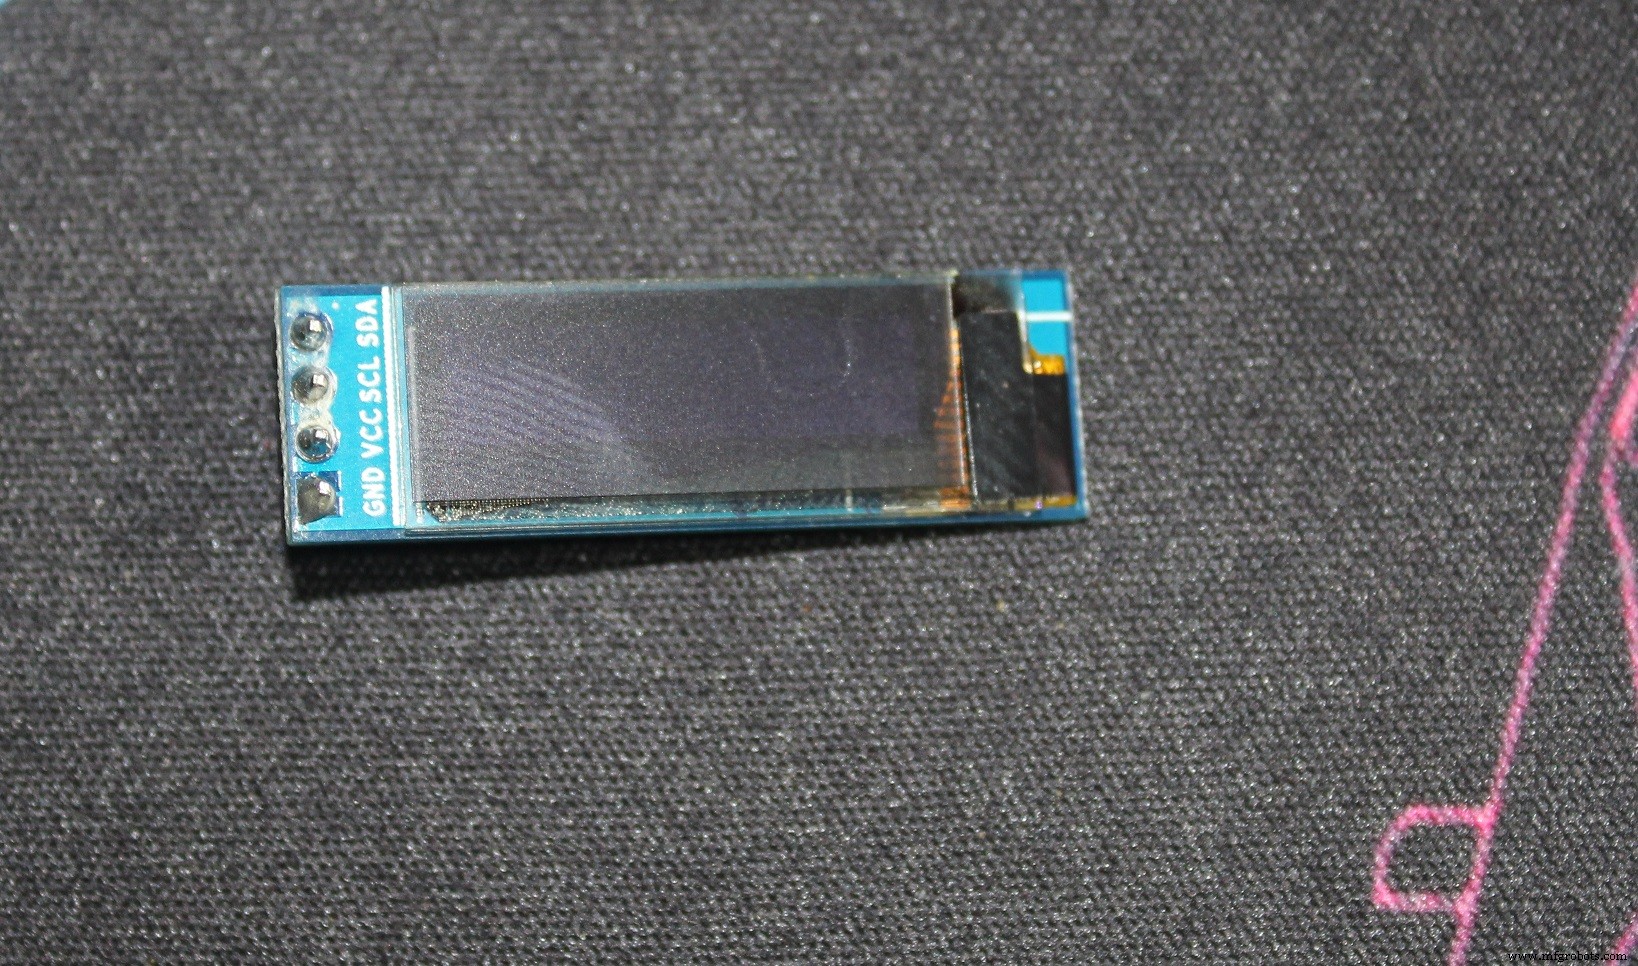
Both modules uses the i²c interface, SDA/SCL with A4 and A5, the BMP280 is powred by 5v meanwhile the OLED is using the 3.3v.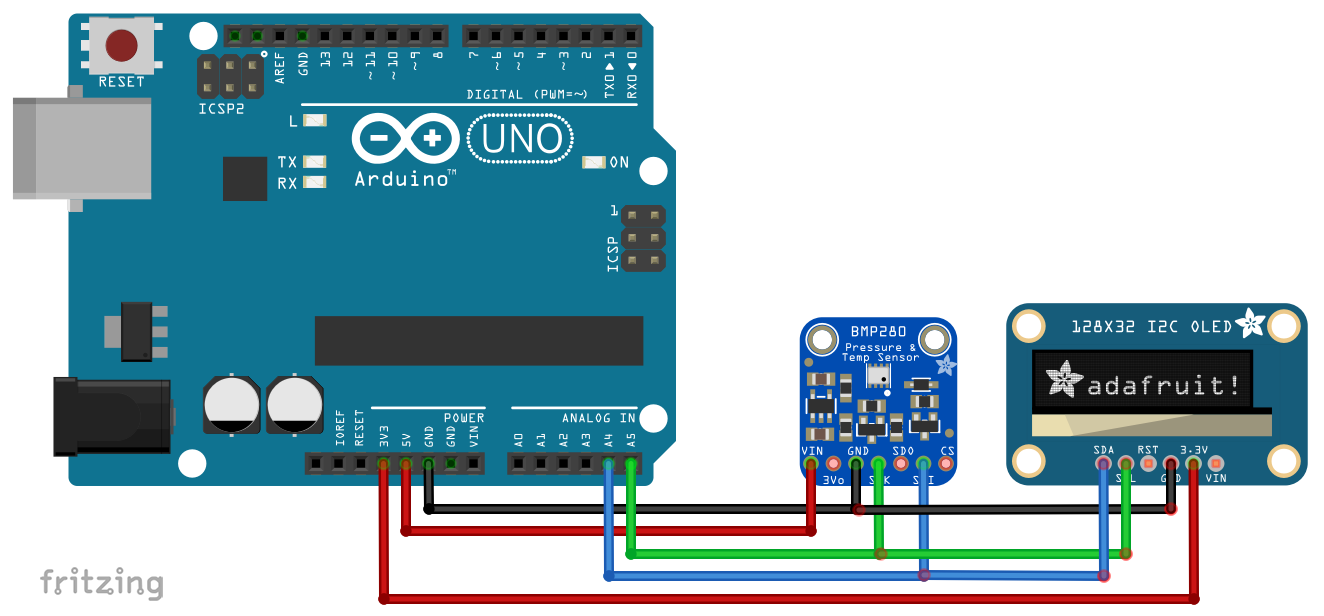
Manufacturing process
- Integrated QR, RFID, and Temperature Verification Access Control System
- Connect Multiple DS18B20 1‑Wire Sensors to a Raspberry Pi for Accurate Temperature Monitoring
- Build a Remote Temperature Sensor with Raspberry Pi and Python – Step‑by‑Step Guide
- Raspberry Pi BMP085: Accurate Temperature & Pressure Readings via I2C
- Build a Multi‑Sensor Temperature & Light Monitoring System with Raspberry Pi & DS18B20
- Display BME280 Temperature, Humidity & Pressure on a Nextion Touchscreen
- Wireless IR Temperature Scanner – Arduino Nano with Bluetooth & MLX90614
- Arduino Weather Clock – Real-Time Date, Time, Temperature & Humidity Display
- Arduino-Based Pressure Sensor & Data Logger for Accurate Air Pressure Monitoring
- Understanding Camera Modules: Definition, Types, and Key Components