•The percentage of disabled people has increased in both rural and urban part of India. The disability could be by birth or due to some medical or accidental reason.
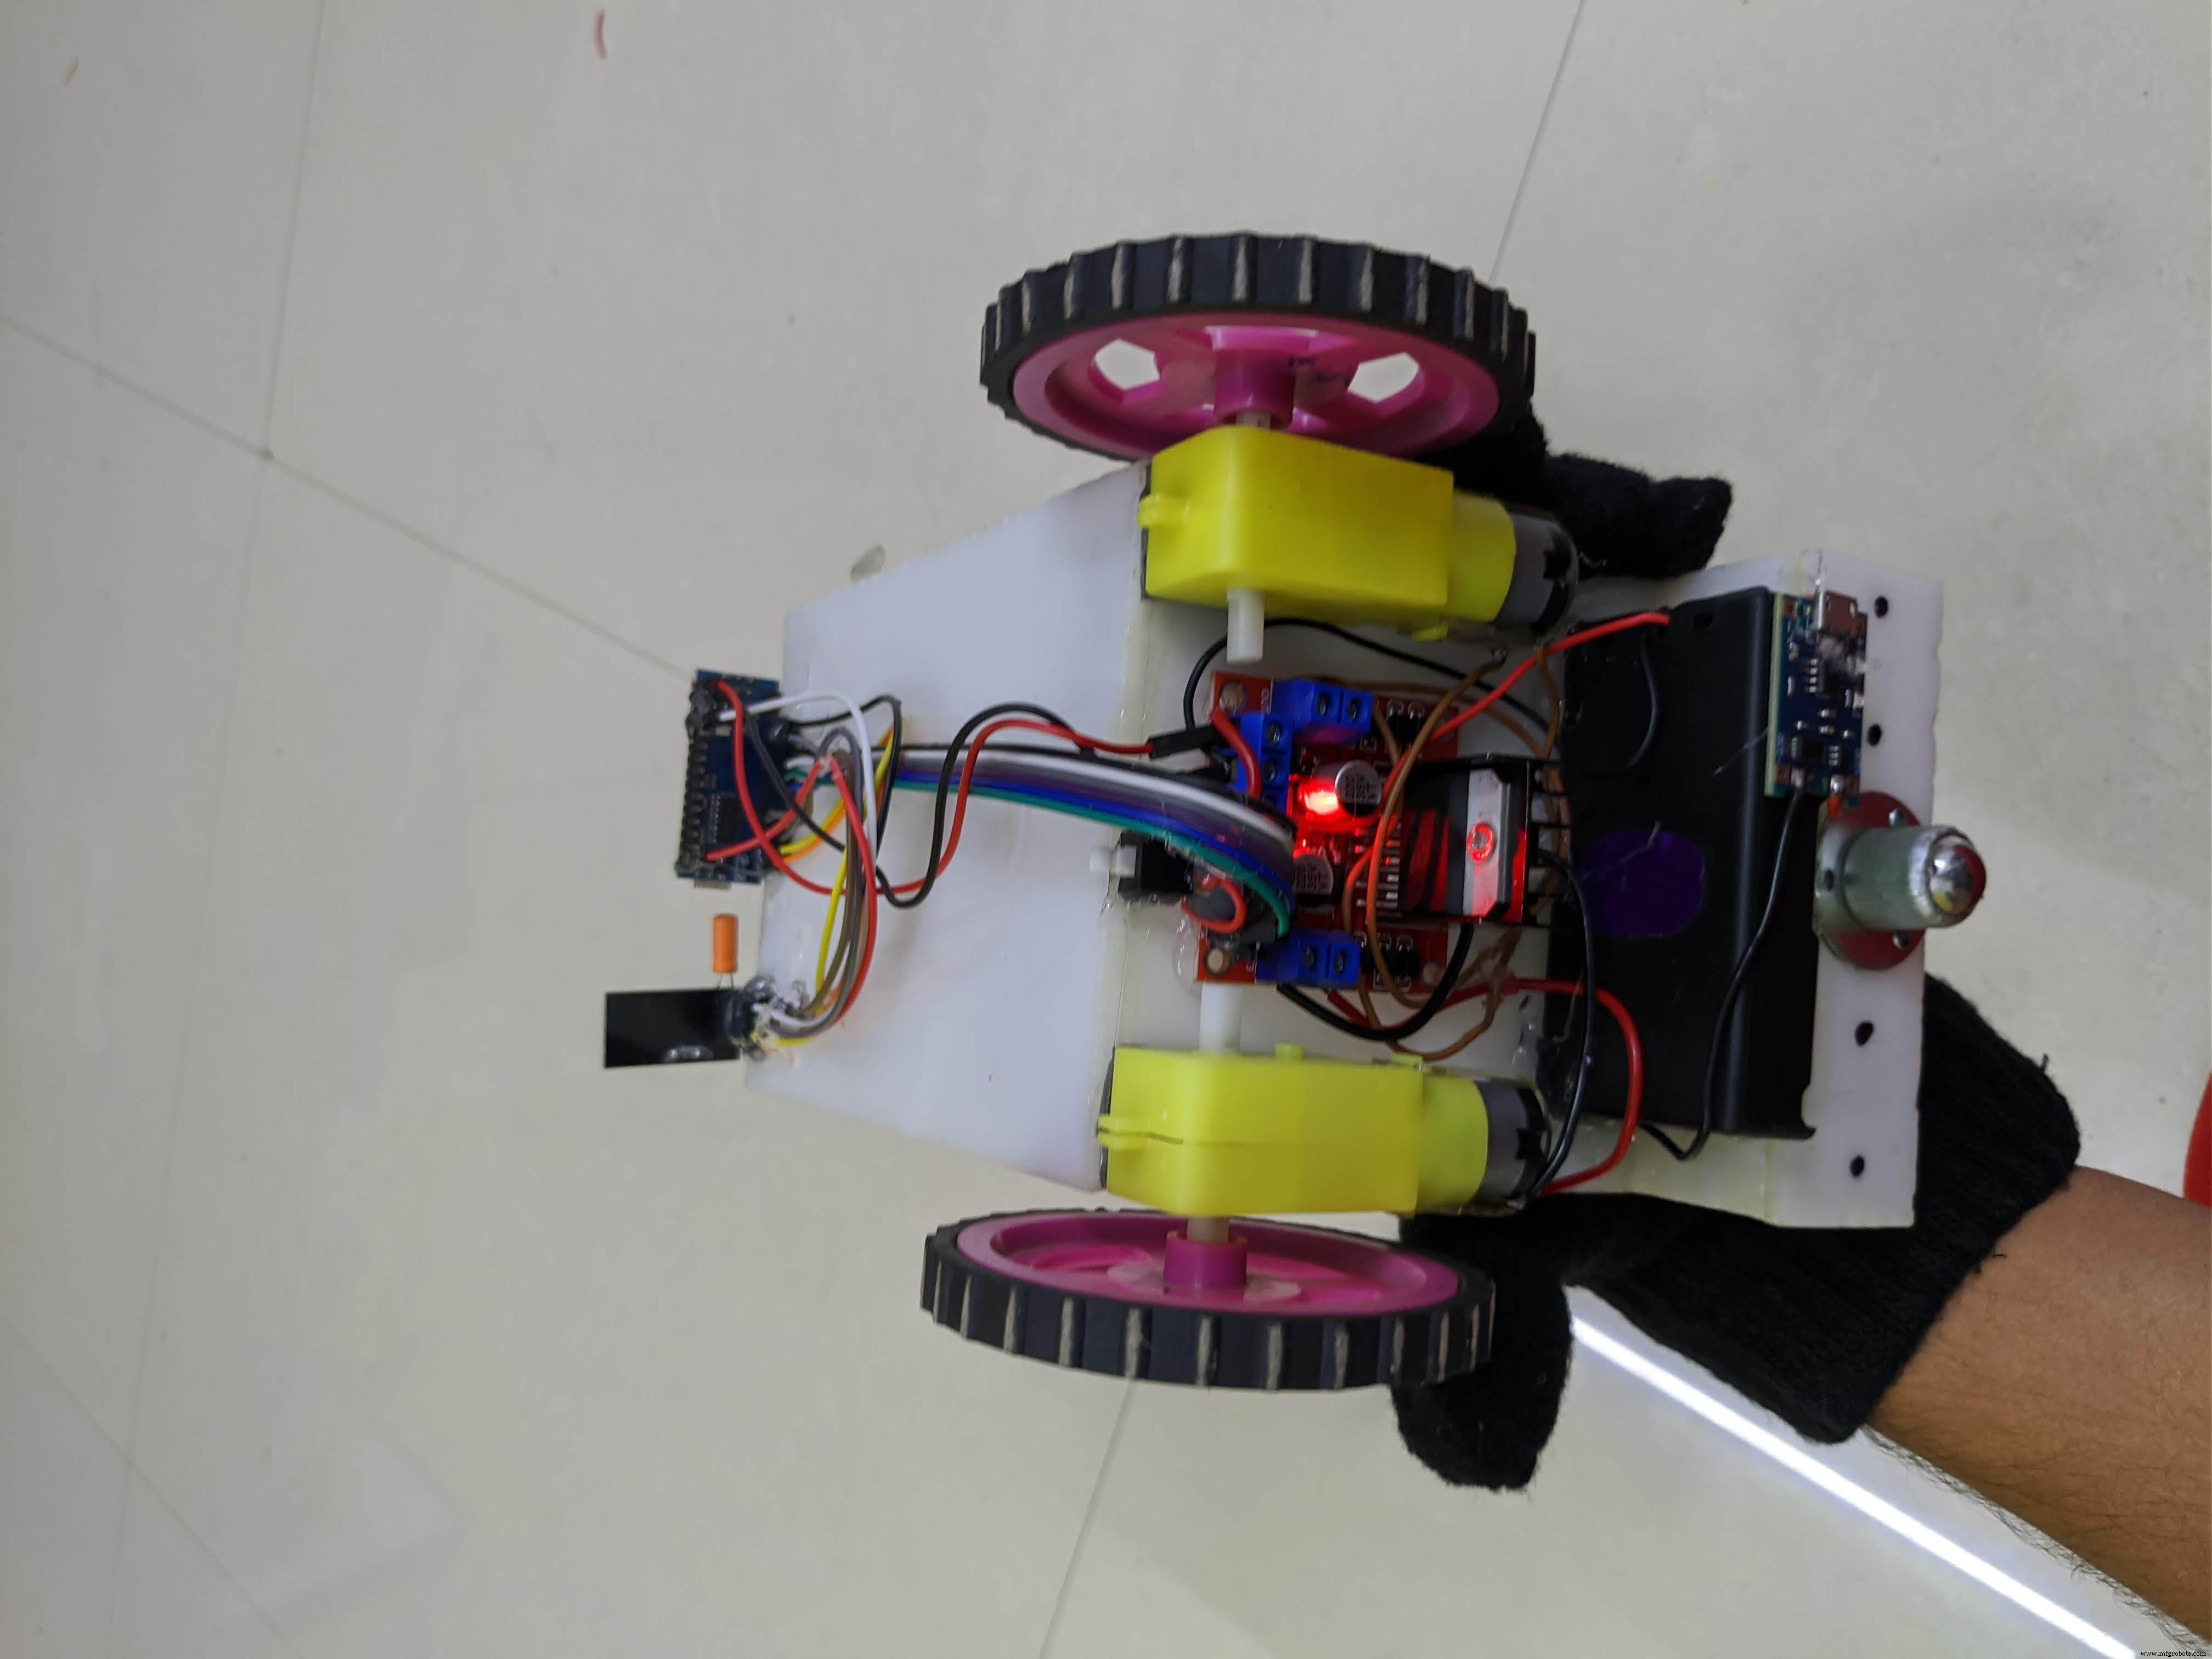
•The aim of this project is to make a hand gesture controlled wheel chair and using Accelerometer as sensor to help the physically disabled people in moving from one place to another just by giving direction from the hand
•Today in India many people are suffering from disability, there are people whose lower half of the body is paralyzed. This Wheelchair will add on to the comfort and make the life of people bit easier
Code
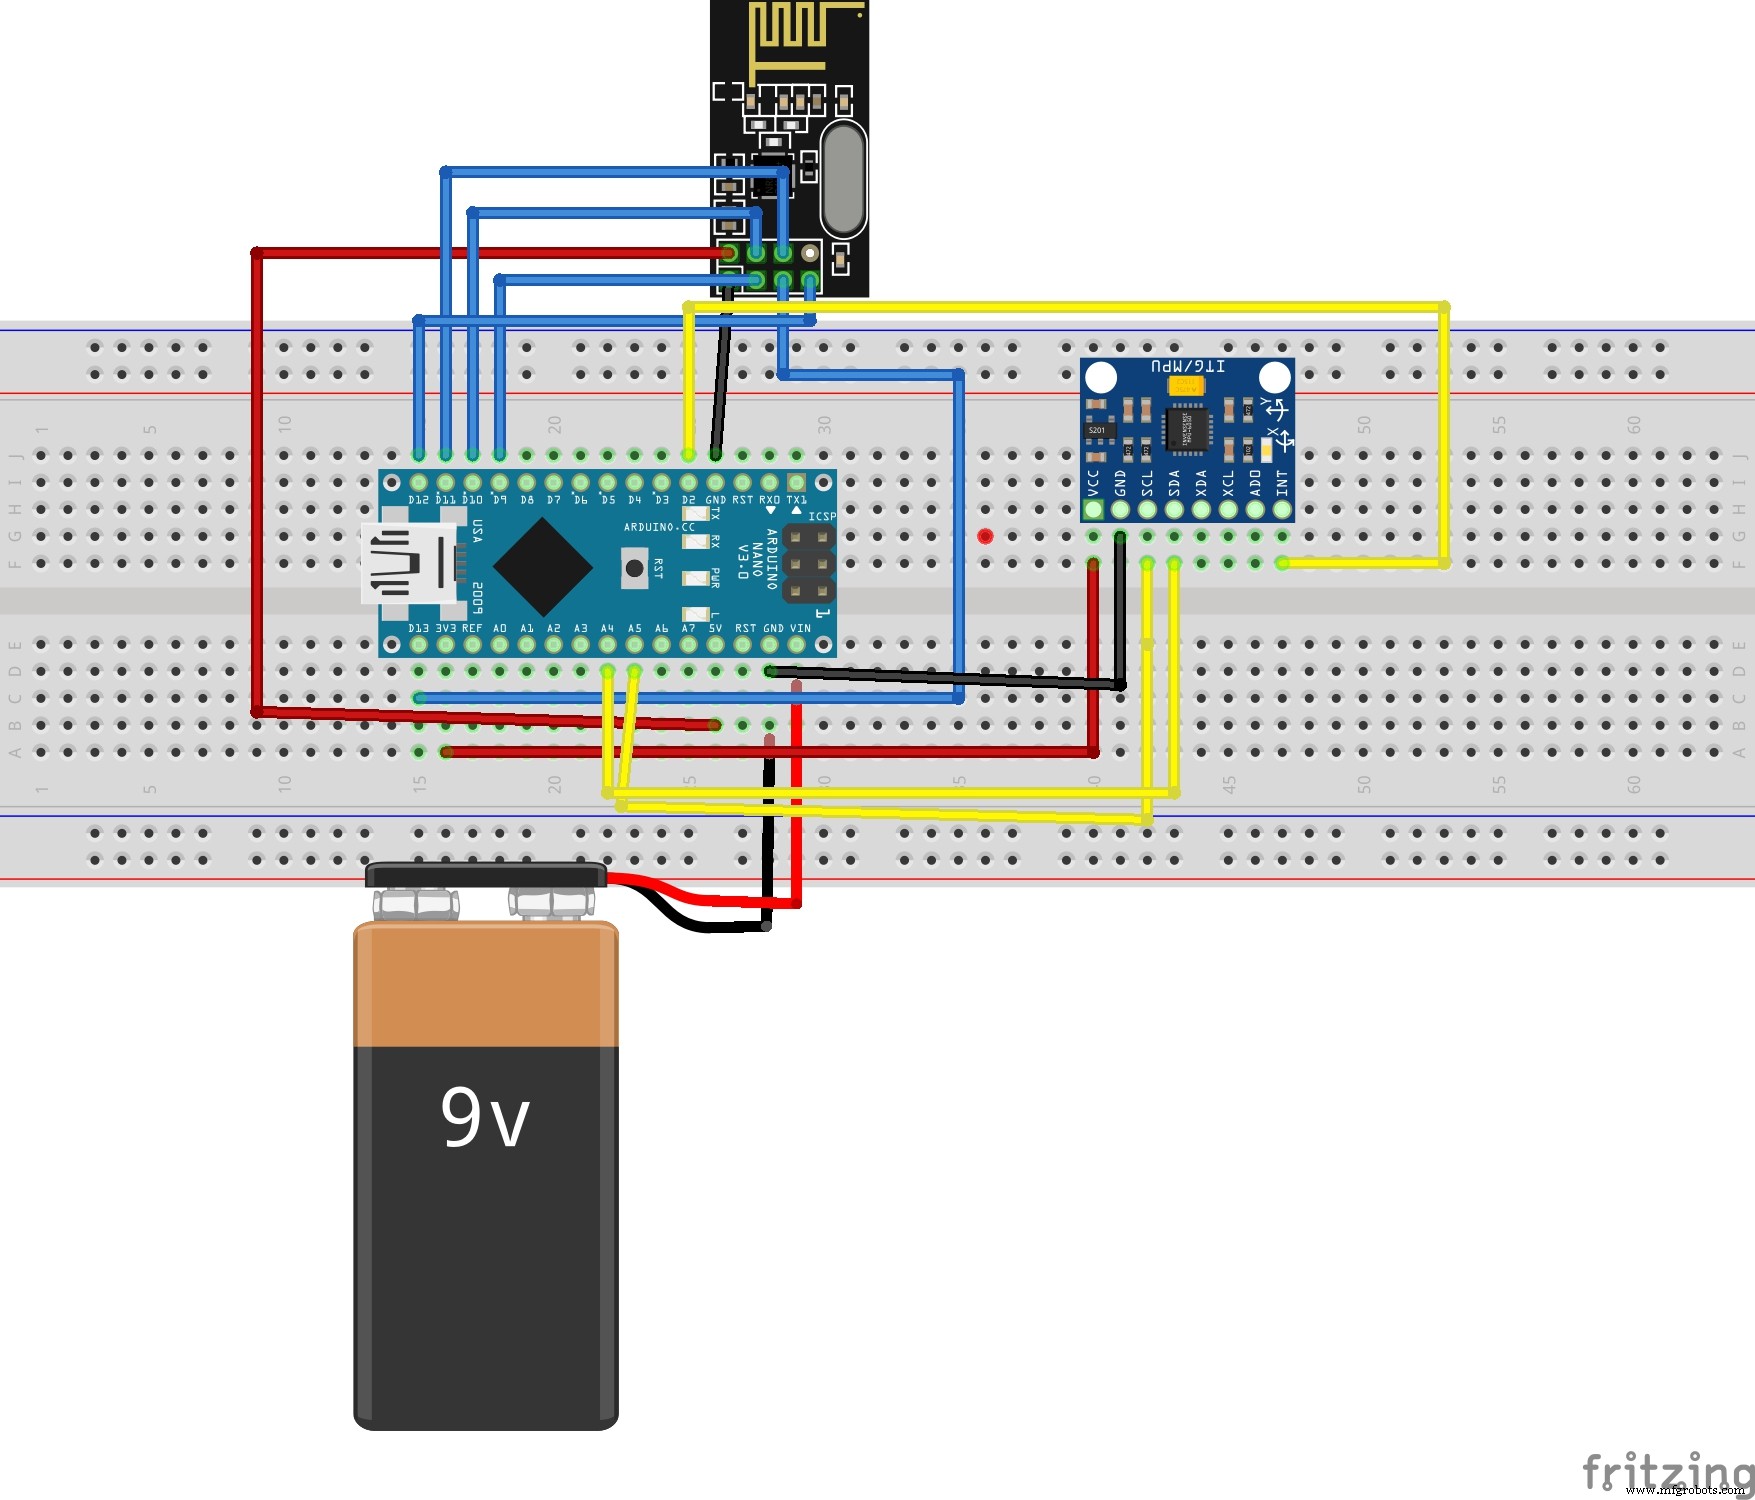
Transmitter code
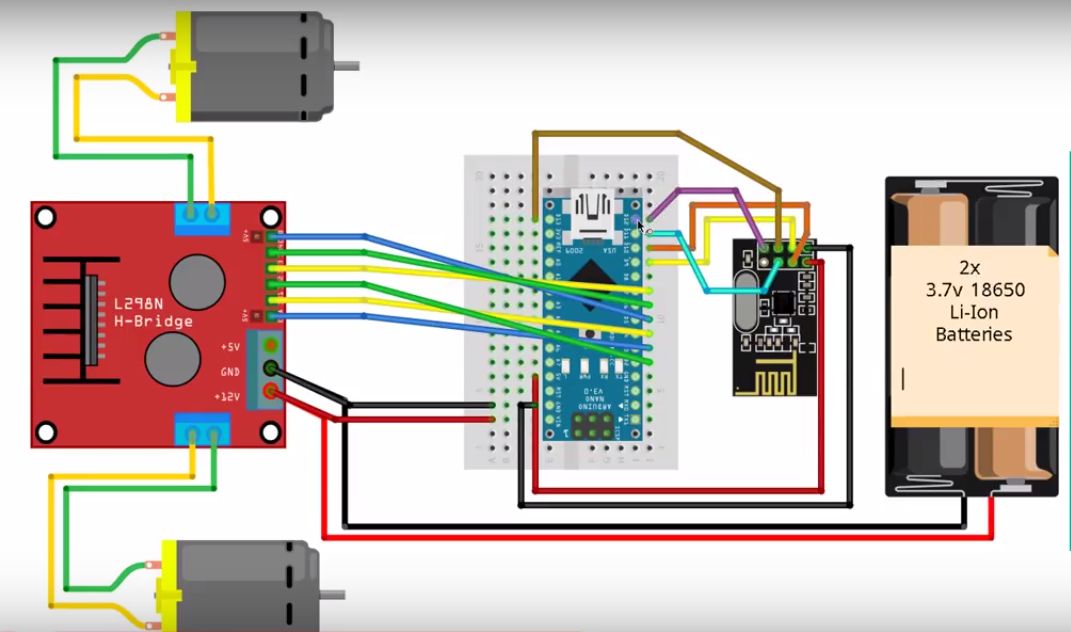
Receiver Code
Transmitter codeArduino
#include <SPI.h>        //SPI library for communicate with the nRF24L01+
#include "RF24.h"       //The main library of the nRF24L01+
#include "Wire.h"       //For communicate
#include "I2Cdev.h"     //For communicate with MPU6050
#include "MPU6050.h"    //The main library of the MPU6050

MPU6050 mpu;
int16_t ax, ay, az;
int16_t gx, gy, gz;
int data[2];

RF24 radio(9,10);

const uint64_t pipe = 0xE8E8F0F0E1LL;

void setup(void){
  Serial.begin(9600);
  Wire.begin();
  mpu.initialize();              //Initialize the MPU object
  radio.begin();                 //Start the nRF24 communicate
  radio.openWritingPipe(pipe);   //Sets the address of the receiver to which the program will send data.
}

void loop(void){

  mpu.getMotion6(&ax, &ay, &az, &gx, &gy, &gz);


  data[0] = map(ax, -17000, 17000, 300, 400 ); //Send X axis data
  data[1] = map(ay, -17000, 17000, 100, 200);  //Send Y axis data
  radio.write(data, sizeof(data));
}
Receiver CodeArduino
#include <nRF24L01.h>
#include <printf.h>
#include <RF24.h>
#include <RF24_config.h>
#include <SPI.h>      //SPI library for communicate with the nRF24L01+
#include "RF24.h"     //The main library of the nRF24L01+


const int enbA = 3;
const int enbB = 5;

const int IN1 = 2;    //Right Motor (-)
const int IN2 = 4;    //Right Motor (+)
const int IN3 = 7;    //Left Motor (+)
const int IN4 = 6;    //Right Motor (-)

int RightSpd = 130;
int LeftSpd = 130;

int data[2];


RF24 radio(9,10);

const uint64_t pipe = 0xE8E8F0F0E1LL;

void setup(){
  //Define the motor pins as OUTPUT
  pinMode(enbA, OUTPUT);
  pinMode(enbB, OUTPUT);
  pinMode(IN1, OUTPUT);
  pinMode(IN2, OUTPUT);
  pinMode(IN3, OUTPUT);
  pinMode(IN4, OUTPUT);

  Serial.begin(9600);
  radio.begin();
  radio.openReadingPipe(1, pipe);
  radio.startListening();
  }

void loop(){
  if (radio.available()){
    radio.read(data, sizeof(data));

    if(data[0] > 380){
      //forward
      analogWrite(enbA, RightSpd);
      analogWrite(enbB, LeftSpd);
      digitalWrite(IN1, HIGH);
      digitalWrite(IN2, LOW);
      digitalWrite(IN3, HIGH);
      digitalWrite(IN4, LOW);
    }

    if(data[0] < 310){
      //backward
      analogWrite(enbA, RightSpd);
      analogWrite(enbB, LeftSpd);
      digitalWrite(IN1, LOW);
      digitalWrite(IN2, HIGH);
      digitalWrite(IN3, LOW);
      digitalWrite(IN4, HIGH);
    }

    if(data[1] > 180){
      //left
      analogWrite(enbA, RightSpd);
      analogWrite(enbB, LeftSpd);
      digitalWrite(IN1, HIGH);
      digitalWrite(IN2, LOW);
      digitalWrite(IN3, LOW);
      digitalWrite(IN4, HIGH);
    }

    if(data[1] < 110){
      //right
      analogWrite(enbA, RightSpd);
      analogWrite(enbB, LeftSpd);
      digitalWrite(IN1, LOW);
      digitalWrite(IN2, HIGH);
      digitalWrite(IN3, HIGH);
      digitalWrite(IN4, LOW);
    }

    if(data[0] > 330 && data[0] < 360 && data[1] > 130 && data[1] < 160){
      //stop car
      analogWrite(enbA, 0);
      analogWrite(enbB, 0);
    }
  }
}