


Secure Arduino‑Based Keyless Door Lock with LCD Display and 4×4 Keypad
Components and supplies
 |
| × | 1 | |||
 |
| × | 1 | |||
 |
| × | 1 | |||
| × | 1 | ||||
 |
| × | 1 | |||
 |
| × | 1 | |||
 |
| × | 1 |
Apps and online services
 |
|
About this project
Arduino Keyless Door Lock System with Keypad and LCD0
0
By Ali Hamza
In this project, we are going to make a keyless door lock system which uses a 4X4 keypad to enter the keys and a DC lock to open or close the door. A 16X2 LCD will be used for display.
Required Components
The components required for this project are as follows
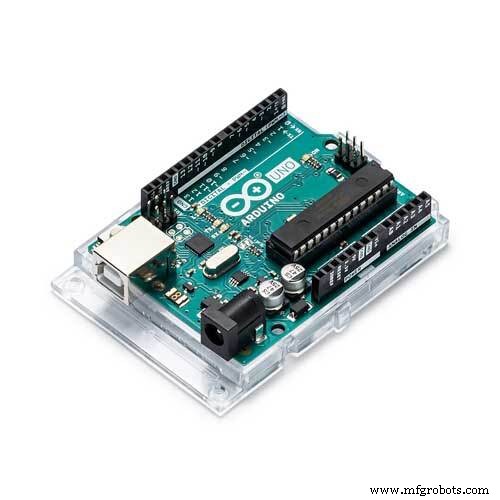
- Arduino
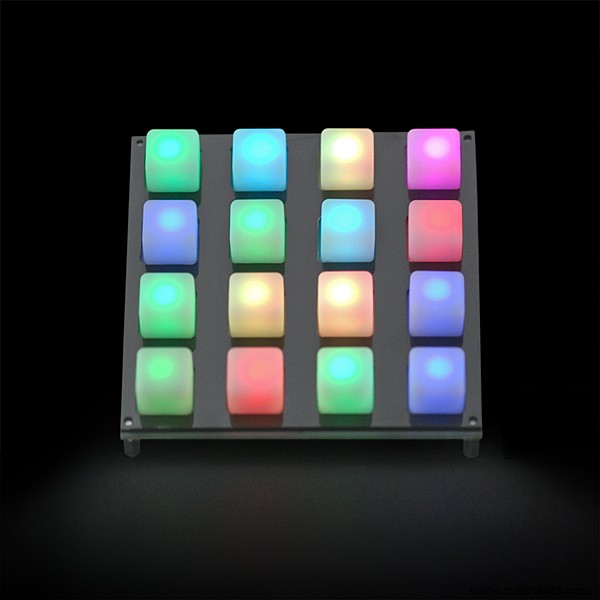
- 4X4 keypad
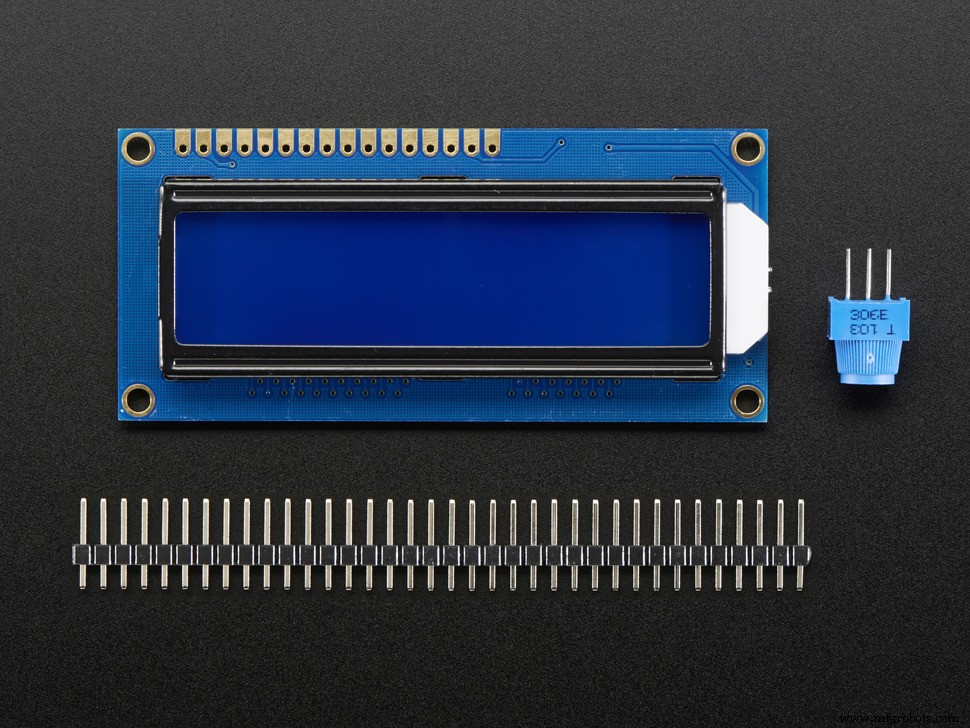
- LCD
- DC Lock
- Relay
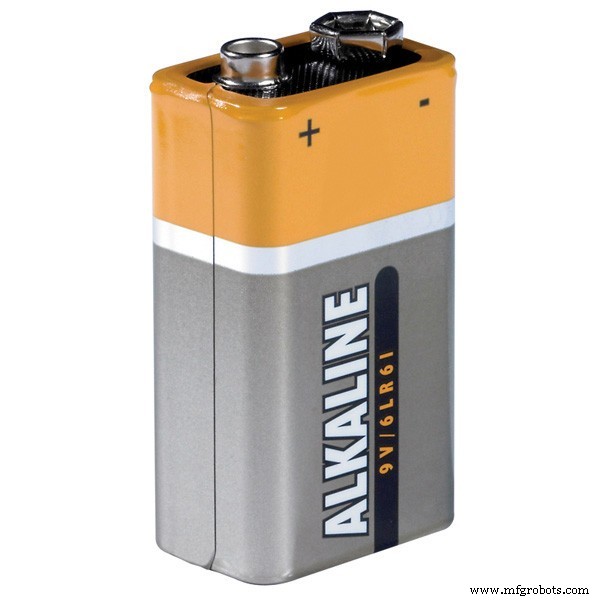
- 9V battery
- 10k potentiometer
- 220-ohm resistor
How Does it Work?
Whenever the keys are pressed, they are matched with the keys already stored. If the keys that are pressed match the initial password stored in the EEPROM which is ‘1234’, then the lock will open up. If the password does not match, then it will print “access denied” on the LCD.
If the ‘#’ key will be pressed, it will ask you to enter the current password and if it matches, then it will ask you to enter the new password and the password will be changed.
Circuit Diagram
First, connect the 4X4 keypad to the Arduino; connect the first six pins on the 4X4 keypad with the A0 and A5 pins on the Arduino. Then connect the last two pins on the 4X4 keypad module to digital pins 3 and 2 on the Arduino.
After that, connect the LCD to the Arduino. The connections for connecting the LCD with the Arduino are as follows
- Connect pin 1 on the LCD, which is the VSS pin, to GND on the Arduino
- Connect pin 2, which is the VDD pin, to the 5V pin on the Arduino
- Connect pin 3, which is the V0, to the middle of the 10k potentiometer and connect the other two pins on the potentiometer to 5V and GND on the Arduino. This pin is for setting the LCD’s contrast.
- Connect pin 4, which is the RS pin, to pin 7 on the Arduino
- Connect pin 5, which is the R/W pin, to the GND pin on the Arduino
- Connect pin 6, which is the Enable pin, to pin 6 on the Arduino
- Connect pins 11, 12, 13, and 14 which are the data pins, to the pins 5, 4, 3, and 2 on the Arduino
- Connect pin 15, which is the LCD’s backlight pin, to 5V on the Arduino through the 220-ohm resistor
- Connect pin 16 on the Arduino, which is the negative pin of the backlight, to GND on the Arduino
Last, we will connect the DC lock with the Arduino. The Lock operates on a voltage from 7 to 12V, so we cannot directly connect it to the Arduino. To connect it to the Arduino, we will require a relay and a battery.
Connect the signal pin of the relay to pin 10 on the Arduino and the lock’s VCC and GND to 5V and GND on the Arduino. Then on the other end of the relay, connect the negative of the battery to the common on the relay and the NO (Normally open) on the relay to one side of the lock. Then connect the other side of the lock to the positive terminal on the battery.

Arduino Keypad Lock Code
The initial password is 1234.
#include <Keypad.h>

#include<LiquidCrystal.h>

#include<EEPROM.h>

LiquidCrystal liquid_crystal_display(9,8,7,6,5,4,);

char password[4];

char initial_password[4],new_password[4];

int i=0;

int relay_pin = 10;

char key_pressed=0;

const byte rows = 4;

const byte columns = 4;

char hexaKeys[rows][columns] = {

{'1','2','3','A'},

{'4','5','6','B'},

{'7','8','9','C'},

{'*','0','#','D'}

};

byte row_pins[rows] = {A0,A1,A2,A3};

byte column_pins[columns] = {A4,A5,3,2};

Keypad keypad_key = Keypad( makeKeymap(hexaKeys), row_pins, column_pins, rows, columns);


void setup()

{

  pinMode(relay_pin, OUTPUT);

  liquid_crystal_display.begin(16,2);

  liquid_crystal_display.print(" DIYhacking.com");

  liquid_crystal_display.setCursor(0,1);

  liquid_crystal_display.print("Electronic Lock ");

  delay(2000);

  liquid_crystal_display.clear();

  liquid_crystal_display.print("Enter Password");

  liquid_crystal_display.setCursor(0,1);

  initialpassword();

}


void loop()

{

  digitalWrite(relay_pin, HIGH);

  key_pressed = keypad_key.getKey();

  if(key_pressed=='#')

    change();

  if (key_pressed)

  {

    password[i++]=key_pressed;

    liquid_crystal_display.print(key_pressed);

      }

  if(i==4)

  {

    delay(200);

    for(int j=0;j<4;j++)

      initial_password[j]=EEPROM.read(j);

    if(!(strncmp(password, initial_password,4)))

    {

      liquid_crystal_display.clear();

      liquid_crystal_display.print("Pass Accepted");

      digitalWrite(relay_pin, LOW);

      delay(2000);

      liquid_crystal_display.setCursor(0,1);

      liquid_crystal_display.print("Pres # to change");

      delay(2000);

      liquid_crystal_display.clear();

      liquid_crystal_display.print("Enter Password:");

      liquid_crystal_display.setCursor(0,1);

      i=0;


    }

    else

    {

      digitalWrite(relay_pin, HIGH);


      liquid_crystal_display.clear();

      liquid_crystal_display.print("Wrong Password");

      liquid_crystal_display.setCursor(0,1);

      liquid_crystal_display.print("Pres # to Change");

      delay(2000);

      liquid_crystal_display.clear();

      liquid_crystal_display.print("Enter Password");

      liquid_crystal_display.setCursor(0,1);

      i=0;


    }

  }

}

void change()

{

  int j=0;

  liquid_crystal_display.clear();

  liquid_crystal_display.print("Current Password");

  liquid_crystal_display.setCursor(0,1);

  while(j<4)

  {

    char key=keypad_key.getKey();

    if(key)

    {

      new_password[j++]=key;

      liquid_crystal_display.print(key);


    }

    key=0;

  }

  delay(500);


  if((strncmp(new_password, initial_password, 4)))

  {

    liquid_crystal_display.clear();

    liquid_crystal_display.print("Wrong Password");

    liquid_crystal_display.setCursor(0,1);

    liquid_crystal_display.print("Try Again");

    delay(1000);

  }

  else

  {

    j=0;

    liquid_crystal_display.clear();

    liquid_crystal_display.print("New Password:");

    liquid_crystal_display.setCursor(0,1);

    while(j<4)

    {

      char key=keypad_key.getKey();

      if(key)

      {

        initial_password[j]=key;

        liquid_crystal_display.print(key);

        EEPROM.write(j,key);

        j++;


      }

    }

    liquid_crystal_display.print("Pass Changed");

    delay(1000);

  }

  liquid_crystal_display.clear();

  liquid_crystal_display.print("Enter Password");

  liquid_crystal_display.setCursor(0,1);

  key_pressed=0;

}


void initialpassword(){

  for(int j=0;j<4;j++)

    EEPROM.write(j, j+49);

  for(int j=0;j<4;j++)

    initial_password[j]=EEPROM.read(j);

}
Code Explanation
First of all, we will include the libraries for the 4X4 keypad, LCD, and a library for storing the password. The EEPROM library is used to store the password. The default password stored in it is ‘1234’.
#include <Keypad.h>

#include<LiquidCrystal.h>

#include<EEPROM.h>
In the loop function, the key pressed will be stored in the ‘key_pressed’ variable and it will be compared with the other keys. If the pressed key is ‘#’, then the change function will be called and it will ask for the new password.
key_pressed = keypad_key.getKey();

  if(key_pressed=='#')

    change();
The keys pressed are stored in the ‘password’ variable and these are shown on the LCD when the keys are pressed. Then these keys will be matched with the initial password stored in the EEPROM. If the keys that were pressed match the initial password, then the lock will get open and “Pass accepted” will be printed on the LCD. If the password does not match, then it will ask to enter the password again.
if (key_pressed)

  {

    password[i++]=key_pressed;

    liquid_crystal_display.print(key_pressed);

      }

if(i==4)

  {

    delay(200);

    for(int j=0;j<4;j++)

      initial_password[j]=EEPROM.read(j);

    if(!(strncmp(password, initial_password,4)))

    {

      liquid_crystal_display.clear();

      liquid_crystal_display.print("Pass Accepted");

      digitalWrite(relay_pin, LOW);

      delay(2000);
If the ‘#’ key is pressed, then it will call the ‘change()’ function. In the change function, it will ask you to enter the current password. If the current password is correct, then it will ask you to enter the new password. Upon entering the new password, the password will be changed.
void change()

{

  int j=0;

  liquid_crystal_display.clear();

  liquid_crystal_display.print("Current Password");

  liquid_crystal_display.setCursor(0,1);

  while(j<4)

  {

    char key=keypad_key.getKey();

    if(key)

    {

      new_password[j++]=key;

      liquid_crystal_display.print(key);


    }

    key=0;

  }

  delay(500);
Tags: 4x4 Keypad, Arduino, DC Lock, Keylock, Keypad, lcd, Lock
Recommended Posts
Arduino Alarm Clock Using a Real Time Clock and LCD Screen

How to Build an Arduino Self-balancing Robot
Use an Arduino and Solenoid to Make a Toaster Dance

Make a DIY Automatic Irrigation System with Arduino
Code
- Code snippet #1
- Code snippet #2
- Code snippet #3
- Code snippet #4
- Code snippet #5
Code snippet #1Plain text
#include <Keypad.h>

#include<LiquidCrystal.h>

#include<EEPROM.h>

LiquidCrystal liquid_crystal_display(9,8,7,6,5,4,);

char password[4];

char initial_password[4],new_password[4];

int i=0;

int relay_pin = 10;

char key_pressed=0;

const byte rows = 4;

const byte columns = 4;

char hexaKeys[rows][columns] = {

{'1','2','3','A'},

{'4','5','6','B'},

{'7','8','9','C'},

{'*','0','#','D'}

};

byte row_pins[rows] = {A0,A1,A2,A3};

byte column_pins[columns] = {A4,A5,3,2};

Keypad keypad_key = Keypad( makeKeymap(hexaKeys), row_pins, column_pins, rows, columns);


void setup()

{

  pinMode(relay_pin, OUTPUT);

  liquid_crystal_display.begin(16,2);

  liquid_crystal_display.print(" DIYhacking.com");

  liquid_crystal_display.setCursor(0,1);

  liquid_crystal_display.print("Electronic Lock ");

  delay(2000);

  liquid_crystal_display.clear();

  liquid_crystal_display.print("Enter Password");

  liquid_crystal_display.setCursor(0,1);

  initialpassword();

}


void loop()

{

  digitalWrite(relay_pin, HIGH);

  key_pressed = keypad_key.getKey();

  if(key_pressed=='#')

    change();

  if (key_pressed)

  {

    password[i++]=key_pressed;

    liquid_crystal_display.print(key_pressed);

      }

  if(i==4)

  {

    delay(200);

    for(int j=0;j<4;j++)

      initial_password[j]=EEPROM.read(j);

    if(!(strncmp(password, initial_password,4)))

    {

      liquid_crystal_display.clear();

      liquid_crystal_display.print("Pass Accepted");

      digitalWrite(relay_pin, LOW);

      delay(2000);

      liquid_crystal_display.setCursor(0,1);

      liquid_crystal_display.print("Pres # to change");

      delay(2000);

      liquid_crystal_display.clear();

      liquid_crystal_display.print("Enter Password:");

      liquid_crystal_display.setCursor(0,1);

      i=0;


    }

    else

    {

      digitalWrite(relay_pin, HIGH);


      liquid_crystal_display.clear();

      liquid_crystal_display.print("Wrong Password");

      liquid_crystal_display.setCursor(0,1);

      liquid_crystal_display.print("Pres # to Change");

      delay(2000);

      liquid_crystal_display.clear();

      liquid_crystal_display.print("Enter Password");

      liquid_crystal_display.setCursor(0,1);

      i=0;


    }

  }

}

void change()

{

  int j=0;

  liquid_crystal_display.clear();

  liquid_crystal_display.print("Current Password");

  liquid_crystal_display.setCursor(0,1);

  while(j<4)

  {

    char key=keypad_key.getKey();

    if(key)

    {

      new_password[j++]=key;

      liquid_crystal_display.print(key);


    }

    key=0;

  }

  delay(500);


  if((strncmp(new_password, initial_password, 4)))

  {

    liquid_crystal_display.clear();

    liquid_crystal_display.print("Wrong Password");

    liquid_crystal_display.setCursor(0,1);

    liquid_crystal_display.print("Try Again");

    delay(1000);

  }

  else

  {

    j=0;

    liquid_crystal_display.clear();

    liquid_crystal_display.print("New Password:");

    liquid_crystal_display.setCursor(0,1);

    while(j<4)

    {

      char key=keypad_key.getKey();

      if(key)

      {

        initial_password[j]=key;

        liquid_crystal_display.print(key);

        EEPROM.write(j,key);

        j++;


      }

    }

    liquid_crystal_display.print("Pass Changed");

    delay(1000);

  }

  liquid_crystal_display.clear();

  liquid_crystal_display.print("Enter Password");

  liquid_crystal_display.setCursor(0,1);

  key_pressed=0;

}


void initialpassword(){

  for(int j=0;j<4;j++)

    EEPROM.write(j, j+49);

  for(int j=0;j<4;j++)

    initial_password[j]=EEPROM.read(j);

}
Code snippet #2Plain text
#include <Keypad.h>

#include<LiquidCrystal.h>

#include<EEPROM.h>
Code snippet #3Plain text
key_pressed = keypad_key.getKey();

  if(key_pressed=='#')

    change();
Code snippet #4Plain text
if (key_pressed)

  {

    password[i++]=key_pressed;

    liquid_crystal_display.print(key_pressed);

      }

if(i==4)

  {

    delay(200);

    for(int j=0;j<4;j++)

      initial_password[j]=EEPROM.read(j);

    if(!(strncmp(password, initial_password,4)))

    {

      liquid_crystal_display.clear();

      liquid_crystal_display.print("Pass Accepted");

      digitalWrite(relay_pin, LOW);

      delay(2000);
Code snippet #5Plain text
void change()

{

  int j=0;

  liquid_crystal_display.clear();

  liquid_crystal_display.print("Current Password");

  liquid_crystal_display.setCursor(0,1);

  while(j<4)

  {

    char key=keypad_key.getKey();

    if(key)

    {

      new_password[j++]=key;

      liquid_crystal_display.print(key);


    }

    key=0;

  }

  delay(500);
Schematics
Use an Arduino to control a solenoid door lock that can be opened with the correct key combination.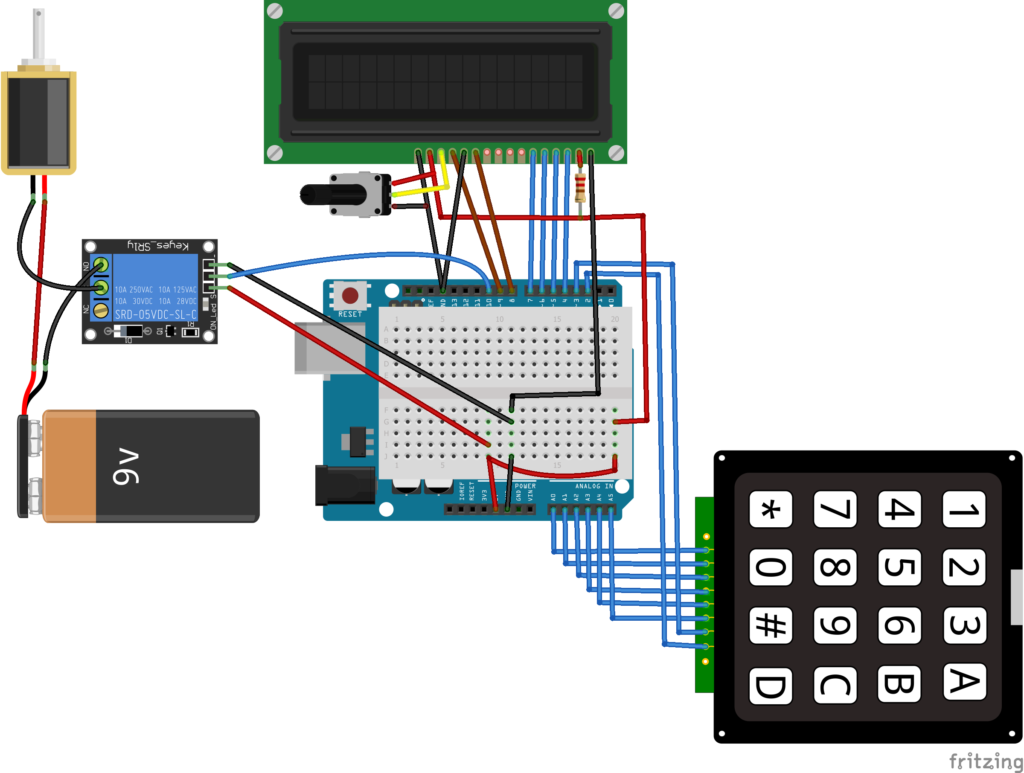
Manufacturing process
- Reliable Arduino-Based RFID Attendance System Powered by Python
- DHT11 Temperature & Humidity Sensor Project with LED Indicators and Piezo Speaker
- Build Engaging LCD Animation & Gaming with Arduino UNO
- Build a 4x4x4 LED Cube with Arduino Uno & 1Sheeld – Interactive LED Project
- Smart Keyless Door Lock – Arduino & Android Bluetooth‑Controlled Password System
- Arduino Keypad Door Lock with User-Defined Code
- Real-Time Soil Moisture Monitoring with LCD Display – Arduino DIY Kit
- Build an Arduino LCD Thermometer Using LM35/36 Temperature Sensor
- Build an Interactive LCD Game with Arduino UNO
- Build an Arduino RFID Door Lock – Master RFID Technology with a Step‑by‑Step Guide