


DHT11 Temperature & Humidity Sensor Project with LED Indicators and Piezo Speaker
Components and supplies
 |
| × | 1 | |||
 |
| × | 3 | |||
 |
| × | 12 | |||
 |
| × | 3 | |||
| × | 1 | ||||
 |
| × | 1 |
Apps and online services
 |
|
About this project
This is my fourth project. In this project we will use a DHT11 temperature and three LEDs that will show you that the temp. is too hot, perfect or too cold.
This is the DHT11:


These are the resistors and the LEDs:

And this is the Piezo speaker:

You will need these libraries:
- https://github.com/adafruit/Adafruit_Sensor
- https://github.com/adafruit/DHT-sensor-library
If you like this project respect the project and follow me!
Code
- DHT11 with LEDs and piezo speaker
DHT11 with LEDs and piezo speakerC/C++
#include <Adafruit_Sensor.h>
#include <DHT.h>
int speakerPin = 9;
int length = 1;
#define DHTPIN 5
#define DHTTYPE DHT11
#define LED_TOO_COLD A0
#define LED_PERFECT A1
#define LED_TOO_HOT A2
DHT dht(DHTPIN, DHTTYPE);
void setup() {
  Serial.begin(9600);
  Serial.println("DHT11 test!");

  dht.begin();
}

void loop() {
  pinMode(speakerPin, OUTPUT);
  pinMode (A0 , OUTPUT);
  pinMode (A1 , OUTPUT);
  pinMode (A2 , OUTPUT);
  delay(2000);

  float h = dht.readHumidity();
  float t = dht.readTemperature();
  float f = dht.readTemperature(true);


  if (isnan(h) || isnan(t) || isnan(f)) {
    Serial.println("Failed to read from DHT sensor!");
    return;
  }

  Serial.print("Humidity: ");
  Serial.print(h);
  Serial.print(" %\t");
  Serial.print("Temperature: ");
  Serial.print(t);
  Serial.println(" *C ");
  if (t <= 20) {
    Serial.println("Too cold!");
    digitalWrite(A0, HIGH);
    digitalWrite(speakerPin, HIGH);
    delay (1000);
    digitalWrite(speakerPin, LOW);
    digitalWrite(A0, LOW);
  }
  if (20 < t < 27) {
    Serial.println("Perfect temperature!");
    digitalWrite(A1, HIGH);
    delay (2000);
    digitalWrite(A1, LOW);
  }
  if (t >= 29) {
    Serial.println("Too hot!");
    digitalWrite(A2, HIGH);
    digitalWrite(speakerPin, HIGH);
    delay (1000);
    digitalWrite(speakerPin, LOW);
    digitalWrite(A2, LOW);
  }

}
Schematics
dht11_with_leds_and_piezo_speaker_JRpaa8ISfy.fzzRenamed a tmp36 to dht 11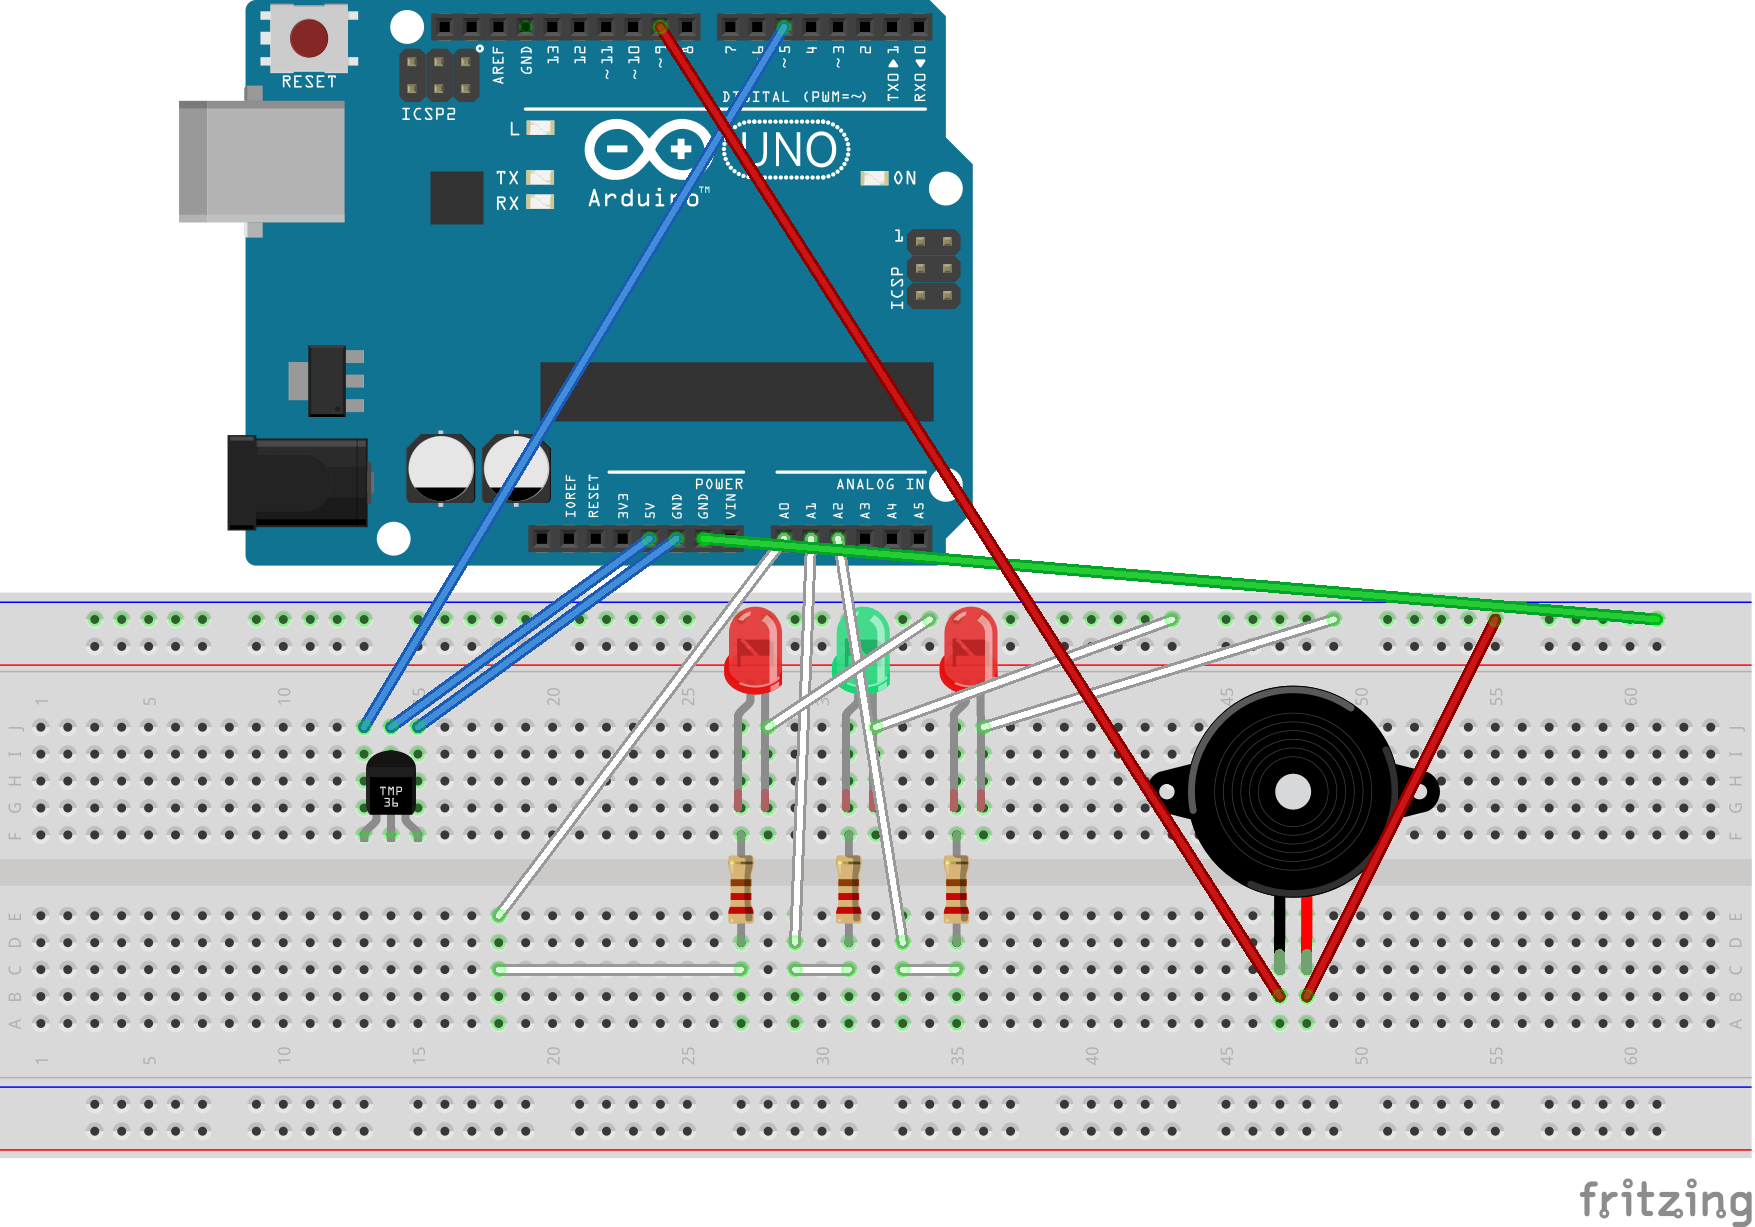
Sprout: Advanced Indoor Self‑Watering Planter Powered by Arduino
Build a Handheld Gaming Console with the Arduboy Clone
Manufacturing process
- Build Your First IoT Project with Raspberry Pi, DHT11, and ThingSpeak
- Build a Smart IoT Jar with ESP8266, Arduino & Ultrasonic Sensor – Real‑Time Monitoring
- Build a Simple Obstacle Sensor with Arduino – Easy IR LED & Photodiode Tutorial
- Read Temperature & Humidity with DHT11 on Blynk – Step‑by‑Step Arduino Tutorial
- Build a 4x4x4 LED Cube with Arduino Uno & 1Sheeld – Interactive LED Project
- High‑Speed Arduino RPM Counter Using a Novel Algorithm
- Real-Time Soil Moisture Monitoring with LCD Display – Arduino DIY Kit
- Build an IR Sensor Project with Arduino UNO – Simple Guide
- Android Motion‑Detection Camera Controlled by Arduino MCU
- PIR Motion Sensor: Working Principles & Arduino Integration Guide