Arduino Temperature & Humidity Logger Using DHT11 and Ethernet Shield
Components and supplies
DHT11 Temperature & Humidity Sensor (4 pins)
×
1
Arduino UNO
×
1
Arduino Ethernet W5100 Shield for Uno
×
1
Jumper wires (generic)
×
1
9V battery (generic)
×
1
Breadboard (generic)
×
1
9V Battery Clip
×
1
Apps and online services
Arduino IDE
About this project
What this project is about
I have been experimenting with Arduino Microcontroller for a few weeks now and only built simple circuits with LED's and stuff. I wanted to build my first projects that can be useful to do something and I decided to build a data logger for temperature and humidity. Although this is a fairly straight forward circuit the code can be quite tricky (for someone on my level. Lol).
How we did it
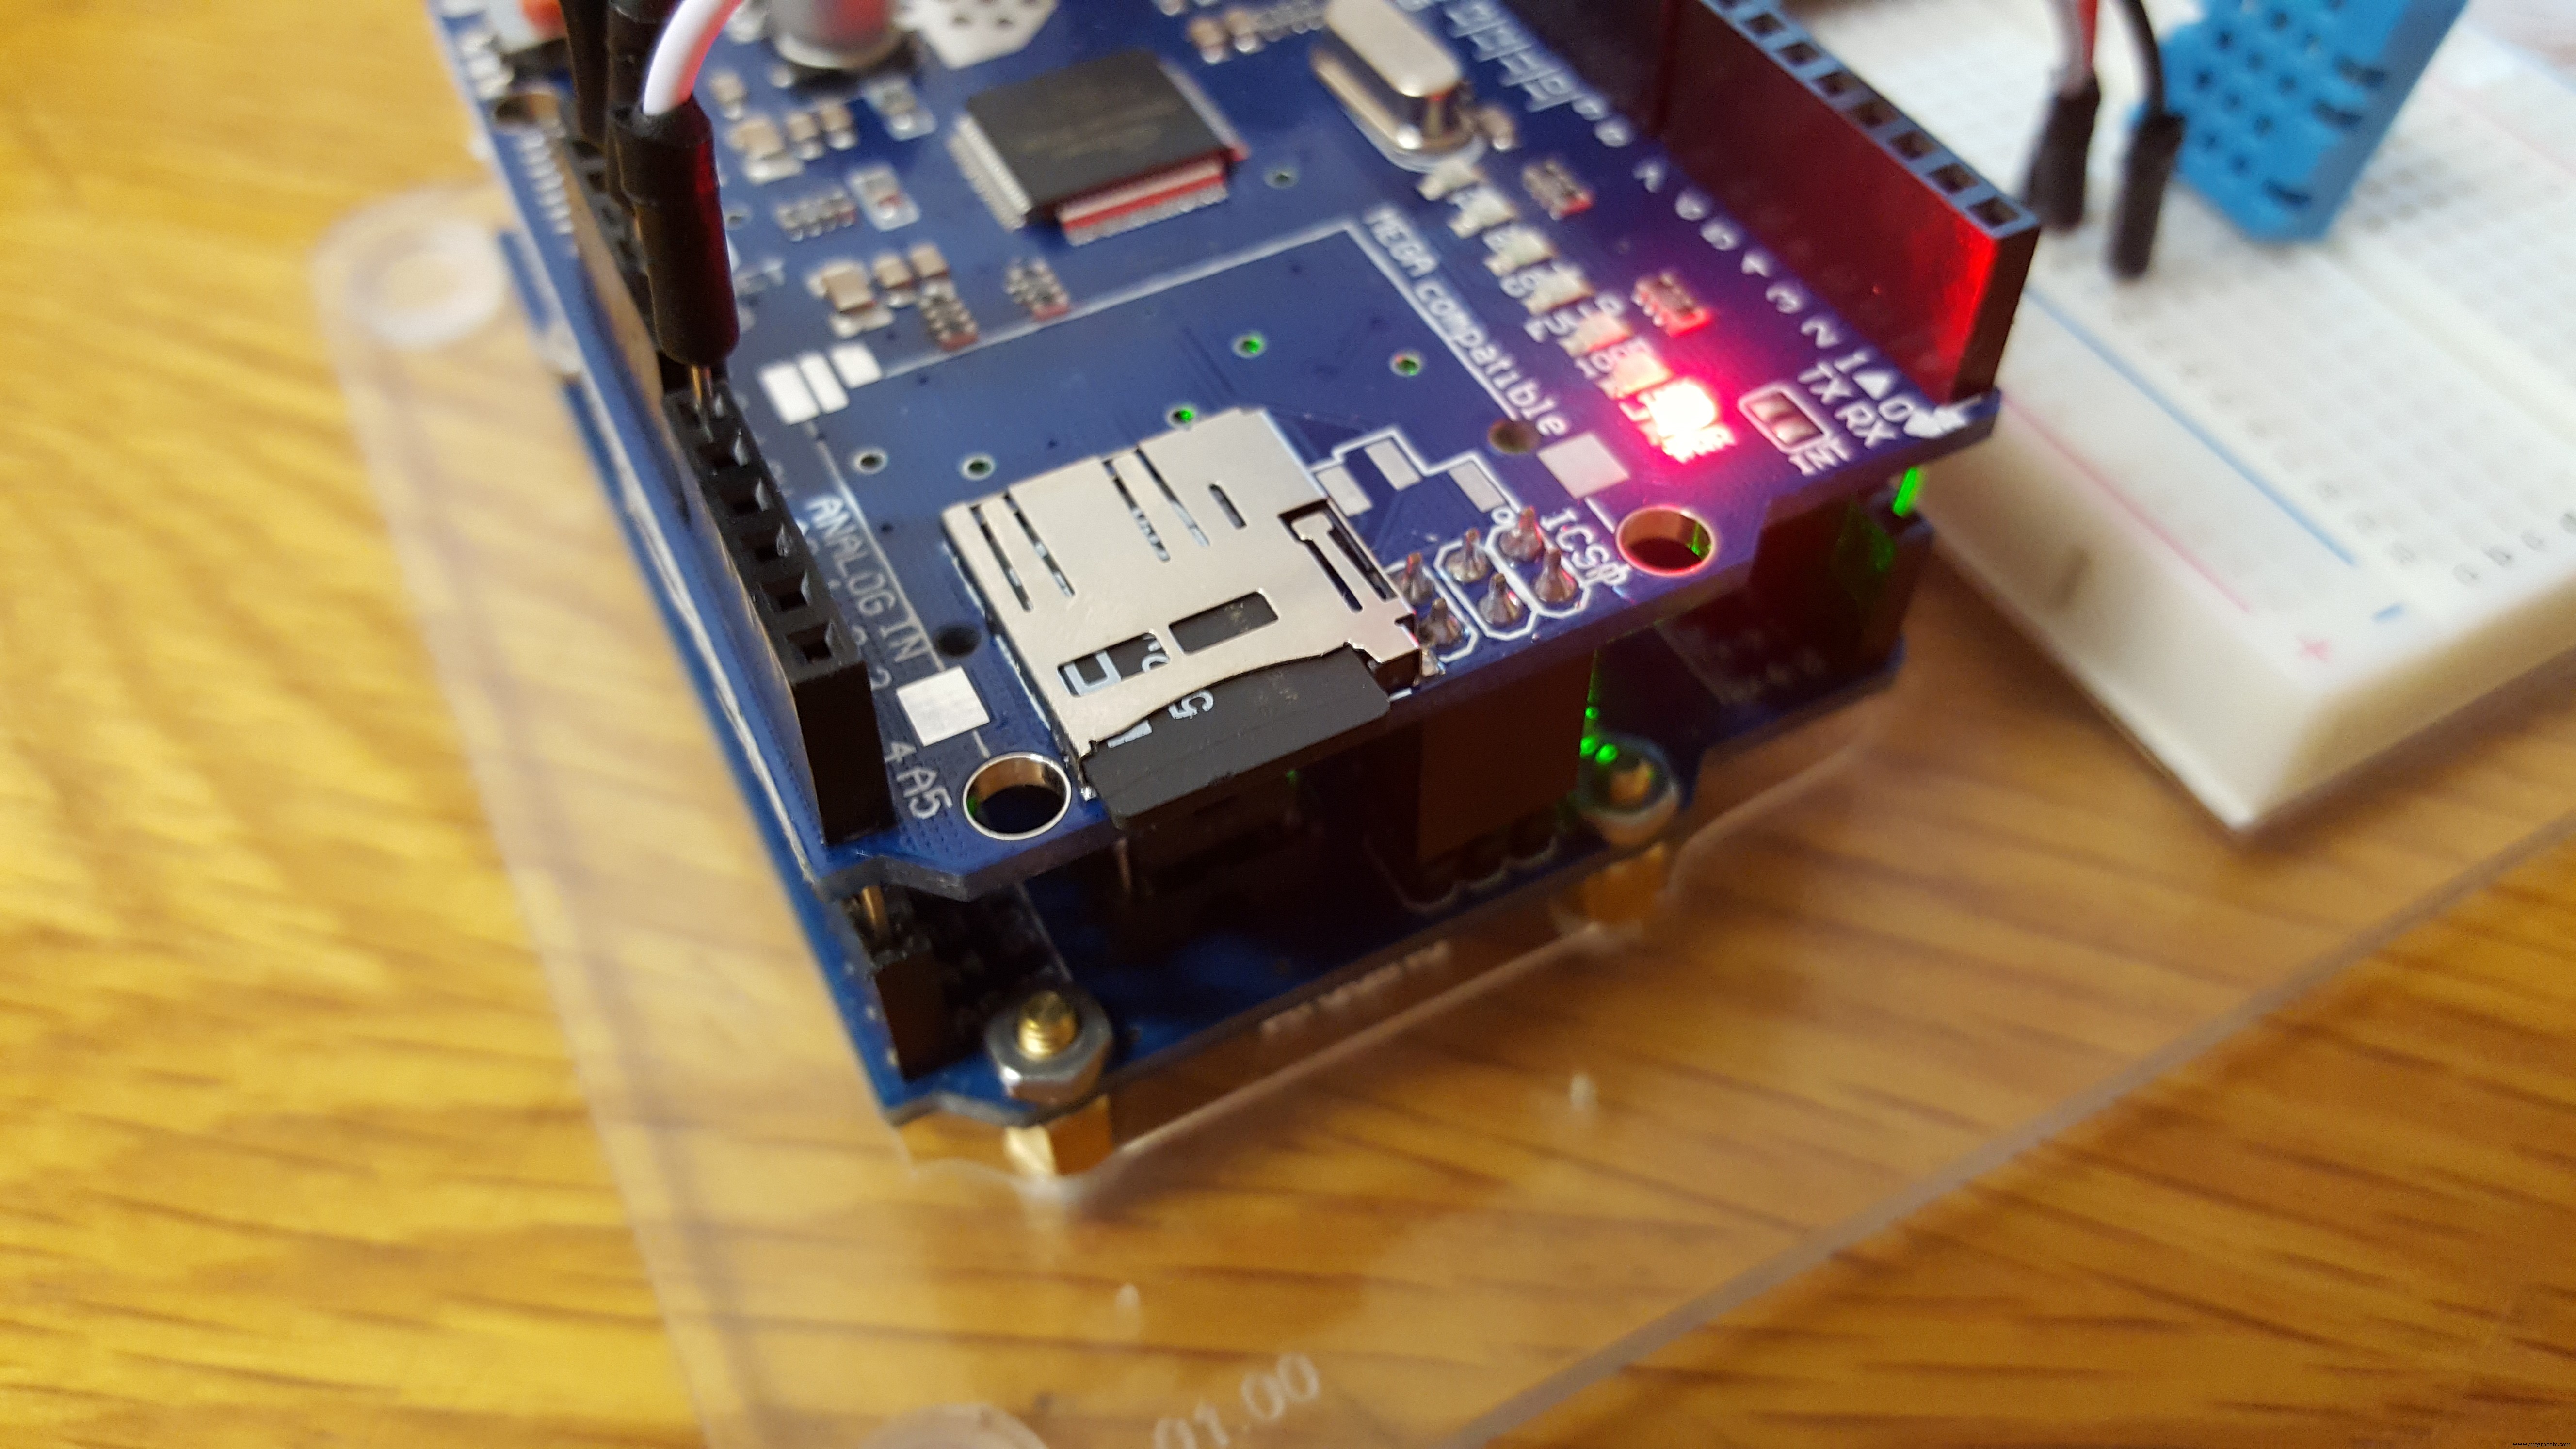
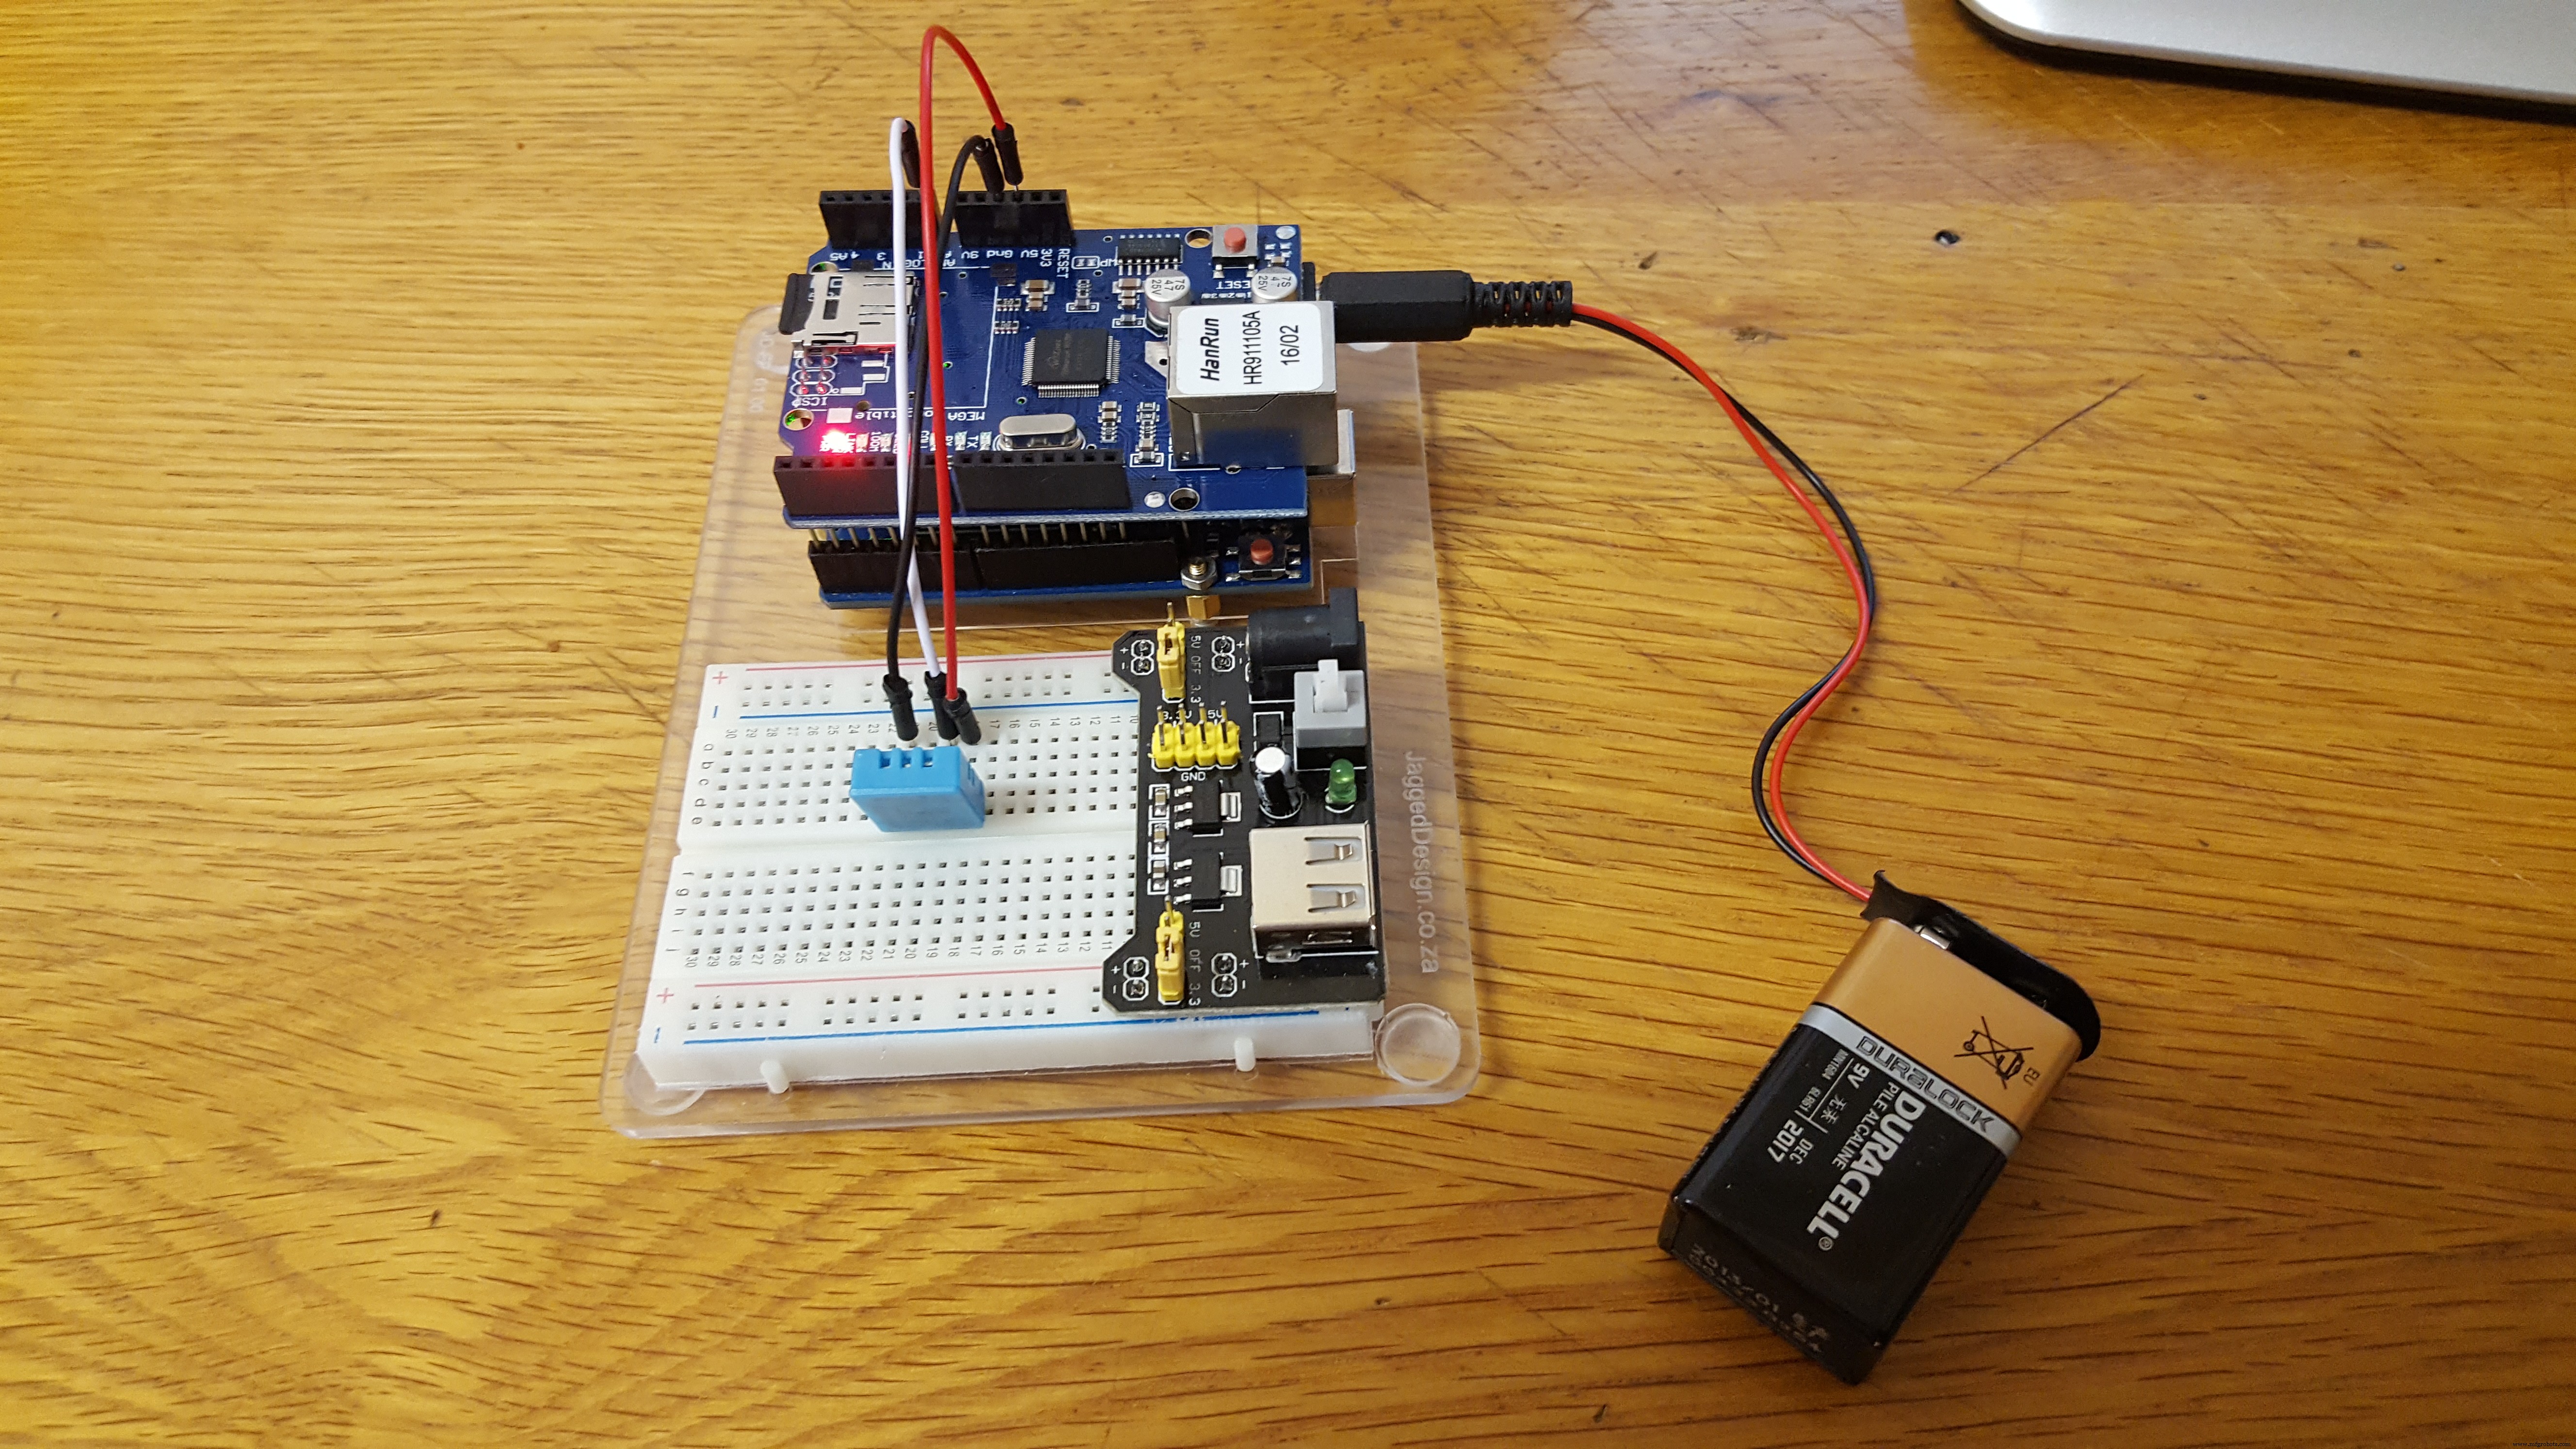
The first step is to assemble your Arduino Uno and the Ethernet Shield and build the following circuit with your components as shown below.
Once the circuit is finished, make sure the SD-card is formatted and inserted on the Ethernet shield.
You can now upload the code shown below to you. Arduino and the sensor will start measuring the temperature and humidity. The Arduino will create a DATALOGGER.TXT file on the SD-card. Once the power is disconnected the datalogger will stop and continue again once the power is restored.
Should the measuring be longer that 1 or 2 hours, I would suggest using a permanent power source like a "wall wart" to make sure the battery does not drain and you lose critical data.
Code
Temp_and_Humid.ino
Temp_and_Humid.inoArduino
Use the SD card data logger in the Arduino IDE examples and add the code for the DHT11 sensor as shown in the code below. The SD-card example allows you to log data from up to 3 sensors. Make sure you change line 57 middle segment from analogPin < 3 to analogPin < 1.
/*
  SD card datalogger

 This example shows how to log data from three analog sensors
 to an SD card using the SD library.

 The circuit:
 * analog sensors on analog ins 0, 1, and 2
 * SD card attached to SPI bus as follows:
 ** MOSI - pin 11
 ** MISO - pin 12
 ** CLK - pin 13
 ** CS - pin 4

 created  24 Nov 2010
 modified 9 Apr 2012
 by Tom Igoe

 This example code is in the public domain.

 */

#include <SPI.h>
#include <SD.h>
#include <dht.h>

dht DHT;

#define DHT11_PIN A0

const int chipSelect = 4;

void setup() {
  // Open serial communications and wait for port to open:
  Serial.begin(9600);
  while (!Serial) {
    ; // wait for serial port to connect. Needed for native USB port only
  }


  Serial.print("Initializing SD card...");

  // see if the card is present and can be initialized:
  if (!SD.begin(chipSelect)) {
    Serial.println("Card failed, or not present");
    // don't do anything more:
    return;
  }
  Serial.println("card initialized.");
}

void loop() {
  // make a string for assembling the data to log:
  String dataString = "";

  // read three sensors and append to the string:
  for (int analogPin = 0; analogPin < 1; analogPin++) {
    int chk = DHT.read11(DHT11_PIN);
    dataString += String(chk);
    if (analogPin < 2) {
      dataString += ",";
    }
  }

  // open the file. note that only one file can be open at a time,
  // so you have to close this one before opening another.
  File dataFile = SD.open("datalog.txt", FILE_WRITE);

  // if the file is available, write to it:
  if (dataFile) {
    dataFile.println(DHT.temperature);
    dataFile.println(DHT.humidity);
    dataFile.close();
    // print to the serial port too:
    Serial.print("Temperature = ");
  Serial.println(DHT.temperature);
  Serial.print("Humidity = ");
  Serial.println(DHT.humidity);
  delay(600000);
  }
  // if the file isn't open, pop up an error:
  else {
    Serial.println("error opening datalog.txt");
  }
}