


Read Temperature & Humidity with DHT11 on Blynk – Step‑by‑Step Arduino Tutorial
Components and supplies
 |
| × | 1 | |||
 |
| × | 1 | |||
 |
| × | 1 | |||
 |
| × | 1 |
Apps and online services
 |
| |||
 |
|
About this project
Hi ! In this project we will learn how to read temperature and humidity from DHT11 using Blynk. If you don't know how to connect your Arduino to a computer (with Linux), look at this project (without adding a LED).
Note: Don't add a button for LED on Blynk or upload the code that you found in that project!!! You must upload the code that is below (in the code section).
I attached the schematics that explains how to connect the DHT11 to Arduino.
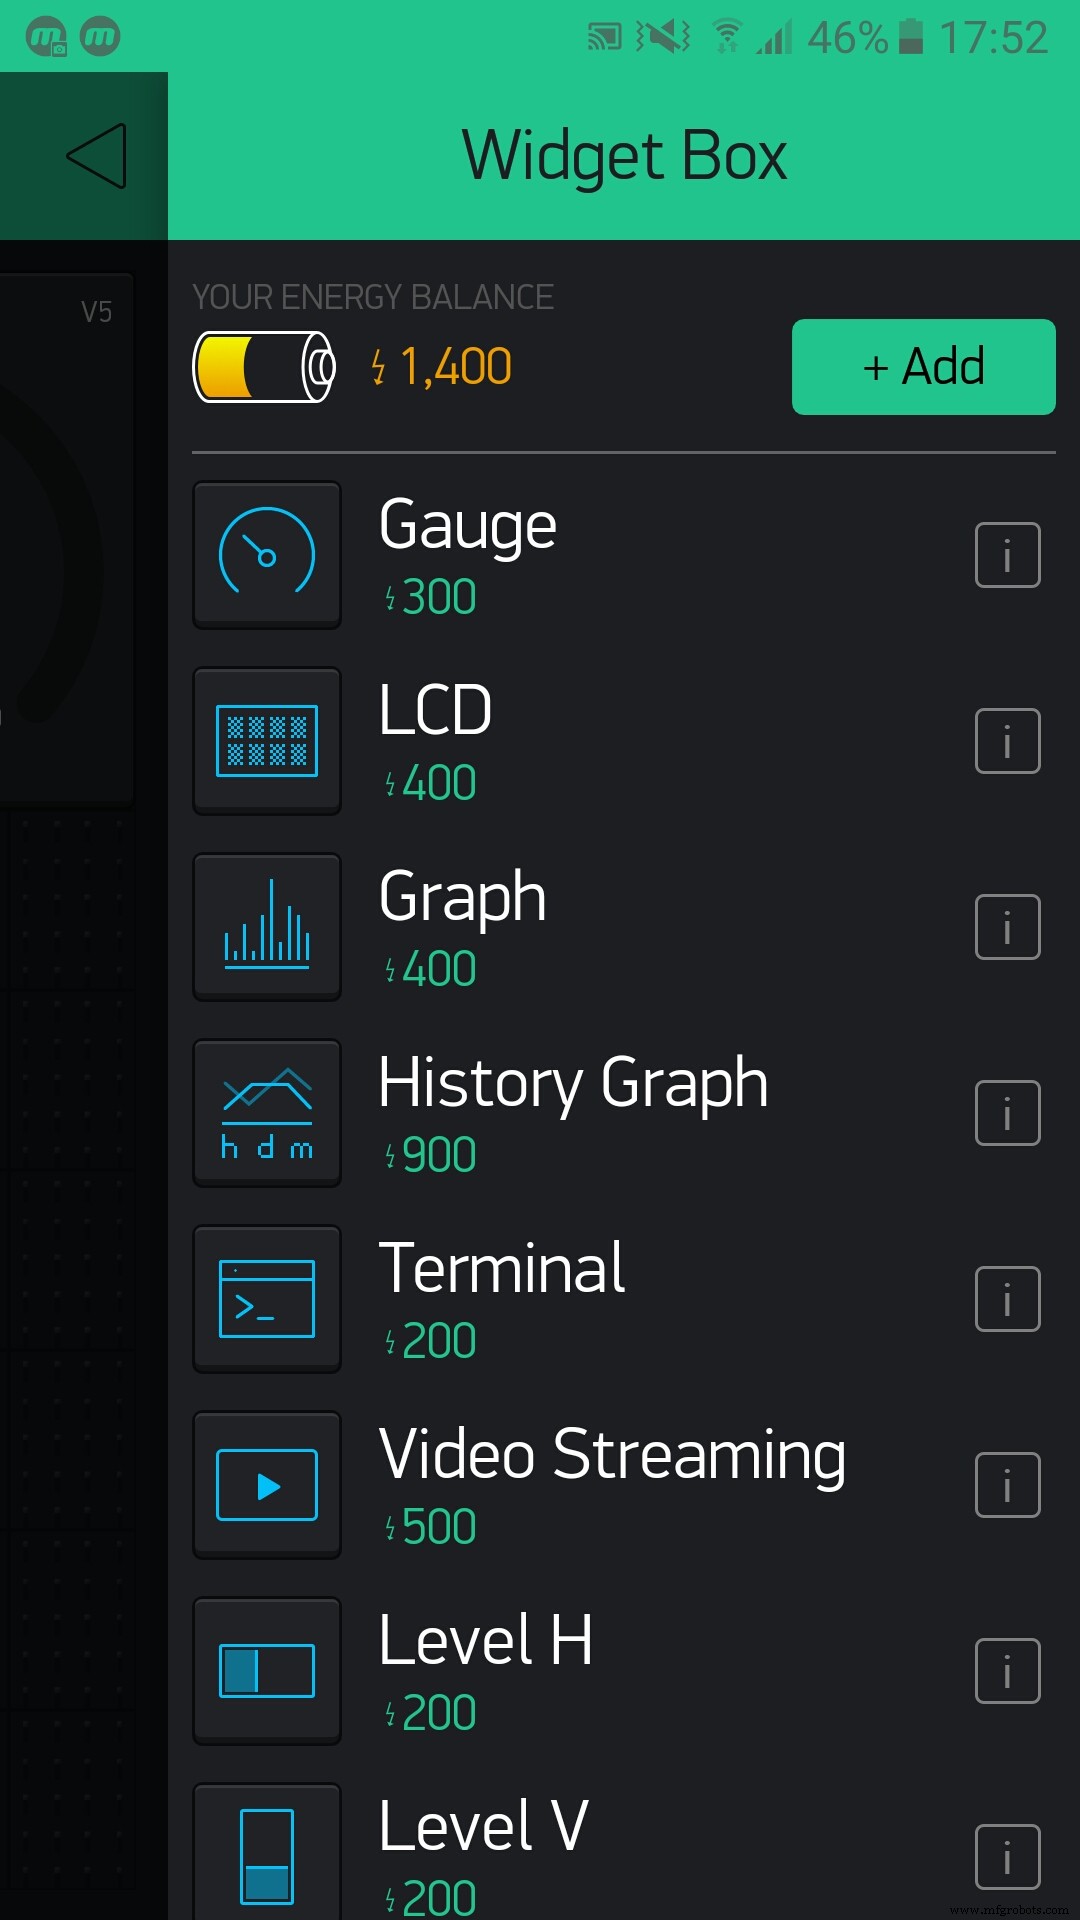
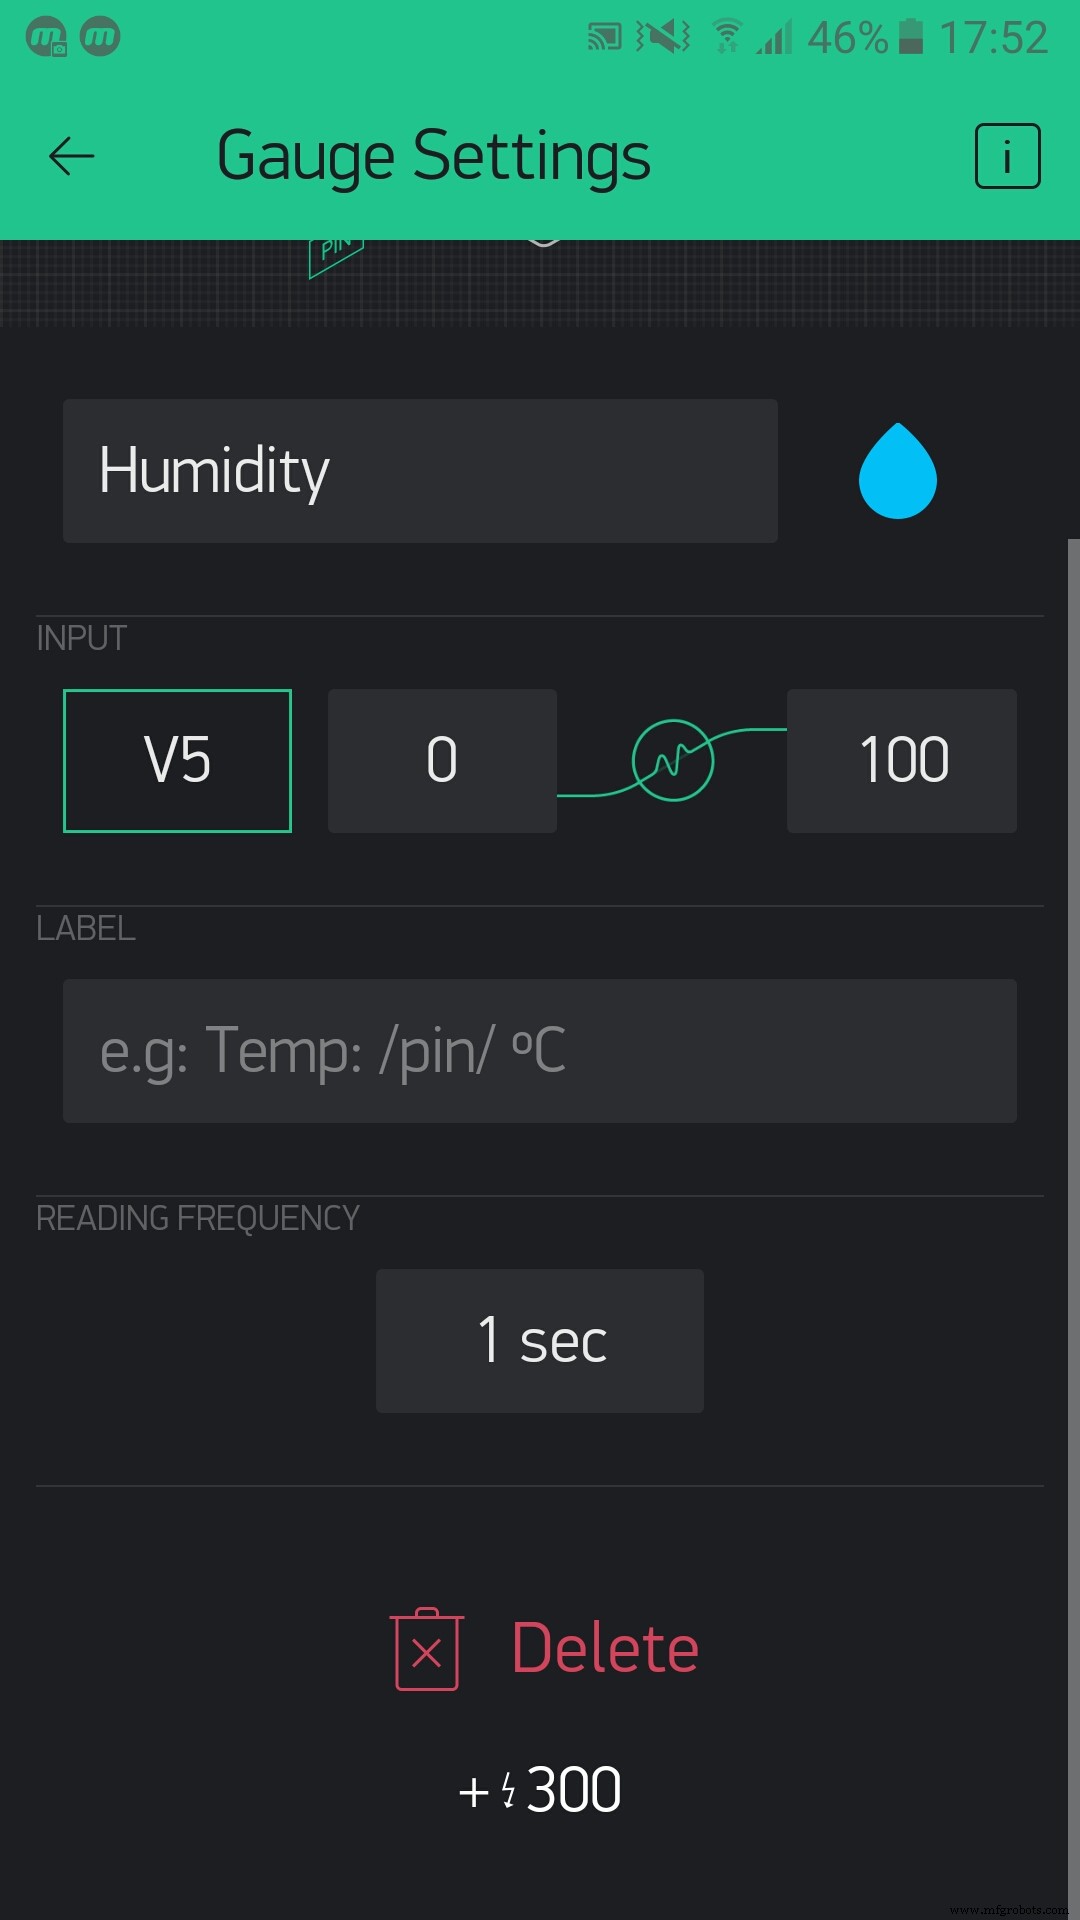
BlynkIf you did exactly what I said below, you should see that you are online. Now you must add two gauges and you must setup the gauges like this:

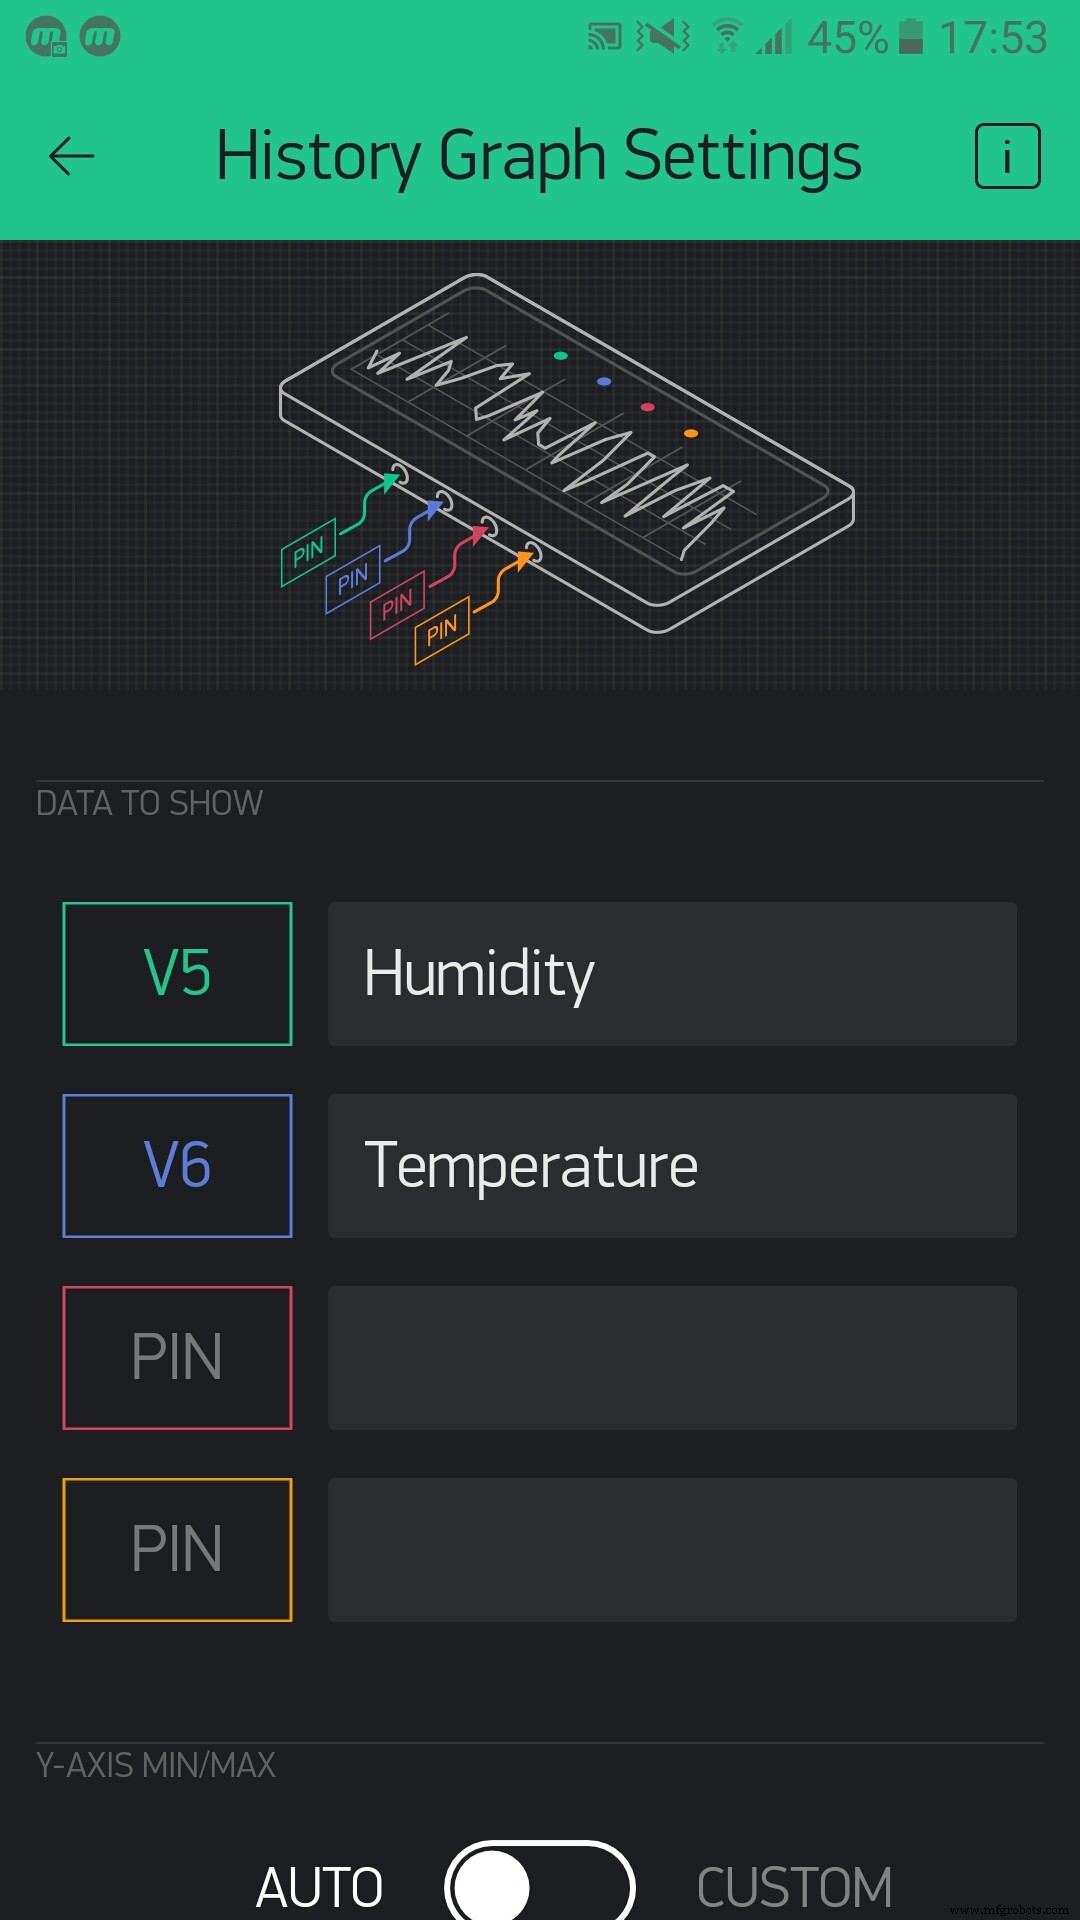
Now, if you want, you can add a history graph:
Now it looks like this:
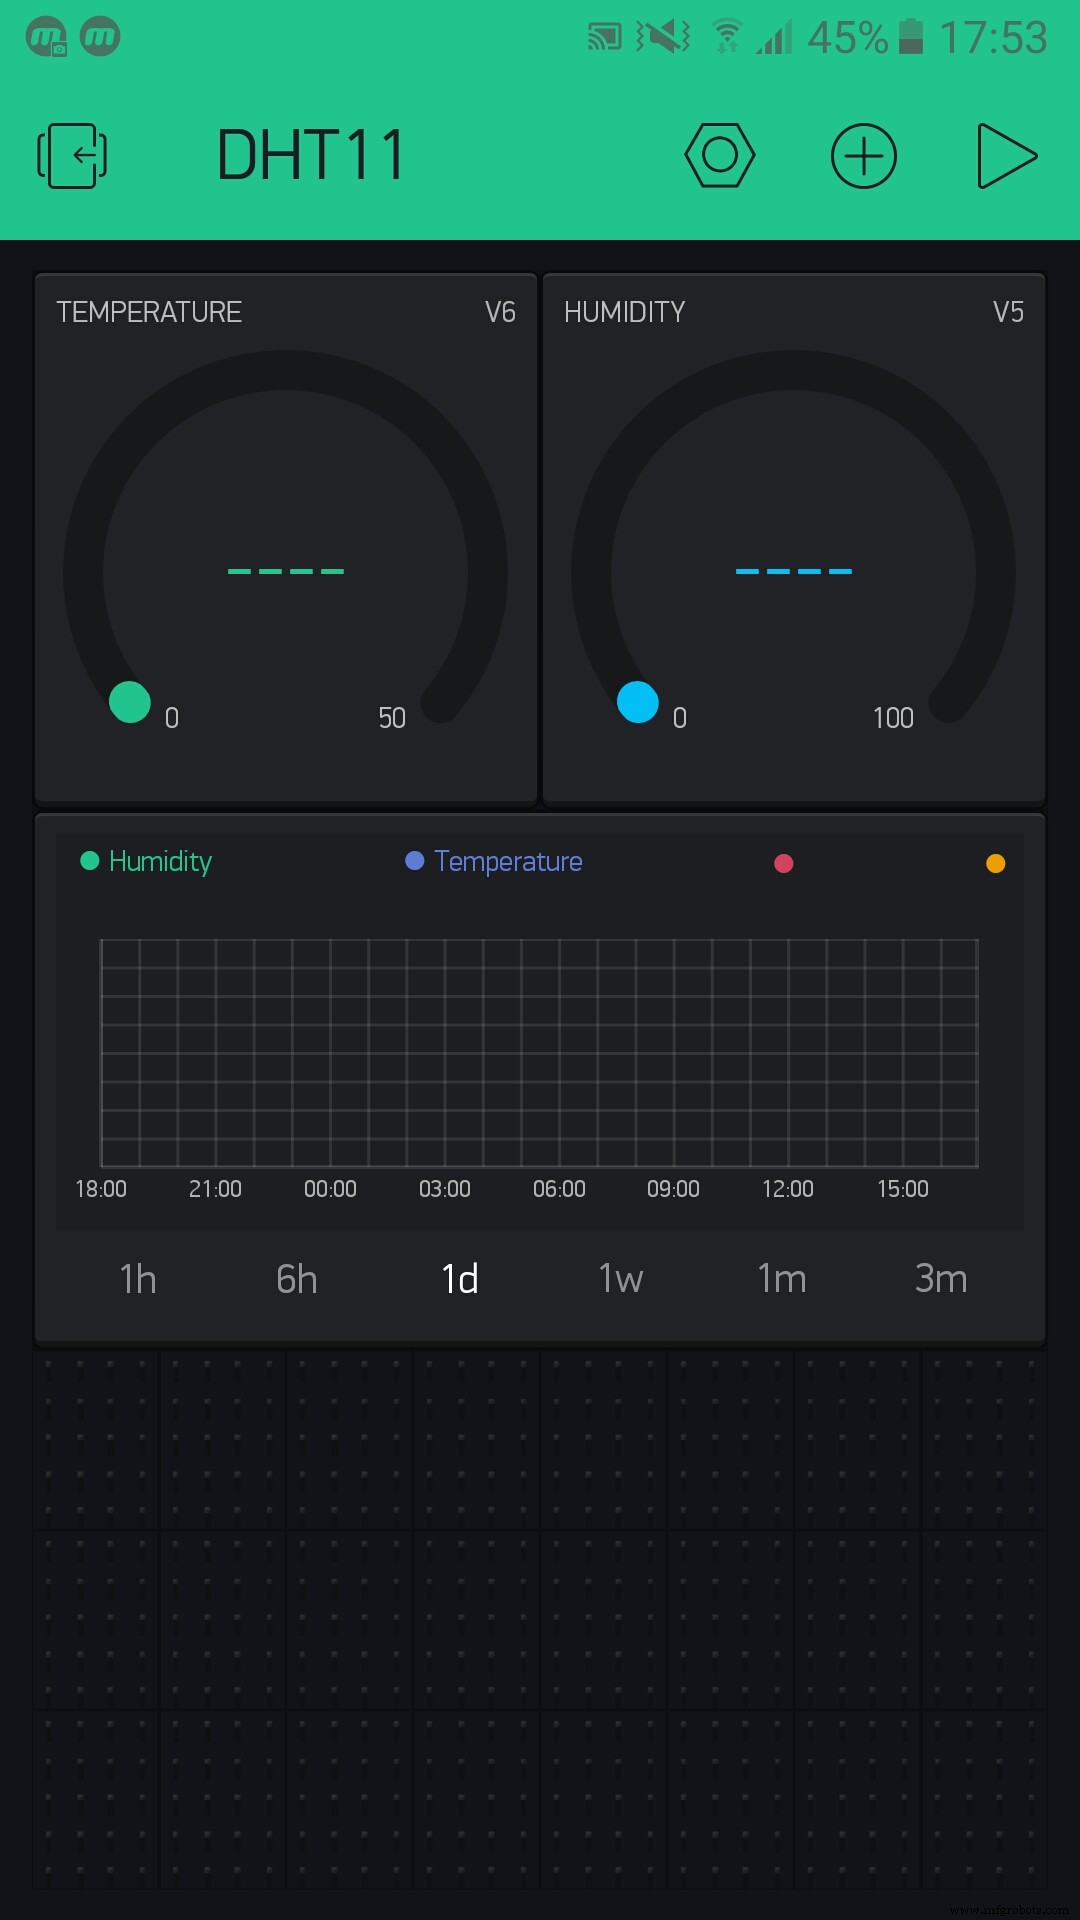
If all the steps went OK, you should see something like this:

Now play it!

You will see the temperature and humidity on the gauges, and the history graph will save the temperature and the humidity progress. This is a project that is simple and if you like it, respect the project and follow me!
P.S. Have fun! (most important rule!)
Code
- Code for DHT11
Code for DHT11 C/C++
/**************************************************************
  Blynk is a platform with iOS and Android apps to control
  Arduino, Raspberry Pi and the likes over the Internet.
  You can easily build graphic interfaces for all your
  projects by simply dragging and dropping widgets.
    Downloads, docs, tutorials: http://www.blynk.cc
    Blynk community:            http://community.blynk.cc
    Social networks:            http://www.fb.com/blynkapp
                                http://twitter.com/blynk_app
  Blynk library is licensed under MIT license
  This example code is in public domain.
 *************************************************************
  This example shows how to use ordinary Arduino Serial
  to connect your project to Blynk.
  Feel free to apply it to any other example. It's simple!
 *************************************************************
             USB HOWTO: http://tiny.cc/BlynkUSB
 **************************************************************/

// You could use a spare Hardware Serial on boards that have it (like Mega)
#include <SoftwareSerial.h>
SoftwareSerial DebugSerial(2, 3); // RX, TX

#define BLYNK_PRINT DebugSerial
#include <BlynkSimpleStream.h>

#include <SimpleTimer.h>
#include <DHT.h>
#define DHTPIN 5          // What digital pin we're connected to

// Uncomment whatever type you're using!
#define DHTTYPE DHT11     // DHT 11
//#define DHTTYPE DHT22   // DHT 22, AM2302, AM2321
//#define DHTTYPE DHT21   // DHT 21, AM2301

DHT dht(DHTPIN, DHTTYPE);
SimpleTimer timer;

// You should get Auth Token in the Blynk App.
// Go to the Project Settings (nut icon).
char auth[] = "YourAuthToken";

// This function sends Arduino's up time every second to Virtual Pin (5).
// In the app, Widget's reading frequency should be set to PUSH. This means
// that you define how often to send data to Blynk App.

void sendSensor()
{
  float h = dht.readHumidity();
  float t = dht.readTemperature(); // or dht.readTemperature(true) for Fahrenheit

  if (isnan(h) || isnan(t)) {
    Serial.println("Failed to read from DHT sensor!");
    return;
  }
  // You can send any value at any time.
  // Please don't send more that 10 values per second.
  Blynk.virtualWrite(V5, h);
  Blynk.virtualWrite(V6, t);
}

void setup()
{
  // Debug console
  DebugSerial.begin(9600);

  // Blynk will work through Serial
  // Do not read or write this serial manually in your sketch
  Serial.begin(9600);
  Blynk.begin(Serial, auth);
    // Setup a function to be called every second
  timer.setInterval(1000L, sendSensor);
}

void loop()
{
  Blynk.run();
  timer.run(); // Initiates SimpleTimer
}
Schematics
Sorry but I didn't find a DHT11 so I renamed a TMP36 to DHT11dht11_JqQomro2Tj.fzzManufacturing process
- DHT11 Temperature & Humidity Sensor Project with LED Indicators and Piezo Speaker
- Arduino Temperature & Humidity Logger Using DHT11 and Ethernet Shield
- Display BME280 Temperature, Humidity & Pressure on a Nextion Touchscreen
- Arduino‑Powered Smart Coffee Maker with Bluetooth Control and Temperature Monitoring
- Bolt IoT: Advanced Humidity & Temperature Monitoring with DHT11 and Arduino
- DHT11 Temperature & Humidity Sensor for Arduino Projects
- Track Orientation with Arduino & ADXL345 Accelerometer – A Step‑by‑Step Guide
- Master Rotary Encoders with Arduino: How They Work & Step‑by‑Step Integration
- Arduino Tutorial: Master Temperature & Humidity with DHT11 & DHT22 Sensors
- PIR Motion Sensor: Working Principles & Arduino Integration Guide