


Android Motion‑Detection Camera Controlled by Arduino MCU
Components and supplies
 |
| × | 1 | |||
 |
| × | 1 | |||
| × | 1 | ||||
| × | 1 | ||||
 |
| × | 1 | |||
 |
| × | 1 |
About this project
Hello everyone. In our smartphone, there are different types of sensor. These are used in different types of applications. But sometimes we need to add extra sensors in our smartphone; for this we have to use Arduino/Micro controller. From the title I hope you are sure that I am going to describe about motion sensor. Yeah, it is possible to make a Motion Detector Camera with a smartphone and Arduino.
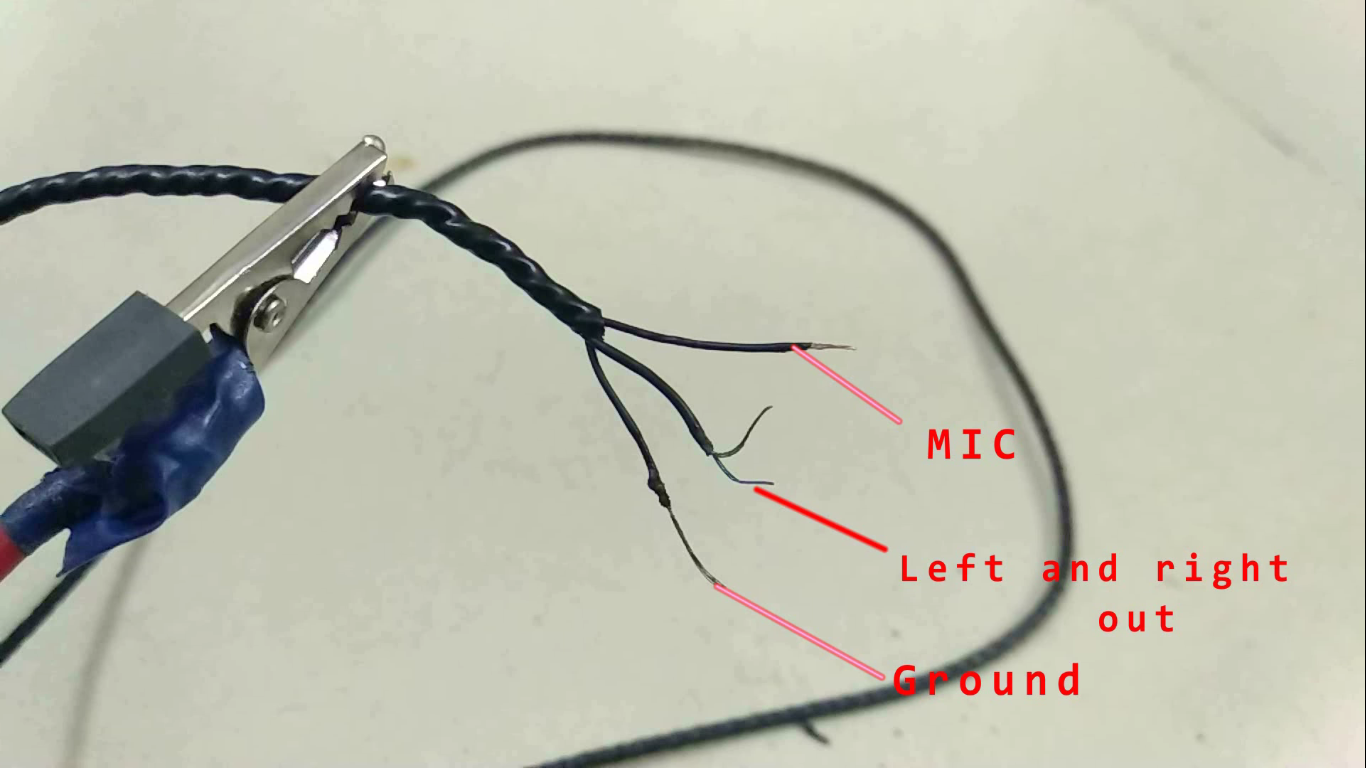
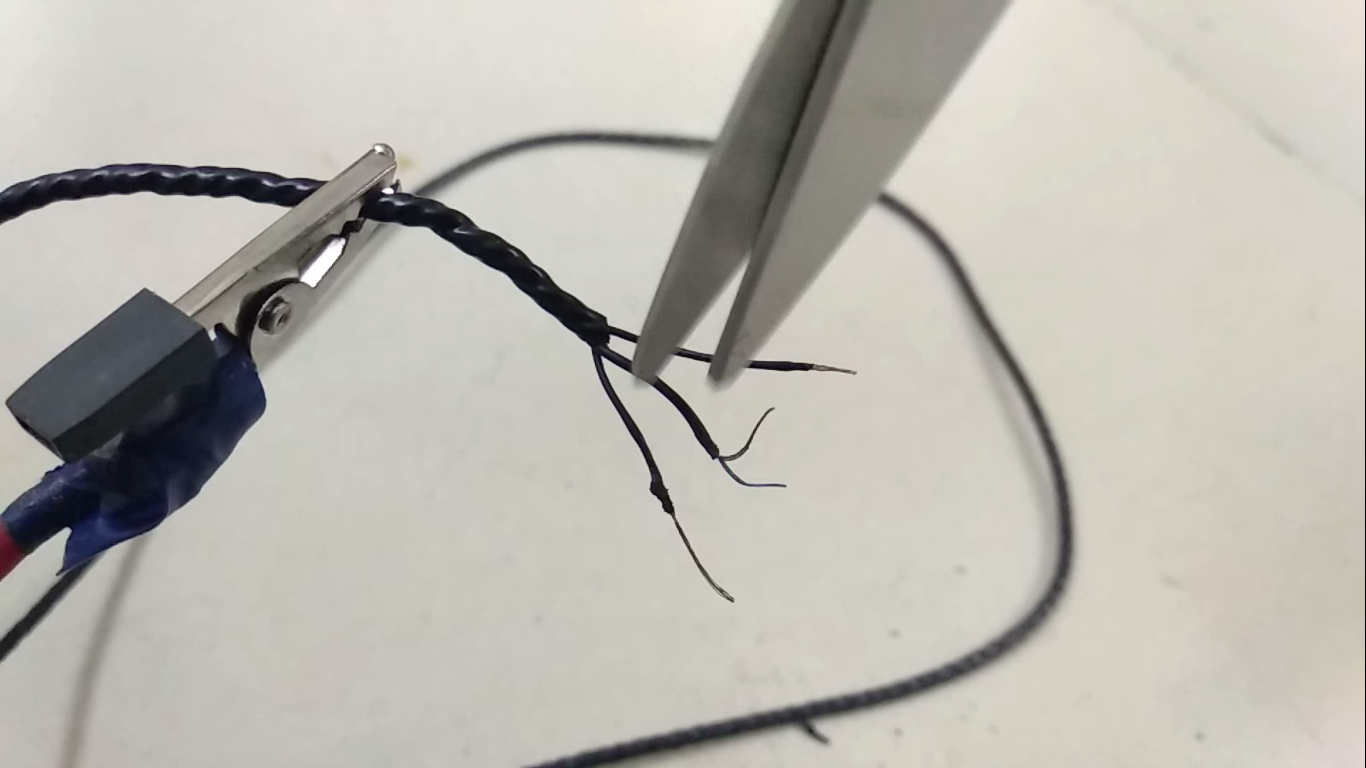
Let's get startedFirstly, cut the left and right audio out wires of your earphone. You will see a red (microphone) and black (ground) wire. Attach the jumper wire to these wires.

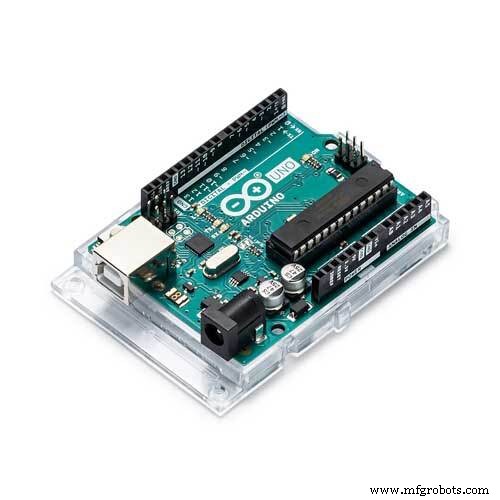
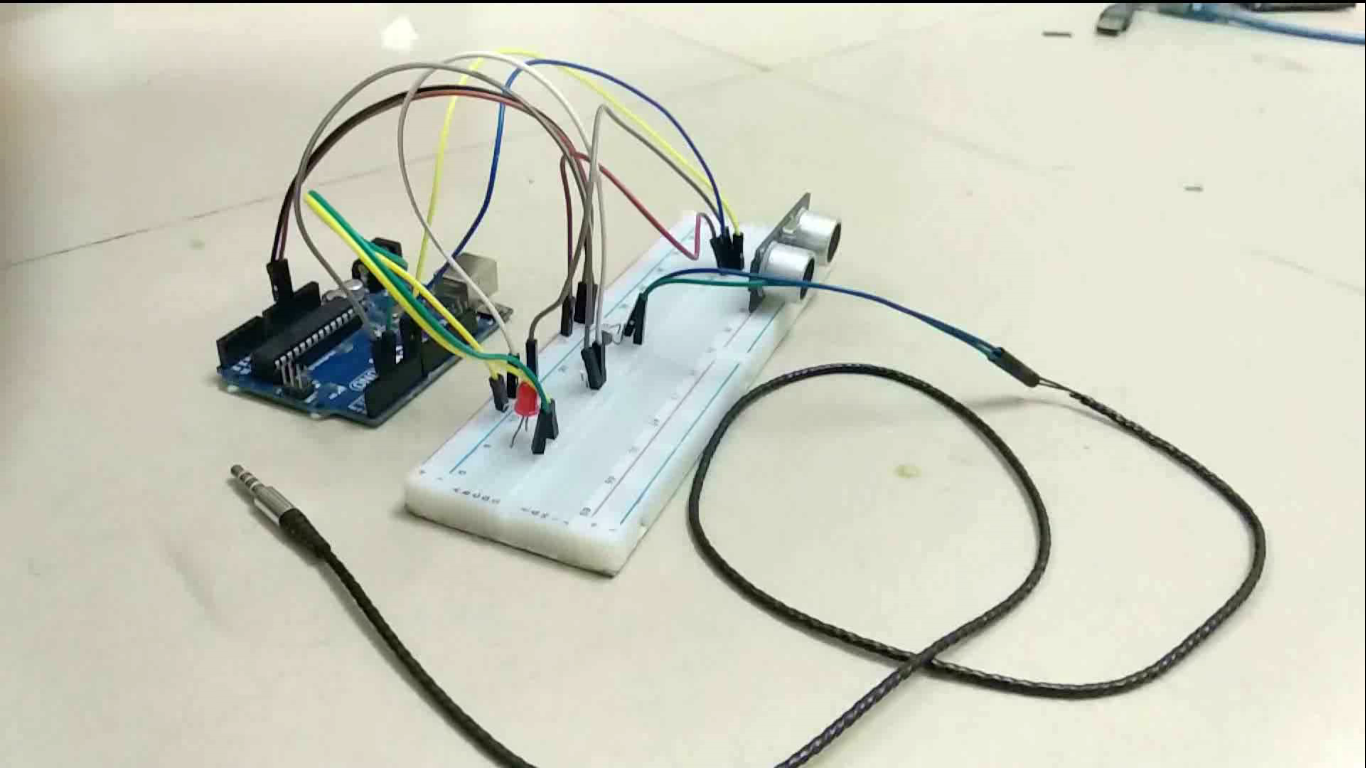
Make the Arduino circuit by following the steps below:
- Arduino pin 2 <----> white LED
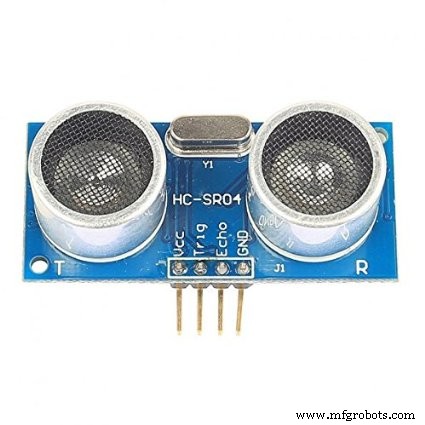
- Arduino pin 6 <---->Tring ( Sonar sensor)
- Arduino pin 7 <----> Echo (Sonar sensor)
Give 5v to the sonar sensor.
Earphone:
- Red wire <----> One leg of LDR
- Black wire <----> Other leg of LDR

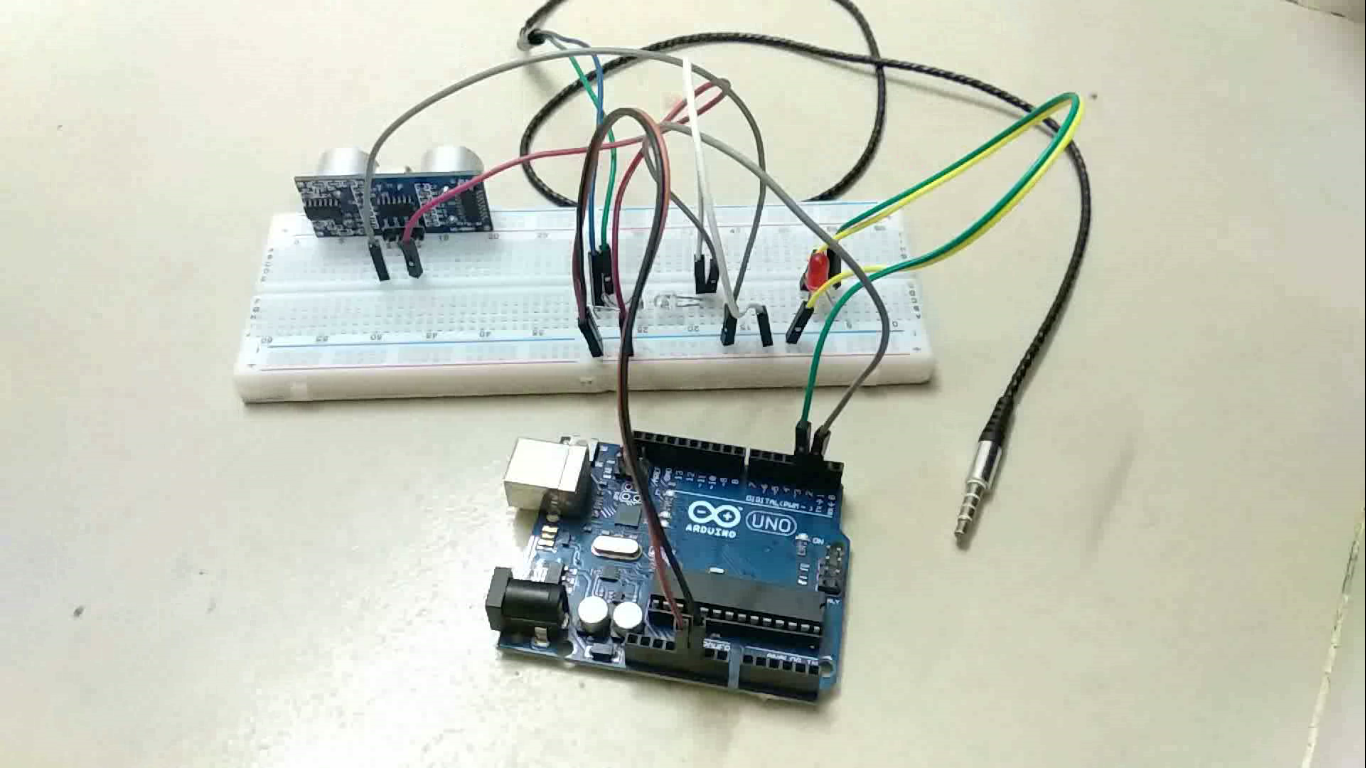
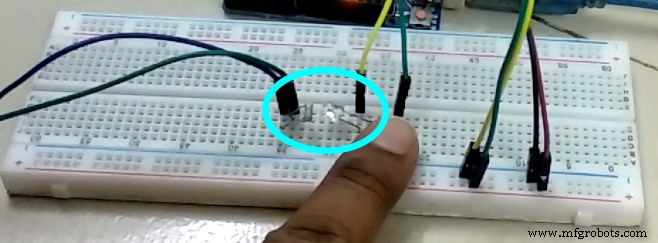
(LDR must be faced on the White LED. You can also isolate LDR and LED by using black scotch tape.)
Power up the Arduino and connect the earphone jack to your smartphone. Then open the camera app in your smartphone. Now put an object in front of the sonar sensor, you will see that your phone will start taking pictures. Then make a nice casing for it. :)
Congratulations! Finally you made your own motion detecting camera.
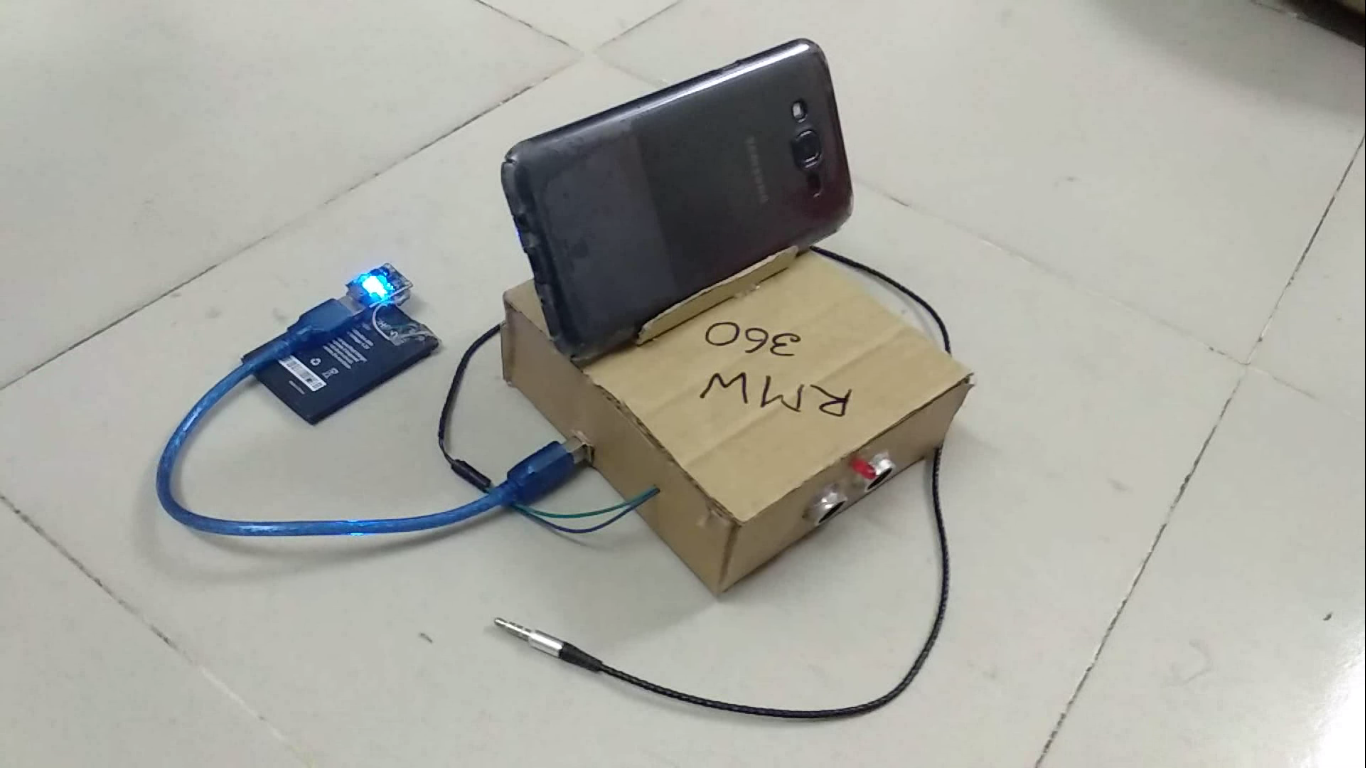
Of course, you are thinking about how it works. I hope that you know how a sonar sensor works. If you don't, you can watch this video. Every earphone has a volume button which works on a smartphone as a shutter button when the camera app is opened. The earphone's volume buttons are connected with the mic and gnd within a fixed value of resistor. And LDR changes its resistance which depends on the presence of light. For this, we have connected a high bright LED in front of the LDR. When Arduino turns on the LED, the resistance of LDR decreases.
Then LDR works as a volume button, it triggers the shutter button and captures a picture. The combination of LED and LDR is also known as optocoupler.
Best way to make a gaming steering wheel using an Arduino Uno:
Code
- Android motion detector camera with Arduino
Android motion detector camera with ArduinoC/C++
Arduino code , Extension is .ino#define pingTrig 6
#define pingEcho 7
int cameratrigger = 2 ;
int led = 3 ;
void setup()
{Serial.begin(9600);
pinMode(pingTrig, OUTPUT);
pinMode(pingEcho, INPUT);
delay(200);
pinMode(led, OUTPUT);
pinMode(cameratrigger, OUTPUT);
}
void loop()
{
long duration, inches, cm;
digitalWrite(pingTrig, LOW);
delayMicroseconds(2);
digitalWrite(pingTrig, HIGH);
delayMicroseconds(10);
digitalWrite(pingTrig, LOW);
duration = pulseIn(pingEcho, HIGH);
cm = duration / 29 / 2;
Serial.print("-->");Serial.println(cm);
if(cm < 30 ){
digitalWrite(cameratrigger,HIGH);
digitalWrite(led,HIGH);
delay(200);
digitalWrite(cameratrigger,LOW);
digitalWrite(led,LOW);
delay(200);}}
Schematics

Manufacturing process
- ESP32-Powered Motion-Detecting Security Camera for Discord
- DHT11 Temperature & Humidity Sensor Project with LED Indicators and Piezo Speaker
- K30 CO2 Sensor: Real‑Time Indoor Air Quality Monitoring
- Build a Simple Obstacle Sensor with Arduino – Easy IR LED & Photodiode Tutorial
- Integrating a DFRobot Capacitive Fingerprint Sensor with Arduino or ESP8266
- Interactive LED Matrix Door Display with PIR Motion Sensor – Arduino Holiday Greeting
- Build an Ultrasonic Range Detector Using Arduino UNO and SR04 Sensor
- Real-Time Soil Moisture Monitoring with LCD Display – Arduino DIY Kit
- Build an IR Sensor Project with Arduino UNO – Simple Guide
- Build a Reliable Arduino-Based Lie Detector