


Interactive LED Matrix Door Display with PIR Motion Sensor – Arduino Holiday Greeting
Components and supplies
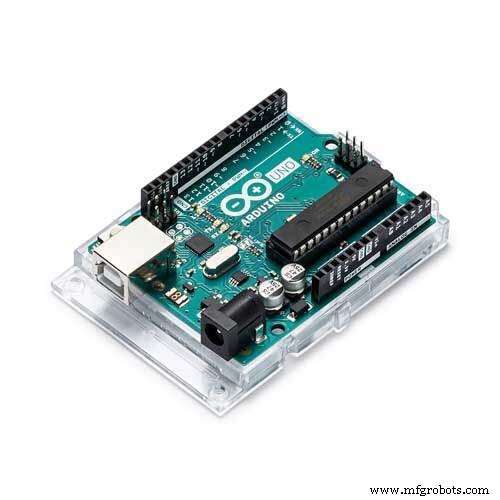 |
| × | 1 | |||
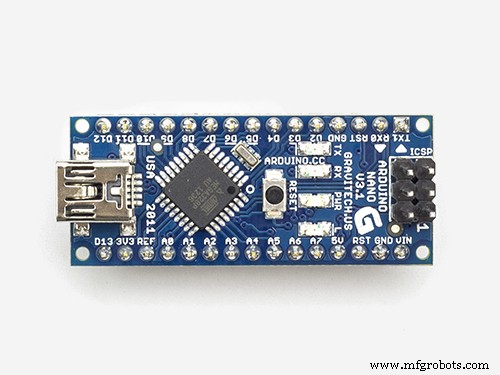 |
| × | 1 | |||
 |
| × | 1 | |||
| × | 1 | ||||
 |
| × | 1 | |||
| × | 1 | ||||
| × | 1 | ||||
| × | 3 |
Necessary tools and machines
|
| |||
|
About this project
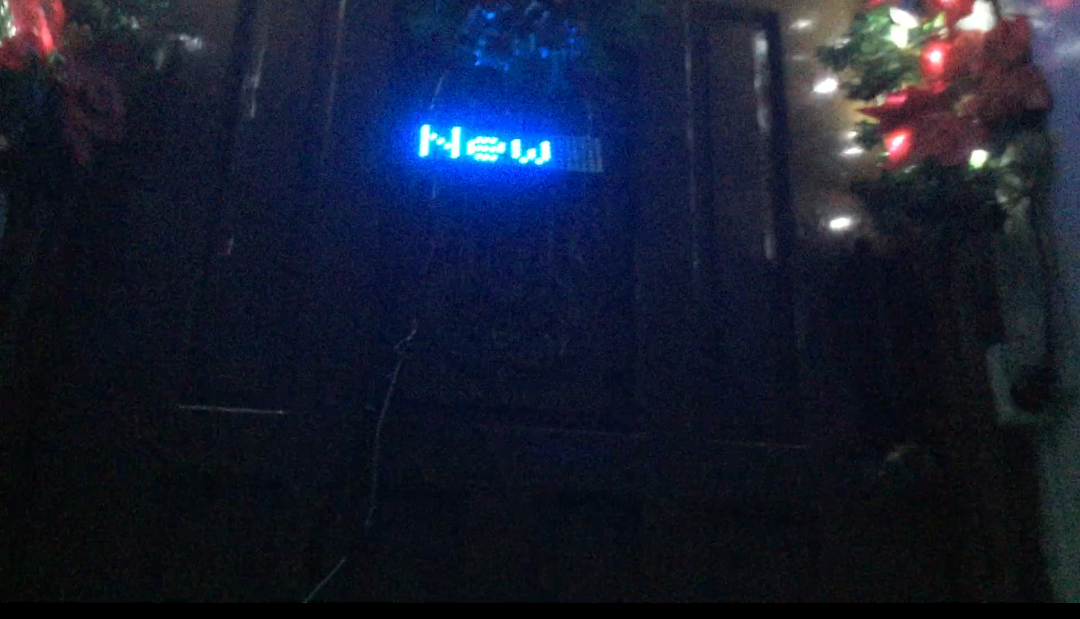
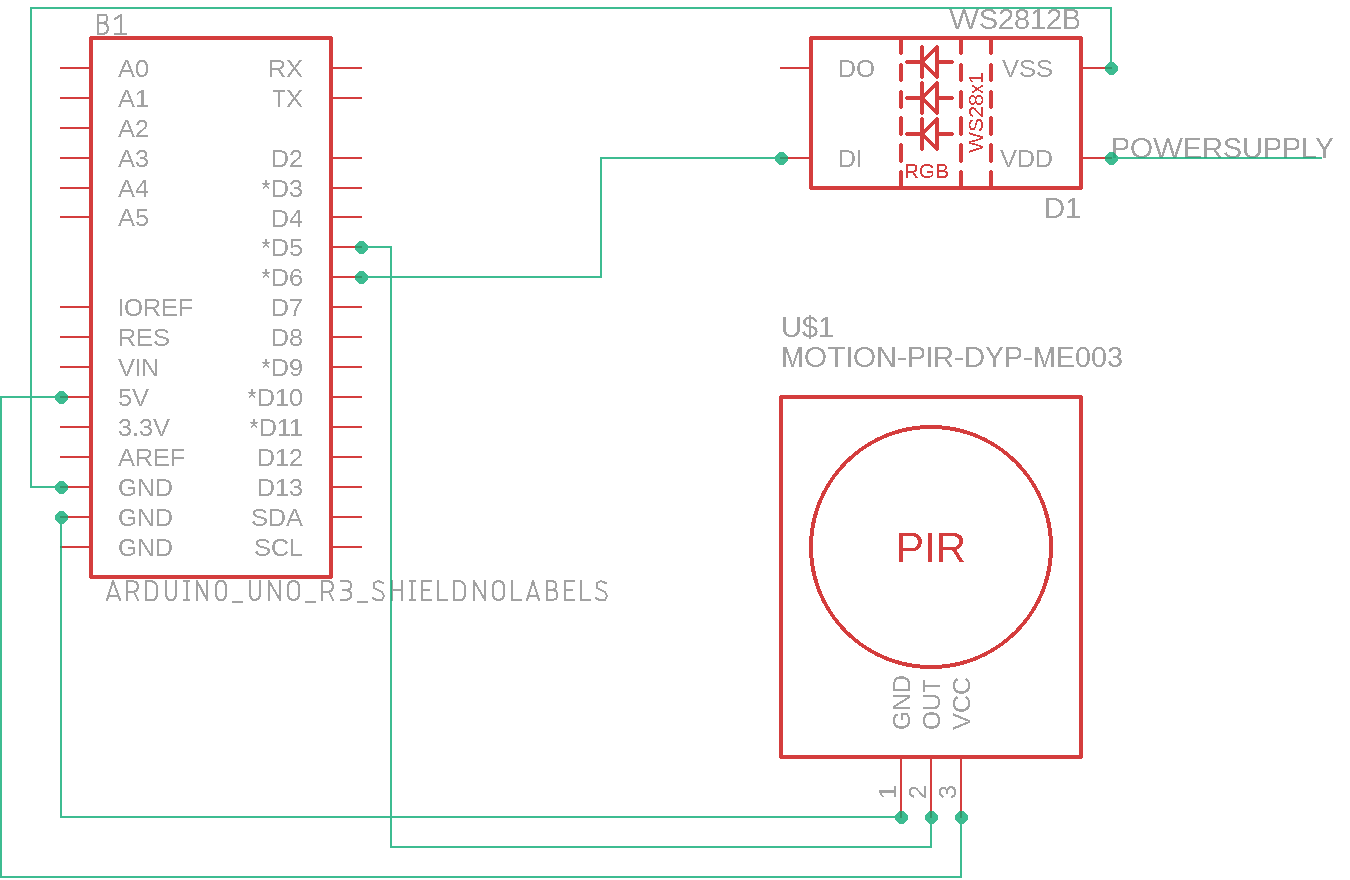
This project combines 3 WS2812B 8x8 RGB LED matrices and a PIR motion sensor to greet visitors with a text saying "Happy Holidays & Happy New Year!" when they are close enough to the door and display a set of effects like a screensaver on monitors when the sensor is not detecting anyone nearby.
It is controlled by an Arduino UNO and powered by a 5v 30a power supply.
I kitbashed or combined 3 sets of codes.
The ones from the FastLED library DemoReel100 Example for the Idle/Standby Effects.
The PIR Motion Sensor Code
And the setup code for the Neopixel, I think. I'm not really sure anymore, tbh,, since that was almost a month ago when I mashed the codes together.
I also used another PIR motion sensor that is connected to a 5v Relay with a 12v RGB LED String via extension cord and controlled by an Arduino Nano.
The LED String, together with the holiday lights which is also connected to the extension cord gets activated when the 1st PIR sensor detects movement. It is located on ceiling near the 1st step of the stairs.
After a few steps going up, the 2nd PIR sensor tells the UNO to show the Text display on the matrices when someone is near enough to the door.
******************************************************************************
Social Media Links To Follow (I mean, if you want to):
Facebook - https://fb.me/HeathenHacks
Twitter - https://twitter.com/HeathenHacks
Instagram - https://instagr.am/HeathenHacks
******************************************************************************

Code
- Arduino Holiday
Arduino HolidayArduino
#include <FastLED.h>

FASTLED_USING_NAMESPACE

#include <Adafruit_GFX.h>
#include <Adafruit_NeoMatrix.h>
#include <Adafruit_NeoPixel.h>
#ifndef PSTR
#define PSTR // Make Arduino Due happy
#endif
#define PIN 6
//#if defined(FASTLED_VERSION) && (FASTLED_VERSION < 3001000)
//#warning "Requires FastLED 3.1 or later; check github for latest code."
//#endif

#define DATA_PIN    6
#define LED_TYPE    WS2811
#define COLOR_ORDER GRB
#define NUM_LEDS    192
CRGB leds[NUM_LEDS];
const uint8_t kMatrixWidth  = 24;
const uint8_t kMatrixHeight = 8;
const bool    kMatrixSerpentineLayout = true;
#define NUM_LEDS (kMatrixWidth * kMatrixHeight)
#define MAX_DIMENSION ((kMatrixWidth>kMatrixHeight) ? kMatrixWidth : kMatrixHeight)
#define BRIGHTNESS          50
#define FRAMES_PER_SECOND  120
// The 16 bit version of our coordinates
static uint16_t x;
static uint16_t y;
static uint16_t z;
Adafruit_NeoMatrix matrix = Adafruit_NeoMatrix(24, 8, PIN,
                            NEO_MATRIX_TOP     + NEO_MATRIX_RIGHT +
                            NEO_MATRIX_COLUMNS + NEO_MATRIX_PROGRESSIVE,
                            NEO_GRB            + NEO_KHZ800);
const uint16_t colors[] = {
  matrix.Color(255, 0, 0), matrix.Color(0, 255, 0), matrix.Color(0, 0, 255), matrix.Color(0, 255, 255), matrix.Color(255, 0, 255), matrix.Color(255, 255, 0), matrix.Color(255, 255, 255)};
uint16_t speed = 20; // speed is set dynamically once we've started up
uint16_t scale = 30; // scale is set dynamically once we've started
uint8_t noise[MAX_DIMENSION][MAX_DIMENSION];
CRGBPalette16 currentPalette( PartyColors_p );
uint8_t       colorLoop = 1;
int pirSensorPin = 5; // choose the input pin (for PIR sensor)
int pirState = true; // we start, assuming no motion detected
int val = 0; // variable for reading the pin status
int minimummSecsLowForInactive = 5000; // If the sensor reports low for
// more than this time, then assume no activity
long unsigned int timeLow;
boolean takeLowTime;

//the time we give the sensor to calibrate (10-60 secs according to the datasheet)
int calibrationTime = 30;

void setup() {
  delay(3000); // 3 second delay for recovery

  // tell FastLED about the LED strip configuration
  FastLED.addLeds<LED_TYPE, DATA_PIN, COLOR_ORDER>(leds, NUM_LEDS).setCorrection(TypicalLEDStrip);
  //FastLED.addLeds<LED_TYPE,DATA_PIN,CLK_PIN,COLOR_ORDER>(leds, NUM_LEDS).setCorrection(TypicalLEDStrip);

  // set master brightness control
  FastLED.setBrightness(BRIGHTNESS);
  matrix.setTextWrap(false);
  matrix.setBrightness(40);
  matrix.setTextColor(colors[0]);
  pinMode(pirSensorPin, INPUT); // declare sensor as input
  LEDS.addLeds<WS2812, DATA_PIN, RGB>(leds, NUM_LEDS);
  x = random16();
  y = random16();
  z = random16();
}
int a    = matrix.width();
int pass = 0;

// List of patterns to cycle through.  Each is defined as a separate function below.
typedef void (*SimplePatternList[])();
SimplePatternList gPatterns = { rainbow, rainbowWithGlitter, confetti, sinelon, juggle, bpm, cylon};

uint8_t gCurrentPatternNumber = 0; // Index number of which pattern is current
uint8_t gHue = 0; // rotating "base color" used by many of the patterns

void fadeall() {
  for (int i = 0; i < NUM_LEDS; i++) {
    leds[i].nscale8(250);
  }
}

void loop()
{
  val = digitalRead(pirSensorPin); // read input value
  if (val == HIGH) { // check if the input is HIGH

    matrix.fillScreen(1);
    matrix.setCursor(a, 0);
    matrix.print(F("Happy Holidays & Happy New Year!"));
    if (--a < -200) {
      a = matrix.width();
      if (++pass >= 6) pass = 0;
      matrix.setTextColor(colors[pass]);
    }
    matrix.show();
    delay(100);
    if (pirState) {
      // we have just turned on
      pirState = false;

    }
    takeLowTime = true;
  }
  else {

    // Call the current pattern function once, updating the 'leds' array
    gPatterns[gCurrentPatternNumber]();

    // send the 'leds' array out to the actual LED strip
    FastLED.show();
    // insert a delay to keep the framerate modest
    FastLED.delay(1000 / FRAMES_PER_SECOND);

    // do some periodic updates
    EVERY_N_MILLISECONDS( 20 ) {
      gHue++;  // slowly cycle the "base color" through the rainbow
    }
    EVERY_N_SECONDS( 10 ) {
      nextPattern();  // change patterns periodically
    }

  }
}
#define ARRAY_SIZE(A) (sizeof(A) / sizeof((A)[0]))

void nextPattern()
{
  // add one to the current pattern number, and wrap around at the end
  gCurrentPatternNumber = (gCurrentPatternNumber + 1) % ARRAY_SIZE( gPatterns);
}

void rainbow()
{
  // FastLED's built-in rainbow generator
  fill_rainbow( leds, NUM_LEDS, gHue, 7);
}


void rainbowWithGlitter()
{
  // built-in FastLED rainbow, plus some random sparkly glitter
  rainbow();
  addGlitter(80);
}

void addGlitter( fract8 chanceOfGlitter)
{
  if ( random8() < chanceOfGlitter) {
    leds[ random16(NUM_LEDS) ] += CRGB::White;
  }
}

void confetti()
{
  // random colored speckles that blink in and fade smoothly
  fadeToBlackBy( leds, NUM_LEDS, 10);
  int pos = random16(NUM_LEDS);
  leds[pos] += CHSV( gHue + random8(64), 200, 255);
}

void sinelon()
{
  // a colored dot sweeping back and forth, with fading trails
  fadeToBlackBy( leds, NUM_LEDS, 20);
  int pos = beatsin16( 13, 0, NUM_LEDS - 1 );
  leds[pos] += CHSV( gHue, 255, 192);
}

void bpm()
{
  // colored stripes pulsing at a defined Beats-Per-Minute (BPM)
  uint8_t BeatsPerMinute = 62;
  CRGBPalette16 palette = PartyColors_p;
  uint8_t beat = beatsin8( BeatsPerMinute, 64, 255);
  for ( int i = 0; i < NUM_LEDS; i++) { //9948
    leds[i] = ColorFromPalette(palette, gHue + (i * 2), beat - gHue + (i * 10));
  }
}

void juggle() {
  // eight colored dots, weaving in and out of sync with each other
  fadeToBlackBy( leds, NUM_LEDS, 20);
  byte dothue = 0;
  for ( int i = 0; i < 8; i++) {
    leds[beatsin16( i + 7, 0, NUM_LEDS - 1 )] |= CHSV(dothue, 200, 255);
    dothue += 32;
  }
}

void cylon() {
static uint8_t hue = 0;
  // First slide the led in one direction
  for(int i = 0; i < NUM_LEDS; i++) {
    // Set the i'th led to red
    leds[i] = CHSV(hue++, 255, 255);
    // Show the leds
    FastLED.show();
    // now that we've shown the leds, reset the i'th led to black
    // leds[i] = CRGB::Black;
    fadeall();
    // Wait a little bit before we loop around and do it again
    delay(10);
  }

  // Now go in the other direction.
  for(int i = (NUM_LEDS)-1; i >= 0; i--) {
    // Set the i'th led to red
    leds[i] = CHSV(hue++, 255, 255);
    // Show the leds
    FastLED.show();
    // now that we've shown the leds, reset the i'th led to black
    // leds[i] = CRGB::Black;
    fadeall();
    // Wait a little bit before we loop around and do it again
    delay(10);
  }
}
Schematics
Manufacturing process
- Build Your Own LUMAZOID: A DIY Arduino Music Visualizer
- Smart Motion-Activated Water Gun Built with Arduino Nano
- Create a Classic Asteroids Game with Arduino Mega and MAX72XX LED Matrix
- Build an Arduino Snake Game on an 8x8 LED Matrix
- Create Your Own LED Color Sequencer with Arduino – Easy DIY Tutorial
- Build a Snake Game on a 16x16 LED Matrix with Arduino UNO
- Real-Time Soil Moisture Monitoring with LCD Display – Arduino DIY Kit
- Android Motion‑Detection Camera Controlled by Arduino MCU
- Arduino Nano 4x64 LED Matrix Clock – New Version
- Build a Reliable Arduino-Based Lie Detector