High‑Speed Arduino RPM Counter Using a Novel Algorithm
Components and supplies
Arduino UNO
×
1
IR proximity sensor
Use the sensor recommended in this project otherwise the results may vary
×
1
Jumper wires (generic)
×
3
Laser Diode, 655 nm
You can use a readymade laser pointer and not necessarily the above mentioned one.
×
1
DC motor (generic)
this is for testing.
×
1
USB-A to Mini-USB Cable
×
1
Battery, 9 V
×
1
Necessary tools and machines
Solder Wire, Lead Free
Soldering iron (generic)
only for soldering wires to motor leads.you can use any other means also.
Apps and online services
Arduino IDE
About this project
This project is developed fromscratchas an attempt to measure the exact RPM (RotationsperMinute)value of various motors using a single IRsensor, an Arduino board and anessentialkey ingredient -a Laser Pointer(necessarily Red).
This project uses the fact that the IR sensor also reads the the low number of IR radiations given off by the red laser. However when a blue/green laser is used these IR radiations get very less and the analog read voltage drops down to approx. 0.
When a blade of the fan attached to the motor comes in the path of the laser beam it blocks up the pathway and the reading drops to 0. The fan blade keeps on spinning and its position keeps on changing with a constant supply of power. A constant change of path occurs. When the path becomes clear again, the laser pointer beam strikes the sensor again.
NEW SINGLE SHOT ALGORITHM BASED CODE,FOR FASTER AND MUCH MORE CHANGE ADAPTIVE MEASUREMENTS :-
The code for this project which is developed by me uses a newly developed algorithm for this project.Thealgorithm is indeed unique and is built to make measurements in less than 40 milliseconds and deliver accurate results. One very important feature of this program is that it uses a method which I call Single Shot Detection for Arduino. It calculates the RPM of the motor every time the fan blade creates an obstruction in the path of the laser beam. This is because the obstruction of the path of the laser beam marks a 1/n complete revolution for n number of blades in the fan. So, the program is verysensitivetoeven minute changes in the RPM (upto 2 places of decimal) inevery1/nthrevolutionofthefanbladeagainwherenisthenumberofbladesofthefan.Hence this unique Single Shot Detection algorithm provides extremely accuratevalueofRPM and higher sensitivity to changes in measurements.
Everyone viewing this must try this project once and share your valuable reviews. Do tell about your experiments and their outcomes related to this algorithm. Suggestions for new projects are welcomed in the comments section. If you like the project, do respect it.
Follow my profile by tapping on this link(https://create.arduino.cc/projecthub/YASH36) @YASH36 for some new project updates.
Until then, Stay Safe and enjoy Arduino!!
Code
RPM_counter_101
RPM_counter_101Arduino
This is the code for the RPM counter.
//code by YaSh.

int sen = A0;
const float wid = 0.012;   //adjust the width of the fan blade according to your needs.
const float rad = 0.045;   //adjust the radius of the point of detection in the fan blade.
const float konst = 6.2832;  //  2*pi.
float time_1;
float time_2;
float vel;
float diff;
float tnet;
float rpm;
void setup()
{
  Serial.begin(9600);
  pinMode(sen,INPUT);
  Serial.print(" \n please start the motor at least 3 seconds prior.\n");
  delay(3000);
}
void loop()
{
  if(analogRead(sen)<950)
  {
    time_1 = millis();
    delay(30);
  }
  if(analogRead(sen)>950)
  {
    time_2 = millis();
    diff = (time_2-time_1);
    vel = wid/diff;                      //rotation velocity
    tnet = (konst*rad)/vel;              //time = (2*pi*radius)/velocity.
    rpm = (60000)/tnet;                // time in ms to minutes and then to rpm conversion step.
  }
Serial.print("\n The rpm is : ");
Serial.println( rpm );
}
Schematics
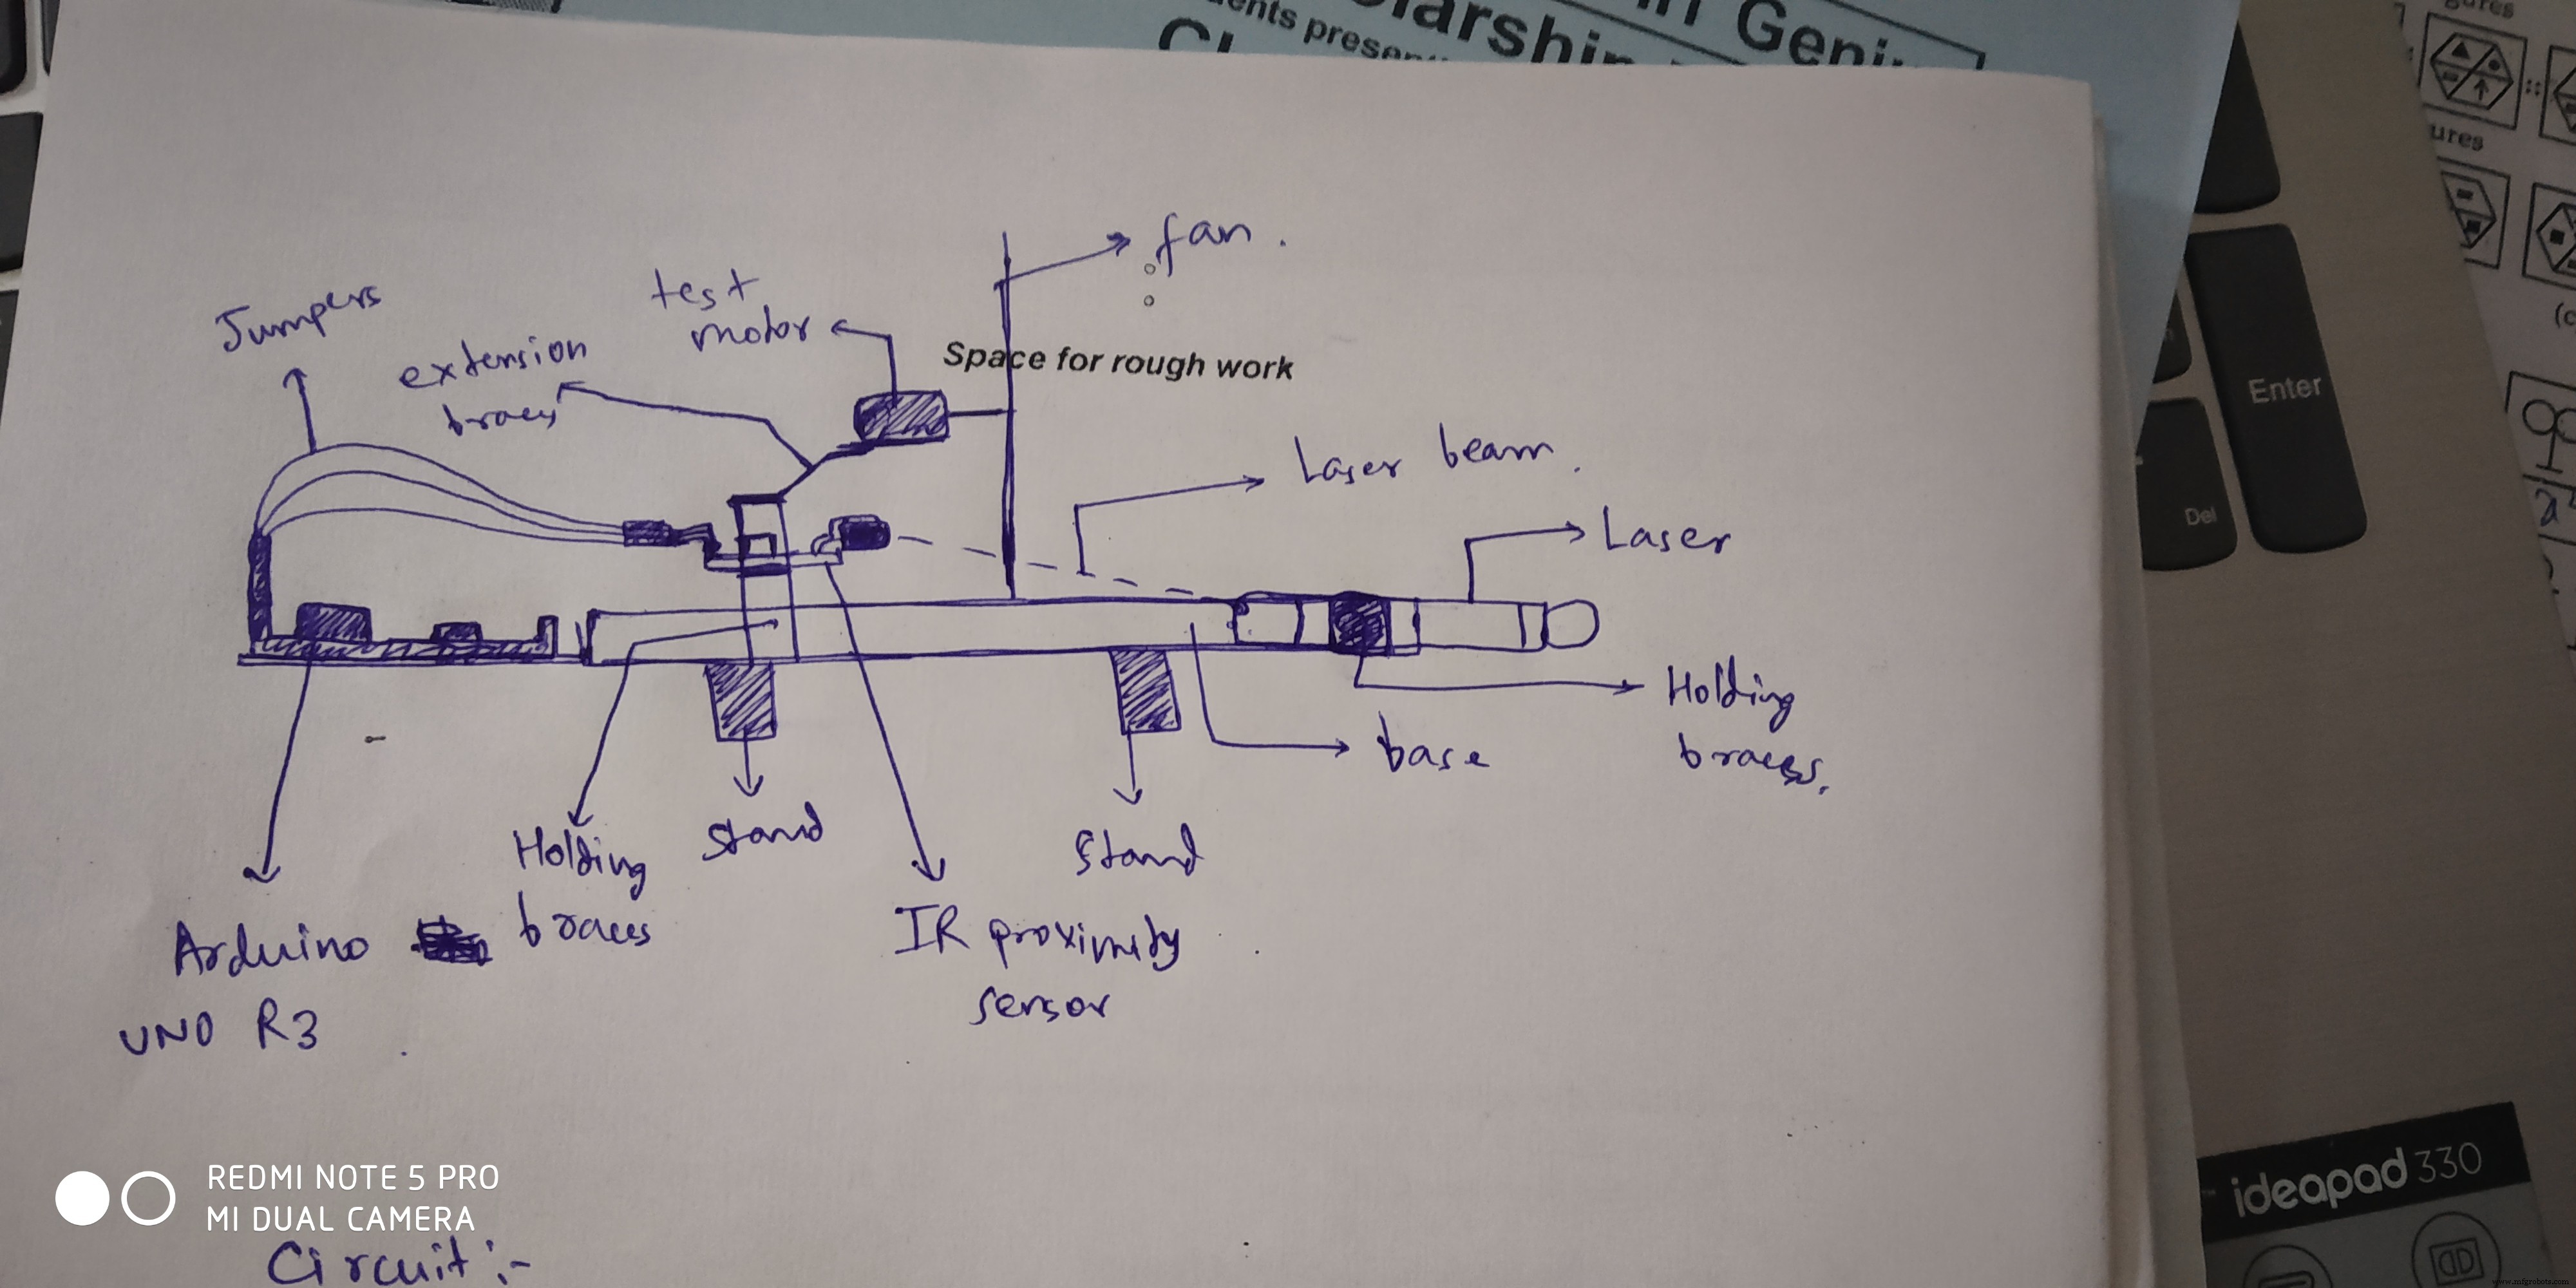
this is the image for the base and other components placementschematic for connecting sensor to the arduino board


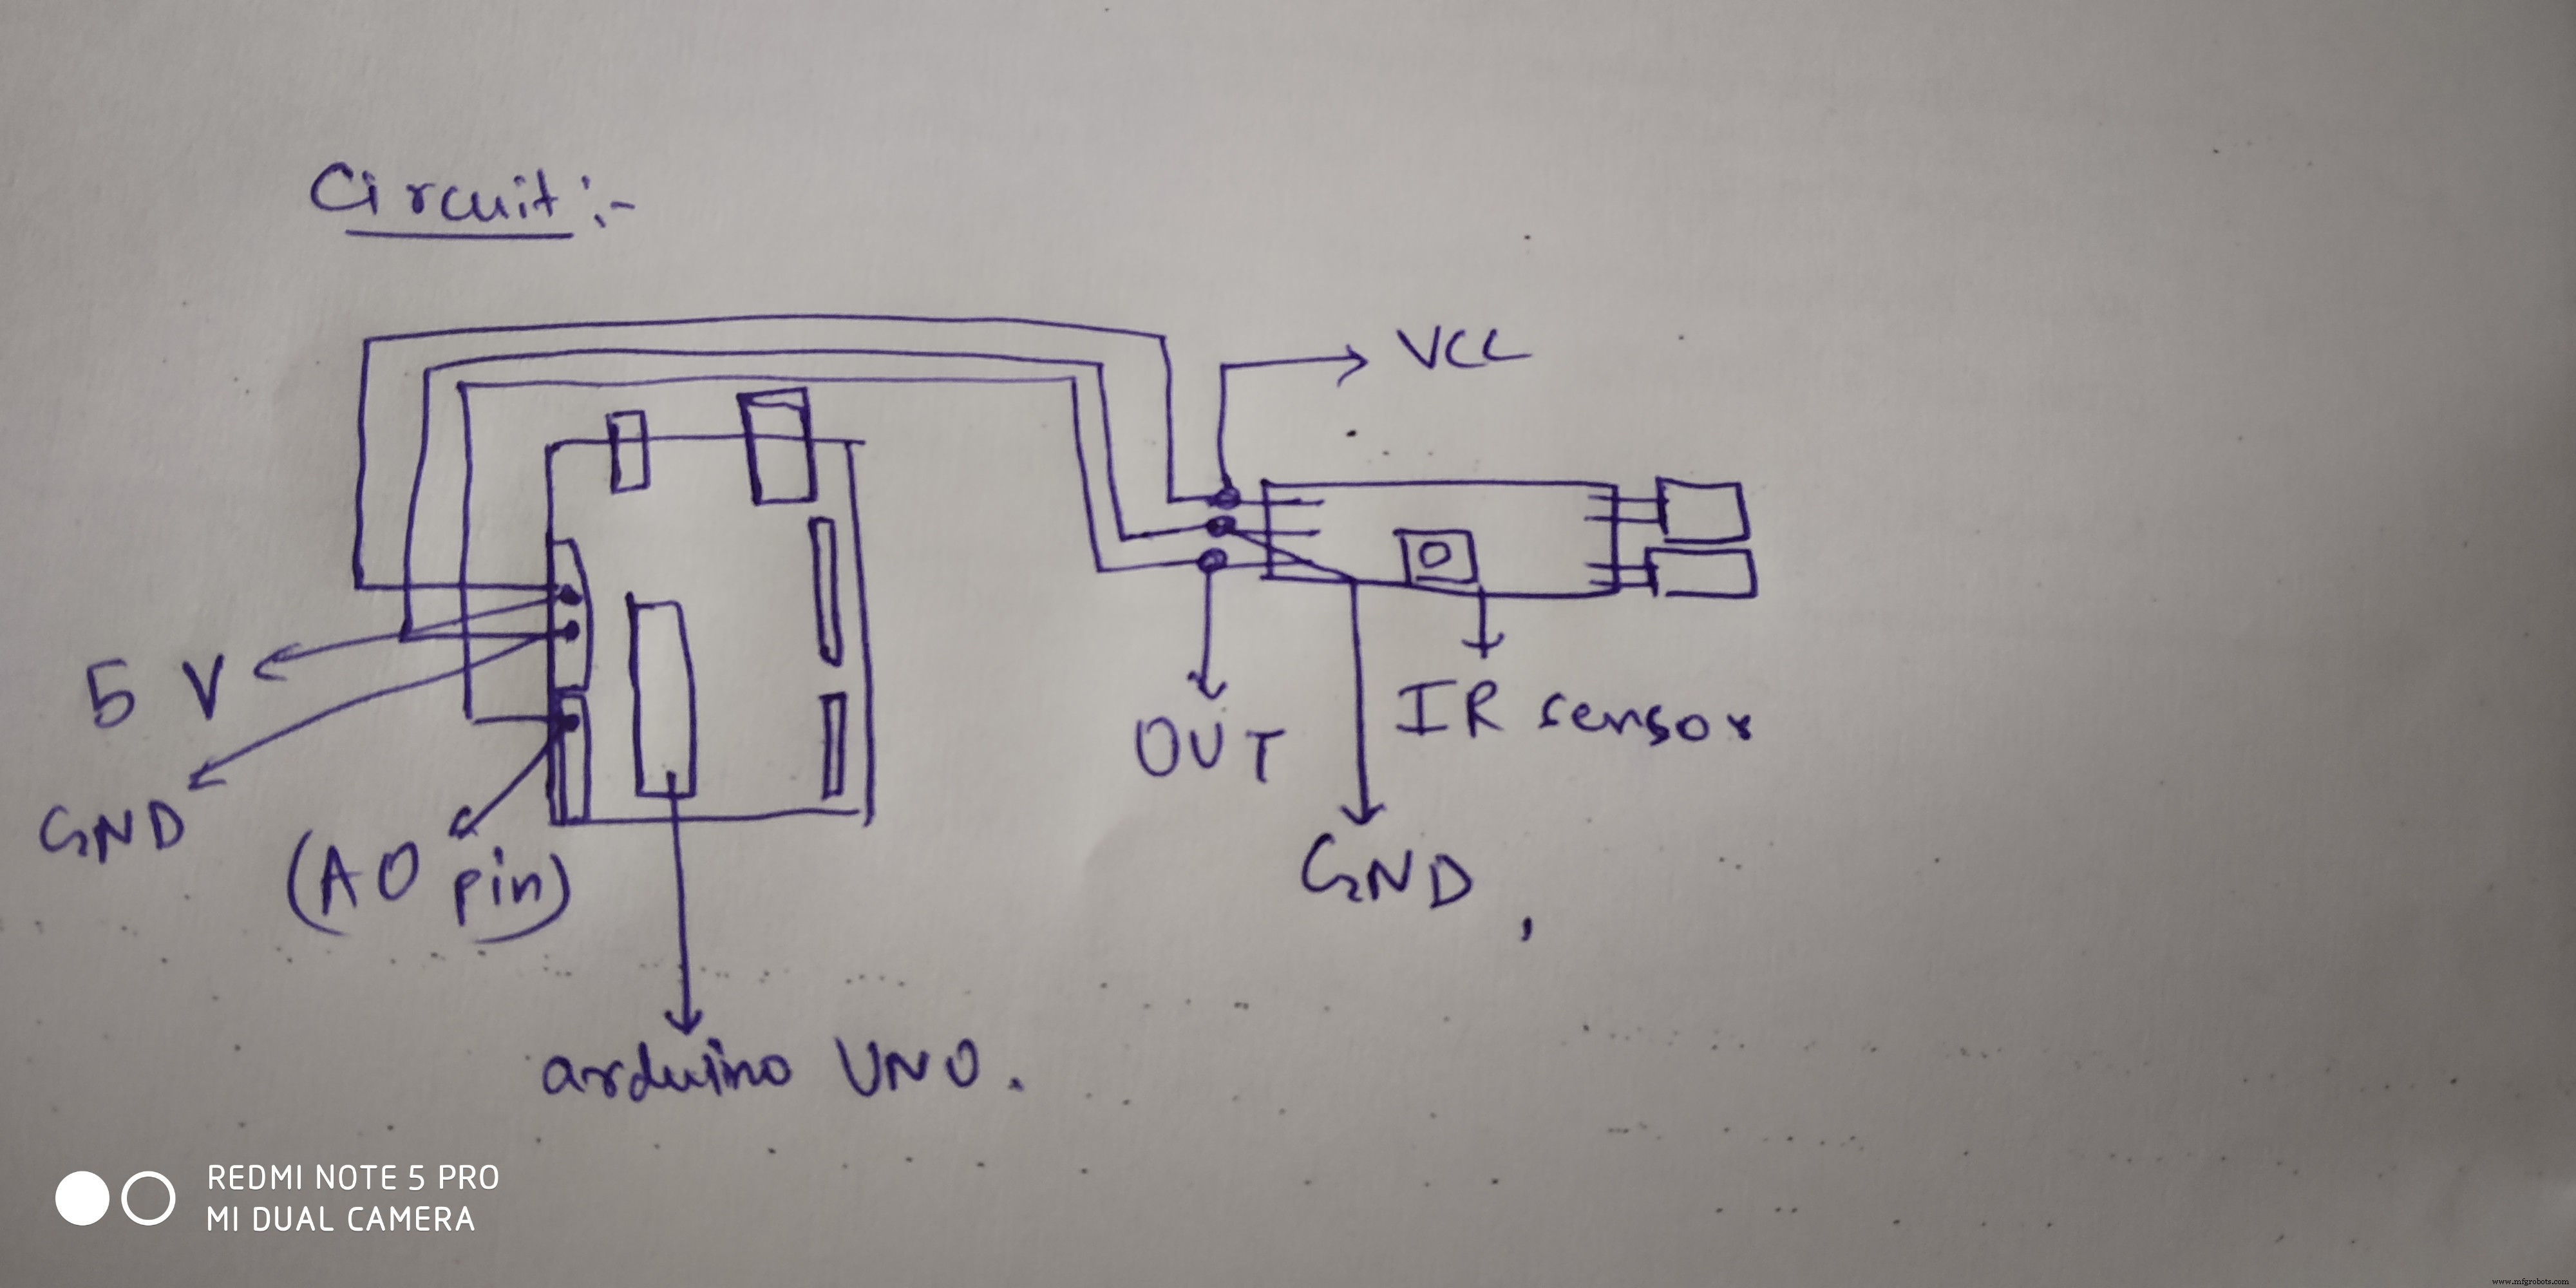
 schematic for connecting sensor to the arduino board