


Master GRBL: Step‑by‑Step Guide to Setting Up and Controlling Your Arduino‑Powered CNC Machine
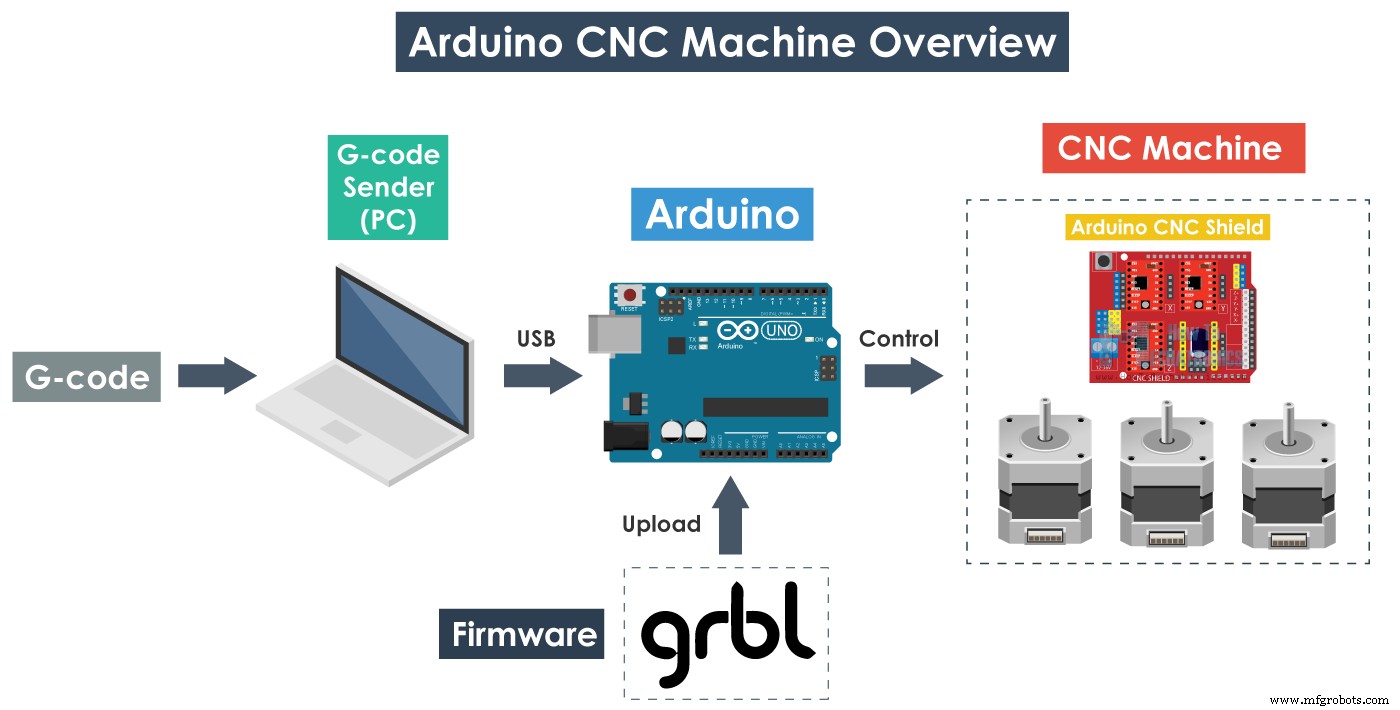
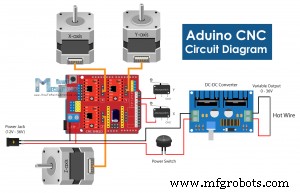
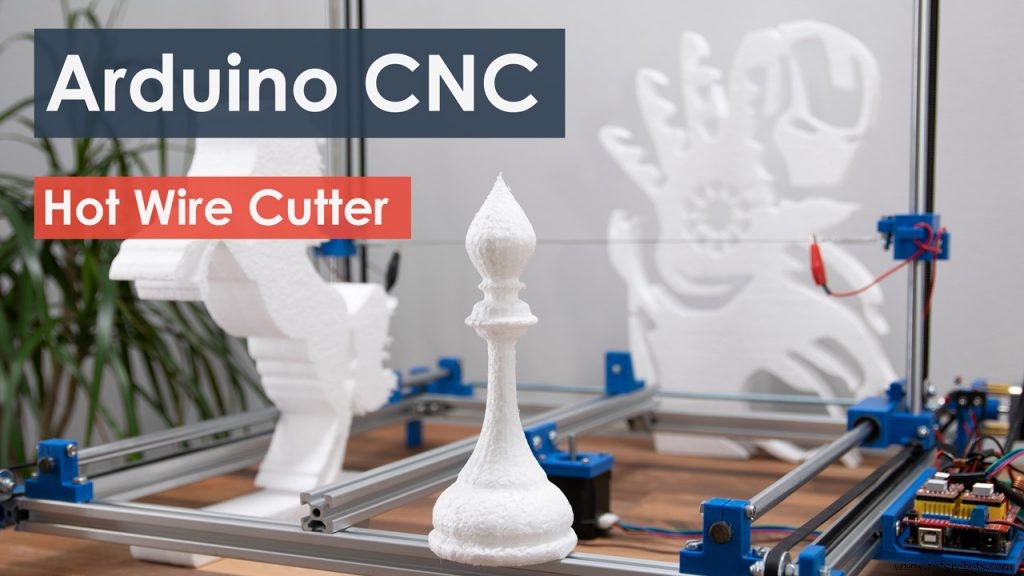
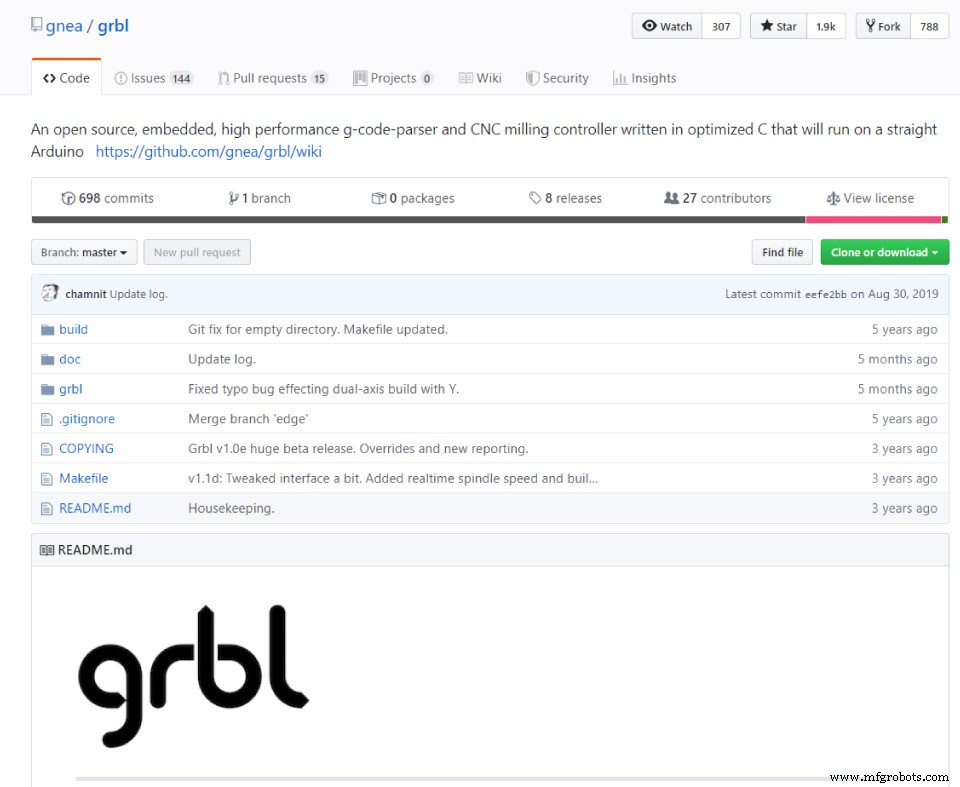
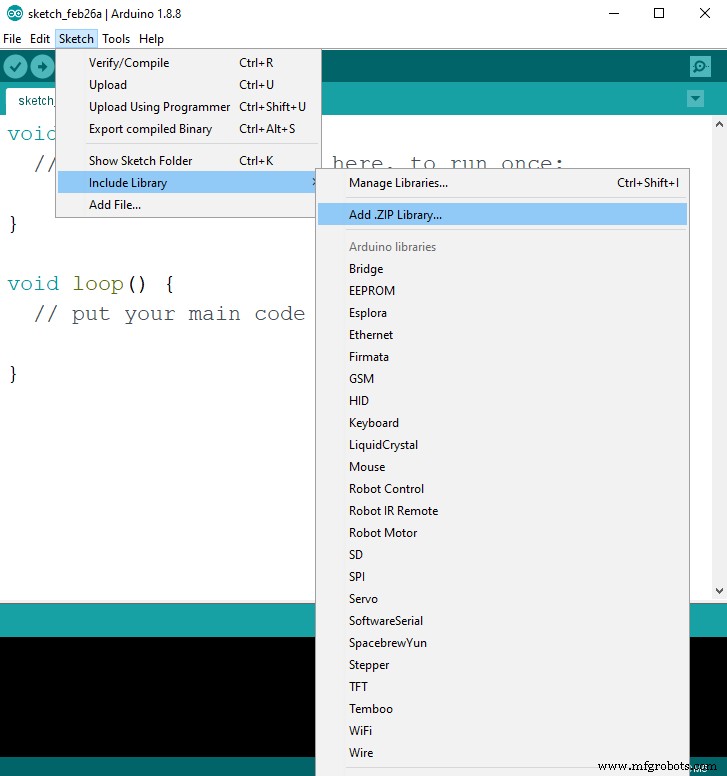
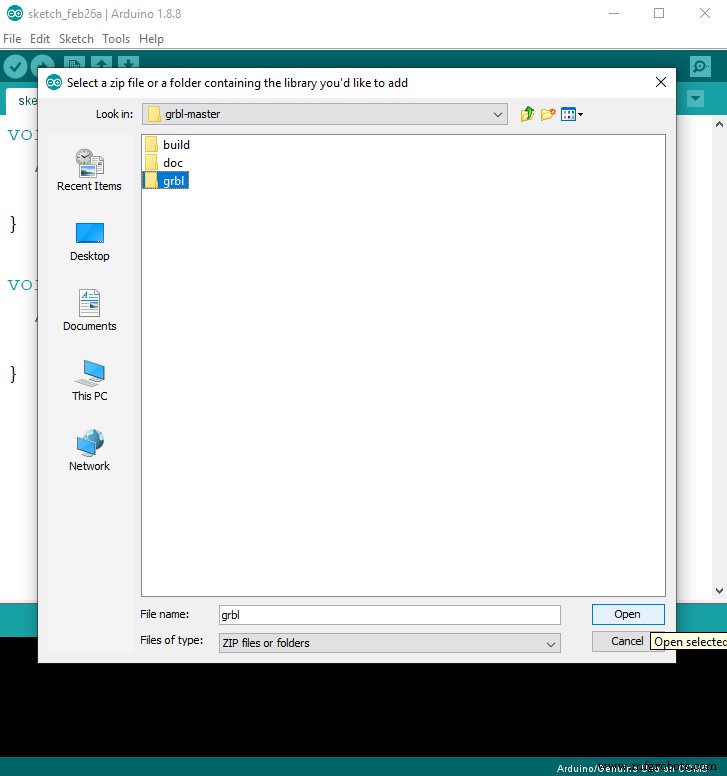
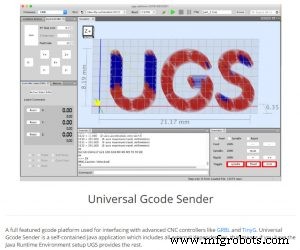
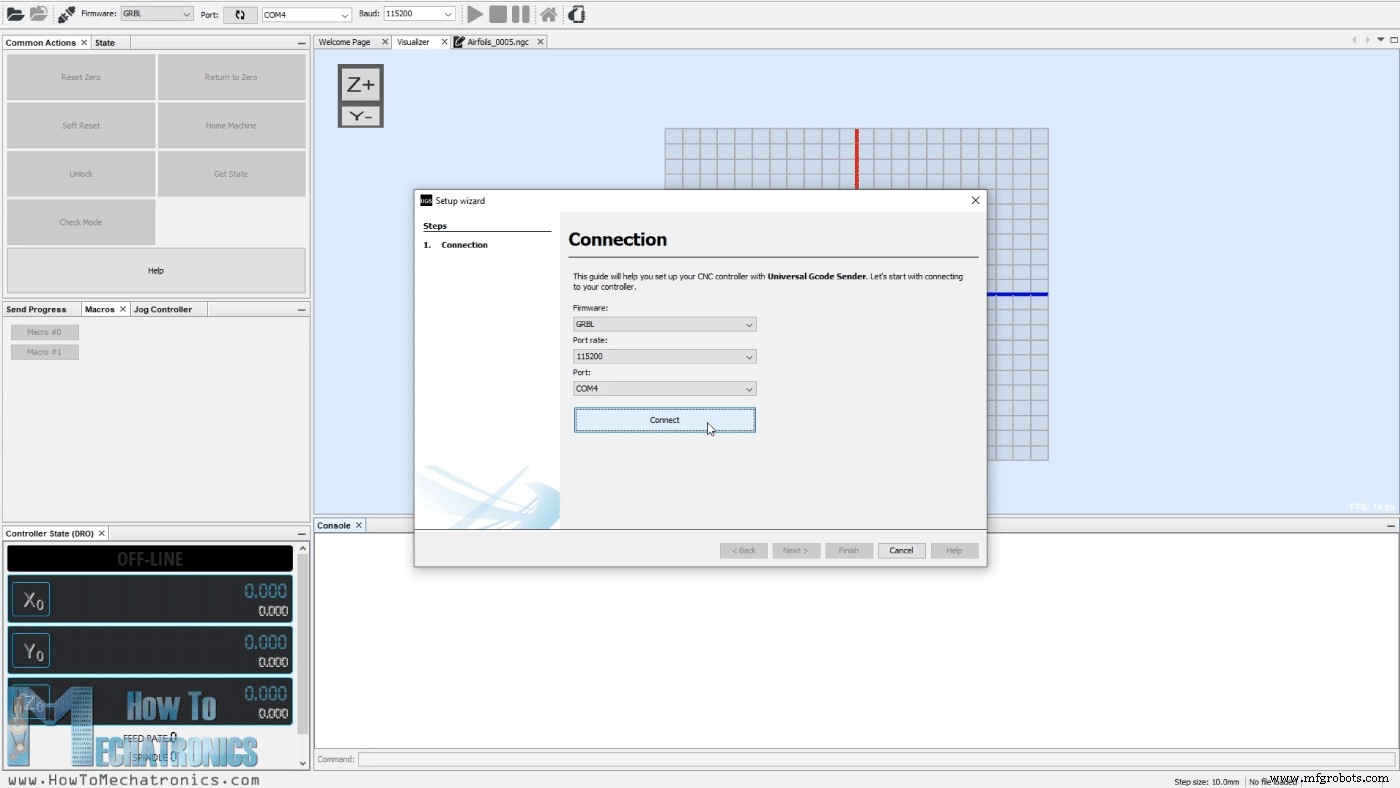
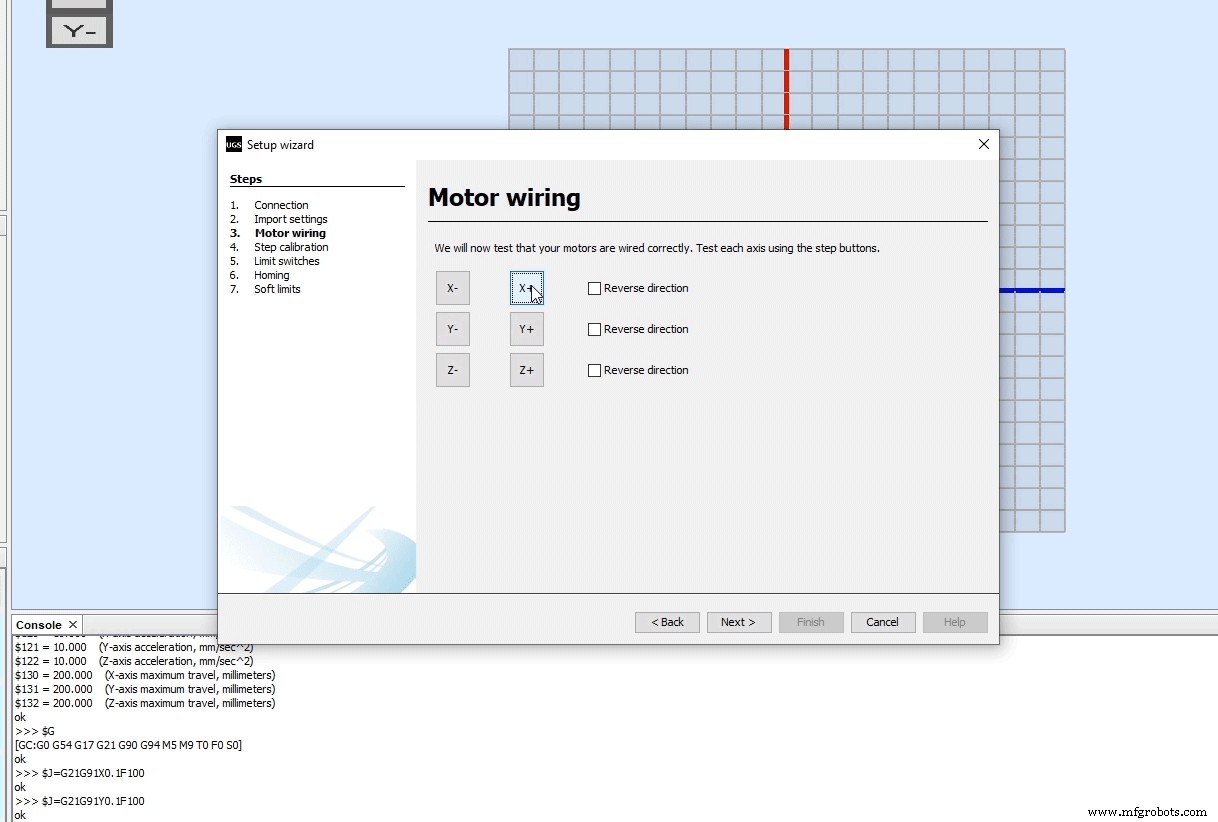
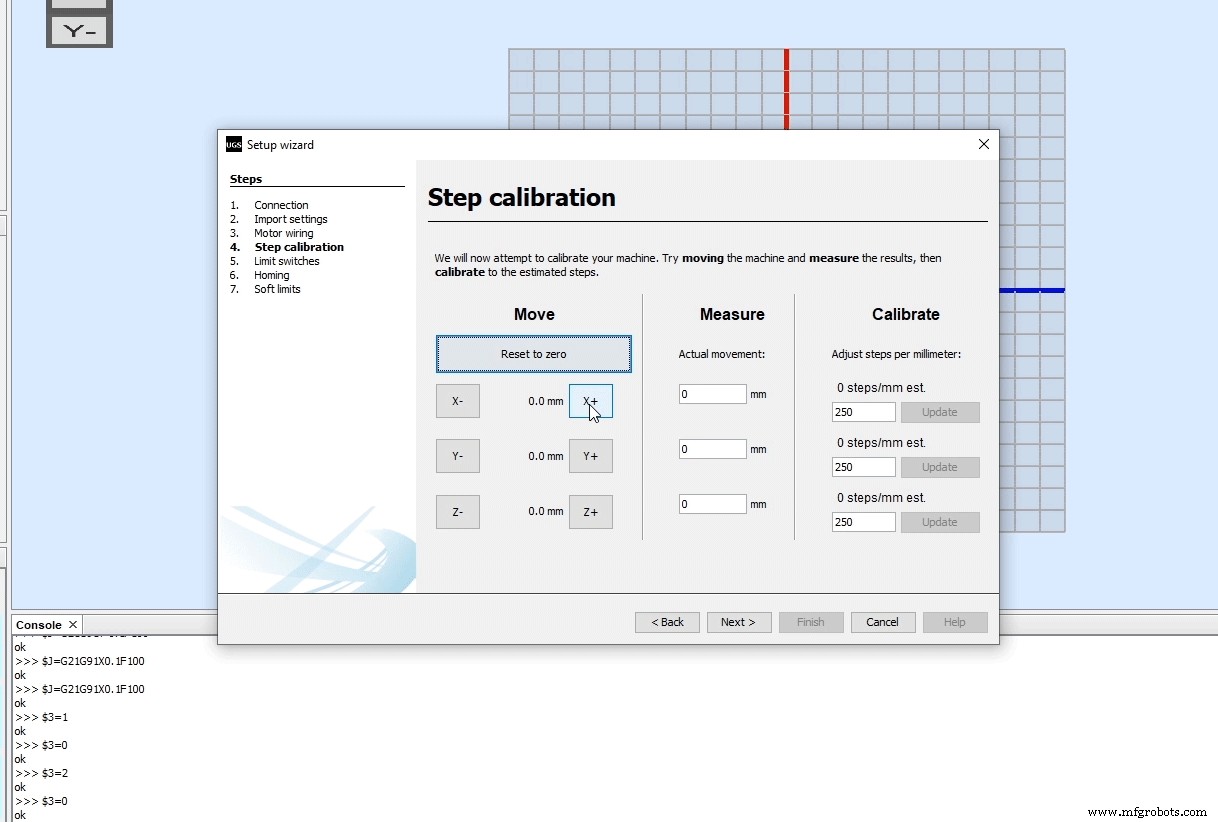
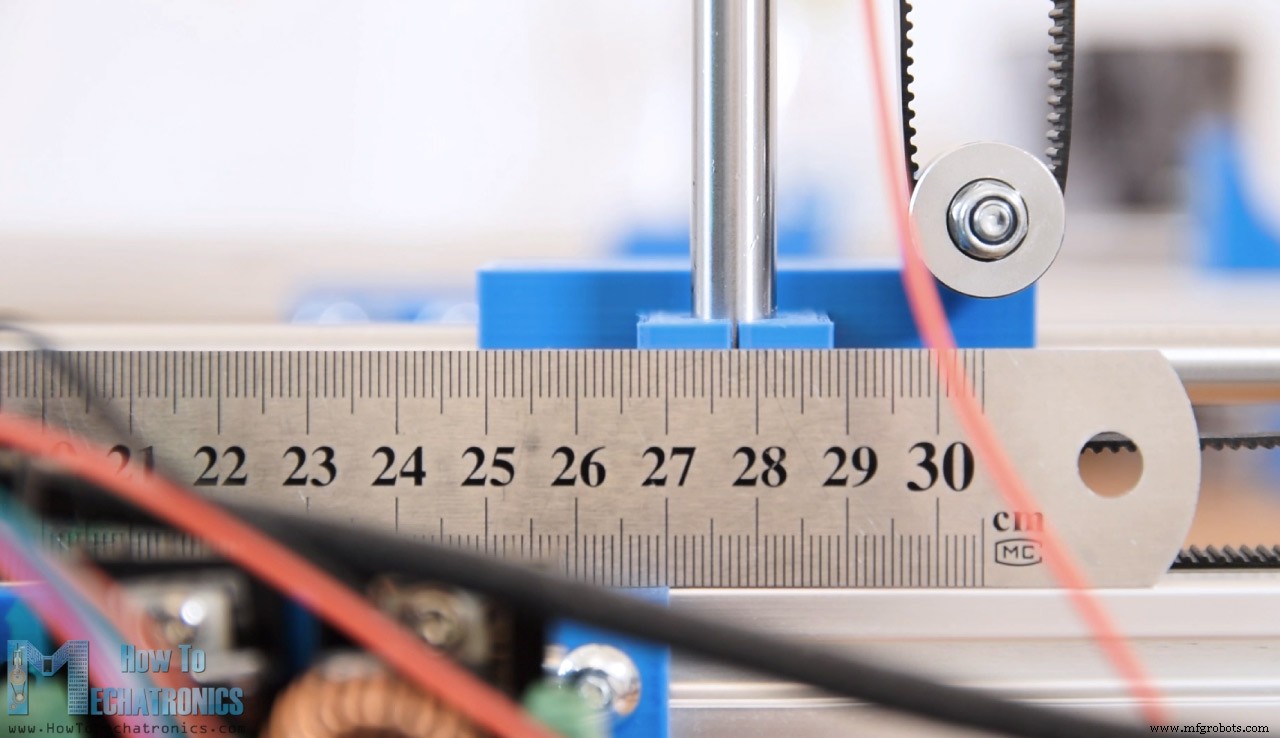
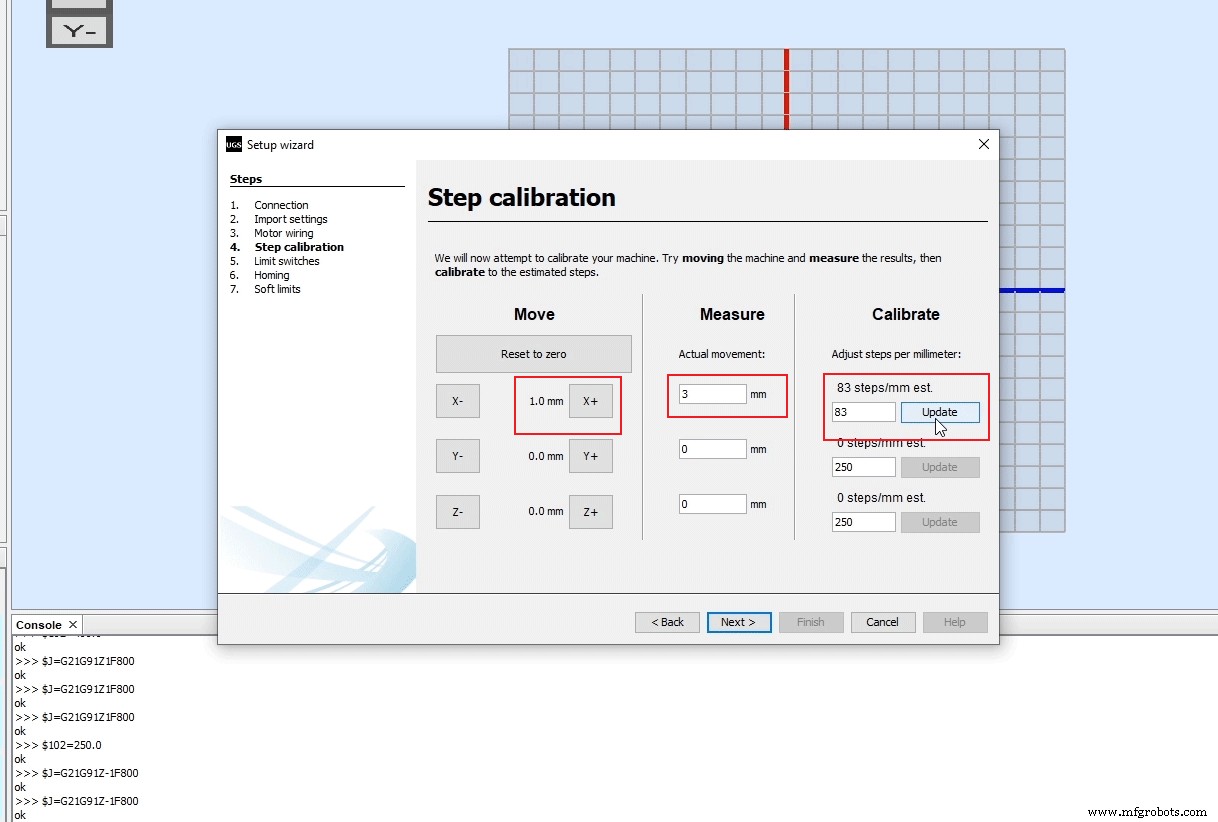
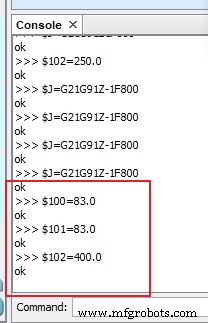
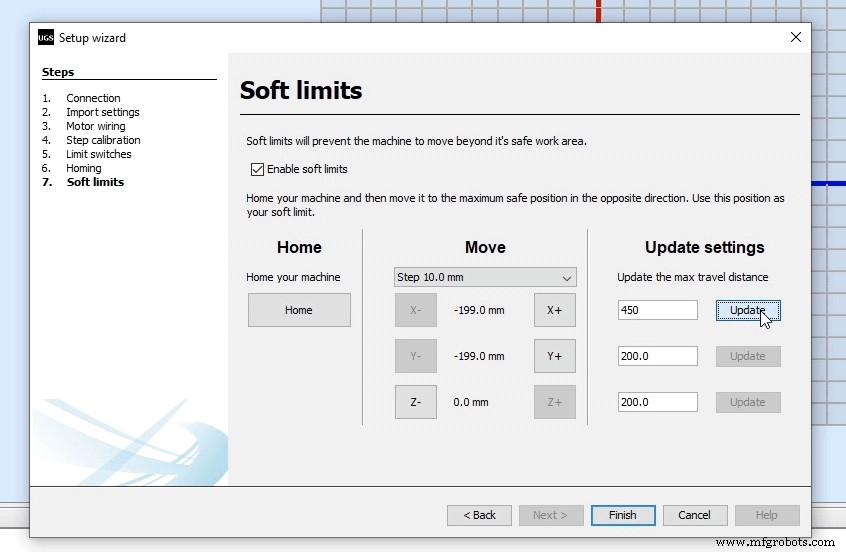
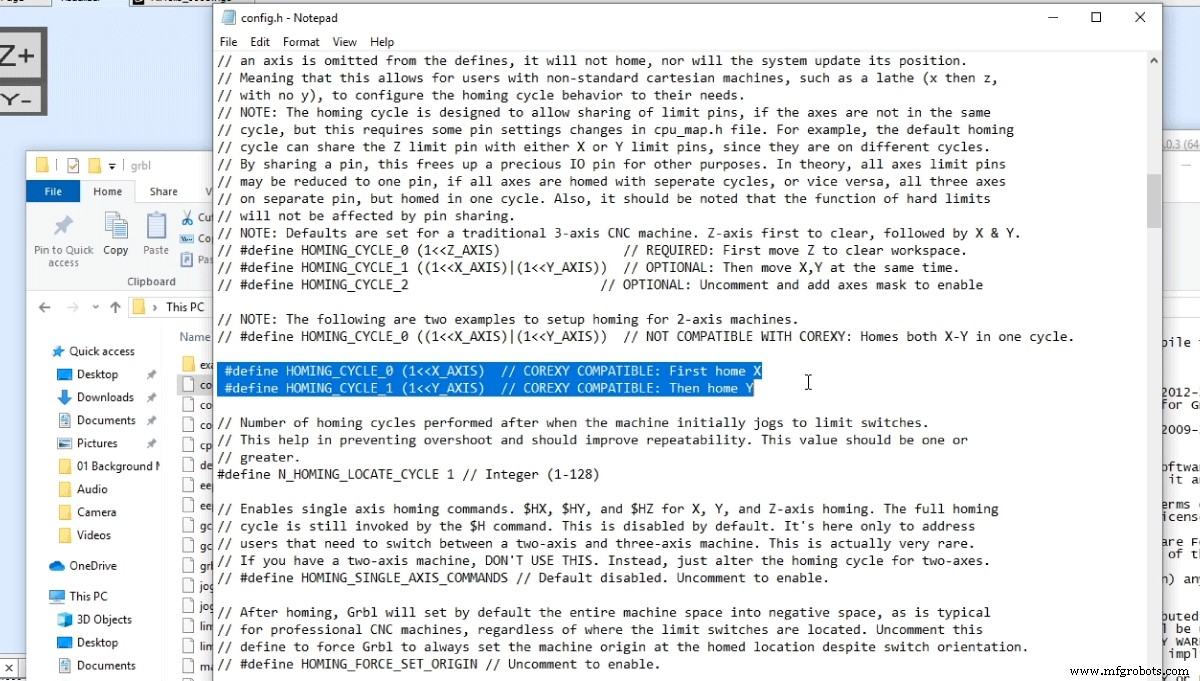
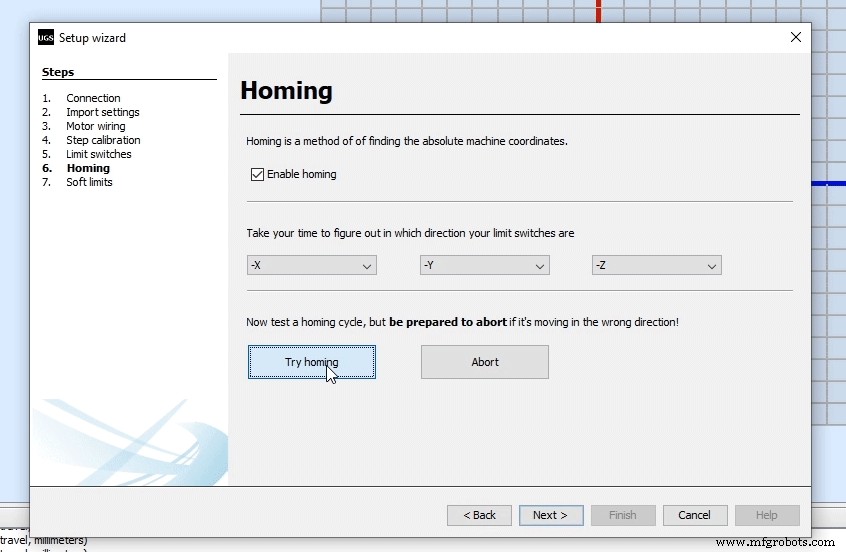
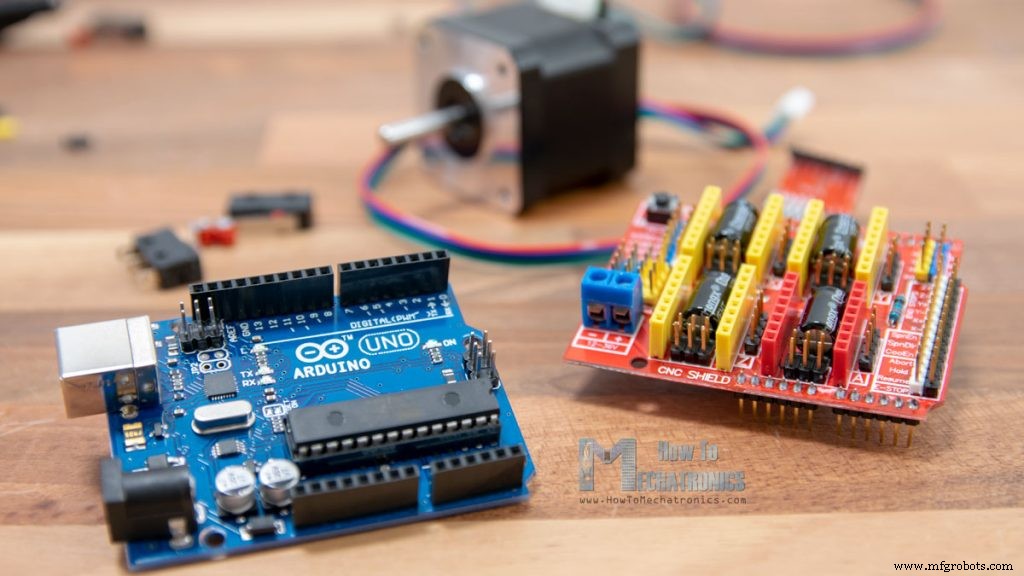
If you are thinking or you are in the process of making your own CNC machine, then most likely you will meet with the term GRBL. So in this tutorial we will learn what is GRBL, how to install and how to use it for controlling your Arduino based CNC machine. Also, we will learn how to use the Universal G-code Sender, a popular open source GRBL controller software. GRBL is an open source software or firmware which enables motion control for CNC machines. We can easily install the GRBL firmware to an Arduino and so we instantly get a low cost, high performance CNC controller. The GRBL uses G-code as input, and outputs motion control via the Arduino . For better understanding, we can take a look at the following diagram: From the diagram we can see where the GRBL take place in the “big picture” of the working principle of a CNC machine. It’s a firmware that we need to install or upload to the Arduino so it can control the stepper motors of the CNC machine. In other words, the function of the GRBL firmware is to translate the G-code into motor movement. Please note that these are just he basic electronic components we need to understand how a CNC machine works. Actually, as an example of how everything needs to be connected we can take a look at my DIY CNC foam cutting machine. You can check and get the main electronics components needed for building this CNC machine here: The main tool of this CNC machine is a hot wire which can easily melt or cut through a styrofoam and make any shape we want. For more details how I made the machine and how everything works you can check the particular tutorial. Nevertheless, we will use this machine as an example throughout this article, because the same working principle applies for any other CNC machine, whether it’s mill or laser. First, in order to be able to install or upload the GRBL to the Arduino we need the Arduino IDE. Then we can download the GRBL firmware from github.com. Download it as .ZIP file and then follow these steps: At this point we should configure or adjust the GRBL to our machine. We can do that via the Serial Monitor of the Arduino IDE. Once we open the Serial Monitor we will get a message like “Grbl 1.1h [‘$’ for help]”. If you cannot see this message, make sure you change the baudrate to 115200. If we type “$$” we will get a list of commands or current settings, and they appear something like this: $100=250.000 (x, step/mm) All of these commands can be or should be adjusted according to our CNC machine. For example the with first command, $100=250.000 (x, step/mm), we can adjust the steps per mm of the machine, or we can specify how many steps the motor should make in order our X axis to move 1 mm. However, I would suggest to leave these settings as they are. There is an easier way to adjust them according to our machine using the controller software, which we will explain in the next section. So once we have installed the GRBL firmware, now our Arduino knows how to read G-code and how to control the CNC machine according to it. However, in order to send the G-code to the Arduino we need some kind of interface or a controller software which will tell the Arduino what to do. Actually, there are many both open source and commercial programs for that purpose. Of course, we will stick to open source, so as an example we will use the Univarsal G-code Sender. For this example, I will use the 2.0 Platform version. Once we download it, we need to extract the zip file, go the “bin” folder and open any of the executable “ugsplatfrom” files. This is actually a JAVA program, so in order to be able to run this program, first we need to install JAVA Runtime Environment. Once we open the Universal G-code sender, first we need to configure the machine, or configure the GRBL parameters shown earlier. For that purpose we will use the UGS Setup Wizard which is much more convenient then manually typing commands through the Serial Monitor of the Arduino IDE. The first step here is to select the baudrate, which should be 115200, and the port to which our Arduino is connected. Once we connect the Universal G-code sender with the Arduino, in the next step we can check the direction of moving of the motors. If needed, we can reverse the direction through the wizard, or by manually flipping the connection of the motor on the Arduino CNC Shield. In the next step we can adjust the steps/mm parameter that we mentioned earlier. Here it’s much easier to understand how to adjust it because the setup wizard will calculate and tell us to what value we should update the parameter. The default value is 250 steps/mm. This means, that if we click the move “x+” button, the motor will make 250 steps. Now depending on the number of physical steps the motor has, the selected stepping resolution and the transmission type, the machine will move some distance. Using a ruler we can measure the actual movement the machine made and enter that value in the “Actual movement” field. Based on this, the wizard will calculate and tell us to what value we should change the steps/mm parameter. In my case, for the DIY CNC machine that I made, the machine moved 3mm. According to this, the wizard suggested to update the steps/mm parameter to a value of 83. With this value updated the machine now moves correctly, 1 mm in the software mean 1 mm for the CNC machine. In the UGS console, as we make each action we can see the commands that are executed. We can notice that by updating the steps/mm parameter the UGS program actually sent to the Arduino, or the GRBL firmware the command we mentioned earlier. This was the default value: $100=250.000 (x, step/mm), and now we updated to value of 83 steps per mm: $100=83. In the next step we can enable the limit switches and test whether they work properly. Depending whether they are Normally Open or Normally Closed connection, we can also invert them here. Here it’s worth noting that sometimes we need to disable Z axis limit switch. That was the case with my DIY CNC Foam Cutting machine where I didn’t need the Z axis limit switch and I had to disable it in order to be able to properly home the machine. So, to do that, we need to edit the config.h file which is located in the Arduino library folder (or Documents\Arduino\libraries). Here we need to find the homing cycle lines and comment the default set for 3 axis CNC machine and uncomment the setup for 2 axis machines. In order the changes to take effect we need to save the file and reupload the grblUpload sketch to our Arduino board. Nevertheless, in the next step we can either enable or disable the homing of the CNC macing. Using the “Try homing” button the machine will start moving towards the limit end switches. In case it goes the opposite way we can easily invert the direction. Finally, in the last step of the Setup wizard we can enable soft limits for our CNC machine. The soft limits prevent the machine from moving beyond the set working area. So, thanks to the GRBL firmware and the Arduino, we can easily setup and get our DIY CNC machine running. Of course, we covered just the basics in this tutorial, but I think that was enough to understand how things work and how to get our first CNC machine up and running. Of course, there are many other settings and features available, as the GRBL is really capable CNC controller firmware. The GRBL documentation explains all of that in details, so you can always check them on their wiki page on github.com. Also, there are many other open source GRBL controller programs like the Universal G-code Sender, and here are few: GRBLweb (Web Browser), GrblPanel (Windows GUI), grblControl (Windows/Linux GUI), Easel (Browser based) etc. You should explore them and see which one suits you the best.What is GRBL?
Required Hardware
How to Install GRBL
GRBL Configuration
$101=250.000 (y, step/mm)
$102=3200.000 (z, step/mm)
$110=500.000 (x max rate, mm/min)
$111=500.000 (y max rate, mm/min)
$112=500.000 (z max rate, mm/min)
$120=10.000 (x accel, mm/sec^2)
$121=10.000 (y accel, mm/sec^2)
$122=10.000 (z accel, mm/sec^2)GRBL Controller
How to Use Universal G-code Sender
Conclusion
Manufacturing process
- Avoiding Common Pitfalls When Purchasing Used CNC Machines
- Build a Smart Piggy Bank: Control a Coin Acceptor with Arduino Nano
- Control an LED via Bluetooth with Arduino – Simple DIY Guide
- Build a Fully Functional CNC Machine with Arduino Nano R3
- Master Arduino Servo Motor Control: Step‑by‑Step Guide
- Master Stepper Motor Control with Arduino & A4988 Driver – Step-by-Step Guide
- Build a Reliable Arduino CNC Foam Cutting Machine – DIY Tutorial
- Mastering Glass Machining: A Complete Guide Using CNC Routers
- Millport SmartLathez 1740 CNC Lathe – Precision & Power
- Mastering CNC Jewelry Machining: A Complete Guide