


Build a Fully Functional CNC Machine with Arduino Nano R3
Components and supplies
 |
| × | 1 | |||
 |
| × | 1 | |||
 |
| × | 1 | |||
 |
| × | 1 |
About this project
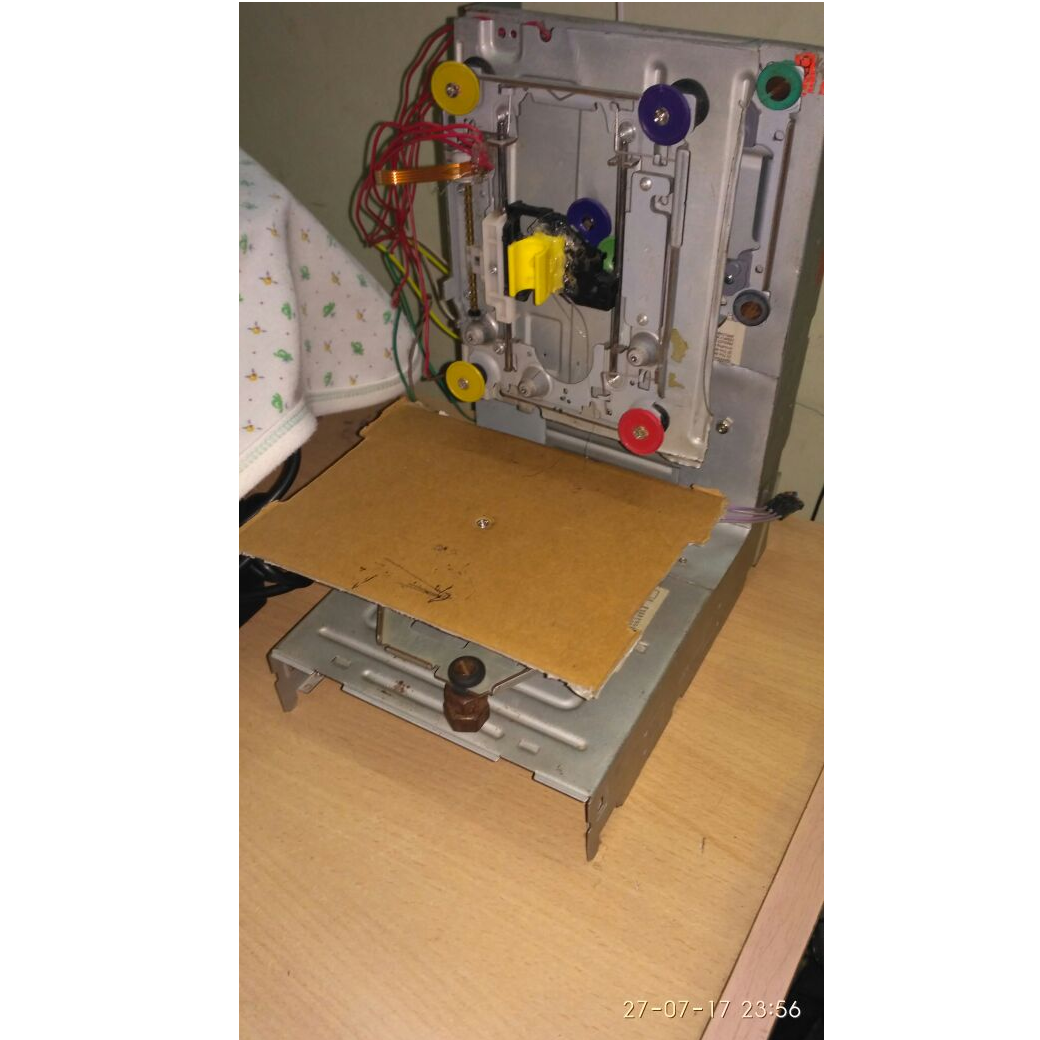
About The ProjectIn this project we will scavenge parts from old PC CD-Rom(s) and build a fully working CNC machine using (basically any type of) Arduino which would run on G-Code.
For more info and Arduino and Raspberry Pi related projects go to my website https://www.neuralnetworks26.com/
You can also visit our official neural networks page at: https://www.facebook.com/Neural.Networks26/
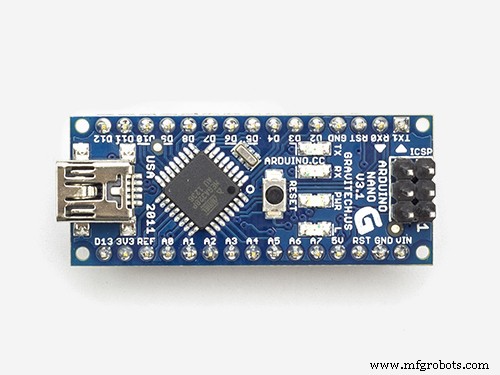
Parts Needed- Arduino Nano x 1
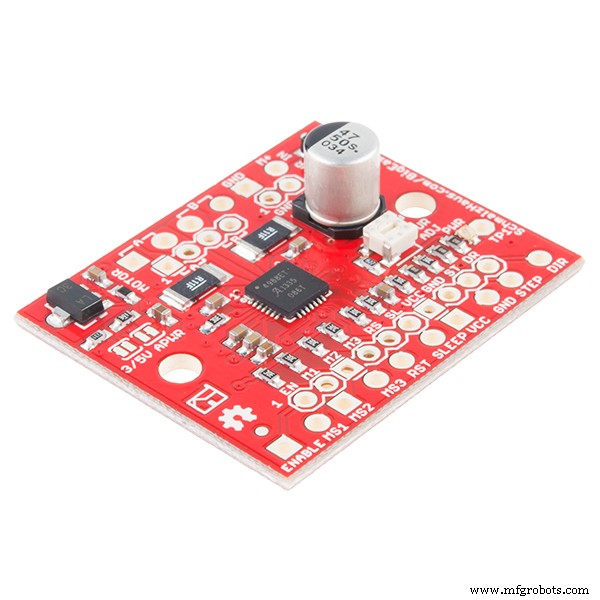
- Easydrivers by Sparkfun x 3
- CD-Rom drives x 3
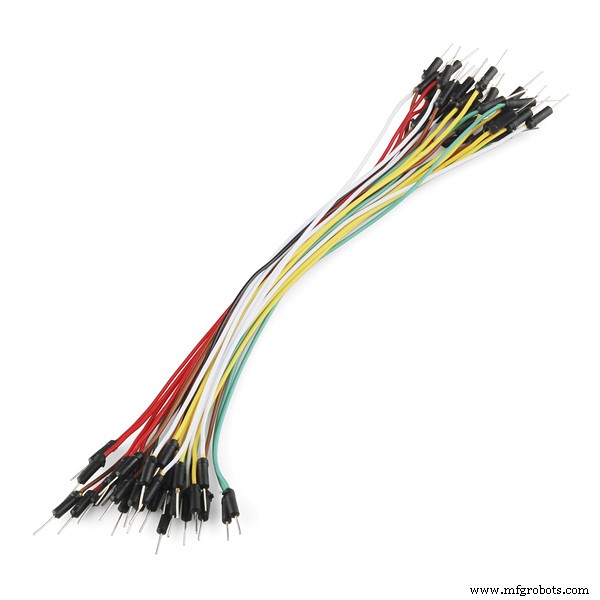
- Jumper Wires x 20
- Spacers and Washers
- Dc Jack Male x 1
- (5v ; 2.1 A) Power Adapter x 1
- XLoader
- Universal G-Code Sender
- Inkscape
- Maker CAM
- First of all you have to assemble your CD-Rom(s) so they are mutually perpendicular to each other and thus form 3 axis namely X, Y and Z.
- Now just follow the following circuit diagram to connect your Easydrivers, Motors and Arduino.
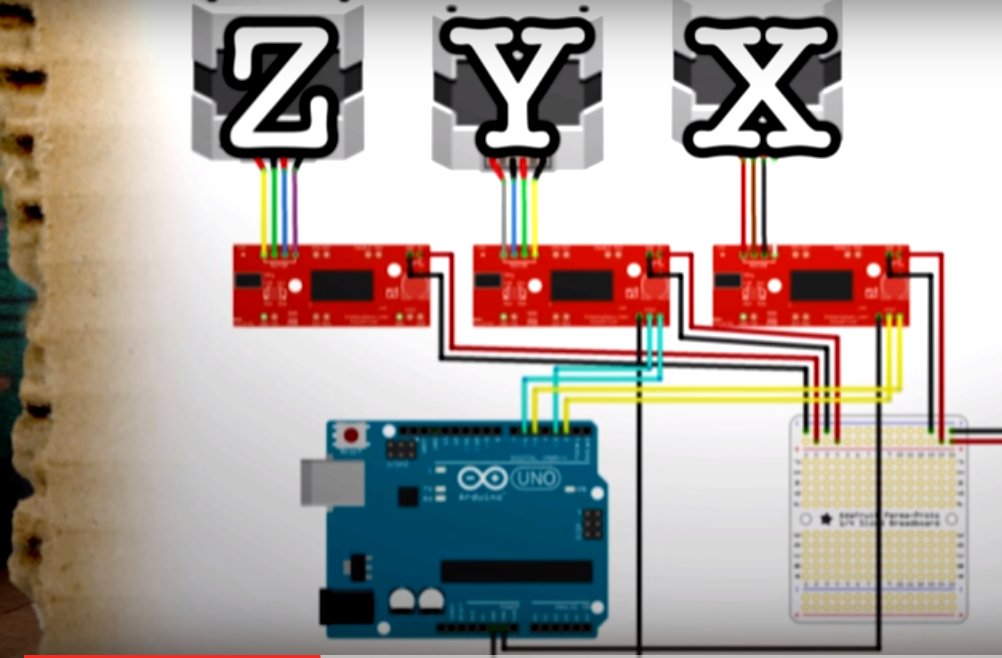
_5J9ZdGylMF.jpeg?auto=compress%2Cformat&w=680&h=510&fit=max)
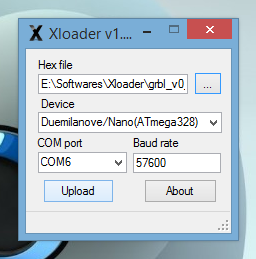
- Next upload the given HEX file onto your Arduino using XLoader https://drive.google.com/open?id=0B739XcxOoVo2aTZFbVJPVzJOVEU
- Now open Universal G-code Sender and connect your Arduino.
- Now go to Settings > Firmware Settings > GRBL. These are the X, Y and Z Step Dimensions for my machine (yours may vary).

- Now you can browse for the G-Code (I have used InkScape to generate G-Code) file and send it to the Arduino
- Your CNC Machine should now start printing.
For a final complicated test print go to:
https://www.facebook.com/Neural.Networks26/
Schematics

Precise GPS-Powered Clock: Affordable Accuracy & Reliability
Connecting Arduino to NMEA‑0183: A Step‑by‑Step Guide
Manufacturing process
- CNC Machine Tools: History, Design, and Future Trends
- What Is CNC? – Understanding Computer Numerical Control for Modern Manufacturing
- Build an Arduino-Powered CNC Plotter: Step-by-Step Drawing Machine DIY
- Build a Triple-Function CNC Machine: Engraving, Laser Cutting, and Pen Drawing
- Build Your Own Monster in a Box: Arduino Robotics Project
- Build a Reliable Arduino CNC Foam Cutting Machine – DIY Tutorial
- Build an Arduino-Driven 3D Wire Bending Machine: Step‑by‑Step Guide
- CNC Fundamentals: Mastering Computer Numerical Control
- Understanding CNC Programmers: Roles, Responsibilities, and Impact on Modern Manufacturing
- CNC Machine Lock: Accurate Program Testing Without Production