



How to Cut a Hole in PrusaSlicer – 7 Step Guide for Precise Openings
Creating openings for fasteners, cables, or weight reduction is a common requirement in 3D printing. PrusaSlicer makes this task straightforward when you use its modifier tools. Below is a step‑by‑step walkthrough that will let you add clean, accurate holes to any model.
Prerequisites: a 3D model (STL/3MF/STEP/OBJ/AMF) and PrusaSlicer installed on your computer.
Here’s the process in a nutshell:
- Import the model.
- Scale the model if necessary.
- Add a modifier.
- Scale the modifier to match the desired hole size.
- Position the modifier over the target location.
- Set the modifier’s infill, layers, and perimeters to 0.
- Slice and export the G‑code.
1. Import Your 3D Model into PrusaSlicer
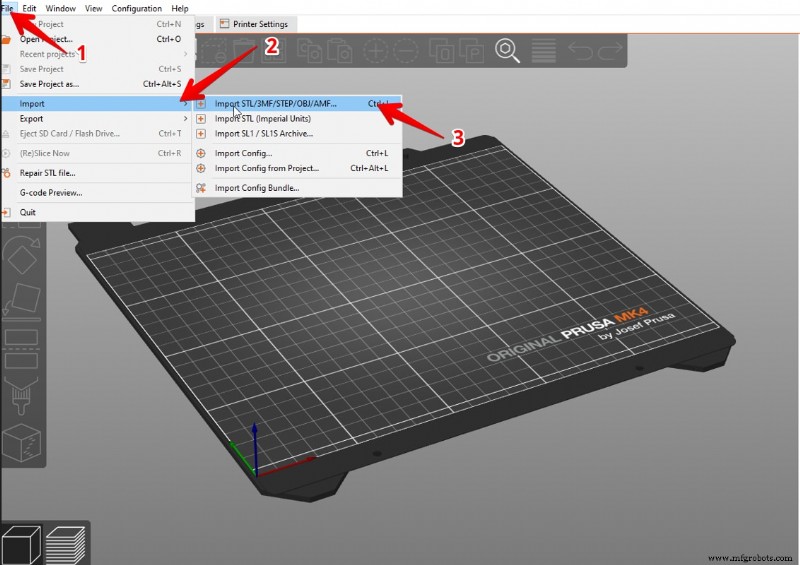
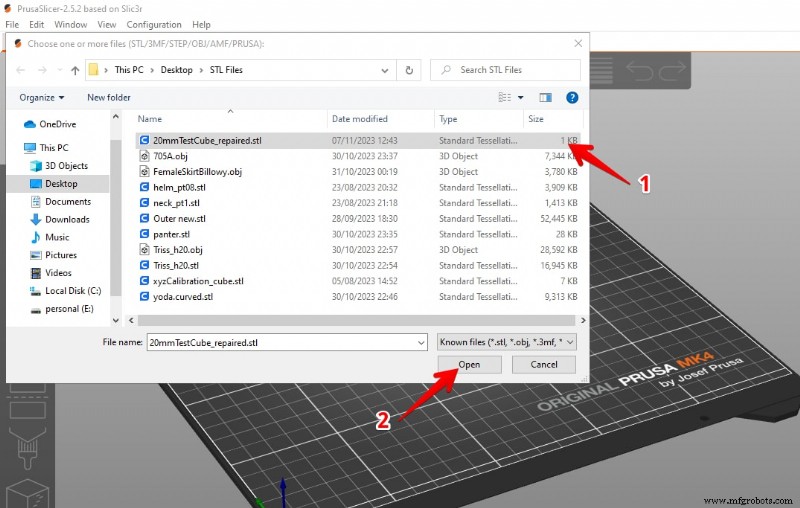
Navigate to File → Import → Import STL/3MF/STEP/OBJ/AMF and select the file you want to edit. Click Open to load it onto the workplane.
Once loaded, you’ll see the model preview in the viewport.
2. Scale the Model (Optional)
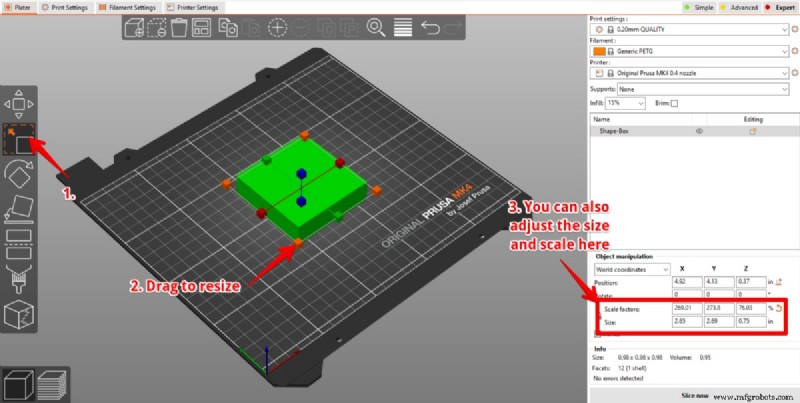
Use the Scale tool to resize the model. Drag the white cubes that appear on each axis to increase or decrease the dimensions.
3. Add a Modifier to the Workplane
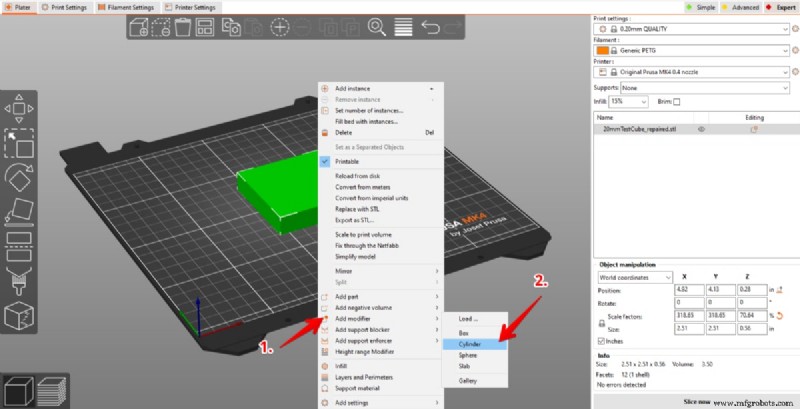
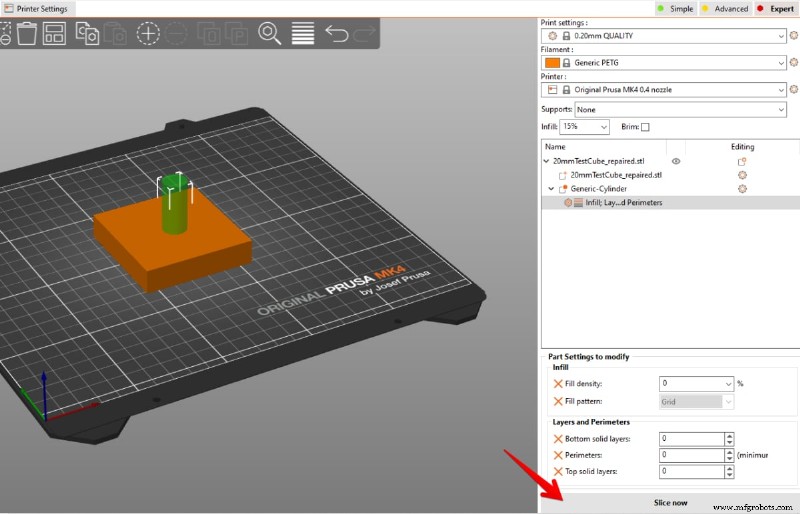
Right‑click the model and choose Add Modifier. Pick the shape that best matches your hole – for a circular opening, select Cylinder. The modifier appears as a translucent object that will subtract from the base model.
4. Size the Modifier to the Desired Hole
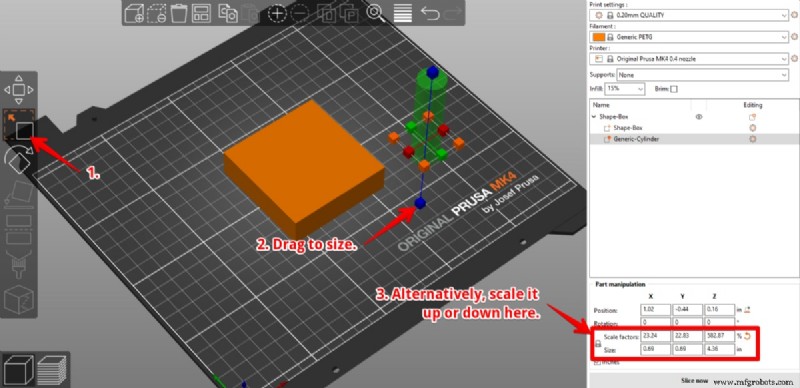
Adjust the modifier’s dimensions using the same Scale tool. Make sure the cylinder’s height exceeds the model’s thickness so the cut goes all the way through.
5. Position the Modifier Over the Target Spot
Drag the cylinder to the exact location where you want the hole. You can fine‑tune the position with the numeric input fields or by snapping to the model’s geometry.
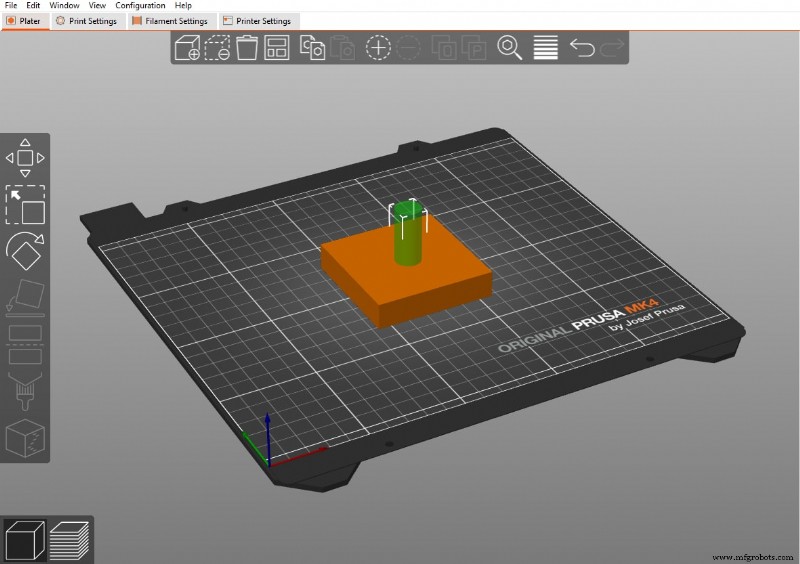
6. Set Modifier Infill, Layers, and Perimeters to Zero
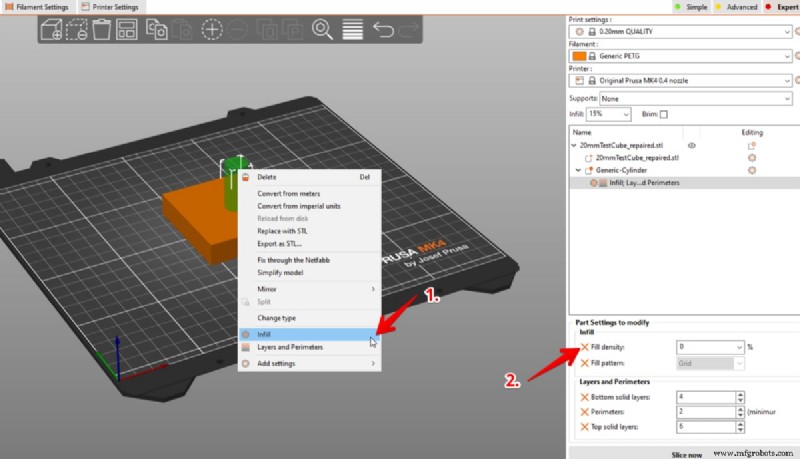
Right‑click the cylinder again and select Infill. In the Print Settings panel, set Fill Density to 0 % so the modifier becomes a pure subtractive element.
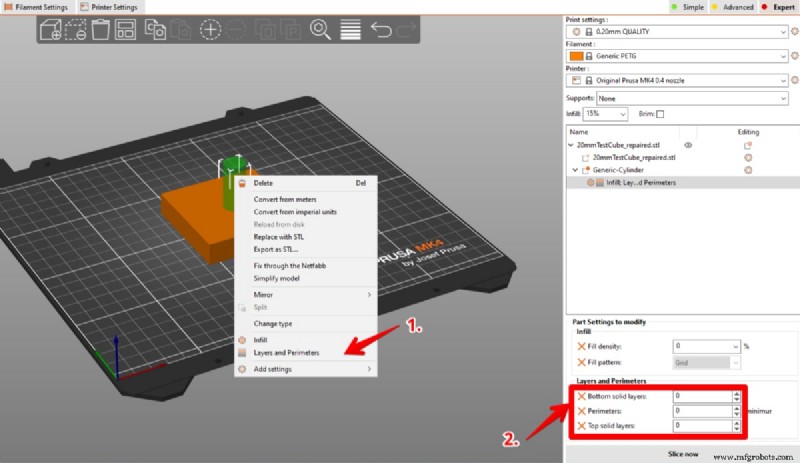
Next, choose Layers and Perimeters and set Bottom solid layers, Perimeters, and Top solid layers all to 0. This ensures the hole is fully open.
7. Slice and Export Your Model
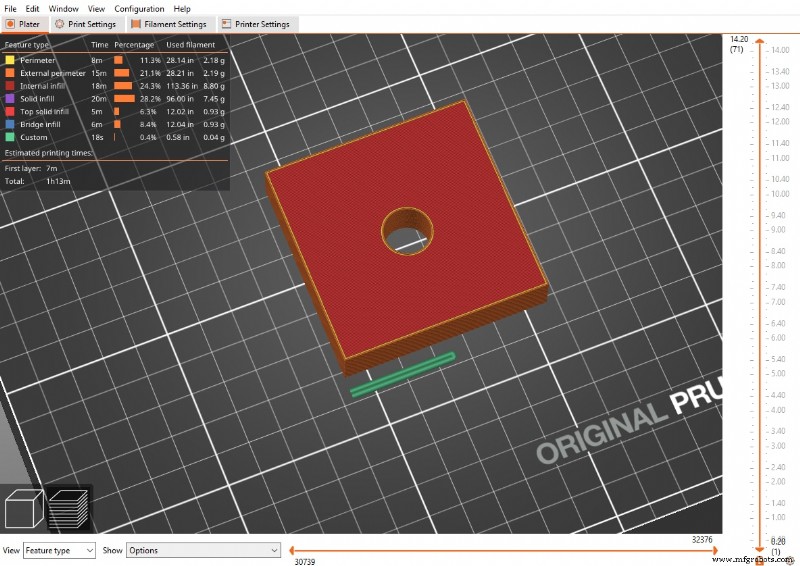
Hit Slice Now. The cylinder will carve a clean hole through the model. When you’re satisfied, export the sliced file as G‑code and load it onto your printer.
Watch the full tutorial on YouTube for a visual walkthrough:
How to Cut a Hole in PrusaSlicer

Michael Dwamena
Michael Dwamena is the founder of 3D Printerly, a platform dedicated to simplifying 3D printing for hobbyists and professionals. With ownership of over 20 filament and resin printers and the authorship of more than 900 articles, Michael has guided millions through the intricacies of 3D printing.
3D printing
- Markforged’s Mark Two Accelerates Innovation at MIT’s 2016 Hardware Hackathon
- Additive Manufacturing: The Resilient Solution to Global Supply Chain Disruptions
- When to Replace Your 3D Printer Nozzle – Expert Guide
- 5 Key Benefits of Adopting SLS Technology for Your Manufacturing Workflow
- Industrial 3D Printing in 2018: 6 Key Trends Shaping the Future
- Are 3D Printer Fumes Dangerous? Health & Safety Insights
- Siemens and Markforged Strengthen 3D Printing Innovation Through Strategic Collaboration
- Geeetech i3 Pro B Review: Is It Worth the Investment?
- Smart Data Drives 3D Printing Innovation in 2022
- Advanced 3D Printing in Aerospace: Accelerating Prototyping & Tooling