


Creating Multi‑Body STL Files for Multi‑Material 3D Printing
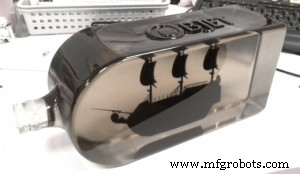
3D printing is revolutionizing design by letting us build complex objects layer by layer, free from traditional spatial constraints. A classic illustration is the “ship in a bottle”—instead of designing a tiny ship that must fit through a bottleneck, we can model the bottle around the ship. The real challenge is making the ship a separate part inside the bottle, so that both the clear bottle and the black ship are printed in a single job. This guide walks you through the proven workflow for producing multi‑body STL files that enable multi‑material 3D printing.
Stage 1: Create Separate Solid Bodies
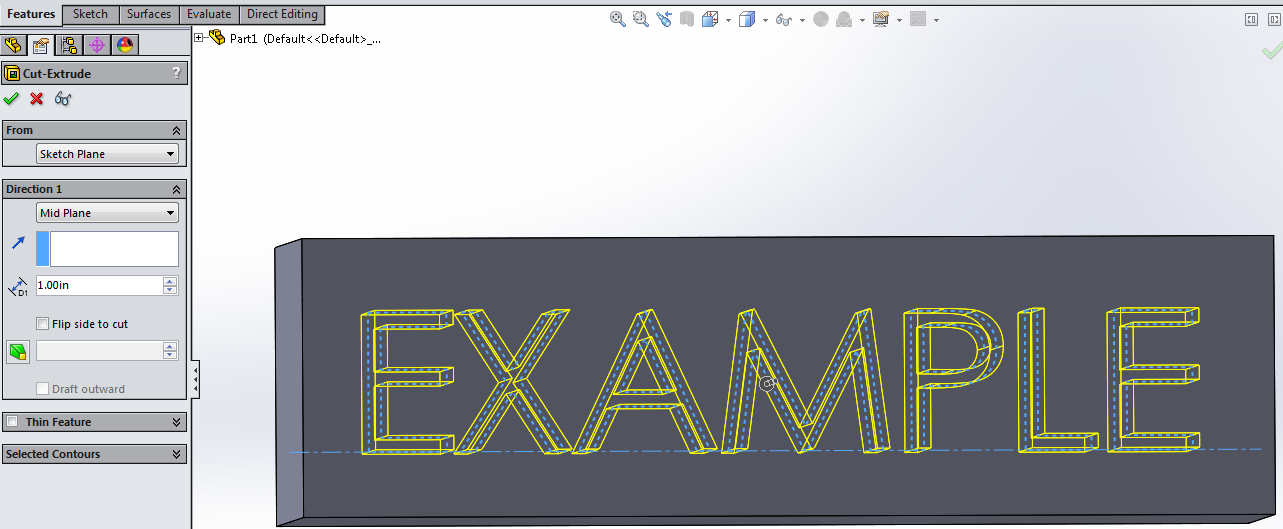
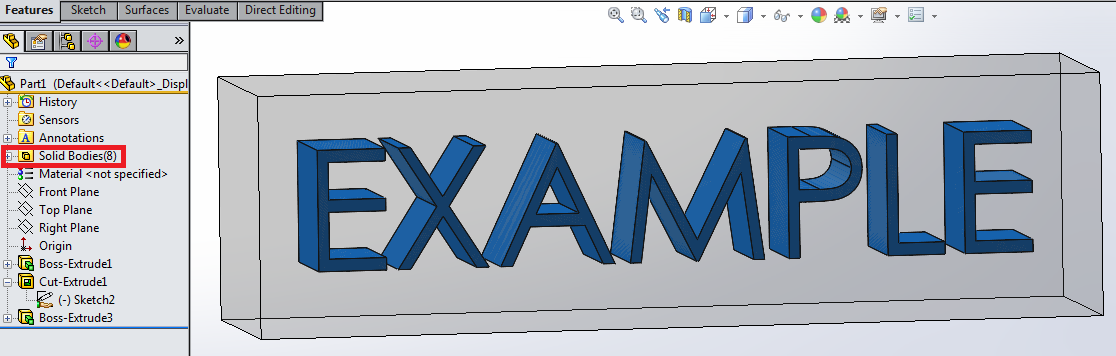
In this example, we start with a single block that contains the letters “HELLO.” To create independent bodies, we first extrude‑cut the letters and then reuse the same sketch to extrude each letter into the same volume. By disabling the “Merge result” option, we avoid gaps that would require support material and we prevent overlapping geometries. The final part contains eight solid bodies: one for the block and seven for the letters. Adding distinct appearances helps us verify the internal structure.
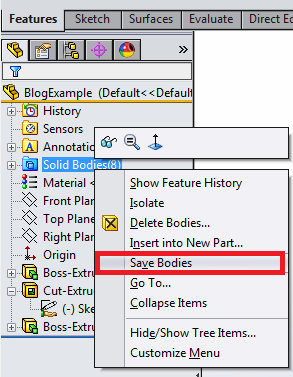
Stage 2: Use the Save Bodies Command
After modeling, we need separate STL files for each body. If we simply save the part, we receive a single solid STL that prints as a monolithic object—exactly what we want to avoid. The “Save Bodies” feature allows us to export each solid body individually. Using the “Auto‑assign Names” option speeds up the process, but naming the clear block explicitly is essential for the printer’s material workflow.
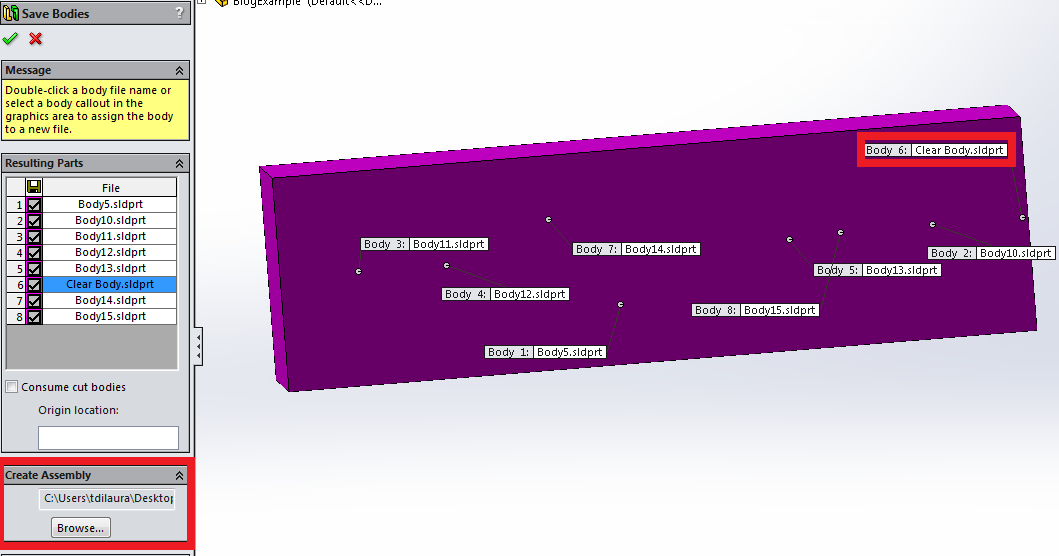
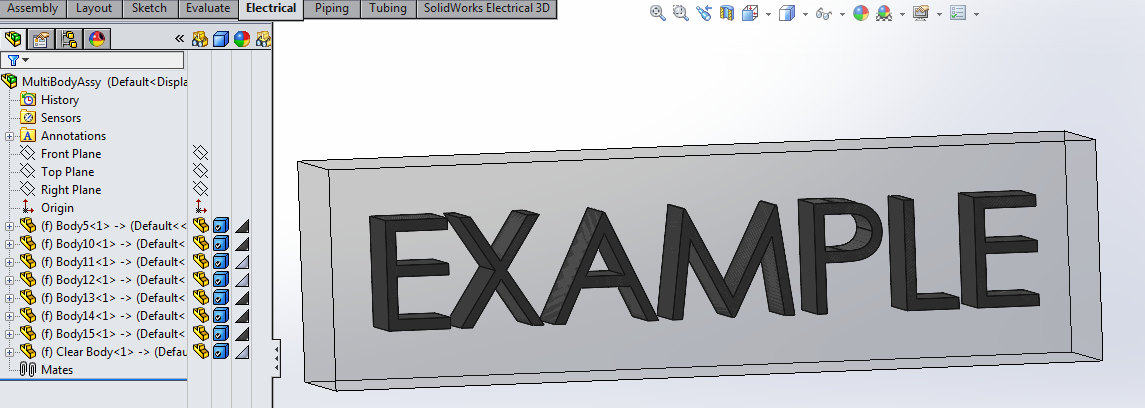
We then create an assembly from these bodies. The assembly file becomes the source for our STL export.
Stage 3: Export the STL Files
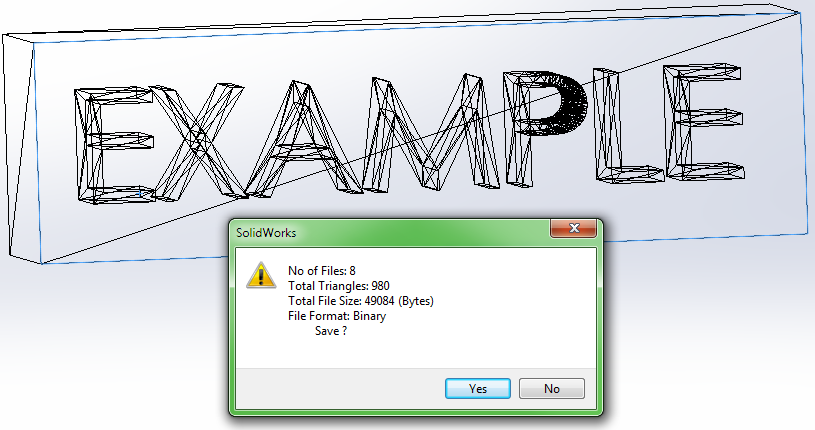
Open the assembly file, choose File → Save As, set the file type to STL (*.stl), and click Options. Here you can fine‑tune the mesh resolution (deviation and angle) for optimal print quality. Crucially, uncheck the “Save all components of an assembly in a single file” box; this keeps each body in its own STL file so that you can assign different materials later.
The preview confirms that eight separate STL files will be generated.
Stage 4: Prepare for Printing in Objet Studio
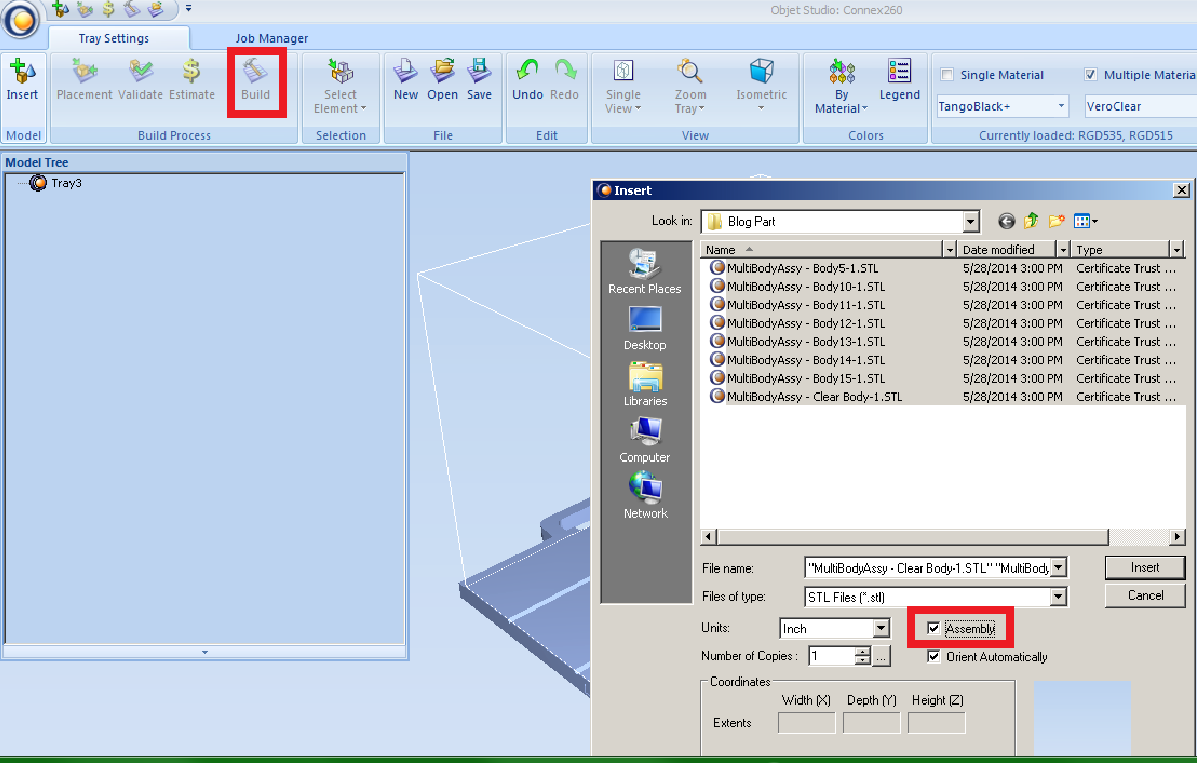
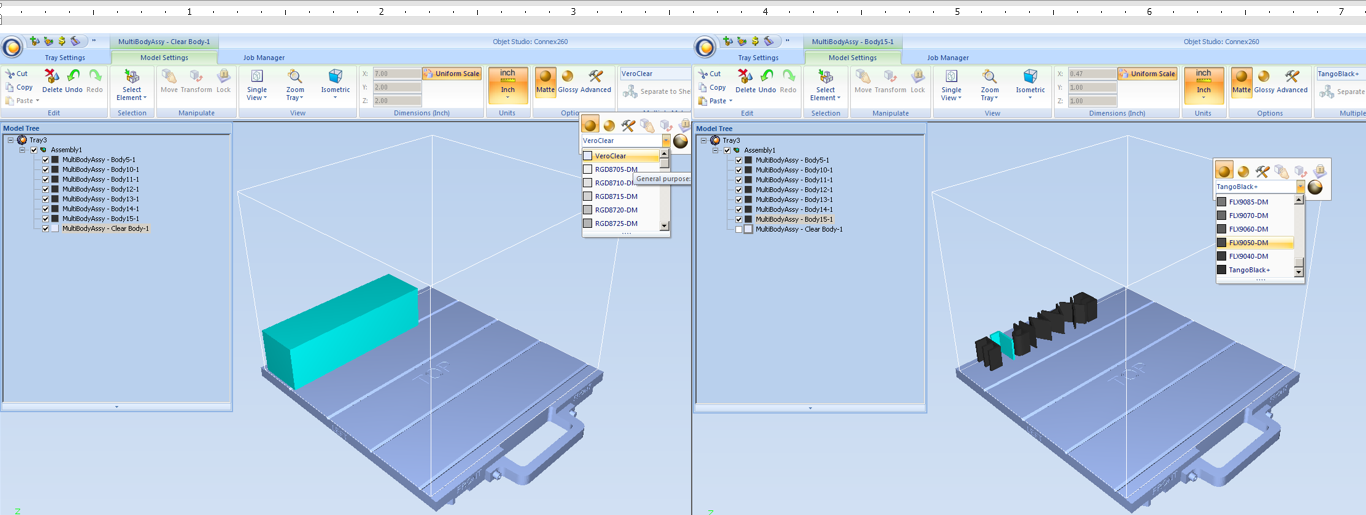
Import the eight STL files into Objet Studio. Ensure the Assembly checkbox is ticked to access individual parts. Assign VeraClear to the clear block and TangoBlack (FLX9050) to the letters. You can also orient the block to optimize print stability.
Once the material selections are complete, click the Build button. The printer’s software will generate the tool paths and the final print will show a transparent bottle holding a black lettered block, all in one cohesive job.
Tags: 3D Printing, STL Files, Stratasys
3D printing
- Effortless Post‑Processing for FDM 3D Prints
- Key Design Principles for Optimizing Metal 3D Printed Parts
- 3D Printing: From Rapid Prototyping to Full‑Scale End‑Part Production
- Mastering 3‑D Print Orientation: Tips for Surface Finish, Strength, and Support Efficiency
- Cut Print Time for 3D‑Printed Plastic Parts – Expert Design Strategies
- Understanding STL Files: The Backbone of 3D Printing
- Master 3D Printing: A Complete Guide to Creating STL Models
- Top Trusted Sites for Free STL Downloads – 3D Printing Made Easy
- Step‑by‑Step Guide: Convert STL to G‑Code for Reliable 3D Printing
- Step-by-Step Guide to Creating STL Files for 3D Printing