


Cut Print Time for 3D‑Printed Plastic Parts – Expert Design Strategies
In this third installment of our Design for 3D Printing series, we reveal practical tactics that shave hours off your print time and reduce material waste. If you missed Parts 1 and 2, read them now to get the full picture.
Why 3D Printing Is Often Slower
Although additive manufacturing can save significant time in prototyping and custom machining, it’s inherently slower than subtractive methods in many scenarios. That said, the right design choices can dramatically accelerate FFF (Fused Filament Fabrication) prints without sacrificing quality.
Key Factors That Add Print Time
Understanding what drives time is the first step toward optimization. Below we dissect each culprit and explain how to mitigate its impact.
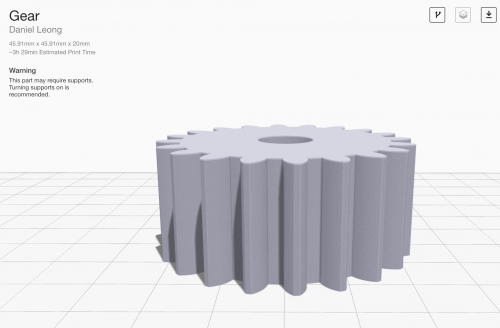
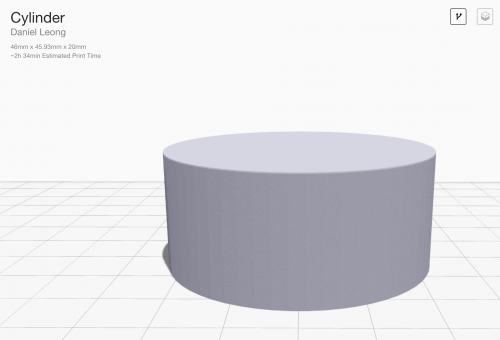
Large Surface Area
Every additional wall on a part forces the print head to slow down. A small gear can take longer to print than a larger cylinder if the gear’s surface area is higher. Rule of thumb: keep wall thickness minimal and avoid unnecessary detail when speed is critical.

Support Material
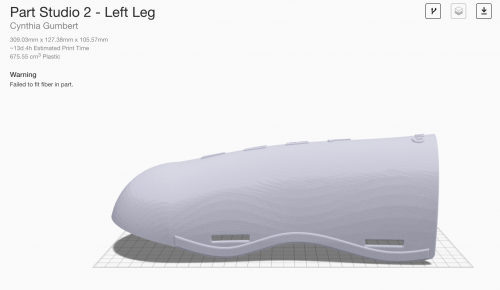
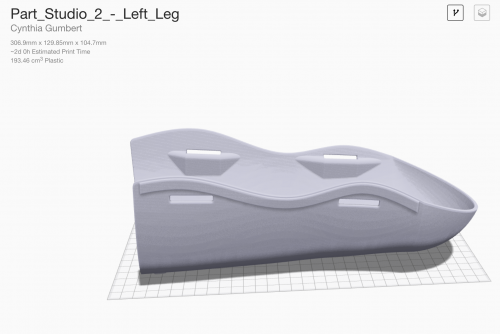
Supports add a long, slow‑moving wall to your print, often more than any other factor. Use the following strategies to reduce support time:
- Re‑orient the part. A simple flip can cut days from a 13‑day print to just 2. Example: Skiing shinguard orientation.
- Limit overhangs. Keep overhang angles below 45° for Onyx (30° for nylon) to avoid automatic support placement.
- Design with a print face in mind. Decide the optimal orientation during design to control overhangs proactively.
- Split complex parts. Divide a single geometry into two or more pieces that print without supports, then re‑assemble with Loctite 401.

Layer Height
Layer height balances resolution against time. Our default of 100 µm offers a fine finish; doubling to 200 µm cuts print time in half with only a modest drop in surface quality—ideal for rapid, non‑critical builds.

Design for 3D Printing
It’s tempting to print every part, but many components—especially simple shafts—are better machined. By printing only those geometries that truly benefit from additive methods, you reduce print time and avoid unnecessary complexity.
Preventing Failed Prints
Every failed print wastes time and material. Mitigate failures with:
- Consistent bed leveling.
- Regular unit tests to catch issues early.
- Proper material management (stock levels, filament health).
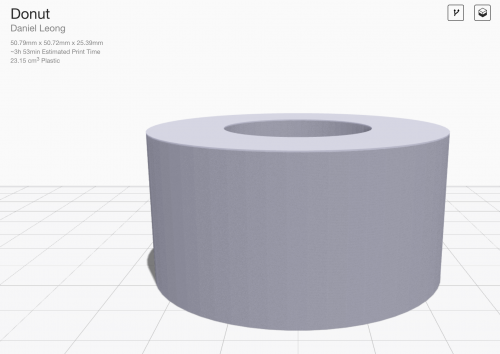
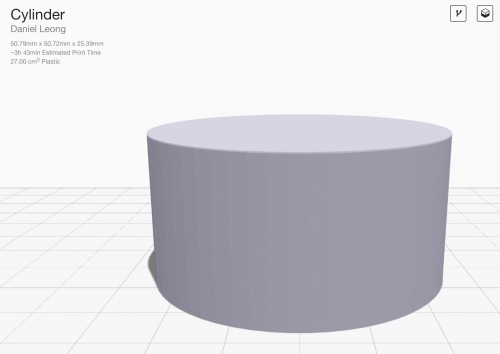
What Doesn’t Help: Speed Holes
Adding holes can reduce material but often increases surface area, adding time. A donut‑shaped part printed with a large central hole actually takes 10 % longer than a solid one.

Conclusion
Time‑saving in 3D printing is highly context‑dependent. By applying the tactics above—minimizing surface area, managing supports, adjusting layer height, and designing only what’s necessary—you’ll see consistent reductions in print duration across most projects.
Try it yourself. Sign up for a free Eiger trial and experience cloud‑based slicing that optimizes your workflow automatically.
Follow us on Facebook, Twitter, Instagram, and LinkedIn for more expert tips.
3D printing
- Effortless Post‑Processing for FDM 3D Prints
- Key Design Principles for Optimizing Metal 3D Printed Parts
- 4 Key Design Principles for Successful 3D Printing
- 3D Printing: From Rapid Prototyping to Full‑Scale End‑Part Production
- Creating Multi‑Body STL Files for Multi‑Material 3D Printing
- Mastering 3‑D Print Orientation: Tips for Surface Finish, Strength, and Support Efficiency
- Master 3D Printing: Part 1 – Unit Tests & Tolerances for Accurate, Cost‑Efficient Builds
- Design for Additive Manufacturing (DfAM): 3D Printing Strategies That Cut Costs and Boost Efficiency
- Mastering Design for Manufacturability: Part 2 – Tolerances & Feature Optimization
- Expert Design Tips for Carbon DLS™ 3D Printing Success