


Optimizing Fixtures and Tooling for Additive Manufacturing
Despite the rapid growth of additive manufacturing, many firms have yet to fully adopt it for fixture design. Traditional fixtures remain shaped by the constraints of 3‑axis CNCs and manual machining, the most common tools in most production shops.
To stay competitive, manufacturers often build fixtures that are bulky and expensive. The goal is to minimize machine time and shift focus to producing customer products. Consequently, fixture production is seen as a non‑value‑added activity, even though it is critical for final output.

The challenges we hear most frequently involve machine time—often measured in weeks—and a shortage of skilled operators. Even when a machine is available, setting up code or manually machining a fixture requires a highly trained machinist, which drives up labor costs.
Although we specialize in complex parts with organic geometries, the standard “blocks on a plate” fixture remains prevalent. This status quo leads to long lead times, large storage footprints, and a high cost‑to‑part ratio when accounting for labor and machine time.
The Additive “Quick Fix”
In response, many manufacturers have turned to additive manufacturing as a quick fix to internal time and resource constraints. By printing fixtures directly, they eliminate queue delays, reduce lead times, and allow continuous, unattended production around the clock.
This approach also cuts fixture costs and frees the shop from manual labor, while offering ergonomic benefits over solid metal alternatives. Our surveys of FDM users reveal numerous such designs.
One client produces 12 aluminum fixtures annually. With traditional methods, each fixture costs over $3,000 and takes 4–6 weeks to procure. Outsourcing is common in such busy shops.
In contrast, a solid ABS 3D‑printed fixture costs $190 and is ready in about 19 hours—just under a day.
Applying design‑for‑additive principles can reduce the cost further to $76 and the print time to 11 hours—achieving a 60% cost reduction and 42% time savings versus the traditional design.
Common Mistakes When Designing for Additive Manufacturing
Before outlining best practices, it’s important to clarify the term “design for additive.” It’s a broad concept that must be tailored to the specific printer and material. Each 3D‑printing technology—FDM, SLA, PolyJet, Binder Jet, DMLS, etc.—has unique constraints and best practices.
Some designers mistakenly believe additive manufacturing solves all problems. While versatile, it is not a silver bullet. For example, inexpensive off‑the‑shelf parts—bolts, screws—may still be more economical to purchase than to print.
Common Mistakes
Two frequent pitfalls are shelling and hollowing of FDM parts. Rather than minimizing infill, designers often create large internal cavities to save material.
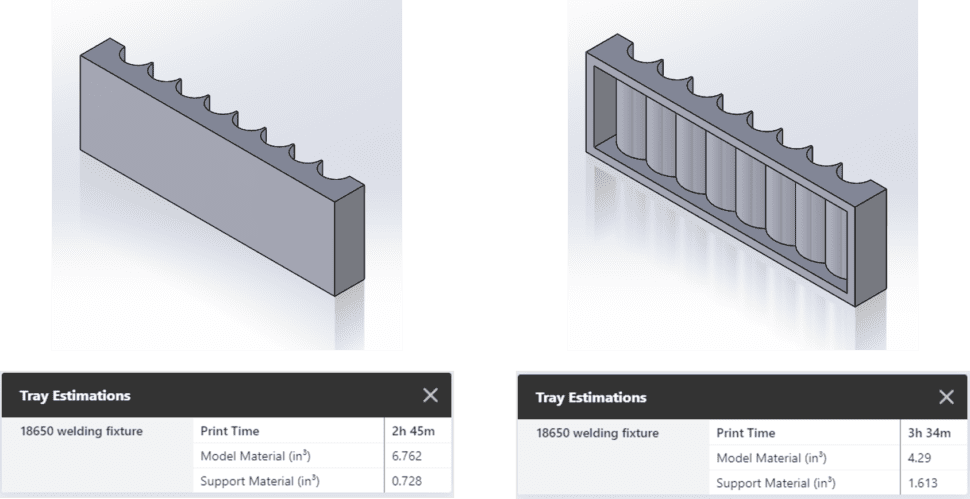
Hollowing reduces material slightly but can dramatically increase print time and may trap support material that cannot be removed.
6 Design‑for‑Additive Rules for FDM
Below are six straightforward rules that can dramatically cut print time, material usage, and cost for FDM parts.
1. Self‑Supporting Angles
The 45‑degree rule states that overhangs less than 45° from vertical do not require support. This simple adjustment cuts support material and speeds up printing. Note that the cutoff can vary by material, typically between 40° and 60°.
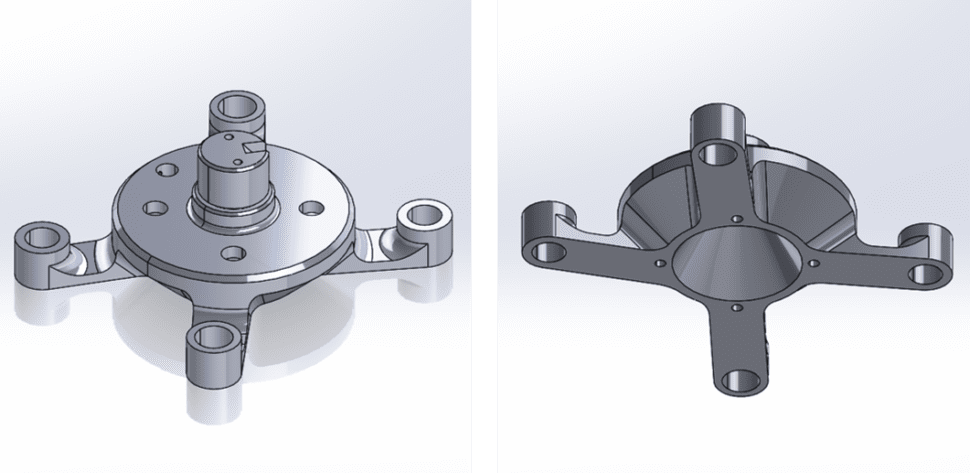
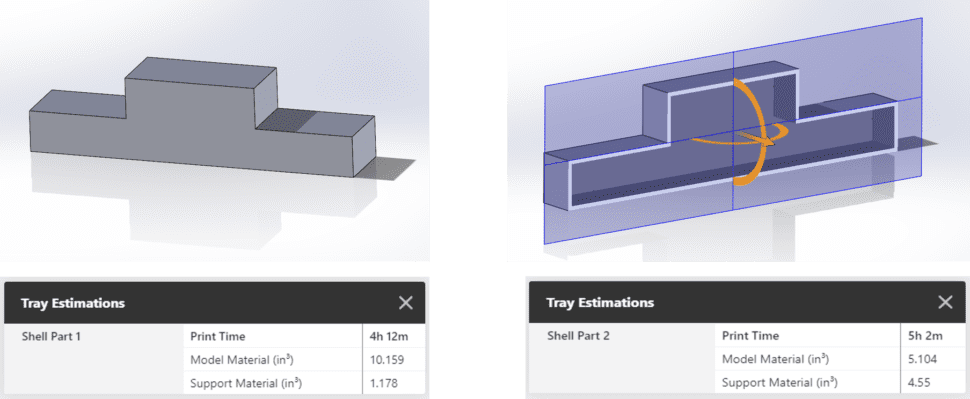
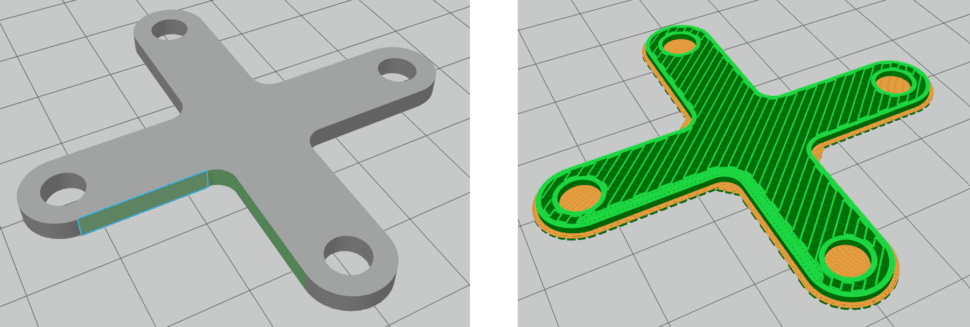
2. Eliminating Material From Bulky Features
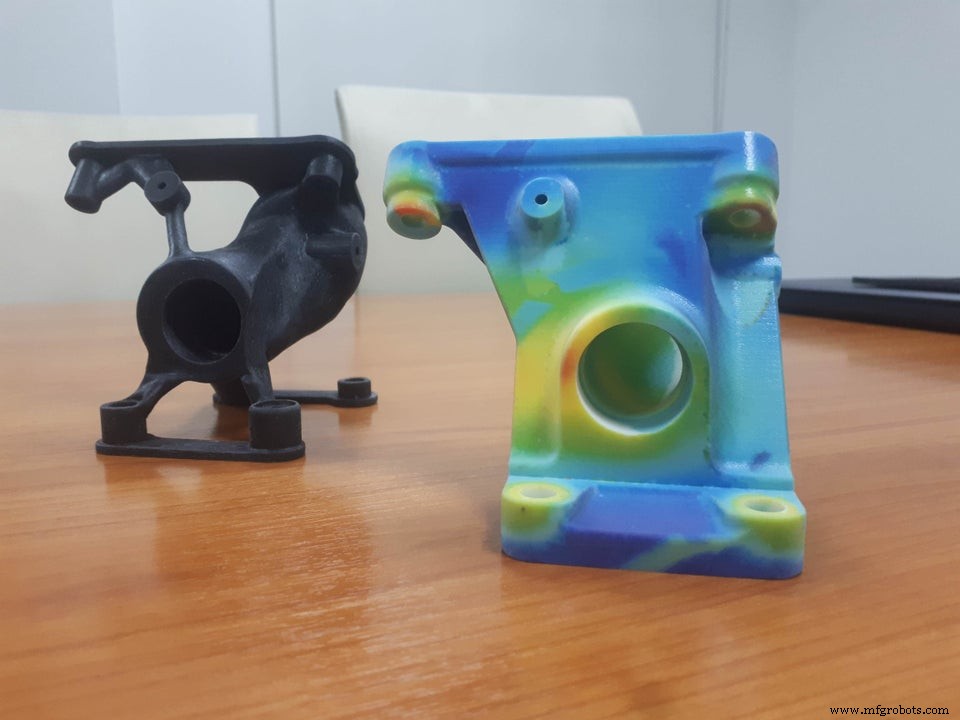
Shelling can reduce weight, but it must be done strategically. Focus on mating surfaces—design contact points first, then optimize the surrounding geometry to maintain strength while removing unnecessary bulk.
3. Selective Strength By Faces
Tools like GrabCAD Print let you assign infill densities and wall thicknesses to specific faces or bodies. This lets you reinforce only the critical areas while keeping the rest of the part lightweight.
4. Selective Strength By Body

Similarly, you can set different infill levels for separate CAD bodies. Adding thin ribs or internal structures provides mechanical support without adding bulk.
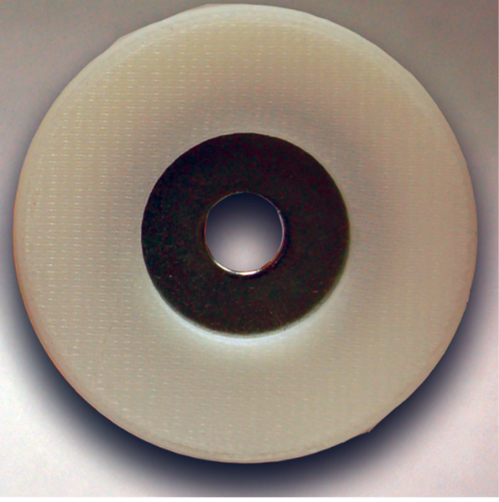
5. Metal Inserts
When a printed part will experience wear, embed metal nuts, washers, or heat‑set threaded inserts. Design a cavity and pause the print to insert the part, then resume. Ensure a small excess of material around the hole for secure engagement.
For heat‑set inserts, leave a thin wall around the hole and use a soldering iron to secure the insert after printing.
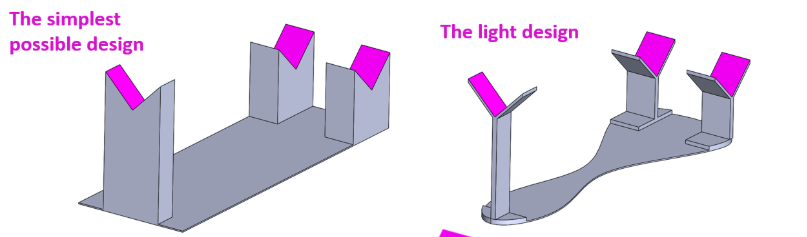
6. Consolidated Assemblies
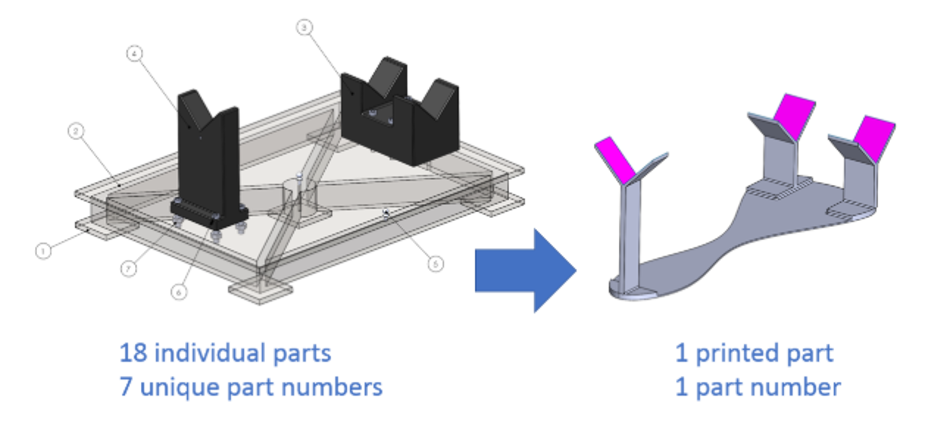
Printing a single integrated fixture eliminates the need to assemble multiple parts, reducing labor and potential misalignment. Hybrid tools that combine 3D‑printed components with metal fasteners or hydraulics further enhance performance while cutting weight.
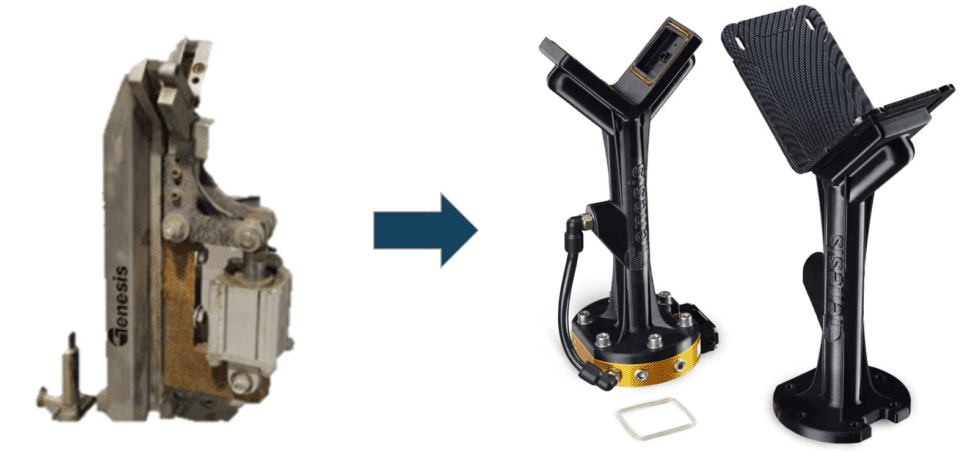
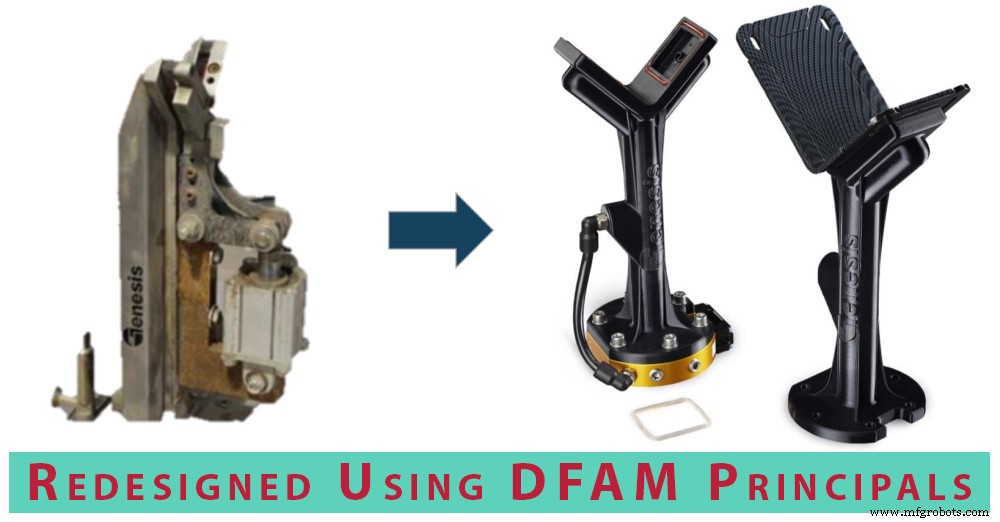
Case studies: Genesis Systems replaced a heavy end‑of‑arm tool with a lightweight 3D‑printed version, enabling use of a smaller, cheaper robot. Ford redesigned a bulky aluminum window‑installation fixture into a 7.5‑lb 3D‑printed alternative that integrates air lines and fasteners while maintaining structural integrity.
Design‑for‑Additive Summary
In summary:
- Traditional manufacturing drives fixture design, but additive manufacturing can slash lead times, costs, and improve ergonomics.
- Misconceptions about additive design can lead to inefficiencies; understanding the specific printer and material is key.
- Avoid shelling and hollowing pitfalls that increase support and print time.
- Apply the six rules above to reduce material use, printing time, and enhance part performance.
Optimize Your Designs for 3D Printing
From concept to production—CADimensions guides you every step of the way.
CADimensions Services
3D printing
- Why Design for Additive Manufacturing Matters: Six Key Benefits
- How Additive Manufacturing Helped Van Damme Produce Custom Marshmallow Nozzles at a Fraction of the Cost
- Practical Design Strategies for Additive Manufacturing and Rapid Prototyping
- Design for Additive Manufacturing (DfAM): 3D Printing Strategies That Cut Costs and Boost Efficiency
- Optimizing PCB Design for Manufacturing: Key Strategies & Best Practices
- Design for Assembly: Enhancing Product Manufacturing Efficiency
- Design for Manufacturing: Key Principles for Product Success
- Essential Guide to Designing Effective Jigs and Fixtures
- Mastering Tooling & Mold Design: Your Essential Manufacturing Guide
- Why Comprehensive PCB Documentation Drives Design Efficiency & Faster Production