


Guest Blog: Charles Guan Builds a 3‑lb Flywheel Flipper with Markforged 3‑D Printing
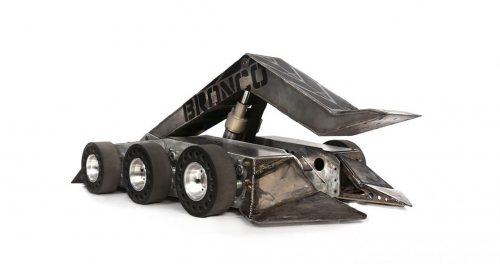
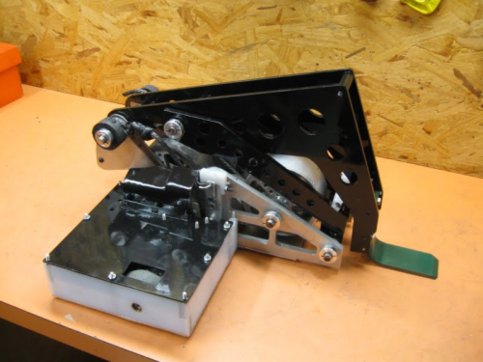
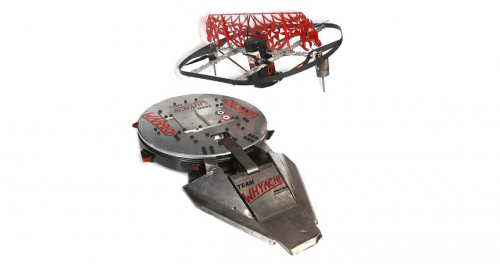
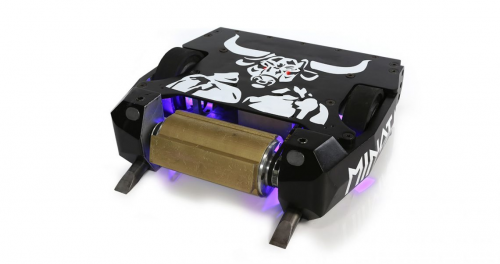
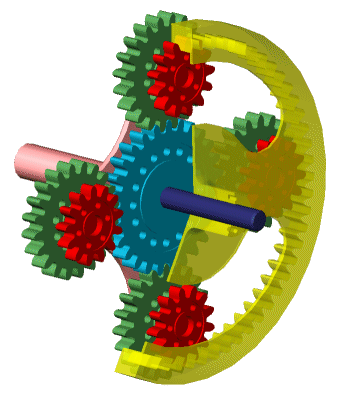
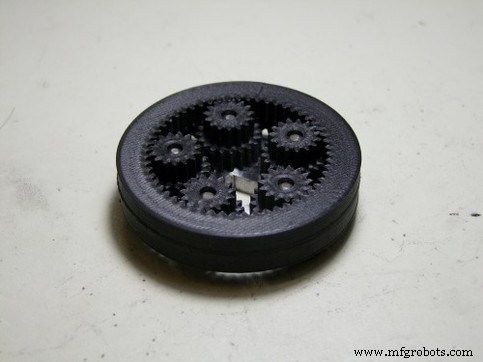
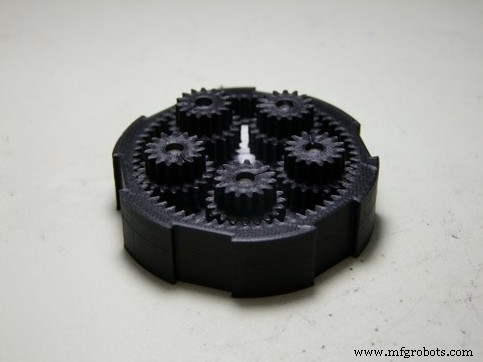
This guest post is written by Charles Guan, an MIT Mechanical Engineering alumnus and former instructor in the university’s machine shop and design program. He is the creator of the robot Overhaul, which will compete on ABC’s BattleBots this summer, airing Thursdays at 8 p.m. Eastern/7 p.m. Central. Charles works as a robotics and transportation engineering consultant, and he is proudly sponsored by Markforged. Visit his website and Equals Zero Robotics for more insights. In the arena of robot combat, certain weapon concepts recur—wedges, flippers, hammers, spinning rotors—and a few become so rare and powerful they’re considered “holy grails.” The flywheel flipper is one such design. Traditional high‑speed flippers use pneumatic systems; while they deliver impressive power, their energy density is low, and a top‑tier flipper typically lasts fewer than a dozen shots before its gas runs out. An electric flywheel flipper merges the high energy density of batteries with the peak power of a flywheel’s kinetic energy, but harnessing that energy in a quick‑release, controllable form remains challenging. Design hurdles include a reliable engagement mechanism, precise timing, gradual acceleration, and a sturdy linkage to the striking arm. A single misstep can turn the mechanism into a kinetic energy grenade. Historically, only a handful of successful flywheel flippers have emerged. In the 3‑ to 30‑lb classes, innovators like Zac O’Donnell (with his robot Magneato) and Dale Heatherington have experimented with the concept. In the heavyweight arena, Warrior has set the benchmark. Each example uses a distinct mechanical approach, illustrating the breadth of experimentation in the community. As builders converge on locally optimal solutions, a truly versatile weapon design—one that can be adapted to multiple configurations—remains largely untapped. Over the past few years I’ve been hunting for a compact, coaxial flywheel solution that could be mounted inline with a “pointy” flywheel—essentially a spinning drum or disc with teeth—and coupled to a mechanism on the opposite side of the robot. This dual‑weapon architecture opens strategic possibilities that are hard to achieve with a single arm. I chose to pursue this idea during the BattleBots off‑season in a 3‑lb robot, a size that can be efficiently printed on a Mark Two. The 3‑lb class offers a manageable volume for 3‑D printing while still demanding a high‑performance weapon. The core requirement was to fit a gear ratio of at least 20:1 into a coaxial package and to engage the reduction only when needed. I studied compound epicyclic (planetary) gear trains, consulting classic texts like “Mechanisms and Mechanical Devices Sourcebook” and numerous technical papers. This approach lets a single gear set deliver extremely high ratios within a volume comparable to a standard planetary gearbox by exploiting the slightly different sizes of two ring gears. Initially, I experimented with custom sliding‑dog clutches and friction bands, essentially creating my own automatic transmission. In combat robotics, complexity often translates to failure, so I pivoted. The breakthrough came when I realized the gear set could act as a torque‑splitting device—akin to Toyota’s “Hybrid Synergy Drive” or other variable‑ratio transmissions. By anchoring one ring gear, the other remains stationary while the first continues to spin; this “relative velocity” principle allowed me to shift torque between rings. To validate the concept, I printed a toy ring‑gear assembly in Onyx on a Mark Two. Onyx’s stiffness and strength were essential, as the small size of the robot would otherwise require overly flexible nylon teeth. The test model confirmed that stopping one gear—by braking, clamping, or a simple mechanical stop—causes the other gear to rotate, thereby engaging the flywheel. After the proof‑of‑concept phase, I moved to full‑scale design. Drawing on sketches from earlier projects, I built a first‑pass CAD model and iterated on specific mechanical needs. The resulting robot features a triangular, invertible chassis, an 8‑ounce aluminum rotor equipped with socket‑head bolts acting as teeth—a common tactic in the 3‑lb class. The planetary gear system is printed in black Onyx, and a servo motor actuates a sliding tooth that locks one ring gear, forcing the other to spin. The spinning ring drives an offset cam that, through a connecting rod, operates a butterfly linkage. This linkage forces two metal wings apart as the cam rotates; one wing pushes upward against the opponent while the other remains on the ground. While the concept is solid, fine‑tuning remains. Potential issues include a stuck sliding tooth that could lock the mechanism permanently, or a dry fire that might propel the robot upward. Embracing these challenges is part of the excitement of robotics, and I’m eager to see the design evolve in competition. Below is a short demonstration of the flywheel flipper in action. Additional photos of the design: Photos courtesy of Charles Guan.Combat Robot Background
Designing a Compact, Coaxial Flywheel Flipper
Developing the 3‑D Printed Gear Mechanism
From Prototype to Battle‑Ready Robot

3D printing
- Build an Internet‑Controlled Video‑Streaming Robot with Arduino & Raspberry Pi
- Markforged Sets New Standards in Antweight Combat Robotics
- Optimizing Robot Traction: Custom 3‑D‑Printed Wheels with Markforged Casting
- Control Your Roomba Create 2 Using Arduino and Android: A Step-by-Step Guide
- Build Your Own AI Assistant Robot Using Arduino & Python
- Wi‑Fi Controlled FPV Rover Robot with Arduino & ESP8266 – DIY Guide
- Quickly Program an Industrial Pick‑and‑Place Robot with RoboDK
- Choosing the Right Suction Gripper for Your Robot Applications
- Enhancing Cycle Times and Repeatability with ABB Gantry Robots
- Robotic Welding: Cost‑Effective, Versatile, and Superior Quality