


Metal 3D Printing Explained: A Three‑Step Process From Design to Finished Part
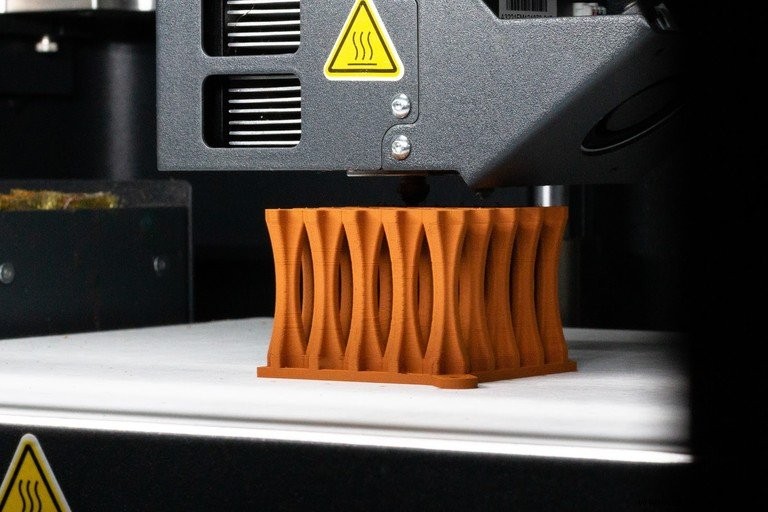
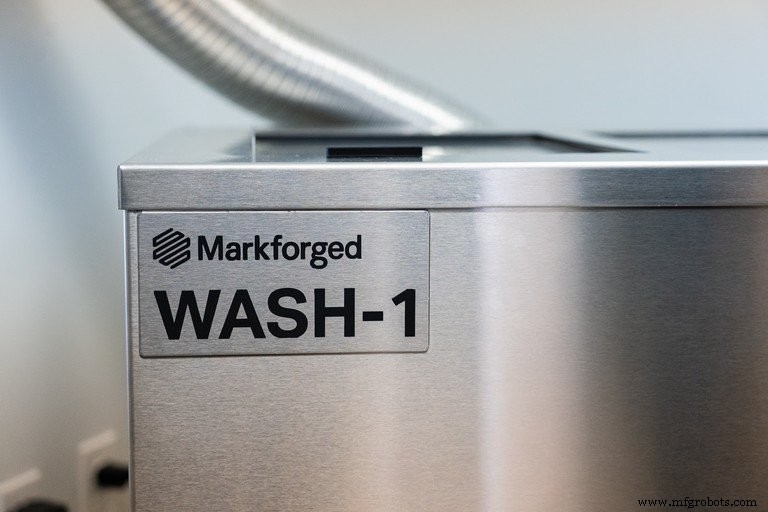
Metal 3‑D printing opens a new era of manufacturing, offering geometric freedom and eliminating tooling costs. By turning digital designs directly into functional parts, manufacturers can prototype rapidly and produce on‑demand replacements without the overhead of traditional machining. In this guide, Applications Engineer Tripp Burd walks you through Markforged’s complete metal 3‑D printing workflow, covering everything from CAD to a finished, sintered component. Every part begins in CAD. Export the model to an STL file and upload it to Eiger, Markforged’s cloud‑based slicing and print‑management system. Eiger auto‑configures settings based on the selected material and printer, scaling the model to counteract shrinkage and distortion. The slicer divides the part into layers, identifies overhangs, and automatically generates supports and a raft. It also tracks progress through each stage of the process. When the print starts, the Metal X printer maps and levels the build bed via a proprietary nozzle touch‑off routine, ensuring perfect first‑layer adhesion. Inside the heated chamber, a dual‑material filament—metal powder bound in a two‑part polymer binder— is extruded layer by layer. A ceramic release material is deposited between the part and its supports, enabling easy separation after sintering. Markforged’s Metal X can print in 17‑4 PH stainless steel, H13, A2, D2 tool steels, copper, and Inconel 625, among other materials under development. Material swaps are quick, and the printer notifies you by email when the build completes. In the wash stage, the Wash‑1 system removes the initial binder. The freshly printed green part is placed in a wash basket and submerged in solvent. Depending on part thickness, washing can take from a few hours to several days. After this step, the part turns a deep brown, ready for sintering. The Sinter‑2 furnace gradually ramps temperature to burn off remaining binder and fuse metal particles near their melting points. This creates a dense, fully metallic part. The furnace uses a carbon‑free retort to preserve alloy composition and part quality. Each sintering cycle lasts about a day and can be monitored remotely via Eiger. Once finished, the part is removed from the raft—where the release material has turned to powder—yielding a clean, ready‑to‑use component. It can be post‑machined, polished, or directly installed, depending on the application. By eliminating powder handling and tooling, this process delivers safe, cost‑effective metal additive manufacturing, accelerating lean production and innovation.Step 1: Print
Step 2: Wash
Step 3: Sinter

3D printing
- Key Design Principles for Optimizing Metal 3D Printed Parts
- Metal 3D Printing Applications: Advanced Use Cases – Part 2
- Metal 3D Printing Applications: Prototyping & Tooling – Part 1
- 3D Printing Trends 2019: Metal Innovation, Binder Jetting Breakthroughs, and Advanced Plastics
- Metal 3D Printing 101: How Additive Manufacturing Transforms Production
- Understanding the Metal FFF 3D Printing Process: From Printing to Sintering
- Mastering Metal 3D Printing: A Comprehensive Guide
- 3D Printing Explained: Part 1 – From Raw Materials to Modern Innovations
- Key Steps in the Machining Process for Flawless Parts
- Precision Sheet Metal Stamping for High-Volume Production