


DIY UVC Sterilizer Kit – Low‑Cost, Easy‑Build UV Box for Medical & Personal Items
Components and supplies
| × | 1 | ||||
| × | 10 | ||||
 |
| × | 1 | |||
 |
| × | 1 |
Necessary tools and machines
 |
| |||
|
Apps and online services
 |
|
About this project
Video-
So this is "UVC BOX" a low cost easy to make UVC Sterilizer which is made for sterilizing things like Medical equipment, daily use things like smartphones, wallets, coins bills, etc.
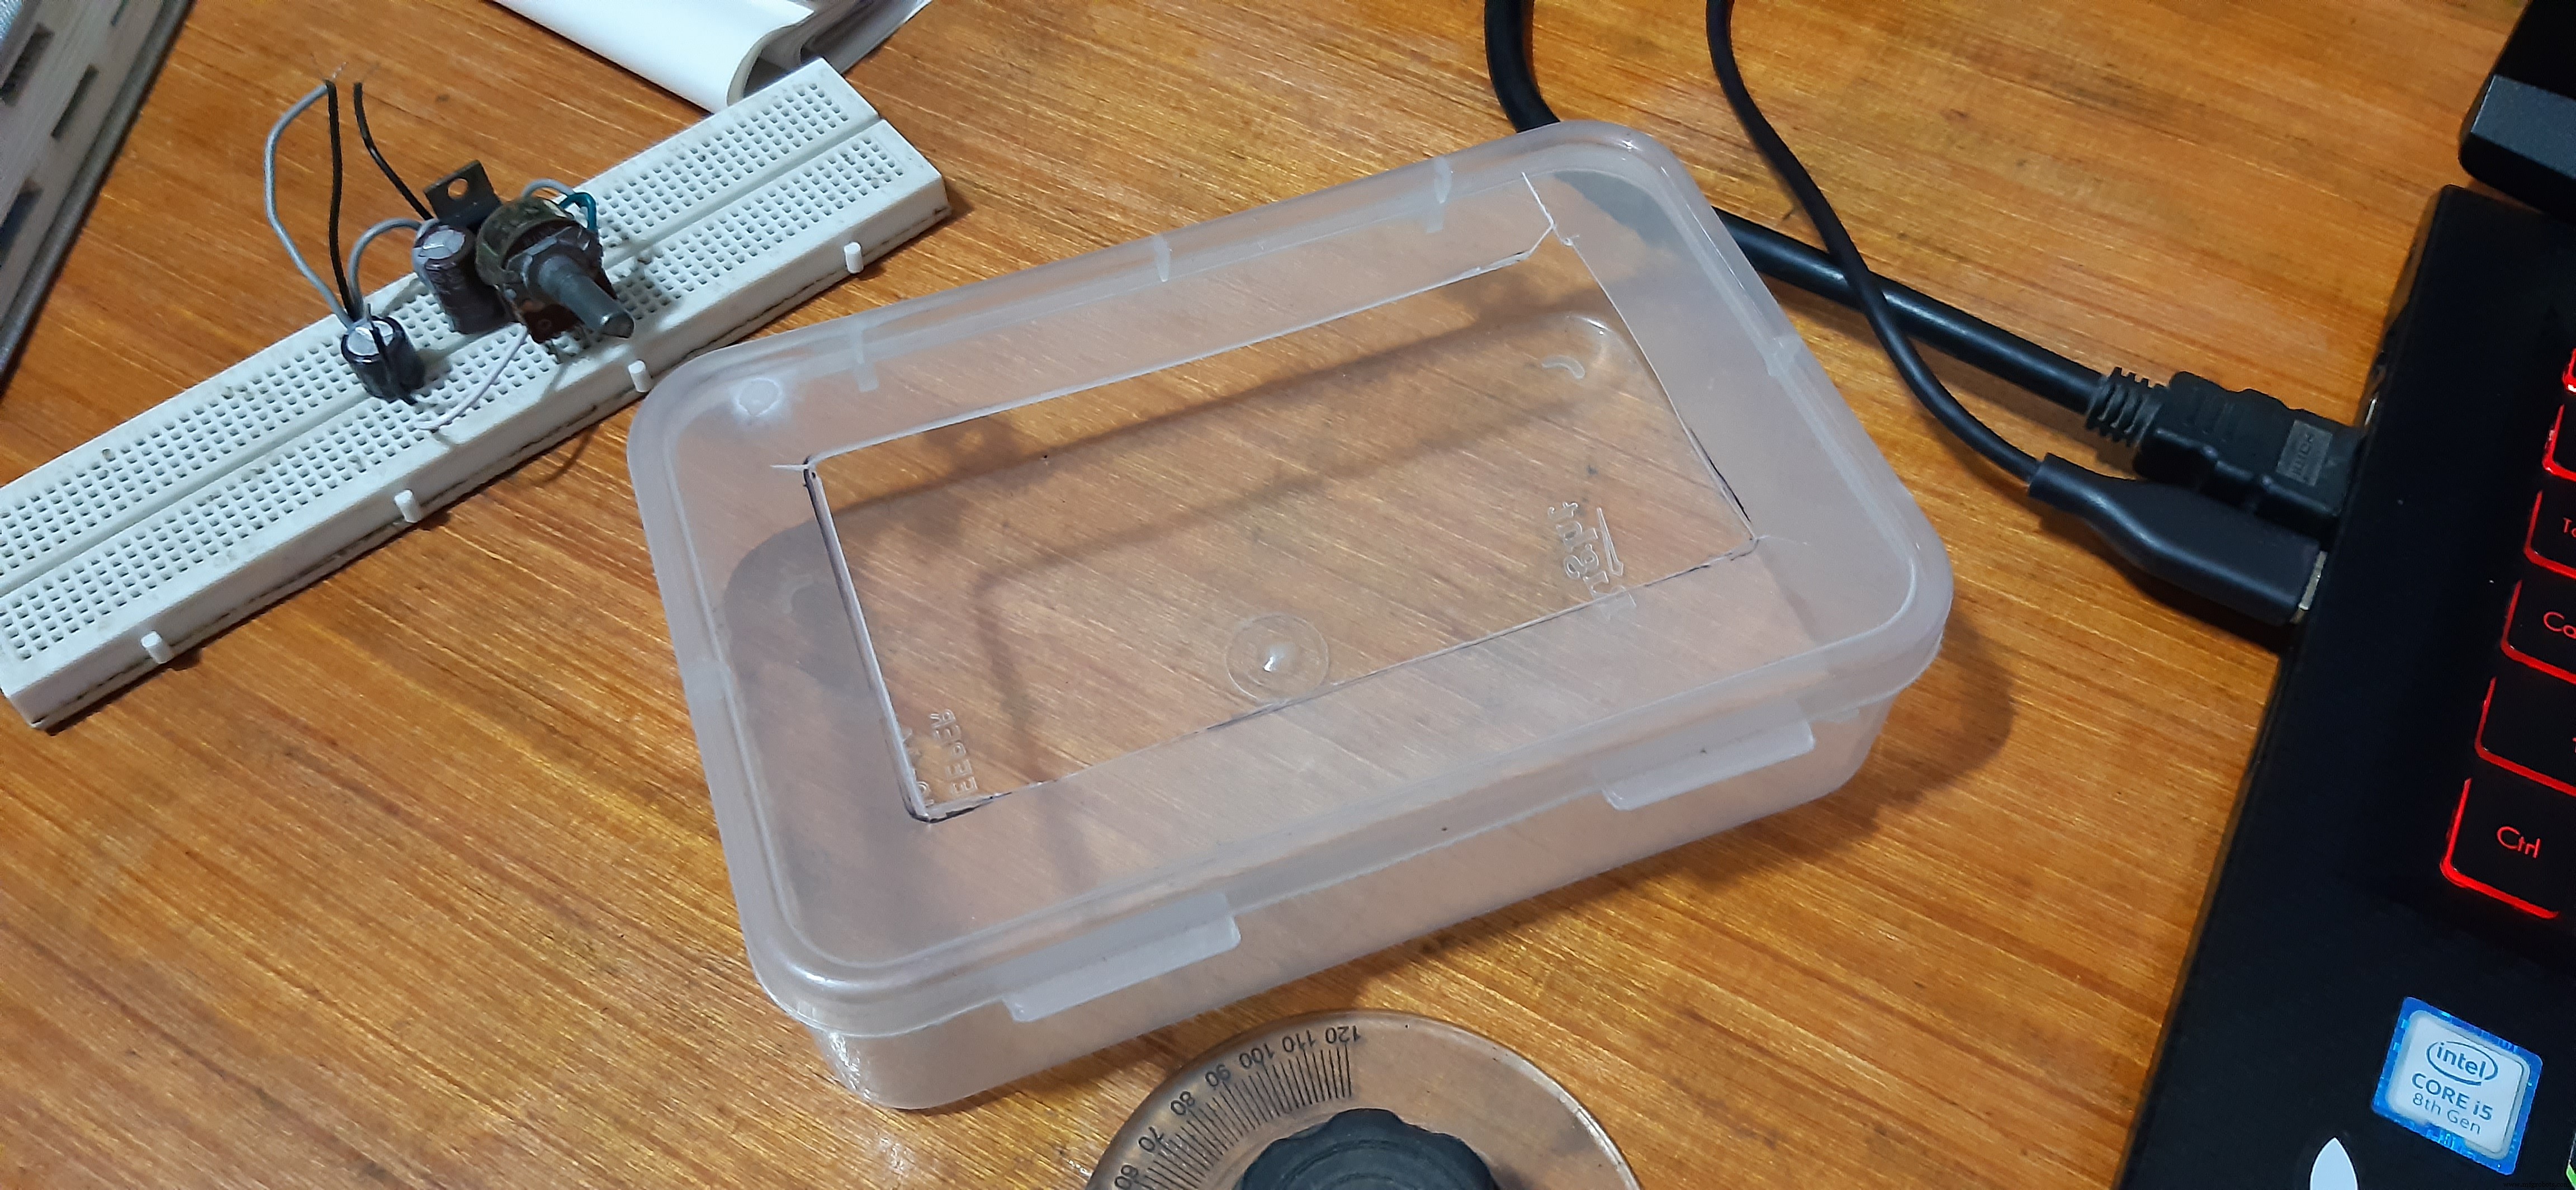
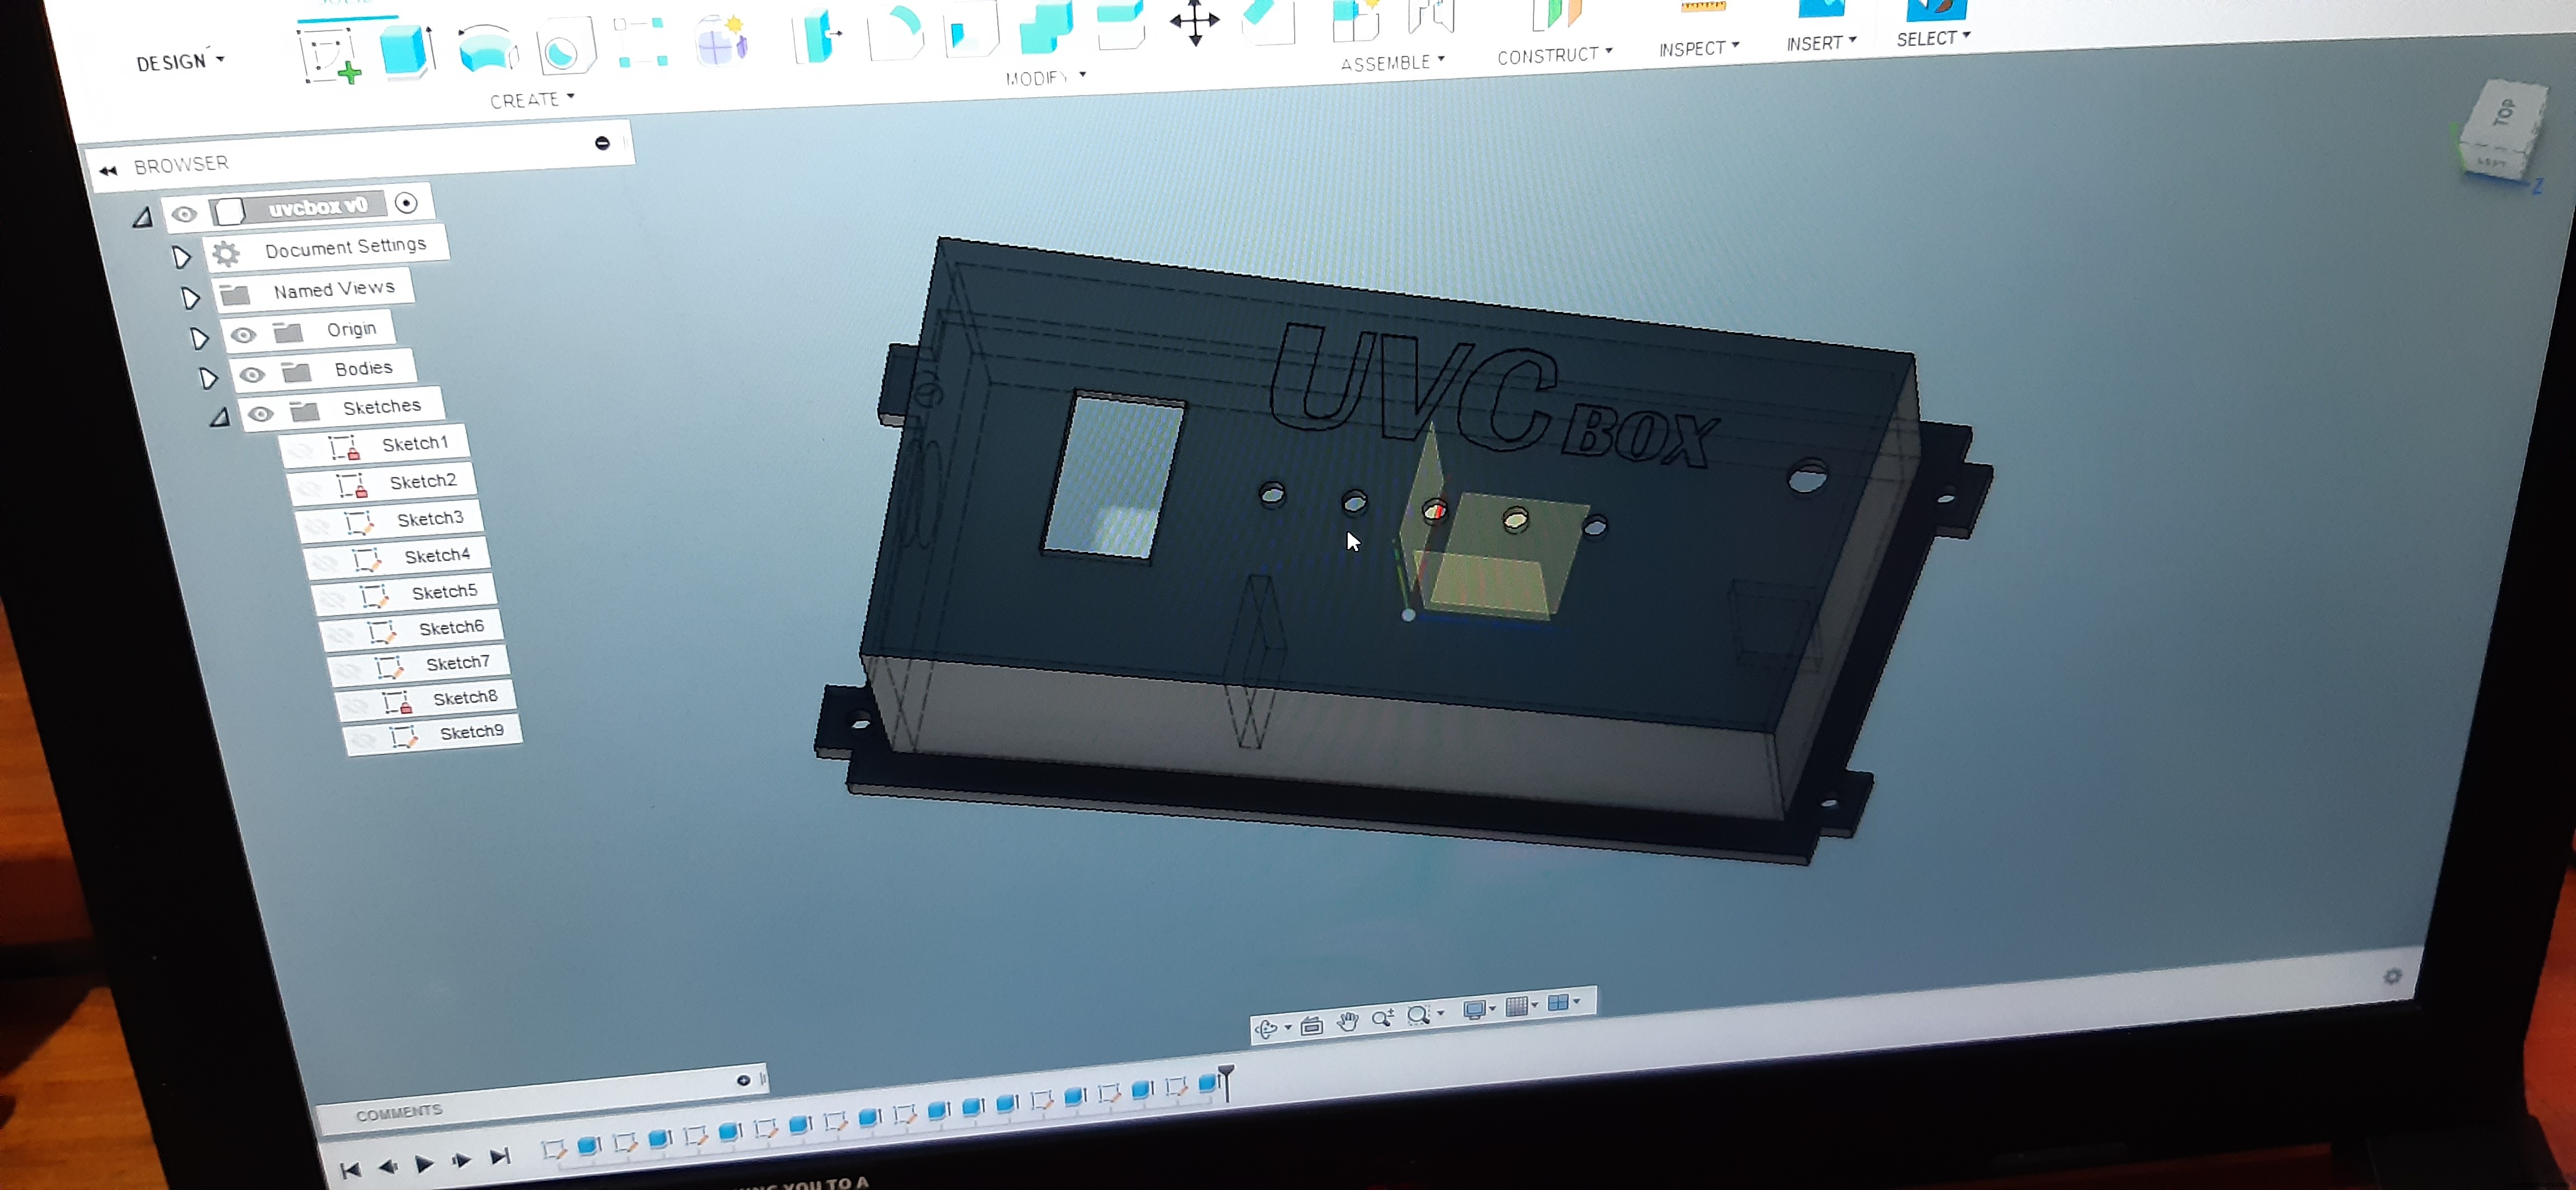
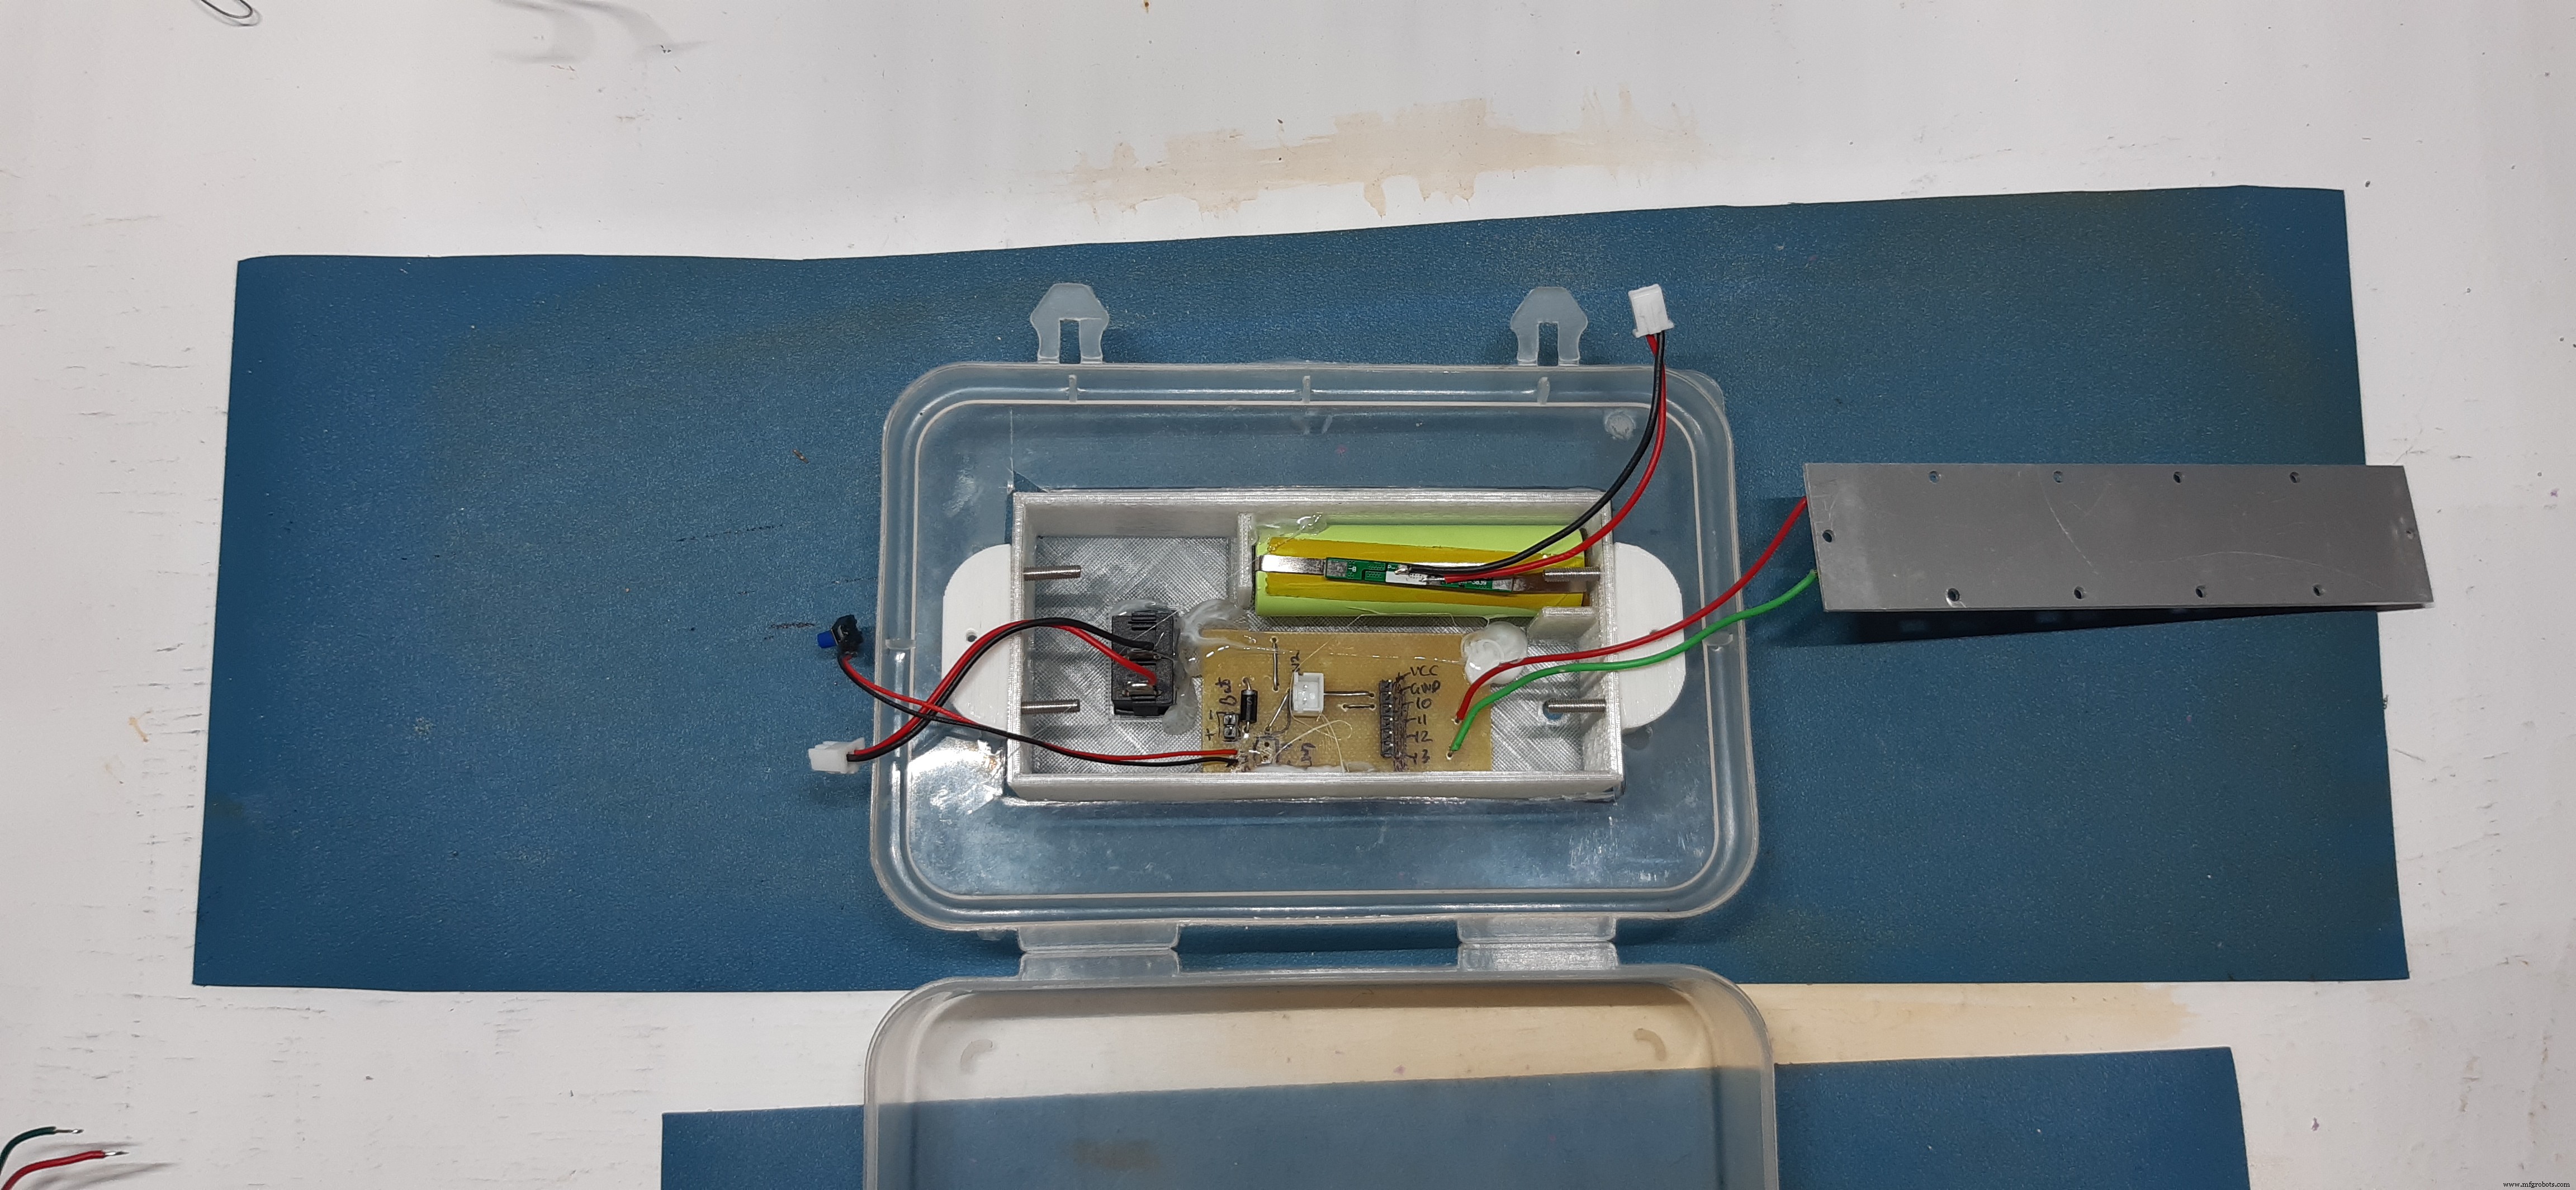
its low costing because I've used some generic low costing parts like this plastic container or jewelry box which you can buy for very cheap, I designed the housing in Fusion360 and then 3D printed it. it fits onto the lid of the container perfectly.
The hardest part was getting the UVC LEDs, I found some on Utsource's website.
you can check UTSOURCE.net, they deal in all kinds of electronics components like for example Attiny84 and other electronic components that I'm using in this project.
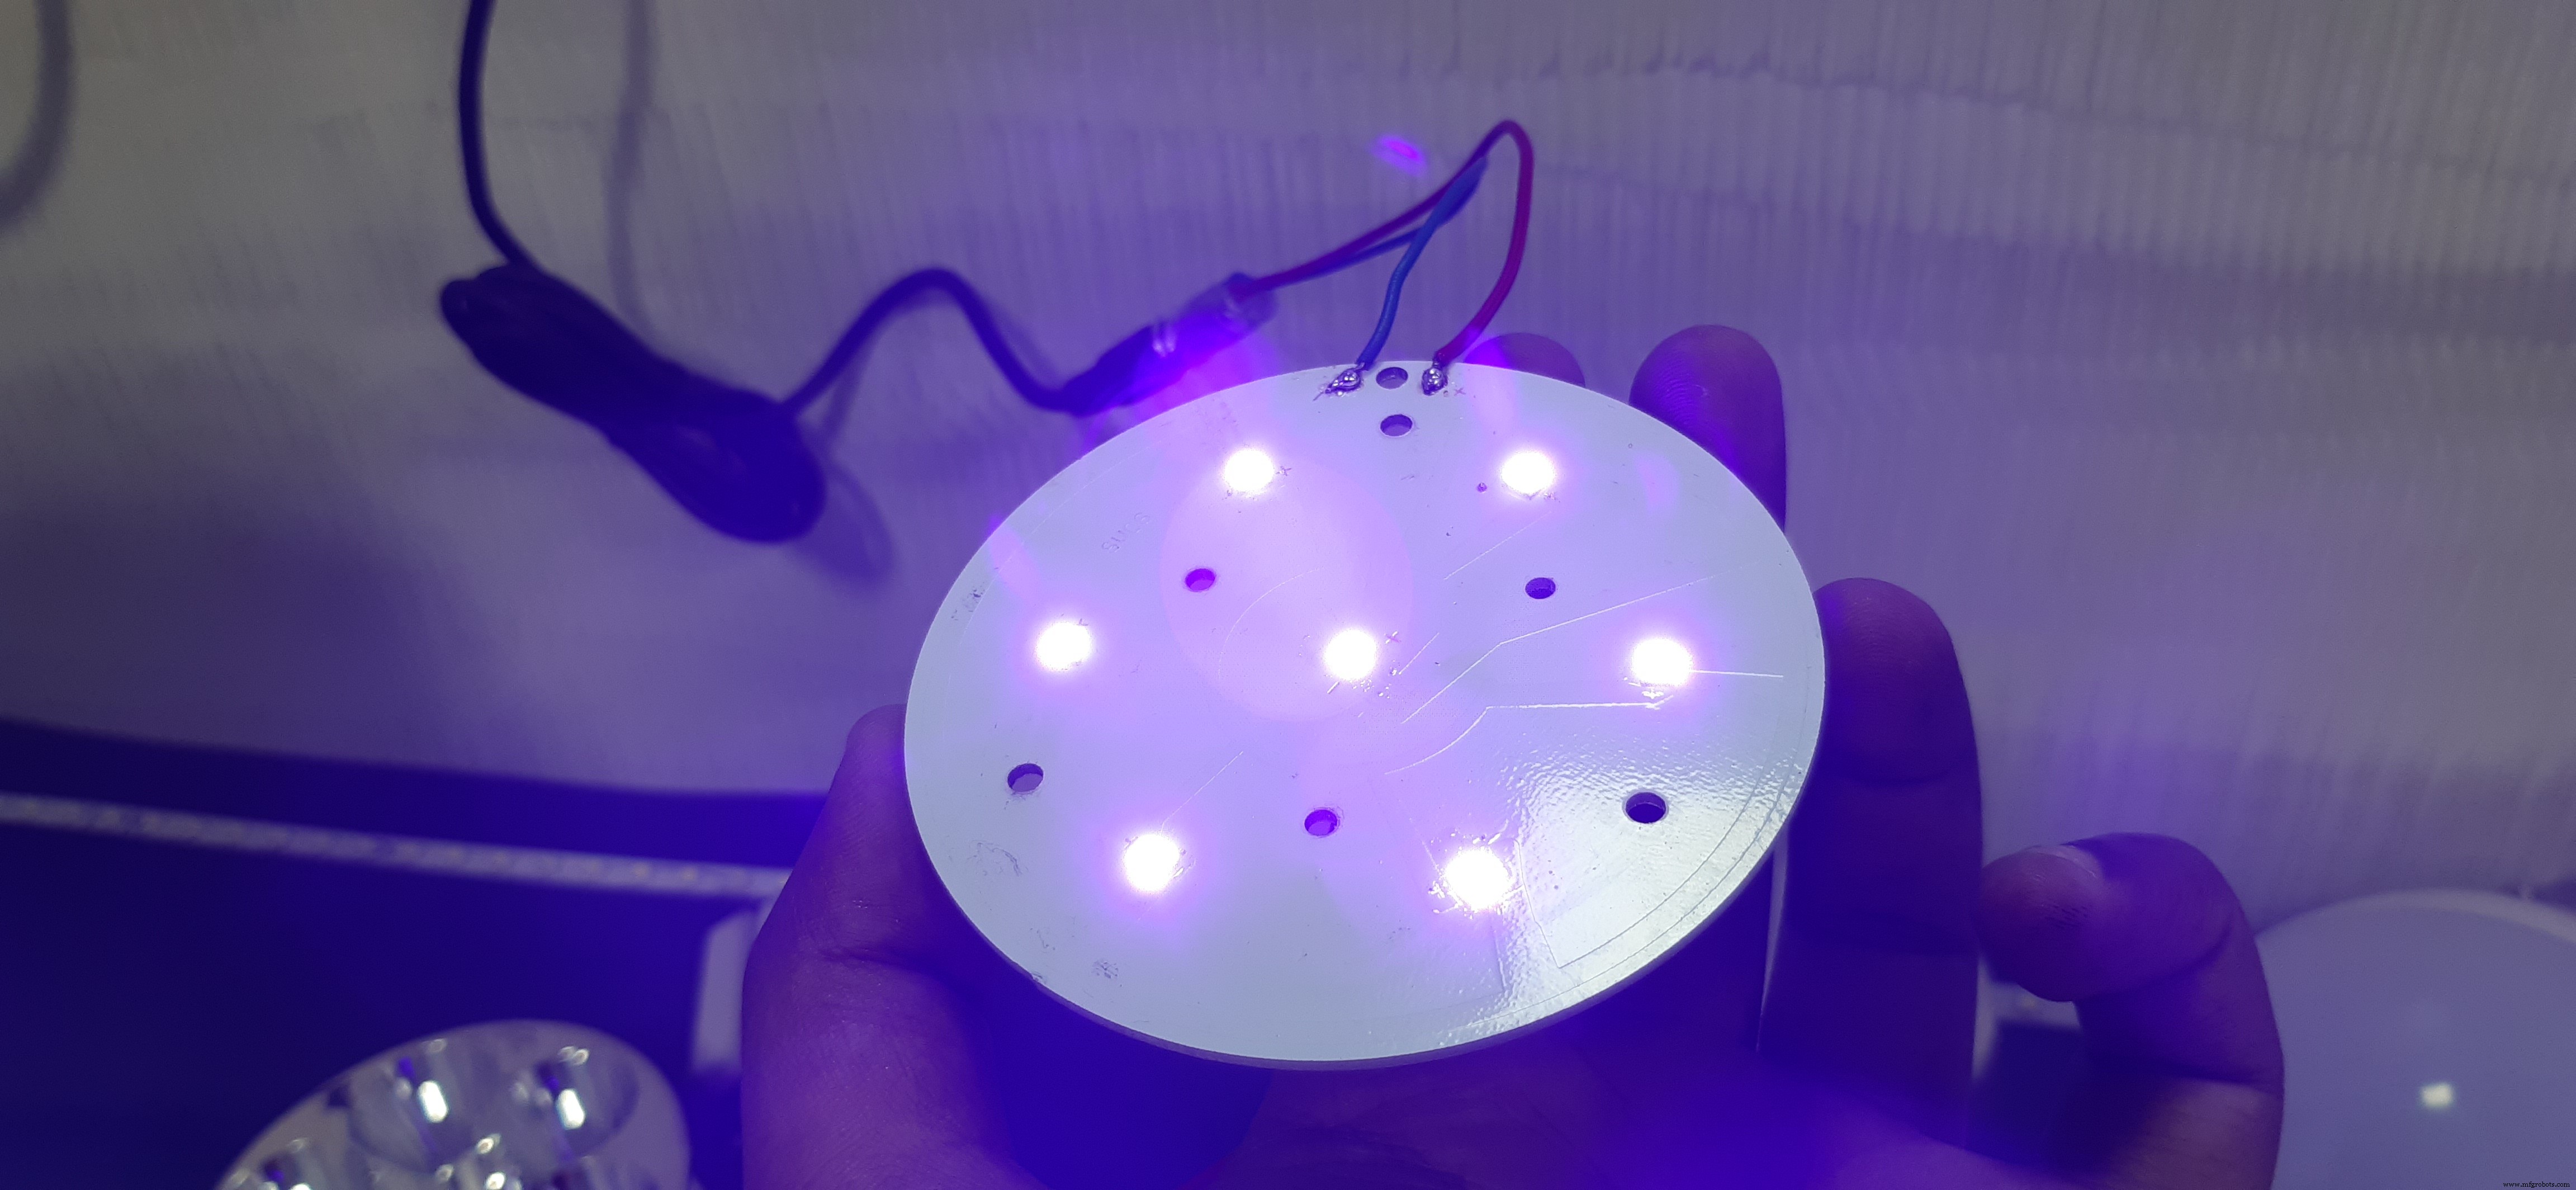
after getting the UVC LEDs I solder them on some MCPCBs I made in past, basically, I connected them in parallel and provide them 3.3V for powering them.
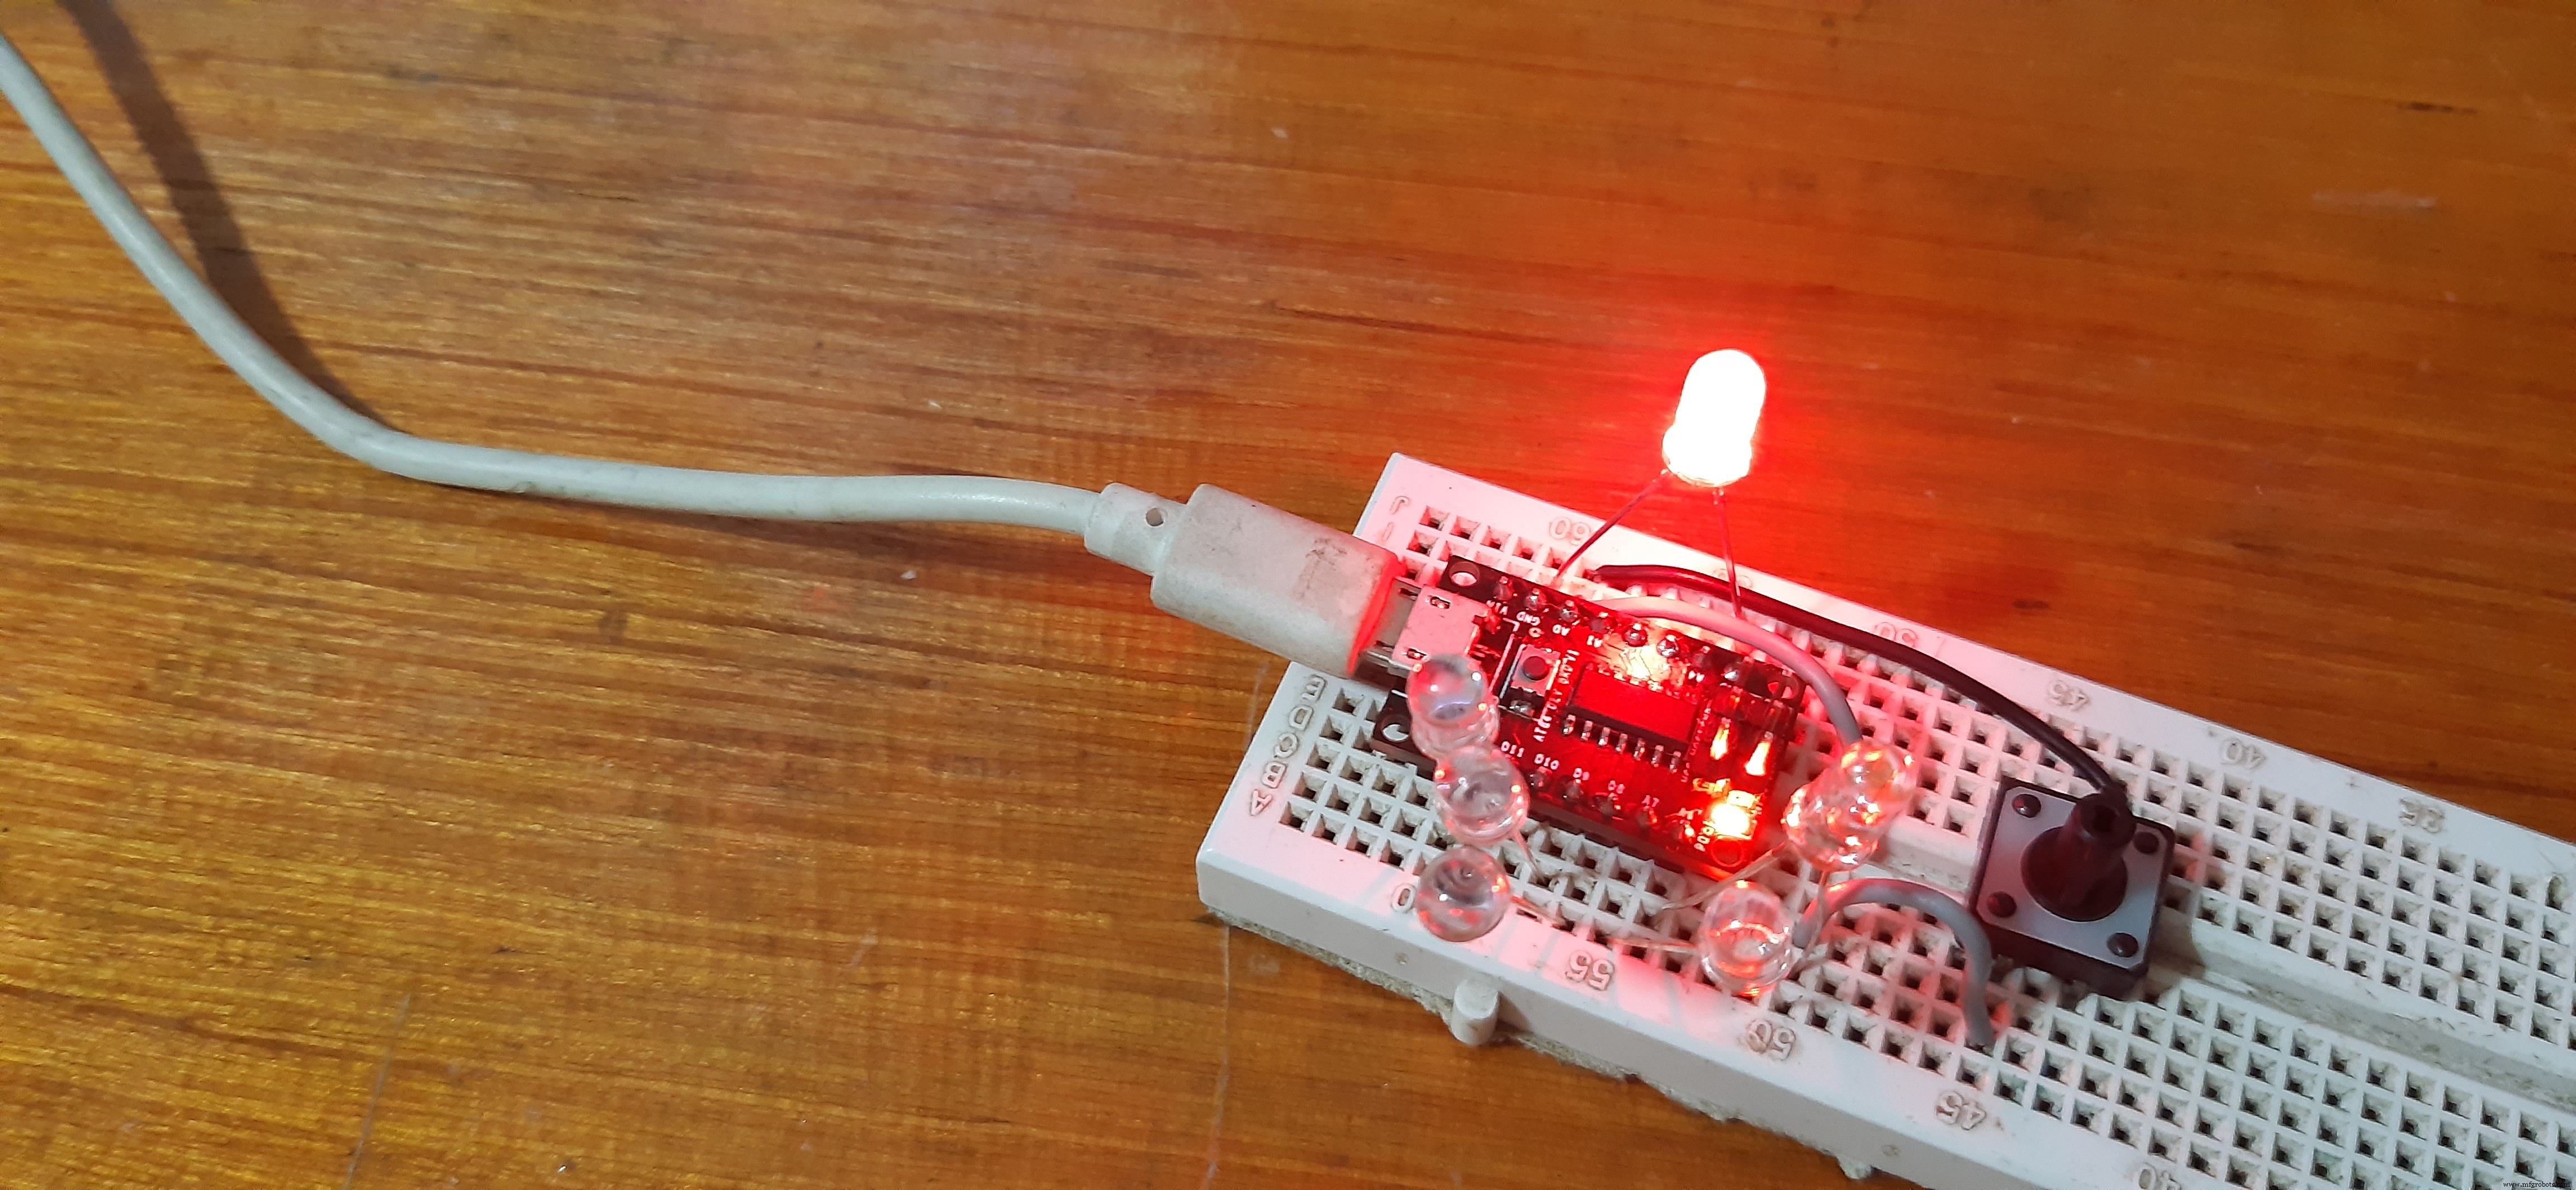
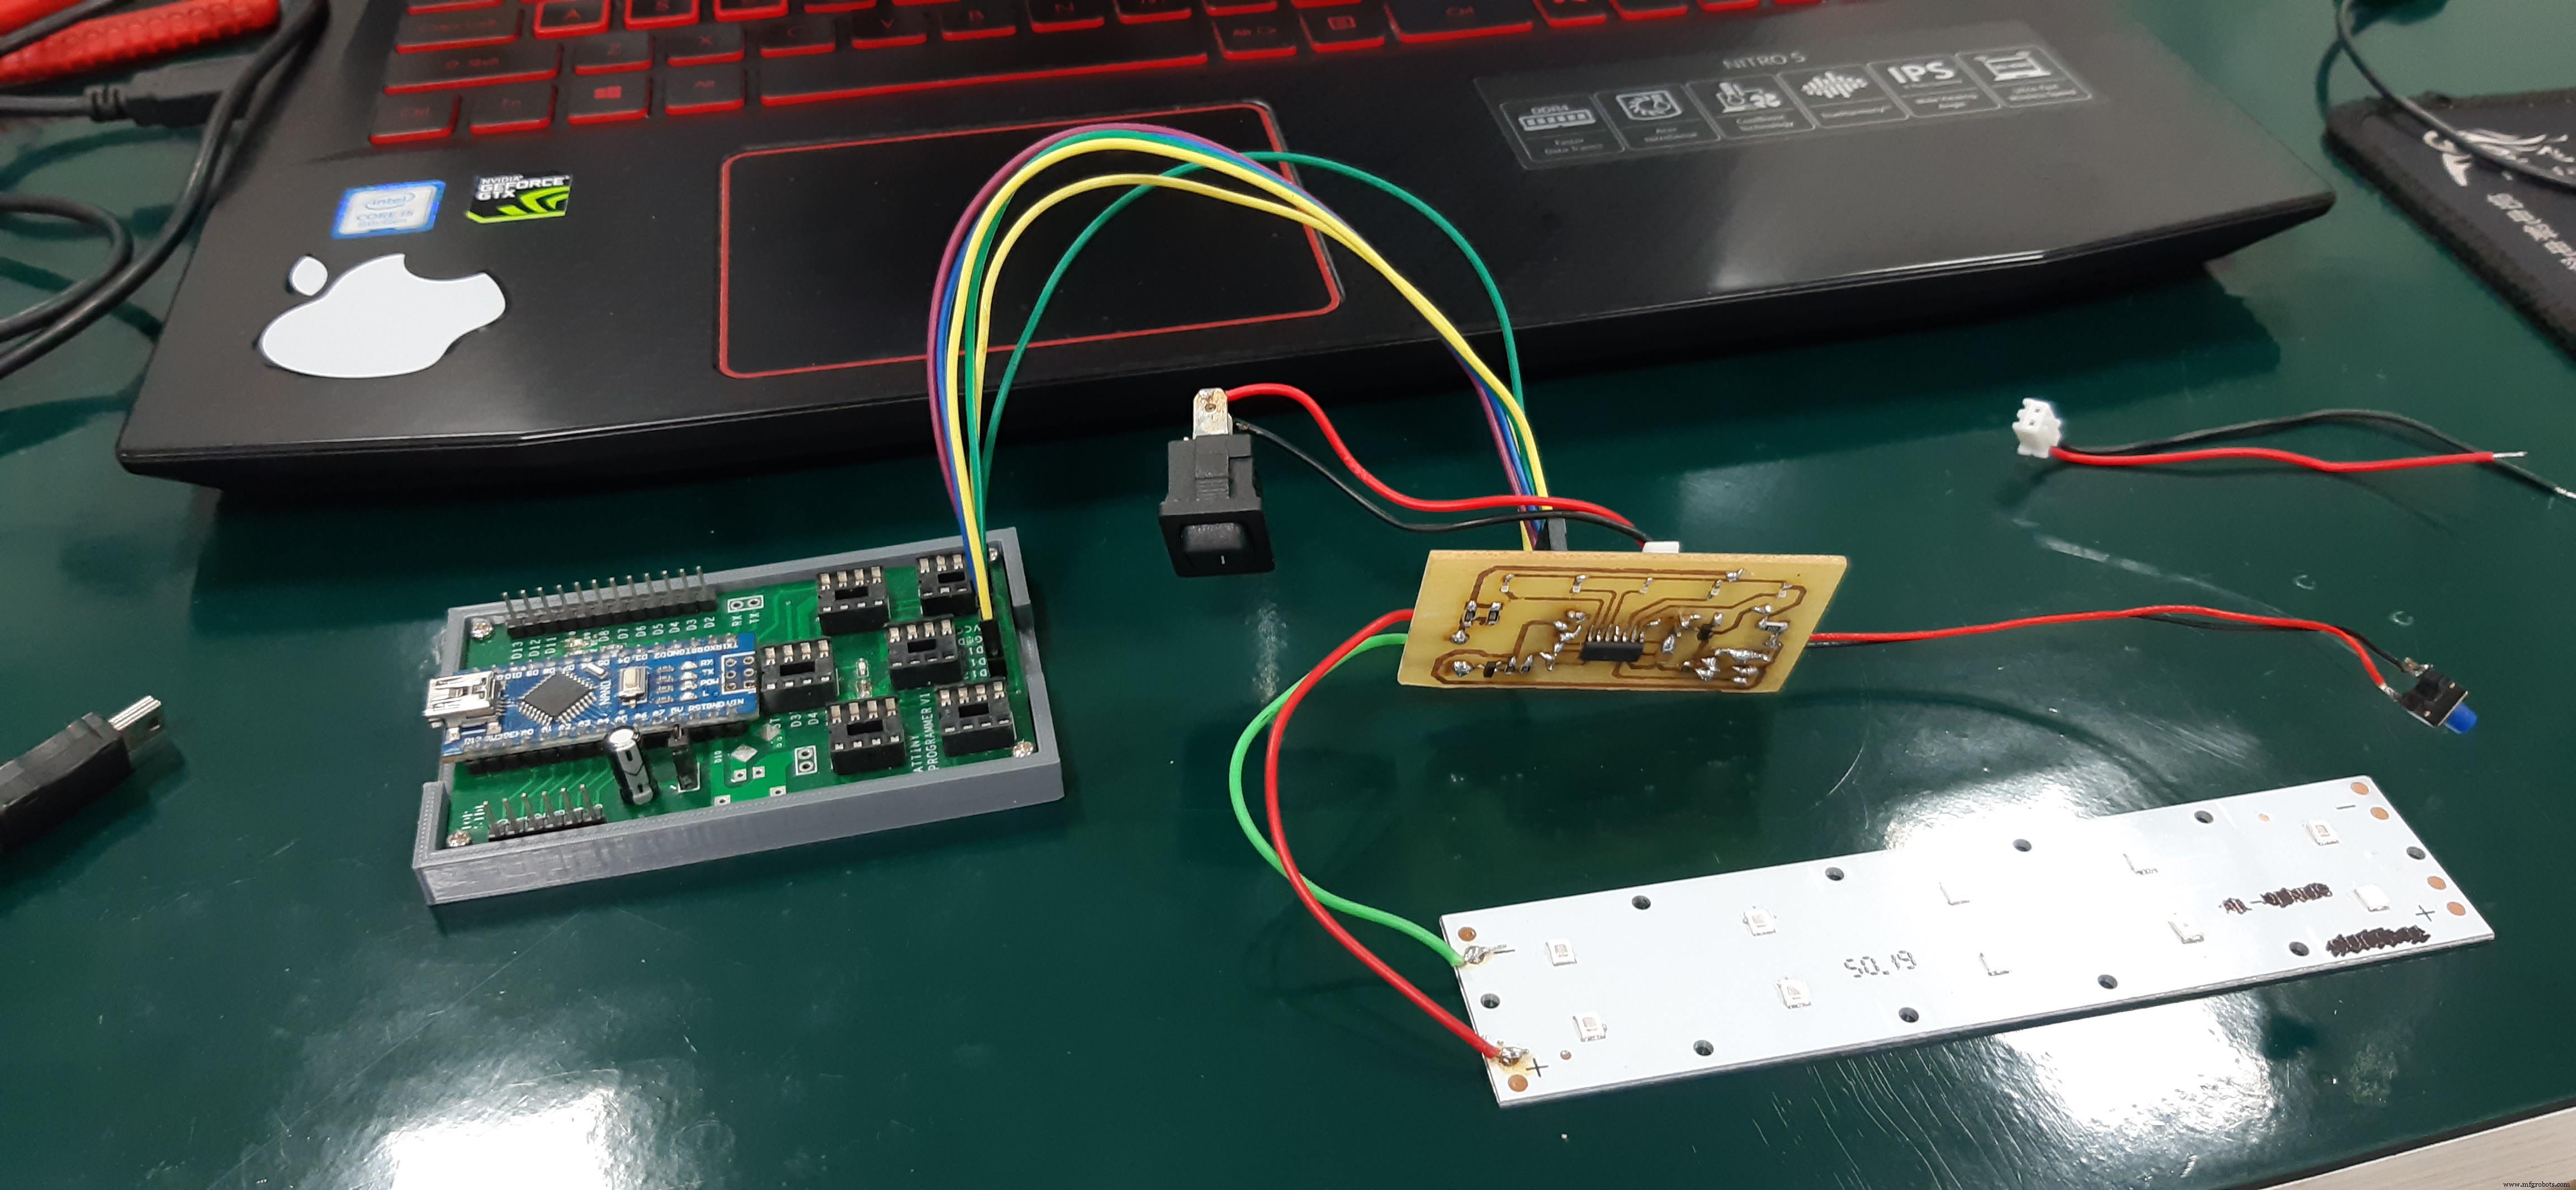
After testing the LEDs, I made a setup which consists of total 6 Outputs and 1 Input, (5 for indication LEDs and 1 for UVC LED, 1 Input for button) and upload the code to my Attiny84 Breakout board Via Arduino as ISP setup
check out about this more from here- https://www.hackster.io/350166/getting-started-with-attiny84-c920ee
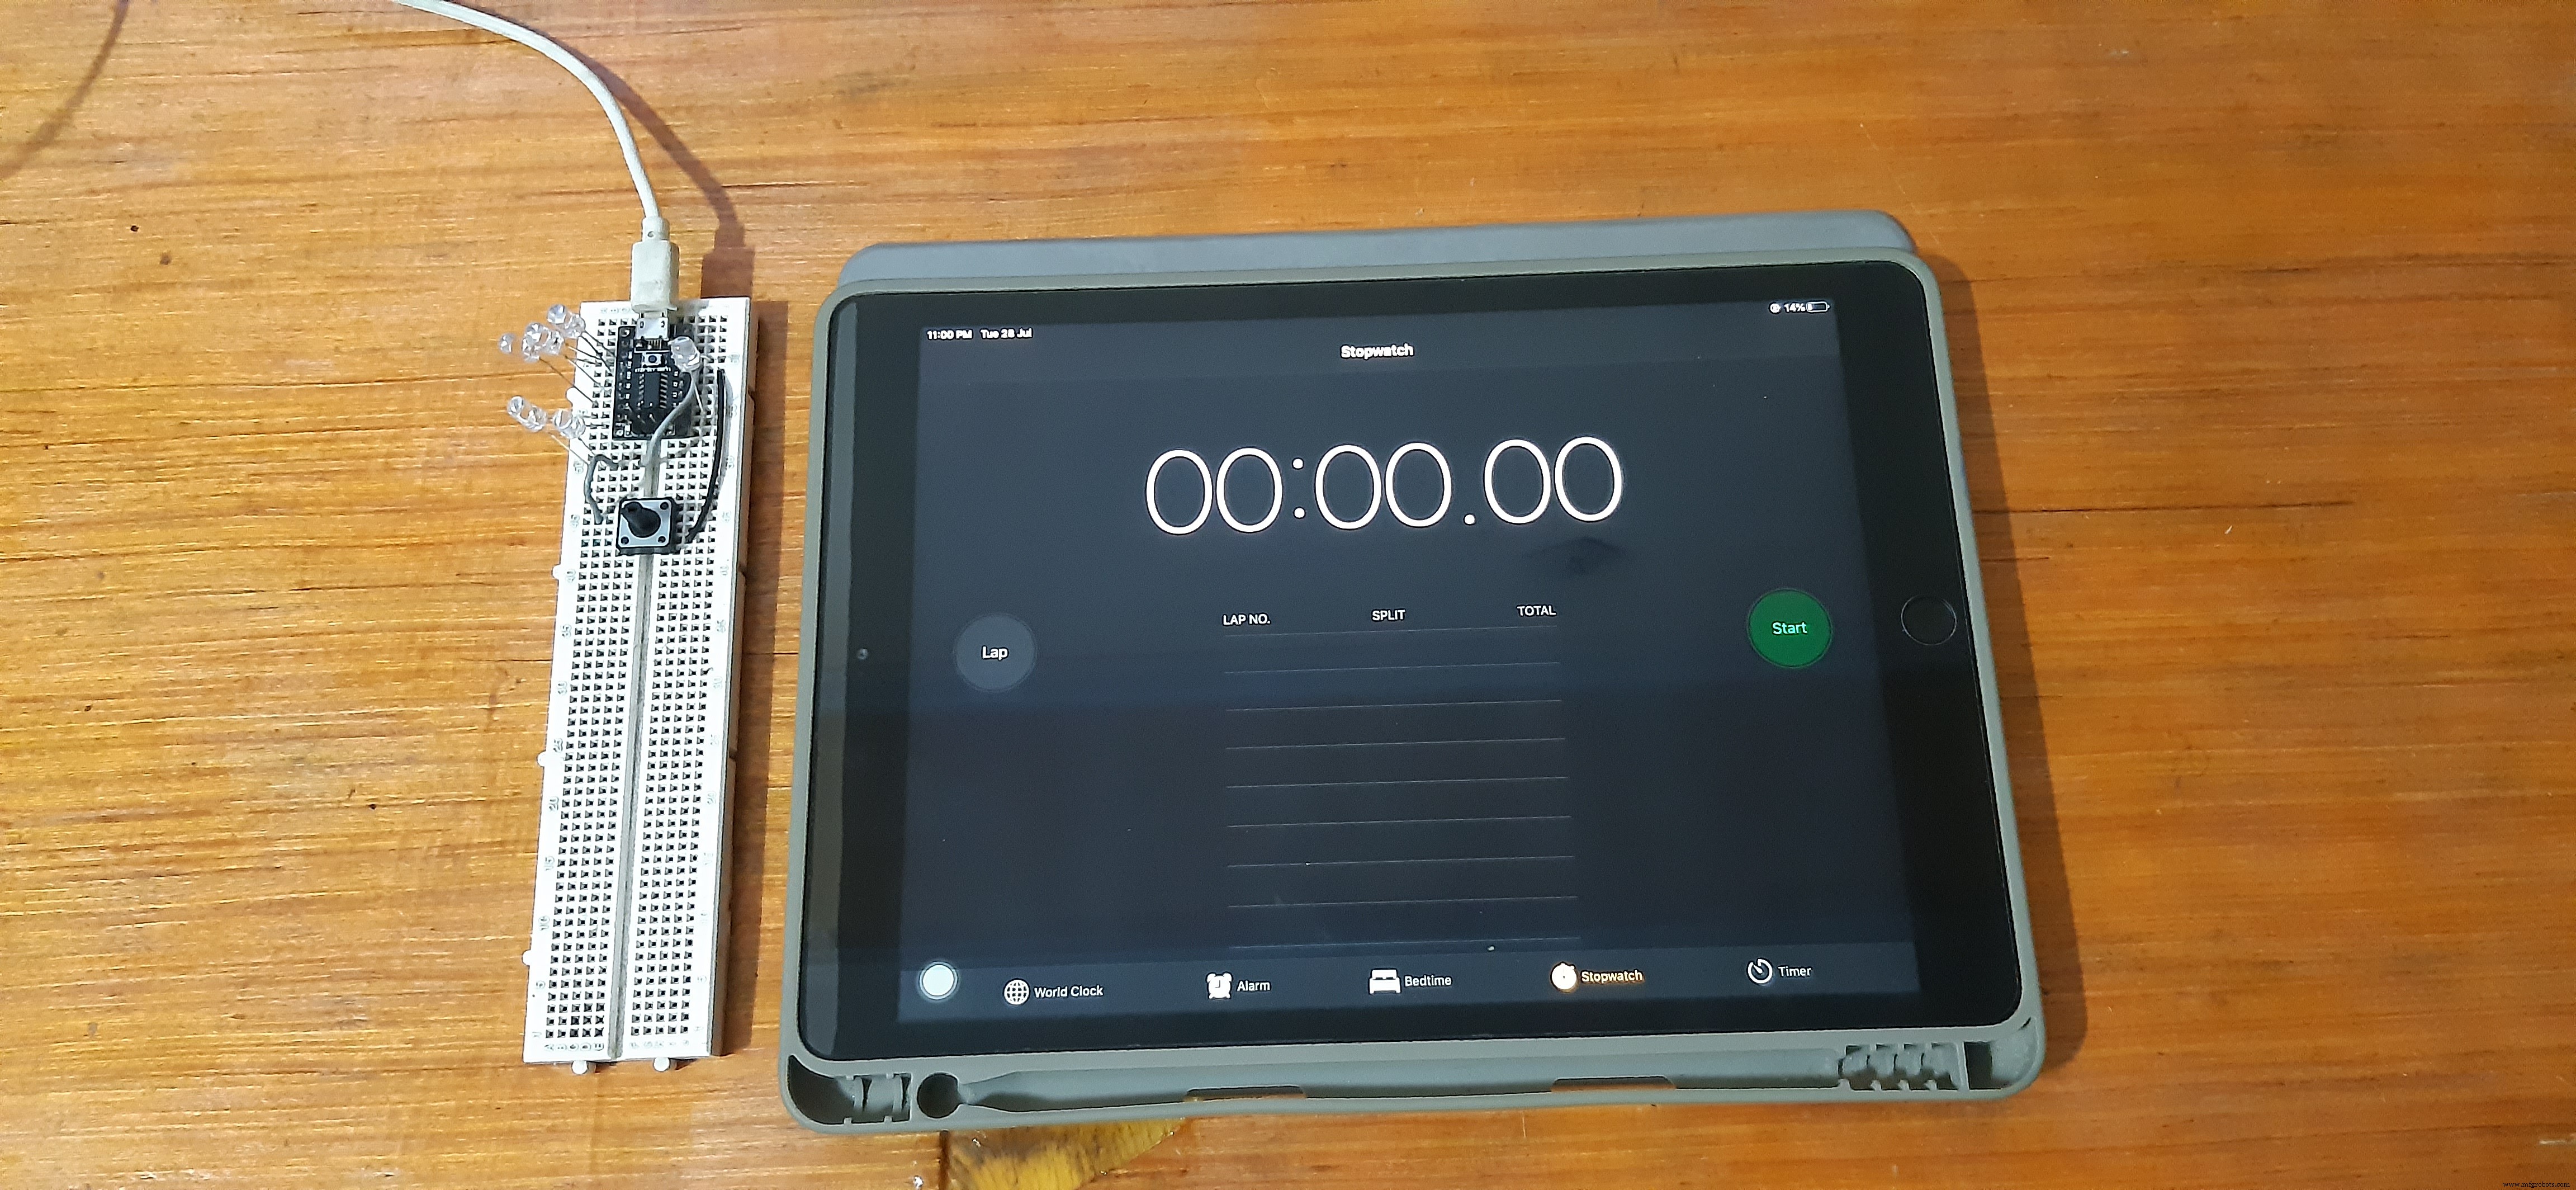
Code basically turns the indicator LED on in a chaser sequence (from 1 to 5) and then we can press the button for Toggling the UVC Led, UVC Led will stay ON for around 10 minutes and then turn OFF.
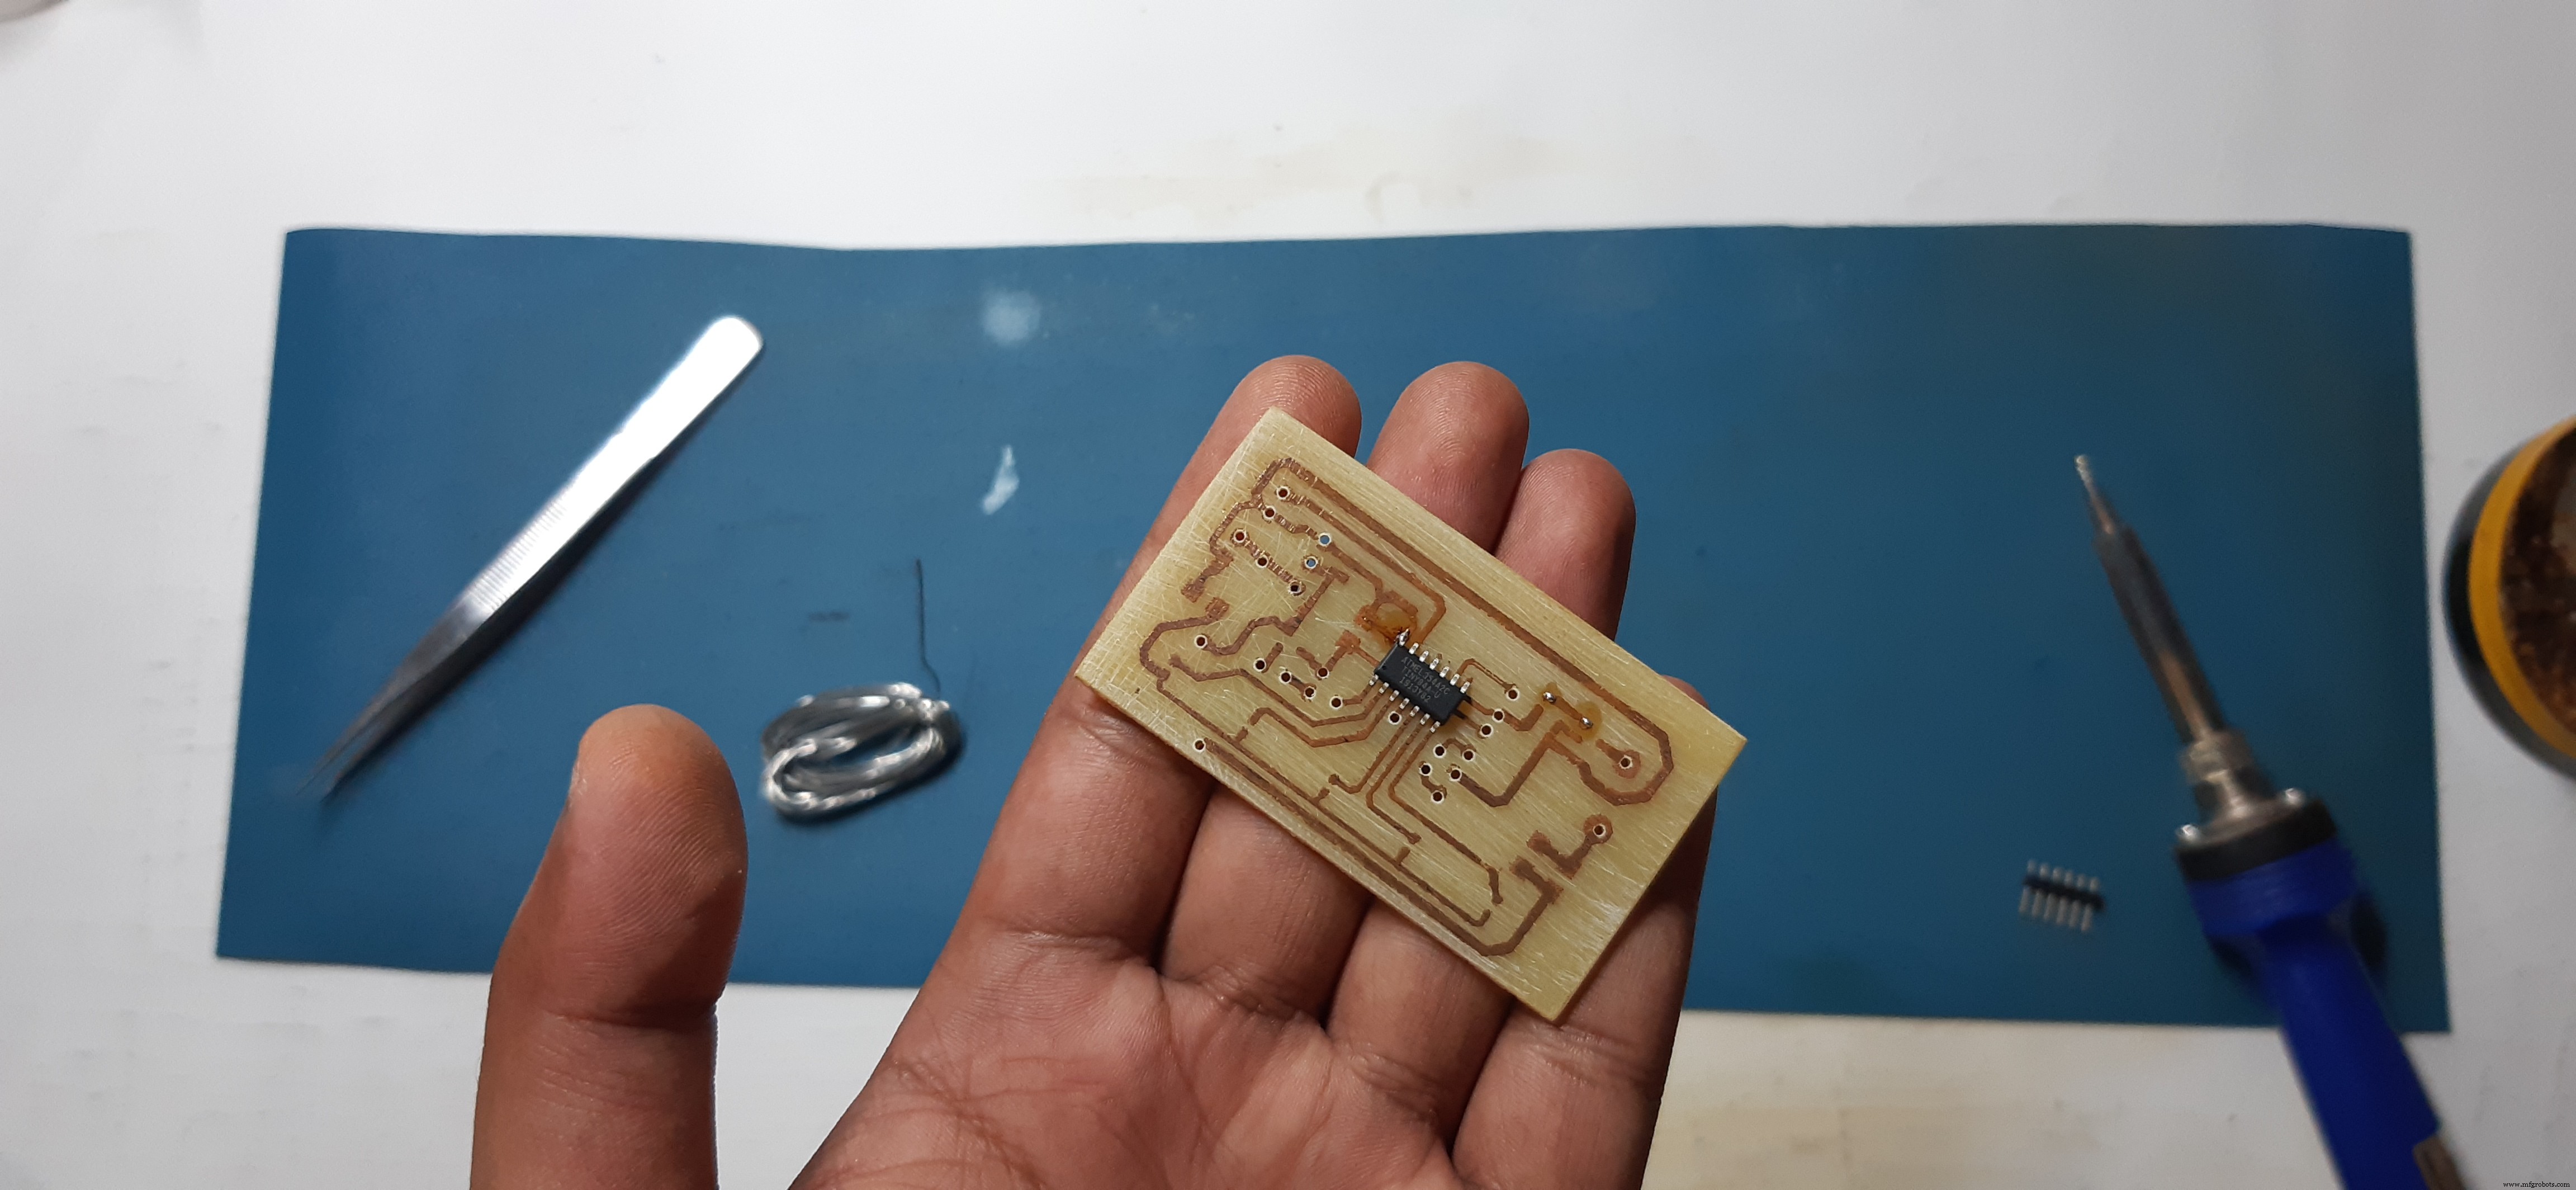
After testing this on a breadboard I designed and then etched a Custom PCB for this Project and assemble everything on it (watch the video for Assembly and basic Test result)
After that, I Hooked it up with my custom Arduino as ISP Programmer which I made a few weeks ago for Programing/Flashing MCUs; more about that here-https://www.hackster.io/Oniichan_is_ded/multiple-attiny85-13a-programmer-84adf8
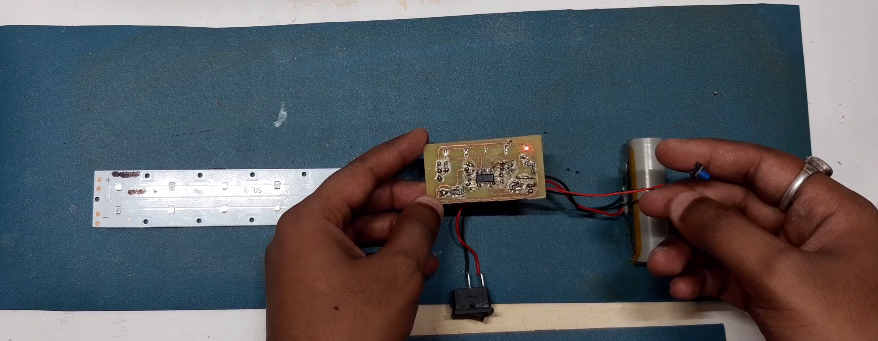
I uploaded the UVC BOX sketch to the custom etched circuit and Tested it one last time by connecting Rocker Switch and Push-button with Lithium Cell with it.
after that, I glued the circuit inside the 3D printed Casing and Assemble everything together.
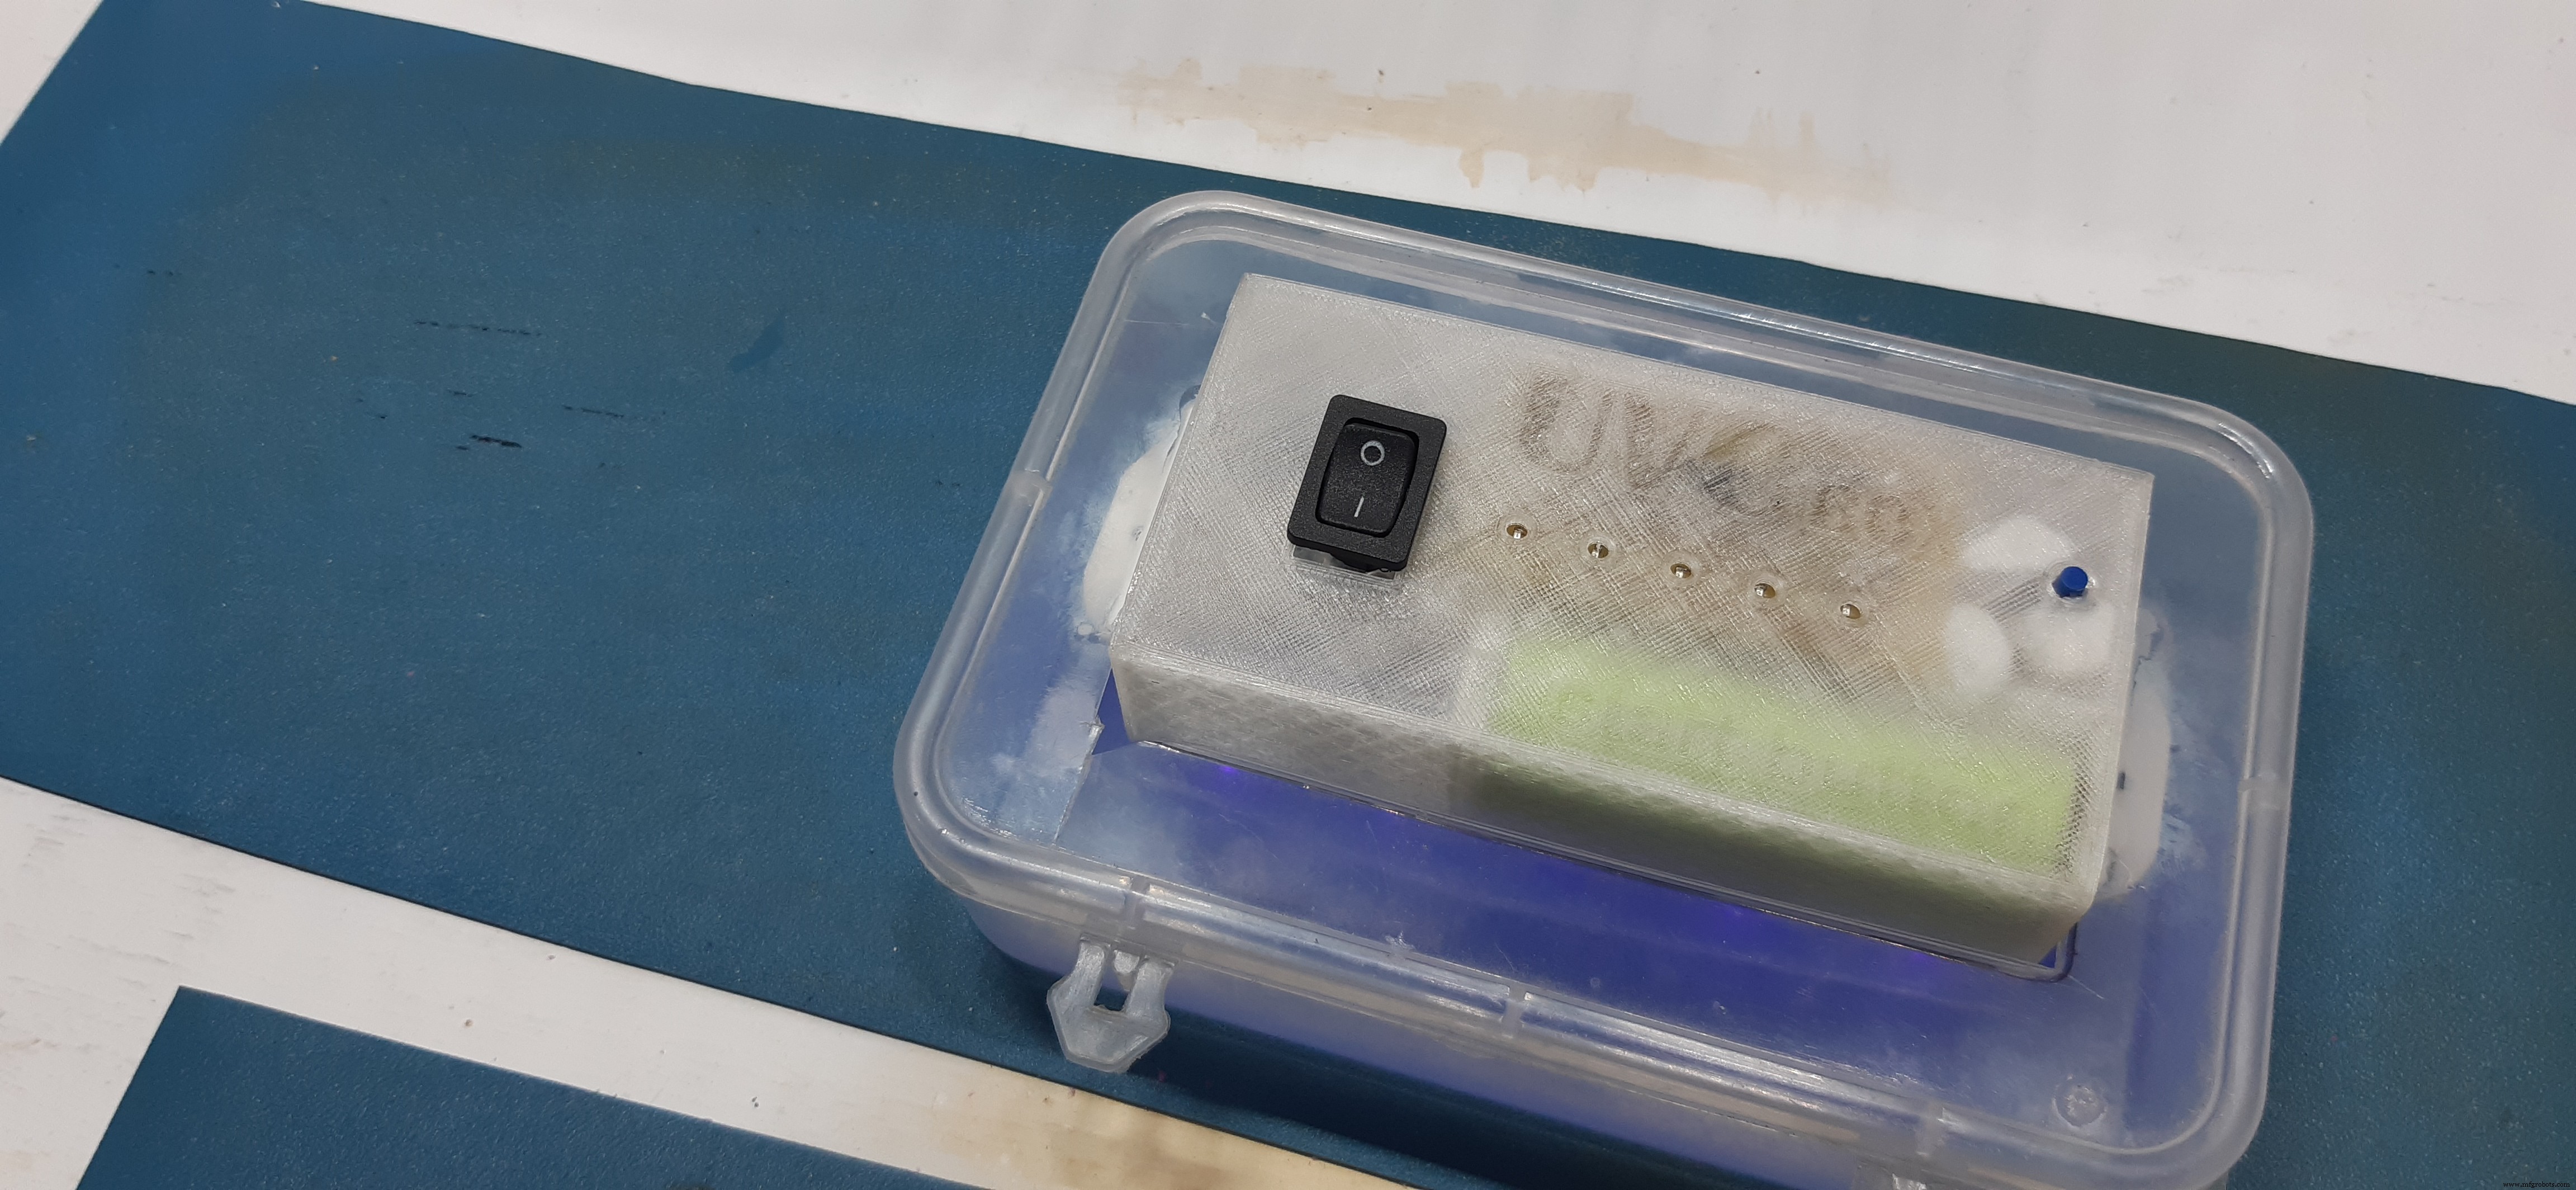
And that's it, In the V2 I will make a better encloser because this jewelry box container is not very durable (it will probably break in a few months of daily use)
Also, this setup is basically identical in working with the commercially available UVC sterilizer, the only difference is the price(this is cheaper)
For a better Tutorial of this project, watch the video-
I've Attached everything related to this project, leave a comment if you guys run into any problem.
Code
- CODE
CODEC/C++
const int buttonPin = 0;    //7 arduino pin
const int UVPin =  5;     //13 arduino pin

int pinsCount=5;
int pins[] = {10,9,8,7,6};   //2,3,4,5,6 arduino pin

int buttonState = 0;

void setup() {
  pinMode(UVPin, OUTPUT);
  pinMode(buttonPin, INPUT_PULLUP);

  for (int i=0; i<pinsCount; i=i+1){
   pinMode(pins[i], OUTPUT);
  }

  for (int i=0; i<pinsCount; i=i+1){
    digitalWrite(pins[i], HIGH);
    delay(1000);
    digitalWrite(pins[i], LOW);
  }
}

void loop() {
  buttonState = digitalRead(buttonPin);
if (buttonState == LOW) {
    digitalWrite(UVPin, HIGH);
    delay(600000);
    digitalWrite(UVPin, LOW);
  } else {
  }
}
Custom parts and enclosures
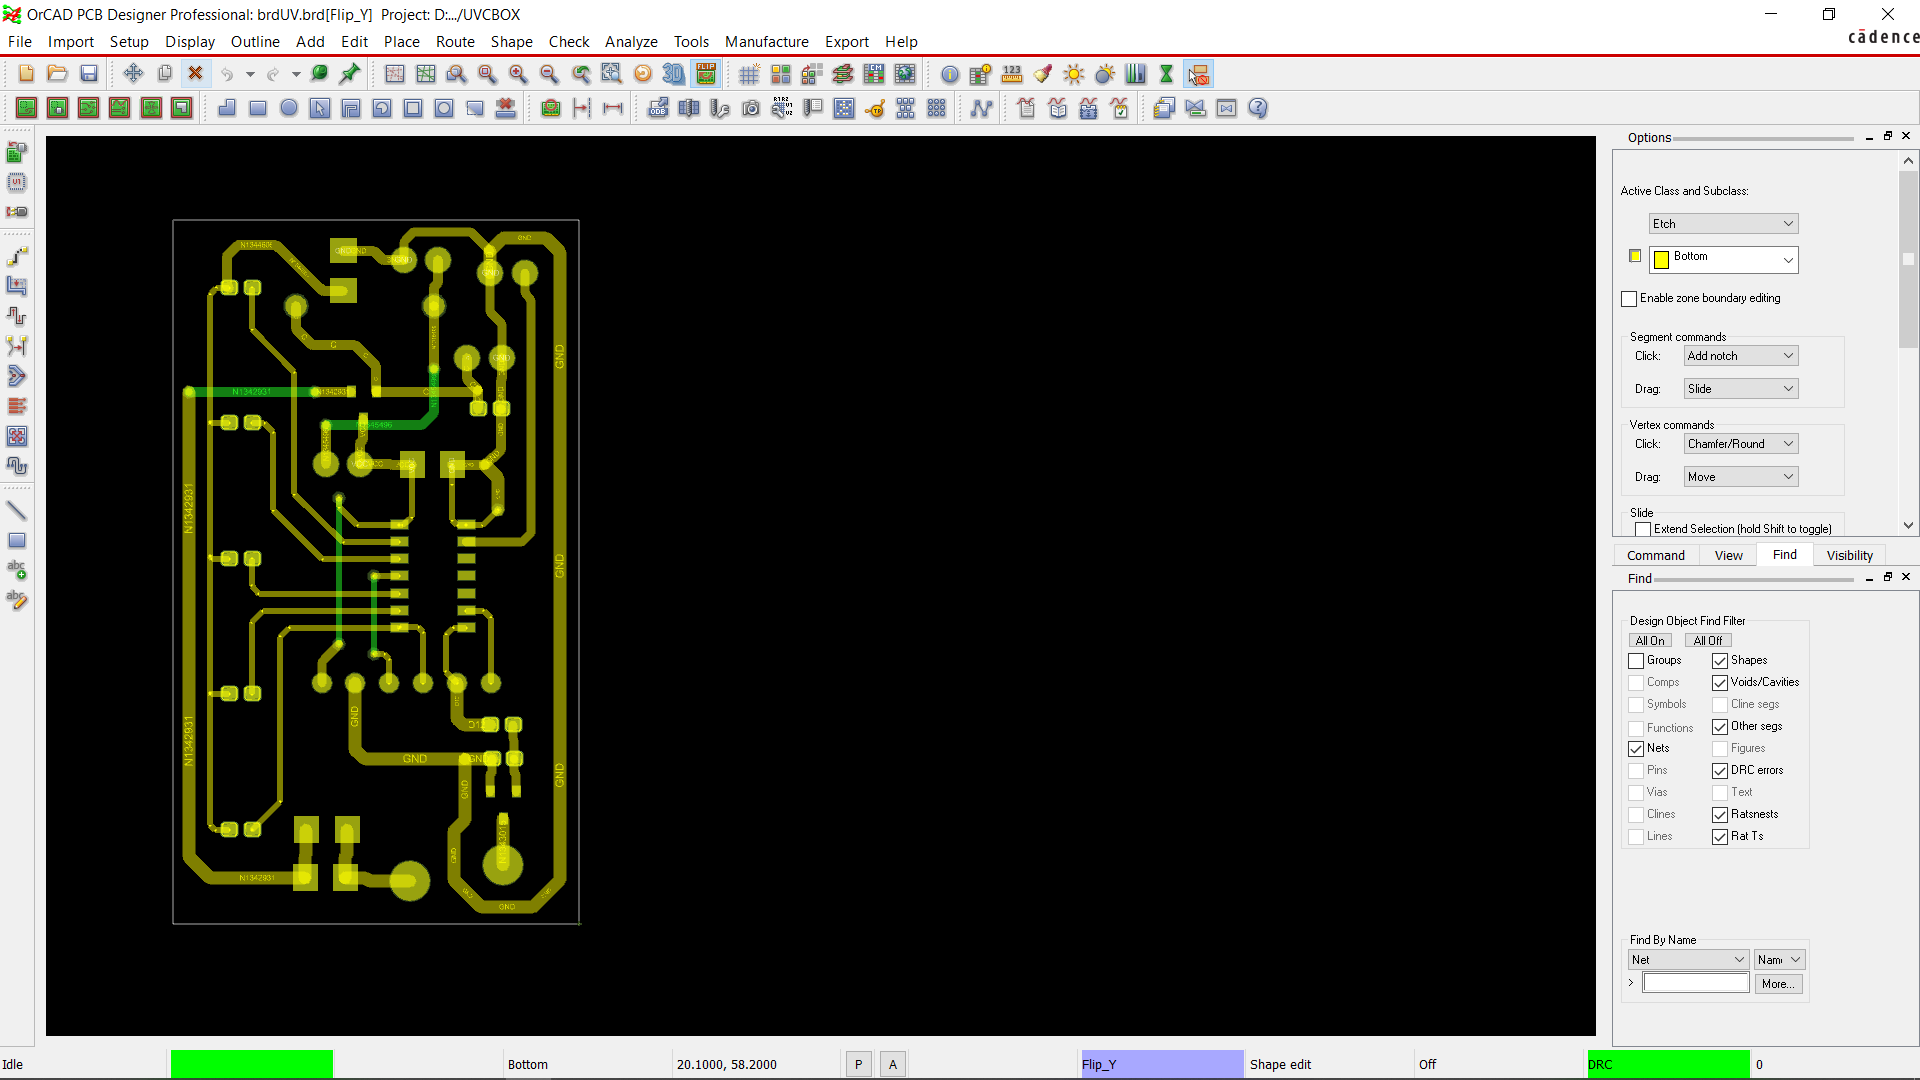
Schematics
Manufacturing process
- The Juice Box Revolution: History, Design, and Environmental Impact
- Black Box Flight Recorders: From Early Prototypes to Future Integrated Designs
- DIY Thermocam: From Classroom Idea to Global Product
- DIY Wall‑E Inspired Raspberry Pi CD‑Box Robot
- Really Smart Box: IoT-Enabled Smart Storage Solution
- Portable Voting System with GSM Connectivity
- Build Your Own Monster in a Box: Arduino Robotics Project
- Build a Complete Arduino‑Powered RC Airplane from Scratch
- Build an Arduino‑Powered RC Hovercraft: Full 3D‑Printed Design & Programming Guide
- Build a Multifunctional Arduino RC Transmitter: Step‑by‑Step DIY Guide