


Real‑Time IoT Heart Rate Monitor with Arduino & MAX30100
Components and supplies
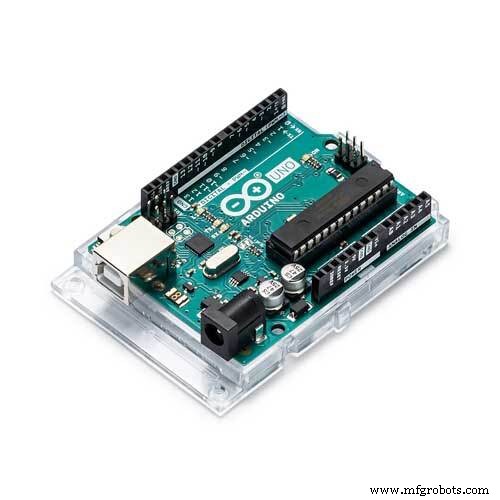 |
| × | 1 | |||
 |
| × | 1 | |||
 |
| × | 1 | |||
 |
| × | 1 |
Apps and online services
 |
| |||
| ||||
 |
|
About this project
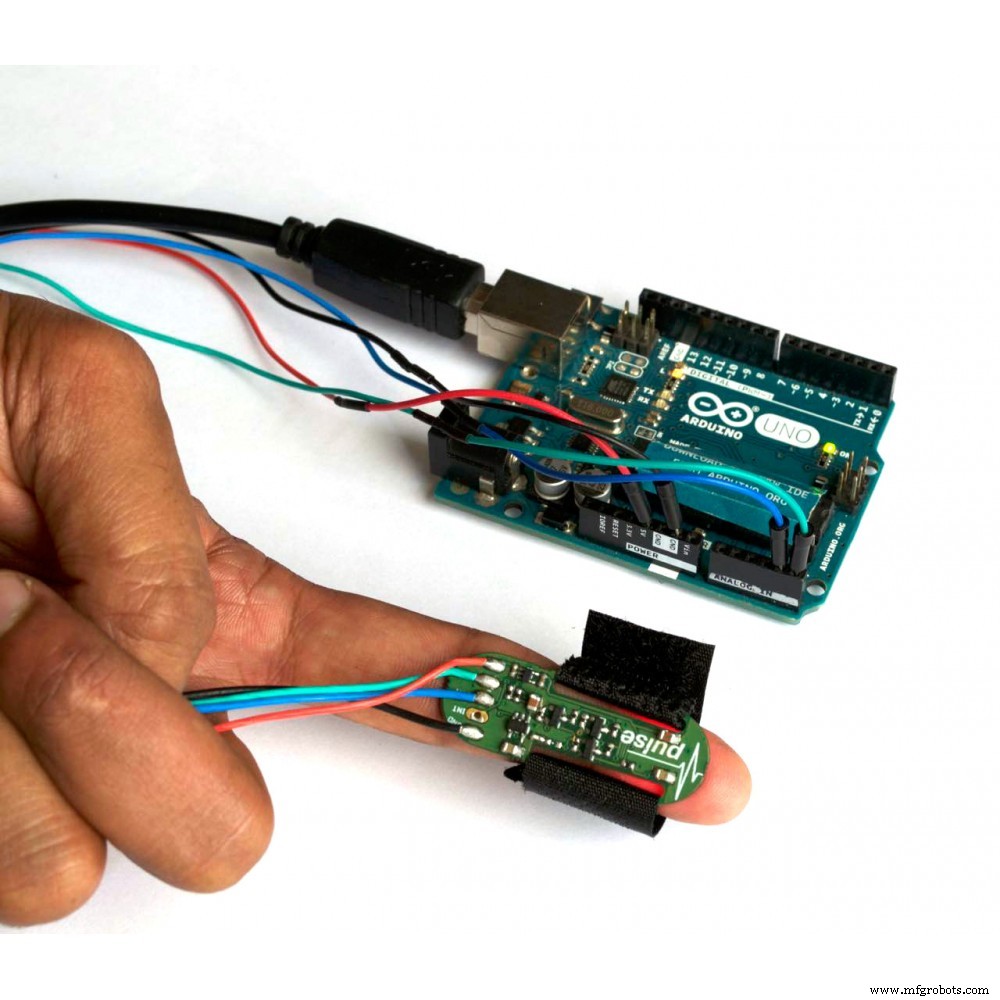
In this project we are going to make a Heart Beat Detection and Monitoring System using Arduino that will detect the heart beat using the Pulse Sensor and will show the readings in BPM (Beats Per Minute). A past few days ago we felt boring and we saw about node.js and thought of implementing something out of that........... And it finally resulted into development of this Prototype which actually Displays Heart Rate in beats per minute using IR pulse sensor..........
"For this project you may either use your PC or Mac or your Raspberry Pi."
The steps for doing this is given below.
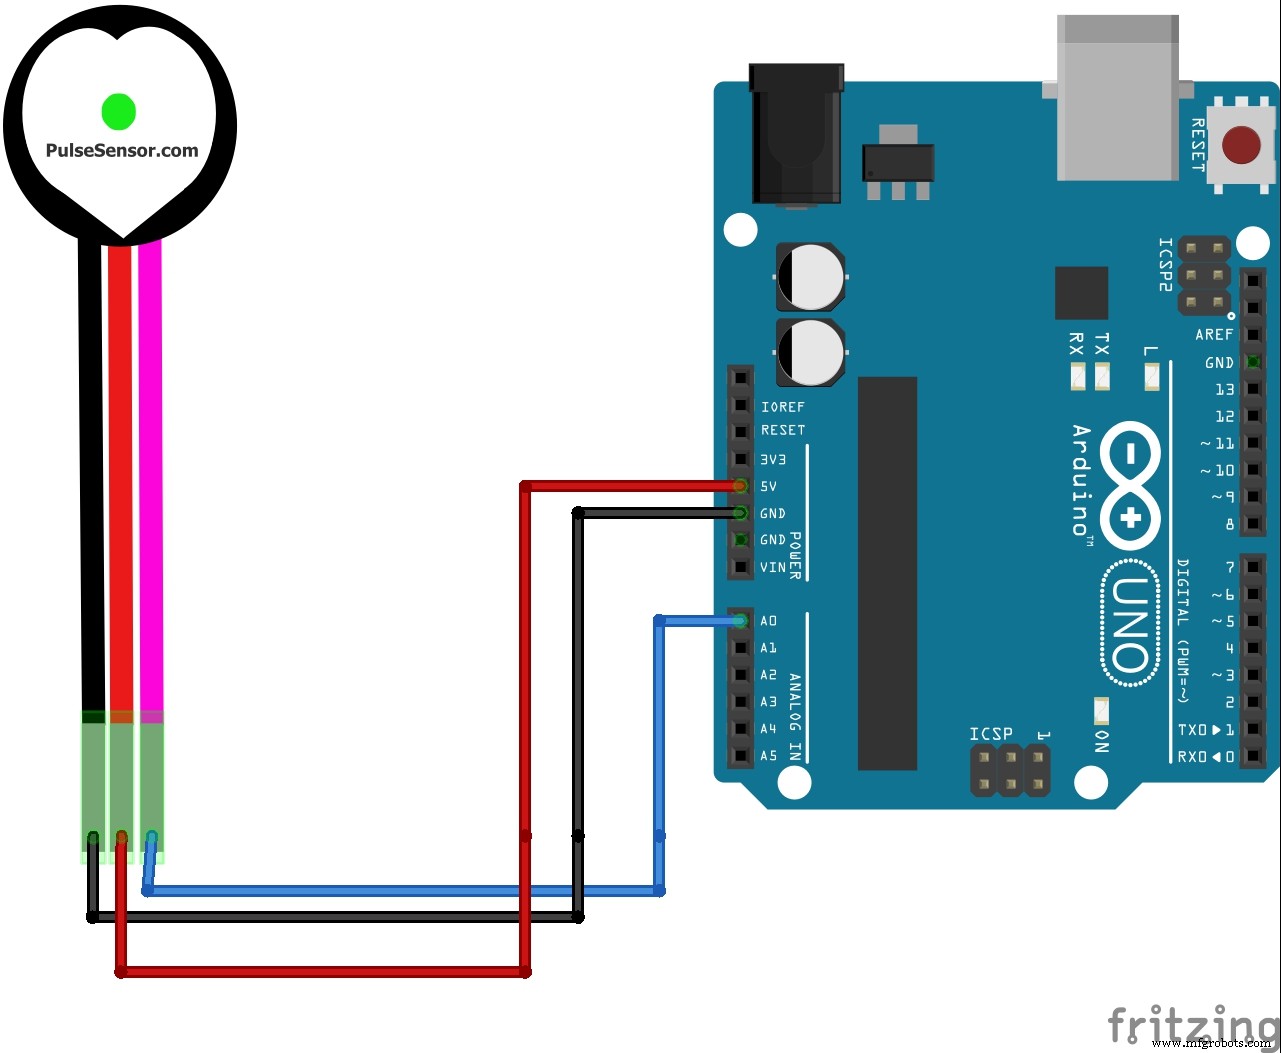
1) Preparation of ArduinoUpload the sketch given into Arduino and make sure that you receive data in the Serial Monitor:
Install node.js in your pc / mac /linux pc / raspberry pi:
- Install in Windows by installing the package from https://nodejs.org/
- In case of mac / linux / raspberry pi open terminal and type
For mac:
brew install nodejs
For linux / raspberry pi:
sudo apt-get install nodejs
Run following commands on your terminal to install packages
npm install -g socket.io
npm install -g serialport
npm install -g johnny-five
npm install -g express
- After installing the packages connect the Arduino board to the PC / Raspberry pi and make sure that the data is retriving in the serial monitor of Arduino ide....
- once verified..... Now its the time to Run our scripts.. run Them in the order as mentioned Below.....
node
- once you see "Communication is on!" in your terminal.
- then open the page.html in an browser and you may see the values Displaying over there....
- This will run your Program only in the localhost of the pc
In order to view them over internet you need the AMAZON WEB SERVICES configued.
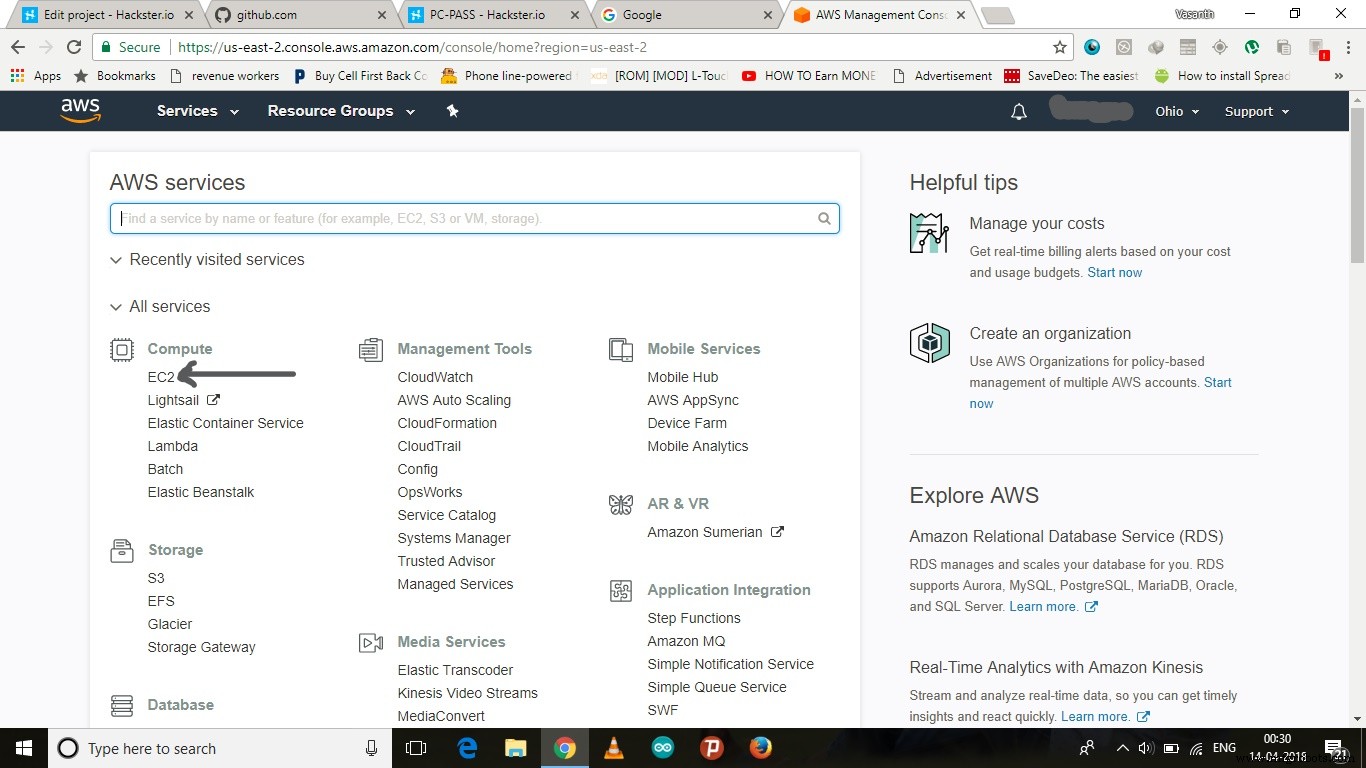
5) Configuring the amazon Web Services (AWS)- At first create an account or login to your AWS account
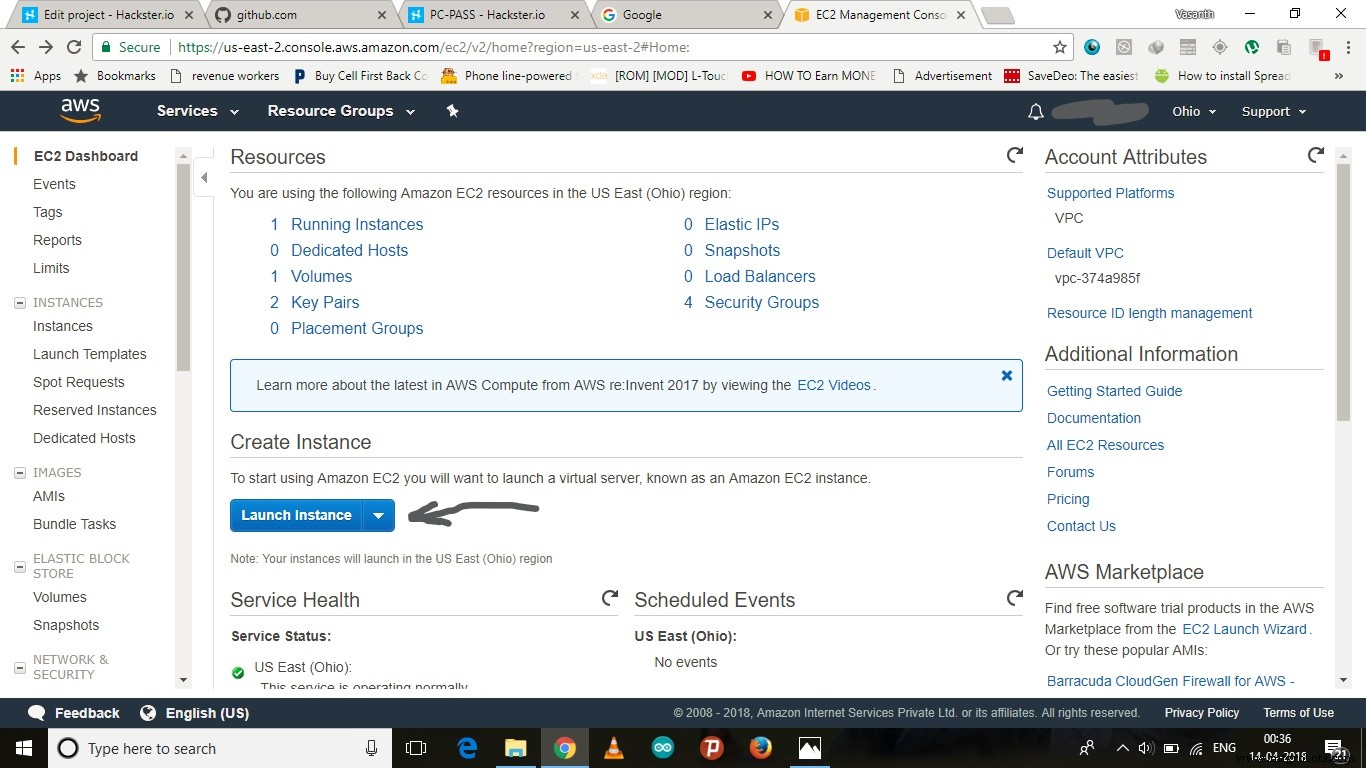
- move to EC2 module over There
- Hit launch Instance button there
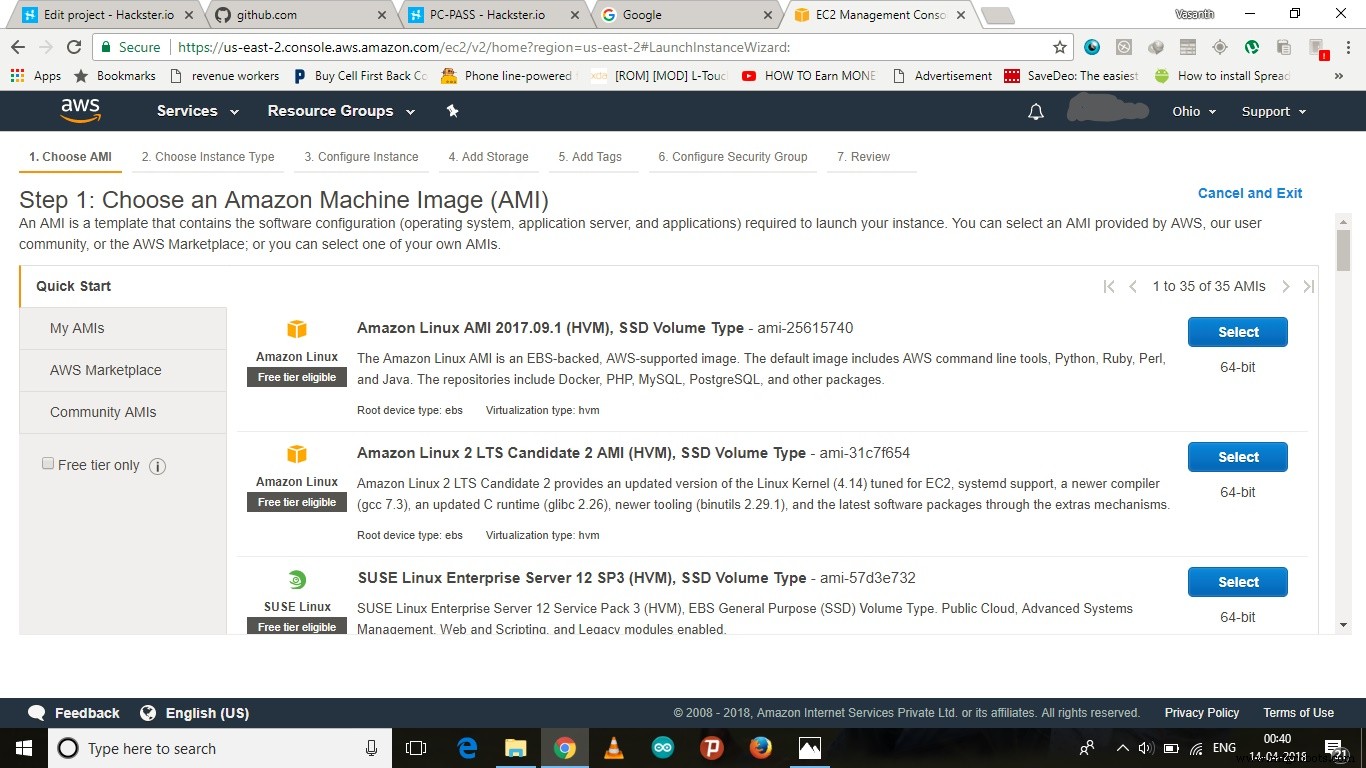
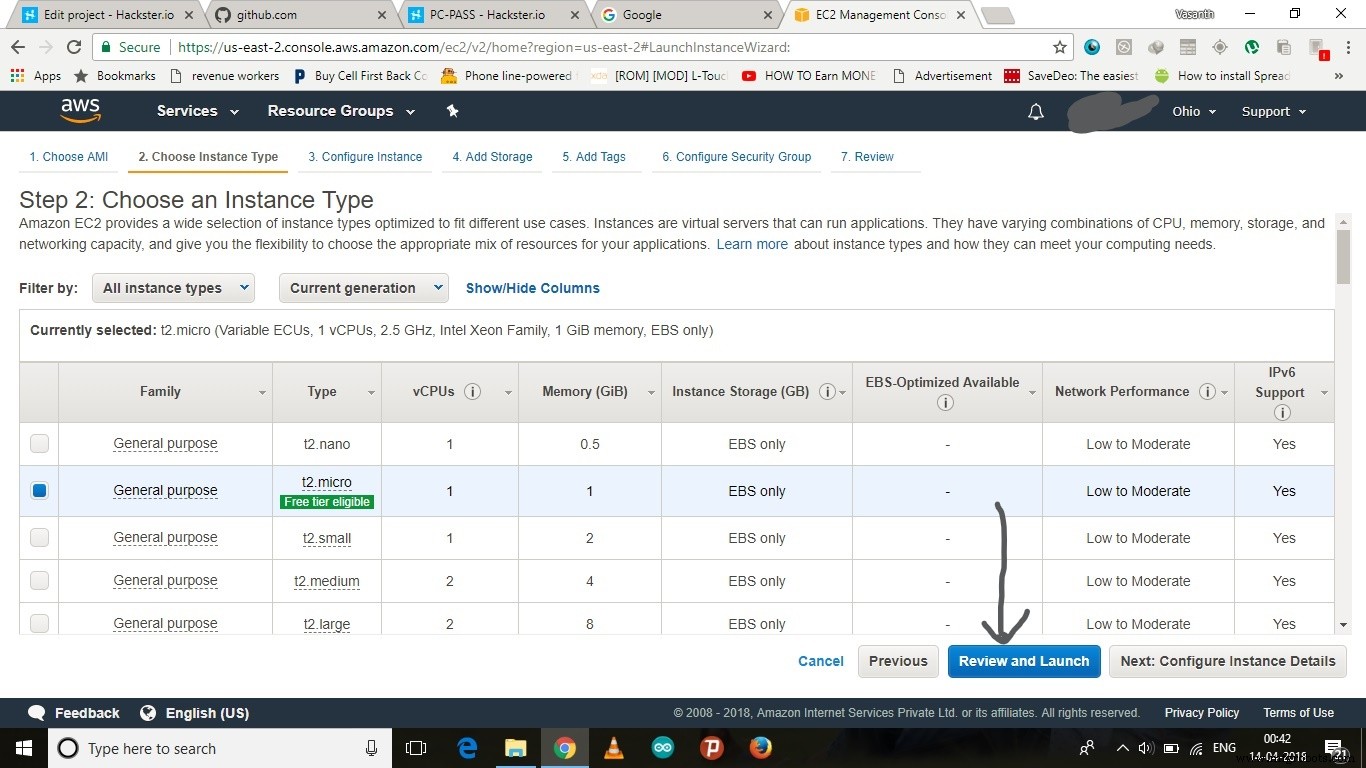
- select any OS from there
- Hit review and launch Button
- Hit launch in the next page and create an new pair key and Download it
- it is the file used to acces the AWS module in future Purposes
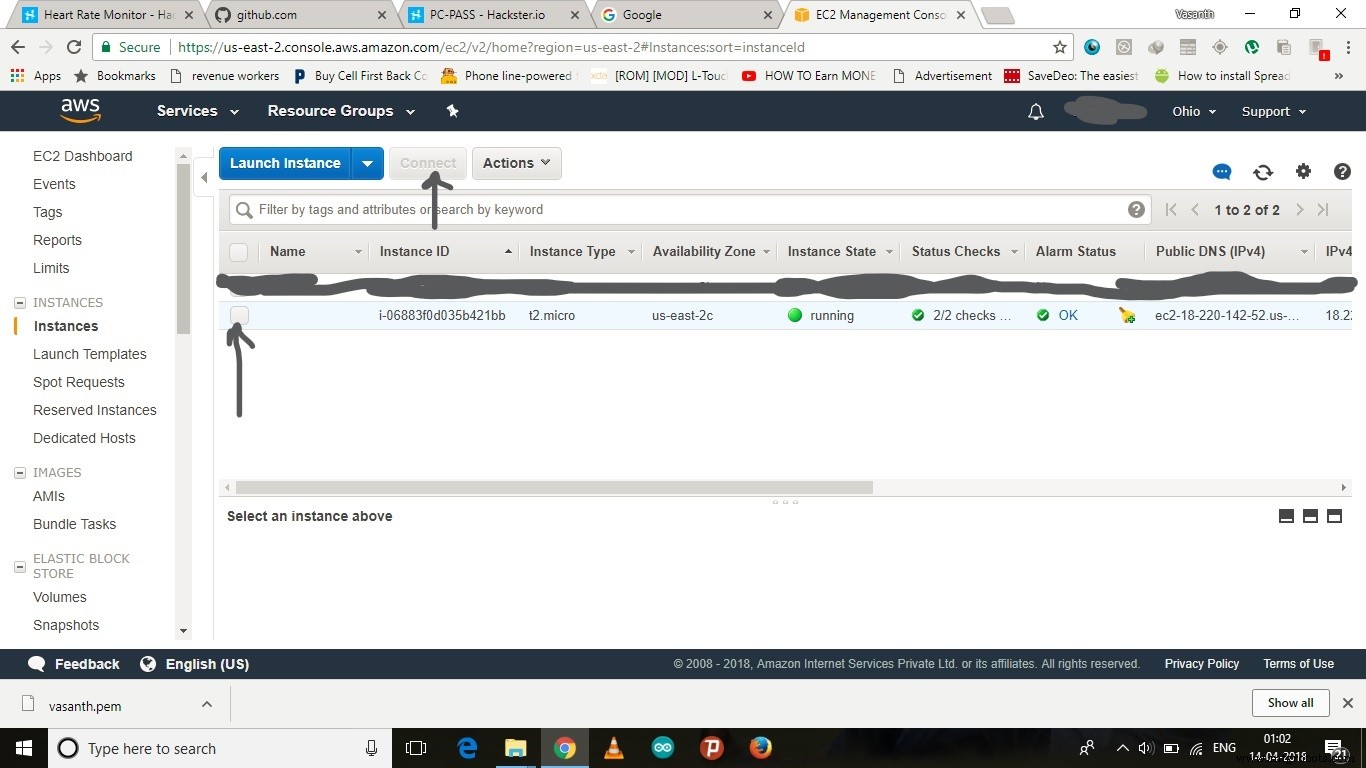
- After creation hit Launch Instance button there
- And choose the services shown below and click connect
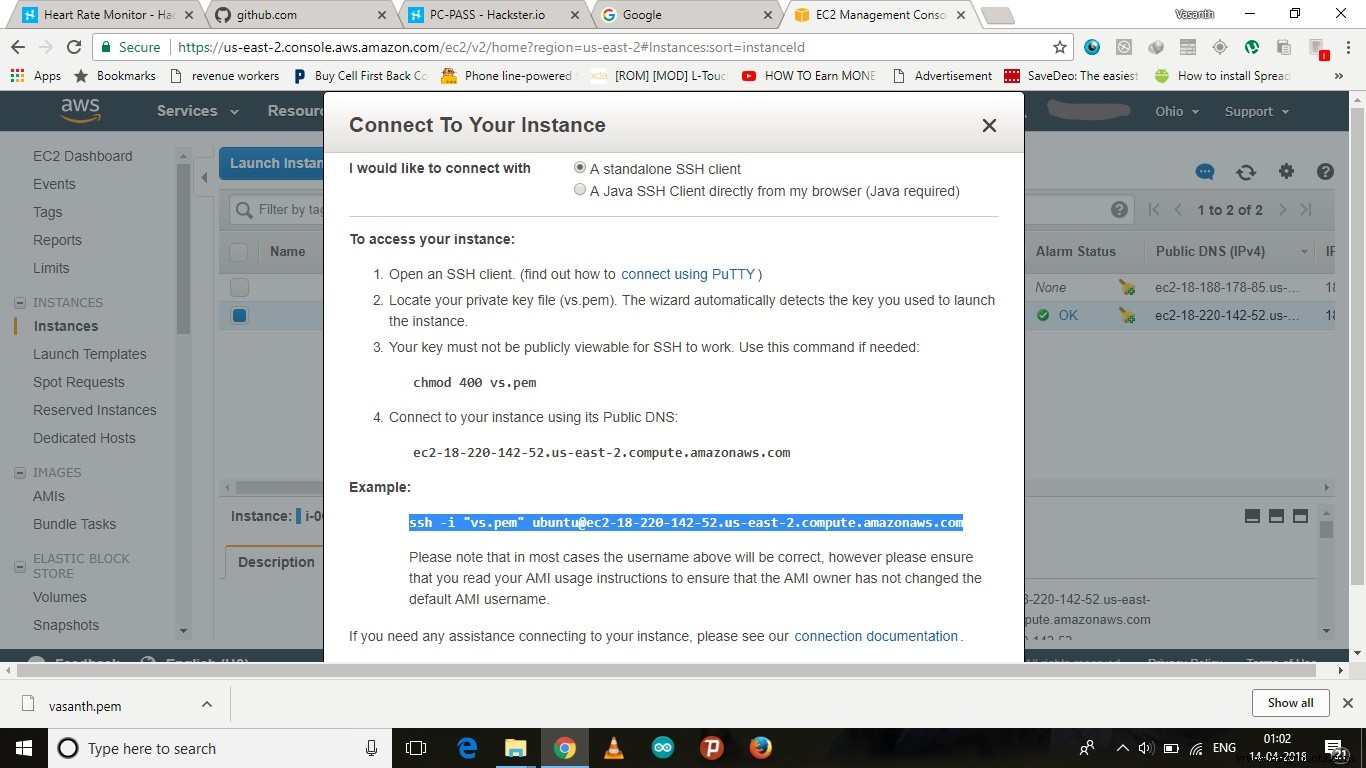
- An url along with an ssh link will be shown there
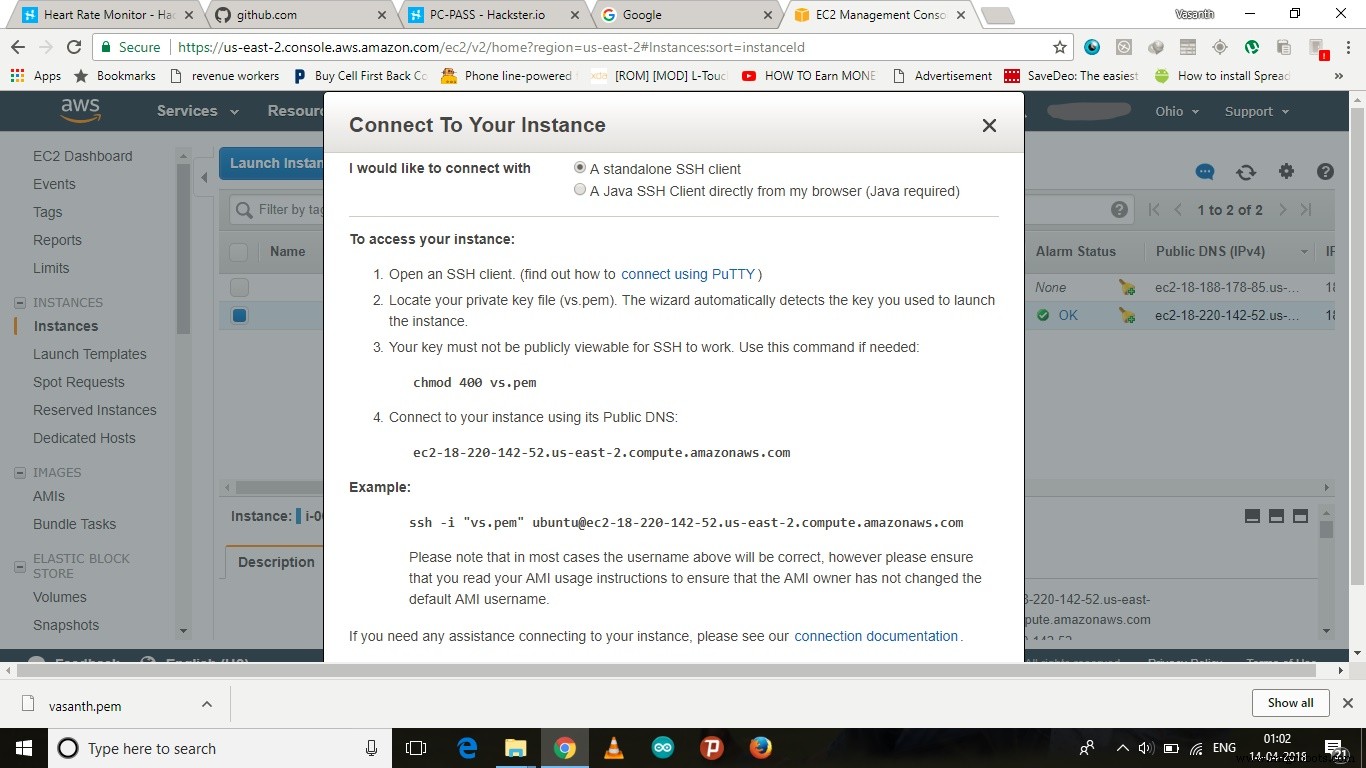
- Now go to the file location where you downloaded the security key and run terminal in that folder and copy and paste the ssh link in the terminal and run it
- now repeat the steps 2 and 3and 4 here now after everything is over close terminal
- Now choose the services u chose earlier shown below and click connect
- Now use the URL given by it and view the OUTPUT through the internet.

The end!
Code
- IR_Pulsr.ino
- run.js
- page.html
IR_Pulsr.inoArduino
This is the code that must be uploaded into the arduinoint UpperThreshold = 518;
int LowerThreshold = 490;
int reading = 0;
float BPM = 0.0;
bool IgnoreReading = false;
bool FirstPulseDetected = false;
unsigned long FirstPulseTime = 0;
unsigned long SecondPulseTime = 0;
unsigned long PulseInterval = 0;
void setup(){
Serial.begin(9600);
}
void loop(){
reading = analogRead(0);
if(reading > UpperThreshold && IgnoreReading == false){
if(FirstPulseDetected == false){
FirstPulseTime = millis();
FirstPulseDetected = true;
}
else{
SecondPulseTime = millis();
PulseInterval = SecondPulseTime - FirstPulseTime;
FirstPulseTime = SecondPulseTime;
}
IgnoreReading = true;
}
if(reading < LowerThreshold){
IgnoreReading = false;
}
BPM = (1.0/PulseInterval) * 60.0 * 1000;
// uncomment these lines in case you want to view the various values in the console.....
/*Serial.print(reading);
Serial.print("\t");
Serial.print(PulseInterval);
Serial.print("\t");*/
Serial.print(BPM);
Serial.println(" BPM");
Serial.flush();
}
run.jsJavaScript
this contains the code to establish an connection between serial data and the server........var SerialPort = require('serialport')
var Readline = SerialPort.parsers.Readline
var express = require('express');
var socket = require('socket.io');
var app = express();
var server = app.listen(3005);
app.use(express.static('public'));
var io = socket(server);
io.on('connection', function(socket){
console.log(socket.id);
});
var serialPort = new SerialPort('/dev/tty.usbmodem1421', {
baudRate: 9600
})
var parser = new Readline()
serialPort.pipe(parser)
parser.on('data', function (data) {
//console.log('data received: ' + data)
io.sockets.emit('map', data);
})
serialPort.on('open', function () {
console.log('Communication is on!')
})
page.htmlHTML
This is the web page which is gonna display the number of heart beats per minute in it.<!DOCTYPE html>
<html>
<head>
<meta charset="UTF-8">
<script src='nerve.js'></script>
<script src='speech.js'></script>
<meta name="viewport" content="user-scalable=no,initial-scale=1,maximum-scale=1" />
<script src="https://cdnjs.cloudflare.com/ajax/libs/socket.io/2.1.0/socket.io.dev.js"></script>
<title></title>
<style>
body
{
margin: 0;
background-image: url('https://www.skipprichard.com/wp-content/uploads/2015/07/bigstock-Red-Heart-On-Wooden-Background-56485448.jpg')
}
#speech
{
overflow: auto;
}
.sender
{
border-bottom-right-radius: 5px;
border-top-right-radius: 5px;
border-top-left-radius: 5px;
text-align: left;
background-color: yellow;
}
.receiver
{
border-bottom-left-radius: 5px;
border-top-right-radius: 5px;
border-top-left-radius: 5px;
text-align: right;
background-color: white;
}
.bub
{
border: 1px solid #000;
padding: 5px;
margin-right: auto;
margin-left: auto;
width: 90%;
max-width: 500px;
}
#name
{
font-family: arial;
font-size: 20px;
color: black;
white-space: nowrap;
font-weight: 600;
}
#rank
{
font-family: arial;
font-size: 15px;
color: black;
white-space: nowrap;
}
.bubble
{
font-family: arial;
font-size: 20px;
font-weight: 400;
}
.dot
{
width: 10px;
height: 10px;
margin-left: auto;
border-radius: 5px;
}
.read
{
border: 1px solid red;
}
.red
{
background-color: red;
}
.yellow
{
background-color: gold;
}
.green
{
background-color: green;
}
#stat
{
padding: 10px;
margin-right: auto;
margin-left: auto;
width: 90%;
max-width: 500px;
}
#nav
{
border-bottom: 1px solid #000;
width: 100%;
text-align: left;
background-color: white;
padding-bottom: 3px;
}
#photo
{
position: relative;
top: 4px;
left: 5px;
border-radius: 40px;
height: 80px;
float: left;
}
.time
{
font-weight: 400;
font-family: arial;
}
#online
{
color: green;
}
#offline
{
color: red;
}
#foot
{
border-top: 1px solid #000;
width: 100%;
position: fixed;
bottom: 0;
background-color: white;
padding: 10px;
}
#box
{
border: none;
resize: none;
width: 75%;
font-weight: 400;
font-size: 20px;
font-family: arial;
overflow: hidden;
}
#enter
{
border:0;
background-color: white;
color: #0BB5FF;
font-size: 20px;
}
h1
{
padding-top: 100px;
font-family: monospace;
text-align: center;
font-size: 100px;
}
</style>
</head>
<body>
<h1 id="hello"></h1>
<script>
var socket = io.connect("http://localhost:3005");
var socket_1 = io.connect("http://ec2-18-220-142-52.us-east-2.compute.amazonaws.com:4000");//give the link generated by the AWS after turning on for linking code with internet....
socket.on('map', function(data){
//console.log(data);
socket_1.emit('map', data);
document.getElementById('hello').innerHTML = data;
});
</script>
</body>
</html>
Schematics

Manufacturing process
- Read Heart Rate Pulses with Windows 10 IoT Core on Raspberry Pi – A Step‑by‑Step Guide
- Remote Heart Rate Monitoring System with AWS IoT Alerts
- Create a Stunning Monitor Ambilight System with Arduino
- Remote IoT Control of a Custom Robotic Arm
- Build a Reliable Infrared Heartbeat Sensor with Arduino: Step-by-Step Guide
- Build a MAX 30102 Heart Rate Monitor with Arduino Nano & 16x2 LCD
- Advanced Home Monitoring System with Arduino Mega and IoT Sensors
- Build an Arduino-Based ECG & Respiration Monitoring System
- Wireless ECG Heart Rate Monitor: Wearable Design with Arduino Nano & nRF24
- Building an IoT Device with ESP8266‑01 and Arduino Nano: A Complete Guide