


DIY Low‑Cost Portable Thermometer with Android Integration
Components and supplies
 |
| × | 1 | |||
| × | 1 |
Necessary tools and machines
 |
| |||
 |
|
Apps and online services
|
About this project
Measuring body temperature with non-contact / contactless like a thermo gun. I created this project because Thermo Gun now is very expensive, so I must get alternative to make DIY. And the purpose is make with low budget version.
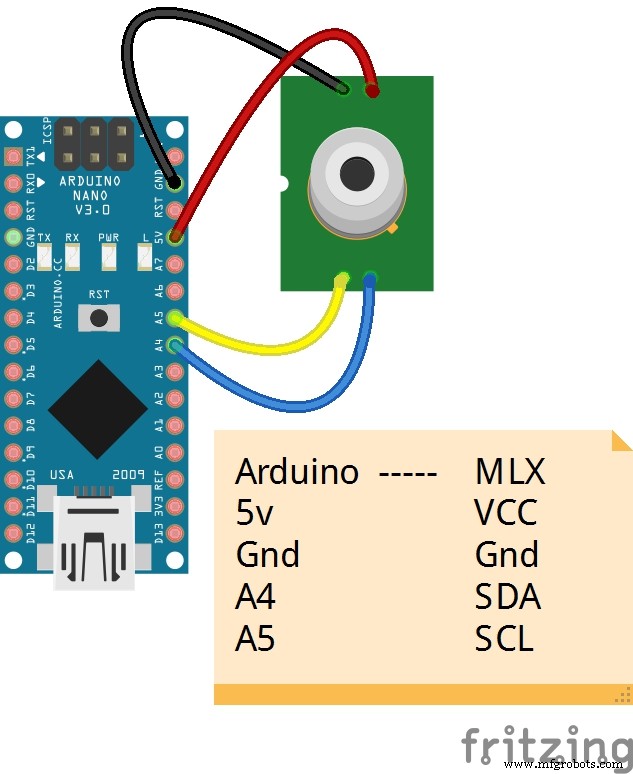
Wiring Connection (Hardware)
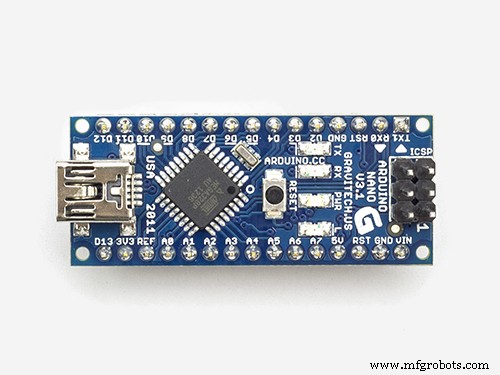
MLX 90614 have I2C communication, so in Arduino Nano use pin A4 & A5

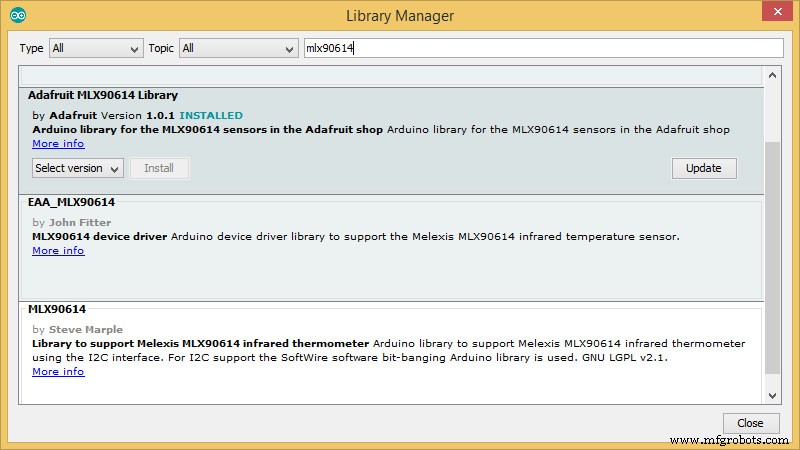
For library MLX90614 I use adafruit library, you can Open Arduino IDE and menu Tools -> Manage Libraries -> search MLX90614. and click Adafruit MLX90614 Library then click install in Library Manager
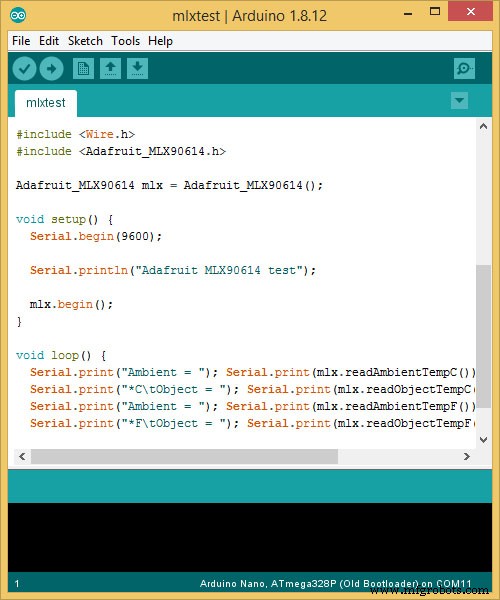
To make sure that mlx90614 sensor can work, open Arduino IDE, Click File -> Examples -> Adafruit MLX90614 Library -> mlxtest.
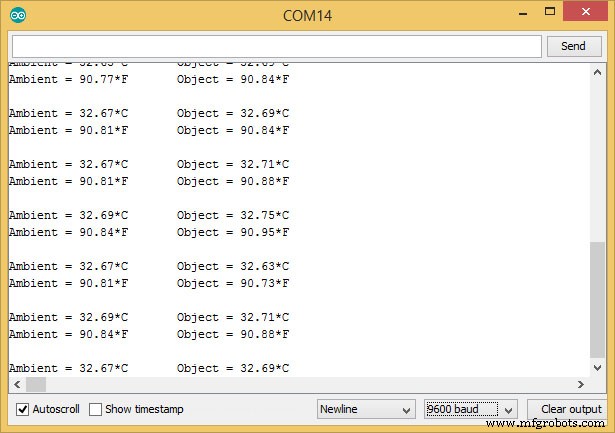
Upload then see serial Monitor, you can see Ambient temperature and object temperature.

_Wrfp3D6xrS.jpeg?auto=compress%2Cformat&w=680&h=510&fit=max)
_8WaO80vwPg.jpeg?auto=compress%2Cformat&w=680&h=510&fit=max)

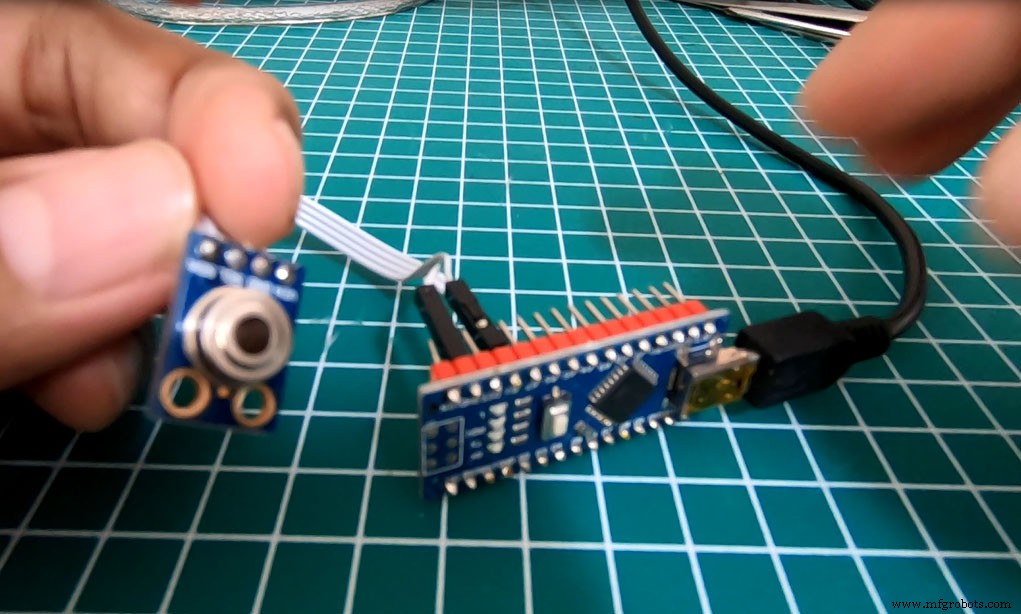
After sample MLX90614 code work, prepare circuit between arduino nano and mlx90614 sensor like a picture. For OTG you can make DIY with Male Microusb and Male Miniusb.
Cover Portable Thermometer can download file 3D in https://grabcad.com/library/portable-thermometer-box-1 and print with your 3Dprint Machine
Install App Portable Thermometer From PlaystoreYou can search in playstore "portable Thermometer" or you can click this link Portable Thermometer or you can scan this qr-code


How to running Portable thermometer
- Connect device in your smartphone with OTG.
- Active OTG Connection in your smartphone
- Run application
- Click check now to check body temperature
Code
- Portable Thermometer Arduino Code
Portable Thermometer Arduino CodeArduino
/*
 * MLX90614 Send to OTG
 * sekolahrobot@gmail.com
 */

#define LED 13
#include <Wire.h>
#include <Adafruit_MLX90614.h>

Adafruit_MLX90614 mlx = Adafruit_MLX90614();

unsigned long previousMillis;
int interval = 50;
char i;
int data = 0;
void setup() {
    Serial.begin(9600);
    mlx.begin();
    pinMode(LED, OUTPUT);
}

void loop() {
    if (Serial.available() > 0) {
        i = Serial.read();
        switch (i) {
            case '0':
                digitalWrite(LED, LOW);
                data = 0;
                break;
            case '1':
                digitalWrite(LED, HIGH);
                data = 1;
                break;
        }
    }
if (data==1)
  {
      if (millis() - previousMillis >= interval) {
          previousMillis = millis();
          Serial.print(mlx.readAmbientTempC());
          Serial.print(";");
          Serial.println(mlx.readObjectTempC());
      }
  }

}
Custom parts and enclosures

Schematics
Manufacturing process
- Dynamic Memory Allocation in C: Understanding malloc() with Practical Examples
- Precision Pressure & Airflow Measurement Device with Analog Sensor
- Control Your Roomba Create 2 Using Arduino and Android: A Step-by-Step Guide
- Remote Control of a Bulb with Arduino Uno, Relay, and Android App
- Connecting Arduino to NMEA‑0183: A Step‑by‑Step Guide
- Control Your Arduino Robot Arm via a Dedicated Android App
- Reliable Arduino-Based Device Tester for Power Blough-R Products
- Build a Precise COVID‑19 Non‑Contact Thermometer with MLX90614 & Arduino Nano
- Handheld Device Detects Harmful E. coli in Food On‑Site Using Bioluminescence
- Boosting Production Efficiency with Portable Container Tilt Systems