


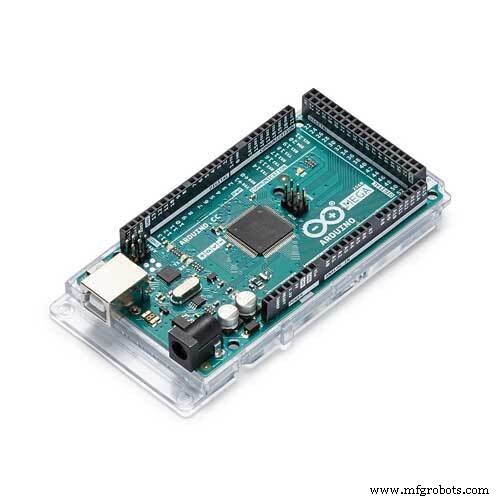
SMS‑Triggered DHT22 Temperature Readout with Arduino Mega 2560
Components and supplies
 |
| × | 1 | |||
 |
| × | 1 | |||
| × | 1 | ||||
 |
| × | 1 | |||
 |
| × | 1 | |||
 |
| × | 1 |
About this project
Hello. This project is part of a much bigger project. Because I had a lot of problems with this part and eventually found a solution, I decided to share it with the community and hope it may help them on their projects.
Project Description
Send SMS to Arduino and get the temperature at home.
SoftwareFor the SIM800L module, I used “Seeeduino_GPRS-master” Library. I had to change the following lines in the “sim800.h” Library to enable it to work on a MEGA:
#define SIM800_TX_PIN 8
#define SIM800_RX_PIN 7
...to TX_PIN 10 and RX_PIN 11. To change the Library from “SoftwareSerial” to one of the Mega Serial ports, i.e. Serial3, was too difficult so I took the easy way out.
The Problem
Basically, my code is cut and paste examples from two libraries: “DHT.h “ and “Seeeduino_GPRS-master”. The problem I had was that the “gprs.h” example only showed how to send a predetermined message in quotes. I couldn’t work out how to send the variable float value from my temperature sensor. This was also true with other libraries I tried: “GPRS_SIM900-master” and “SIM800L-master” .
I had spent weeks searching the WEB for examples to solve my problem and found none. I had found forum postings on the same subject, and for those poor lost souls who didn’t get answers, I hope you find this posting.
The Answer
Convert the float value to a String and then the String to a Char Array - simple!
Code Snippet
MyString = String(temp,0); //Convert float to String
MyString = (MyString + " Degrees C");
// convert string to char starts here
// Length (with one extra character for the null terminator)
int str_len = MyString.length() + 1;
// Prepare the character array (the buffer)
char char_array[str_len];
// Copy it over
MyString.toCharArray(char_array, str_len);
// convert string to char ends here
gprs.sendSMS("04++++++++",char_array); //define phone number and text.
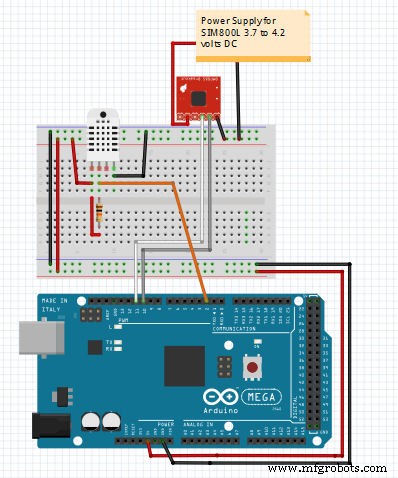
I used a ULTRAFIRE 18650 battery to supply power to the sim module. Later I will add a voltage regulator to the circuit. See this tutorial.
Reference material
- http://www.ayomaonline.com/programming/quickstart-sim800-sim800l-with-arduino/
- https://www.sparkfun.com/datasheets/Sensors/Temperature/DHT22.pdf
- https://github.com/Seeed-Studio/Seeeduino_GPRS
- https://github.com/adafruit/DHT-sensor-library
Code
- DHT_SIMPosting.ino
DHT_SIMPosting.inoArduino
Send SMS "InTemp" requests the temperature and the Arduino reply's in Degrees C.// Example testing sketch for various DHT humidity/temperature sensors
// Written by ladyada, public domain
#include "DHT.h"
#define DHTPIN 2 // what digital pin we're connected to
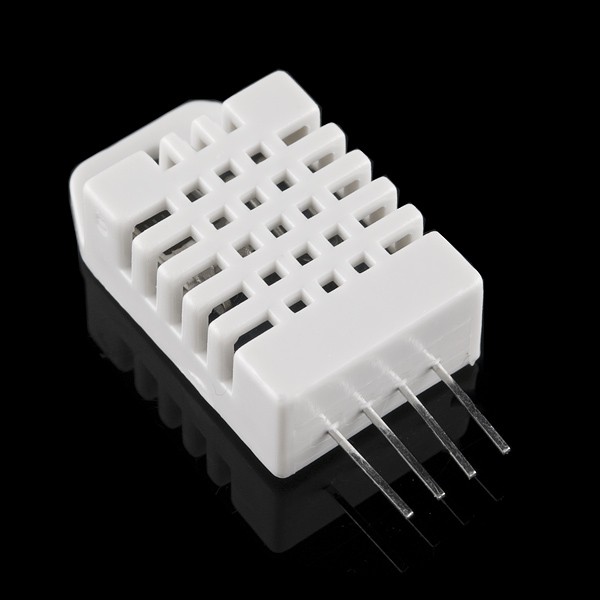
#define DHTTYPE DHT22 // DHT 22 (AM2302), AM2321
//#define DHTTYPE DHT21 // DHT 21 (AM2301)
// Connect pin 1 (on the left) of the sensor to +5V
// Connect pin 2 of the sensor to whatever your DHTPIN is
// Connect pin 4 (on the right) of the sensor to GROUND
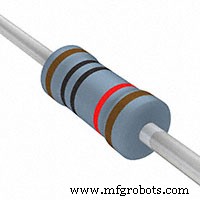
// Connect a 10K resistor from pin 2 (data) to pin 1 (power) of the sensor
// Initialize DHT sensor.
DHT dht(DHTPIN, DHTTYPE);
#include <gprs.h>
#include <softwareserial.h>
#define TIMEOUT 5000
GPRS gprs;
bool ITemp = false;
float temp;
String MyString;
#define LED_PIN 13
bool ledStatus;
//Variable to hold last line of serial output from SIM800
char currentLine[500] = "";
int currentLineIndex = 0;
//Boolean to be set to true if message notificaion was found and next
//line of serial output is the actual SMS message content
bool nextLineIsMessage = false;
void Reply ()// Function starts here
{
Serial.println("GPRS - Send SMS Test ...");
gprs.preInit();
delay(1000);
while(0 != gprs.init()) {
delay(1000);
Serial.print("init error\r\n");
}
Serial.println("Init success, start to send SMS message...");
if (ITemp == true){
float t = dht.readTemperature();
temp=t;
ITemp = false;
}
MyString = String(temp,0); //Convert float to String
MyString = (MyString + " Degrees C");
// convert string to char starts here
// Length (with one extra character for the null terminator)
int str_len = MyString.length() + 1;
// Prepare the character array (the buffer)
char char_array[str_len];
// Copy it over
MyString.toCharArray(char_array, str_len);
// convert string to char ends here
gprs.sendSMS("04++++++++",char_array); //define phone number and text
// Function ends here
}
void setup() {
Serial.begin(9600);
Serial.println("DHTxx test!");
dht.begin();
gprs.preInit();
delay(1000);
while(0 != gprs.init()) {
delay(1000);
Serial.print("init error\r\n");
//later display SIM ERROR on Nextion HMI Home Page
}
//Set SMS mode to ASCII
if(0 != gprs.sendCmdAndWaitForResp("AT+CMGF=1\r\n", "OK", TIMEOUT)) {
ERROR("ERROR:CNMI");
return;
}
//Start listening to New SMS Message Indications
if(0 != gprs.sendCmdAndWaitForResp("AT+CNMI=1,2,0,0,0\r\n", "OK", TIMEOUT)) {
ERROR("ERROR:CNMI");
return;
}
Serial.println("Init success");
}
void loop() {
// Wait a few seconds between measurements.
delay(2000);
// Reading temperature or humidity takes about 250 milliseconds!
// Sensor readings may also be up to 2 seconds 'old' (its a very slow sensor)
float h = dht.readHumidity();
// Read temperature as Celsius (the default)
float t = dht.readTemperature();
Serial.print("Humidity: ");
Serial.print(h);
Serial.println(" %\t");
Serial.print("Temperature: ");
Serial.print(t);
Serial.println(" *C ");
SIM();
}
void SIM()
{
//Write current status to LED pin
digitalWrite(LED_PIN, ledStatus);
Serial.println("Looking for SMS");
//If there is serial output from SIM800
if(gprs.serialSIM800.available()){
char lastCharRead = gprs.serialSIM800.read();
//Read each character from serial output until \r or \n is reached (which denotes end of line)
if(lastCharRead == '\r' || lastCharRead == '\n'){
String lastLine = String(currentLine);
//If last line read +CMT, New SMS Message Indications was received.
//Hence, next line is the message content.
if(lastLine.startsWith("+CMT:")){
Serial.println(lastLine);
nextLineIsMessage = true;
} else if (lastLine.length() > 0) {
if(nextLineIsMessage) {
Serial.println(lastLine);
//Read message content and set status according to SMS content
if(lastLine.indexOf("InTemp") >= 0){
Serial.println("InTemp");
ITemp = true;
Reply ();
// ledStatus = 1;
// Serial.println("Turn ON the Light");
// } else if(lastLine.indexOf("LED OFF") >= 0) {
// ledStatus = 0;
// Serial.println("Turn OFF the Light");
}
nextLineIsMessage = false;
}
}
//Clear char array for next line of read
for( int i = 0; i < sizeof(currentLine); ++i ) {
currentLine[i] = (char)0;
}
currentLineIndex = 0;
} else {
currentLine[currentLineIndex++] = lastCharRead;
}
}
}
Schematics
Manufacturing process
- The Thermometer: From Galileo’s Thermoscope to Modern Digital Sensors
- Temperature‑Controlled Fan: DIY Relay System for Media Furniture Cooling
- Beginner IoT Tutorial: Streaming Temperature Data from a Raspberry Pi
- Build a Raspberry Pi Home Temperature Monitor with MCP9808, InfluxDB & Grafana
- Build a Windows IoT Core Rover with Raspberry Pi 2 – Beginner to Advanced Guide
- Arduino Tic Tac Toe with MAX7219 LED Matrix and Cardboard Enclosure
- Arduino Temperature Sensor Project: Read, Convert, and Display Fahrenheit
- AuGe12: Premium Gold-Based Soft Solder Alloy
- Rhenium: The Ultra‑High‑Density Metal for Filaments and Refractory Applications
- JW Machine: Precision CNC Contract Manufacturing Services