Arduino-Based Repulsive Magnetic Levitation: Simple Circuit & DIY Guide
Components and supplies
Arduino UNO
×
1
Resistor 1k ohm
×
1
Transistor BD241
×
1
Linear hall effect sensor UGN3503
×
1
RobotGeek Medium Solenoid
×
1
Big speaker magnet
×
1
Necessary tools and machines
Soldering iron (generic)
Apps and online services
Arduino IDE
About this project
A few years ago I was trying to make a device for repulsive magnetic levitation but all the circuits I had were complex and the setting was very difficult.
After several unsuccessful and semi-successful attempts, I bought the levitator that you can see in the picture, but it's almost impossible to make it at home (DIY).
Now I will present you a repulsive Levitator which besides the Arduino board, contains only a few additional componentsand it is very easy for DIY:
Any middle power transistor: in my case BD241
Universal diode 1N4001
Resistor 1 Kohm
UGN3503 Hall effect sensor (you can use any 5V RATIOMETRIC hall effect sensor)
Torus magnet from an old speaker(with a diameter of 9cm to 11cm and more).
Instead of a large torus magnet, it can be used groups of small neodymium magnets deployed as a regular hexagon, as in commercial devices.
Solenoid composed of about 200 winding insulated copper wire 30AWG. In this case, I used a solenoid removed from old cash drawer.
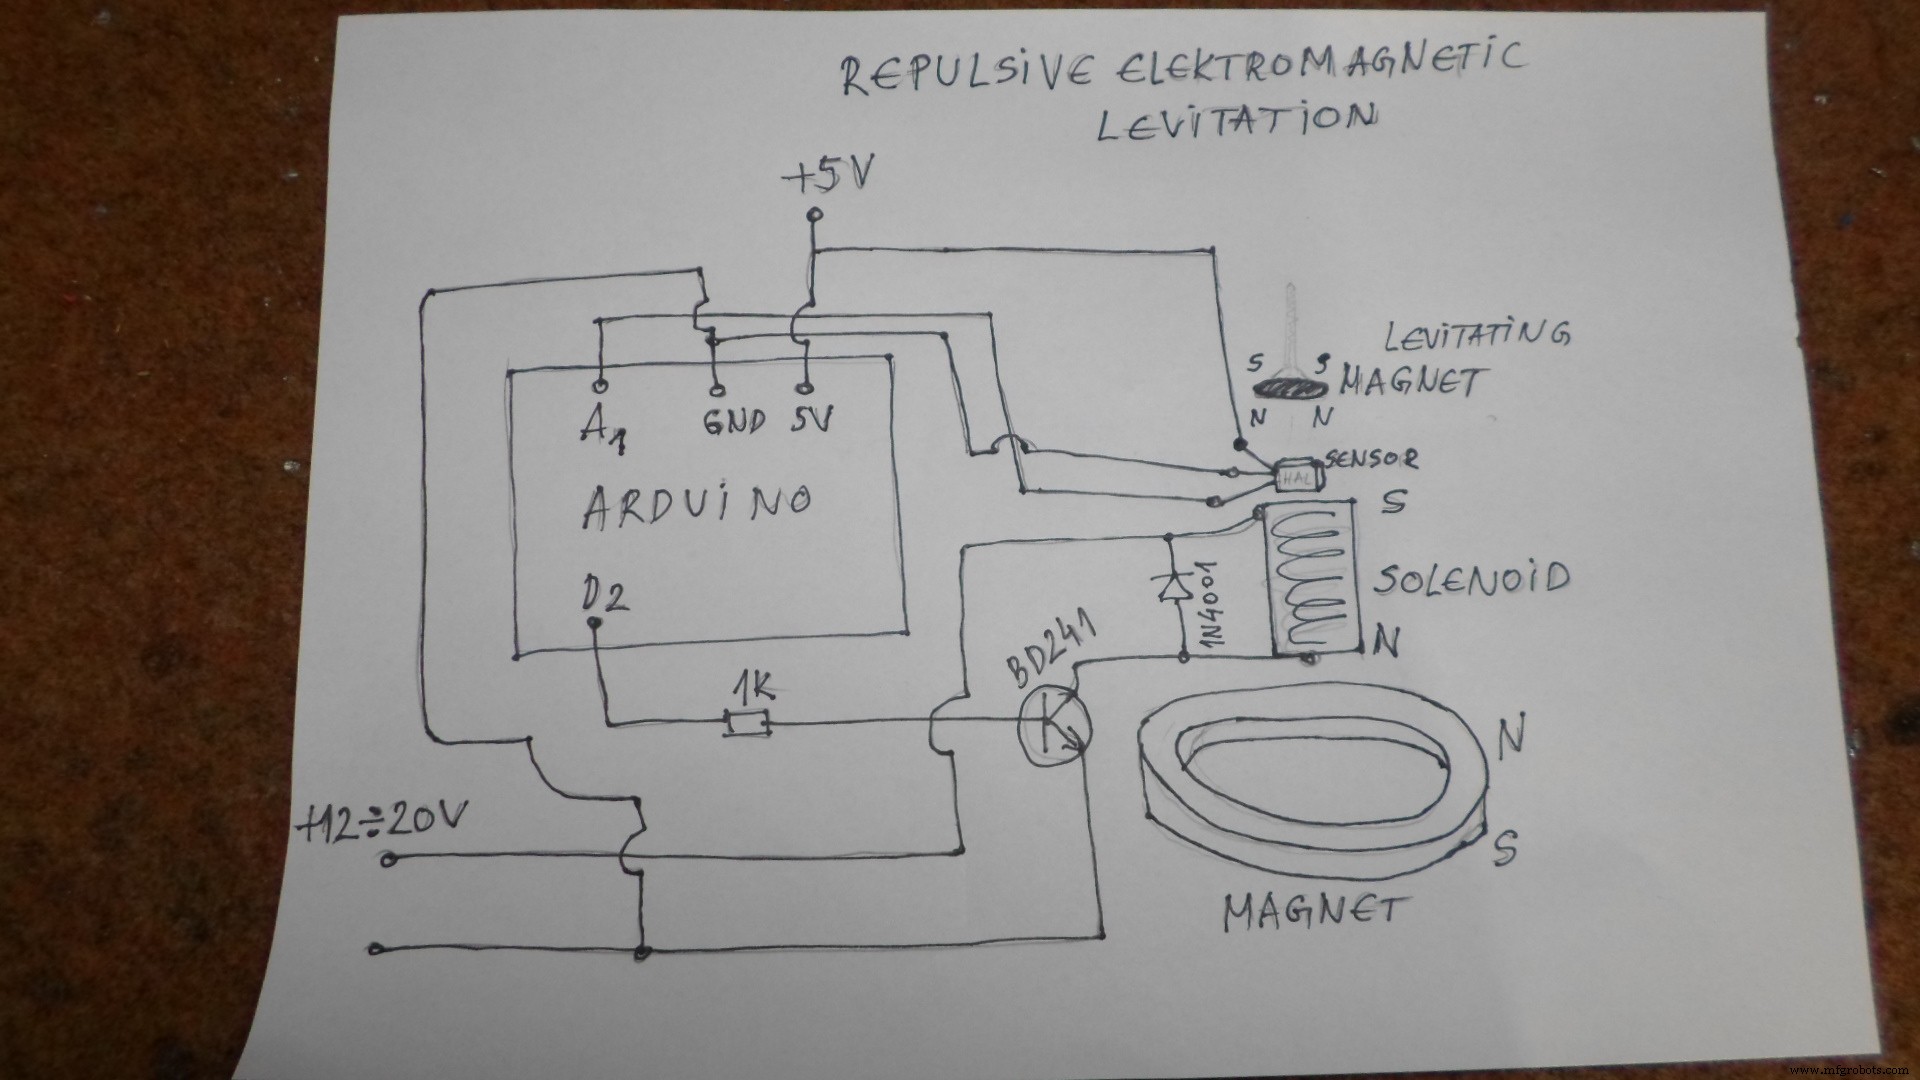
The circuit is very simple and is presented below in the picture. Arduino is powered by default with 5V and solenoid via transistor with 12v-20v.Both have a common ground.Polarity of magnets and solenoid is shown in the figure.For adjustment you will need a little patience and time, and in fact there is the pleasure in making a device.The hal sensor should be at the top above the solenoid.Above it is placed the magnet which should float.In my case, the setting was to move the torus magnet up and down.In addition to hardware, there is also a setting in the code by changing the value of the first row in the code and can range from 200 to 350.With a combination of these two settings we get the best results.