


Wireless Node.js‑Controlled Robotic Car – Real‑Time IoT Project
Components and supplies
 |
| × | 1 | |||
 |
| × | 1 | |||
 |
| × | 1 | |||
 |
| × | 1 | |||
 |
| × | 2 | |||
 |
| × | 2 |
About this project
Project IdeaNode.js is one of the best options for Real-Time Applications. I have previously worked on some real-time apps using Sockets, so with the same concept, I decided to make some IoT projects with Node.js server for self-learning.
This Rover of mine communicates with my Node.js server using Bluetooth and on the front-end, I send commands to the server using Sockets.
Project AimTo study and implement wireless communication between Node server and hardware (which is in this case our Rover), and to remotely control the Rover with a mobile web-page served by Node server using Sockets.
PrerequisiteYou need to have some basic knowledge of Node, socket programming, and L298 Motor Driver working.
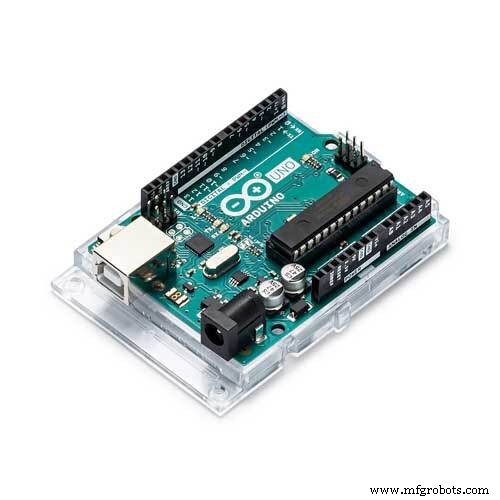
Requirements- 1 Arduino Uno
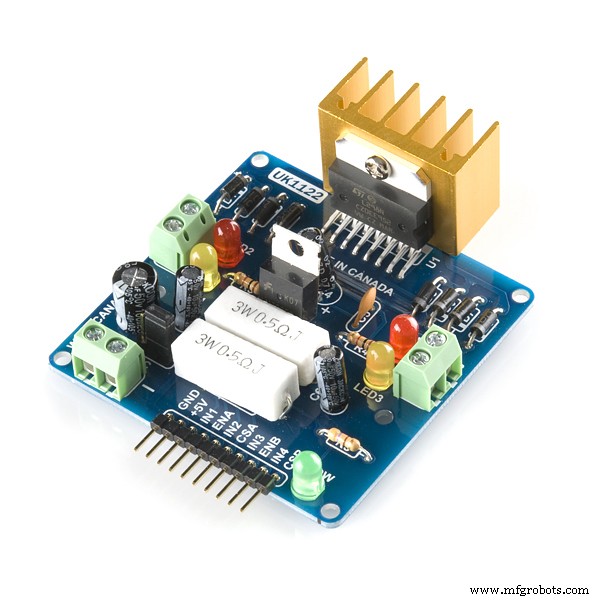
- 1 L298 Motor Driver
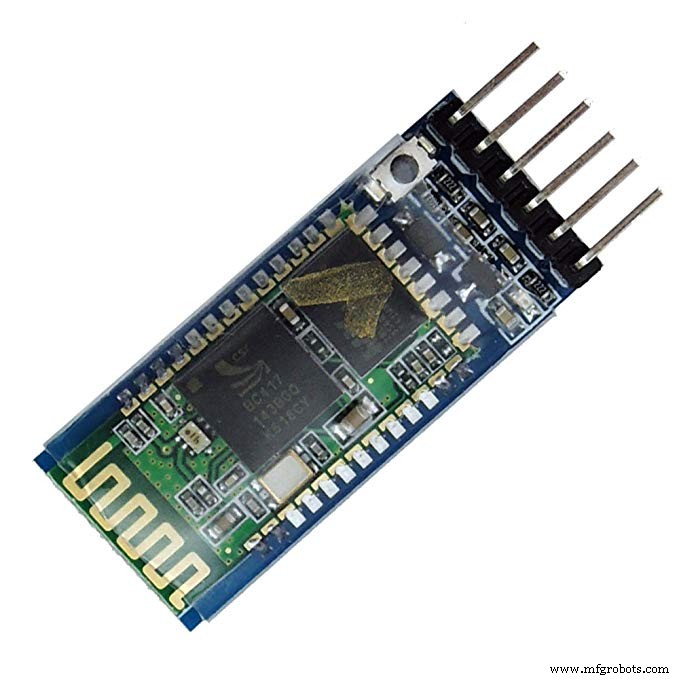
- HC-05 Bluetooth Module
- Jumper Wires
- 2 Battery - 9 volts each
- 2 gear Motors (6-9 volts)
- 2 compatible wheels
- Chassis
- Computer with Node.js installed for our server.
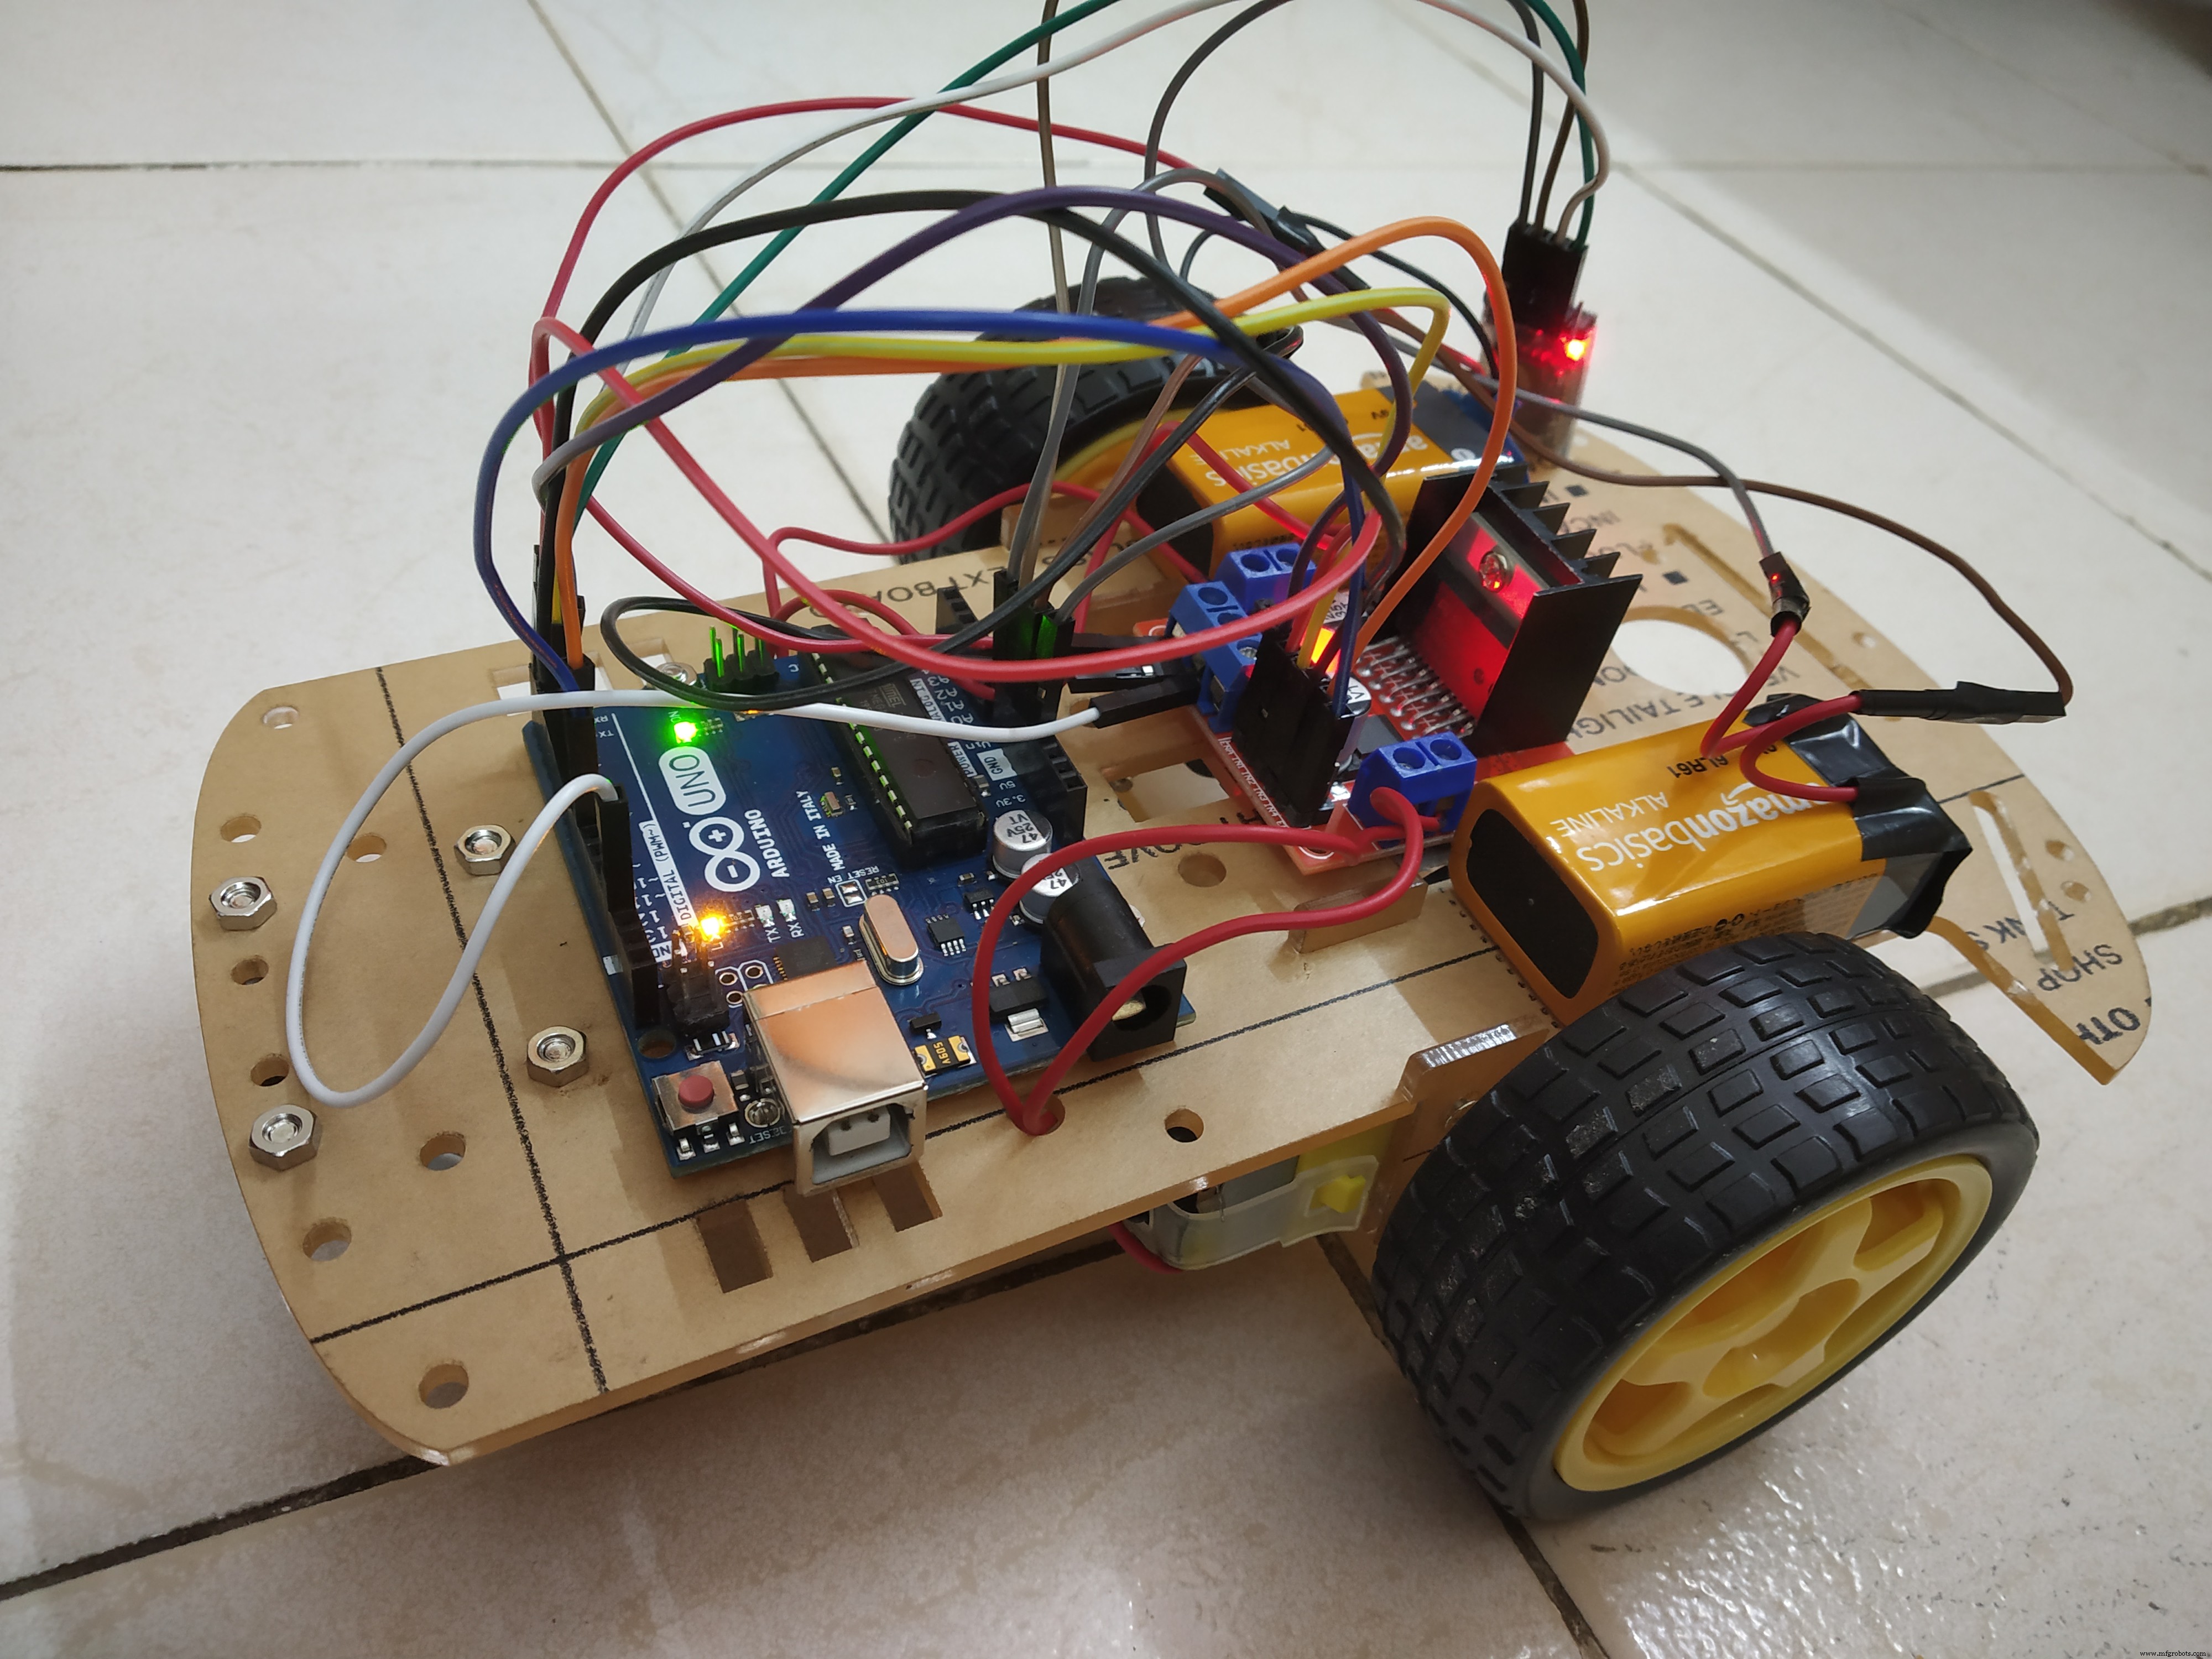
Building the Rover is not that complicated, you can purchase a "2 wheel chassis kit" which is easily available online and comes with all assembling units.
Our Arduino Uno and L298 Motor Driver are embedded on top of our Rover, both of which are powered by two 9 volts battery separately.
Arduino Uno in turn will power the HC-05 Bluetooth module which will communicate with our server.
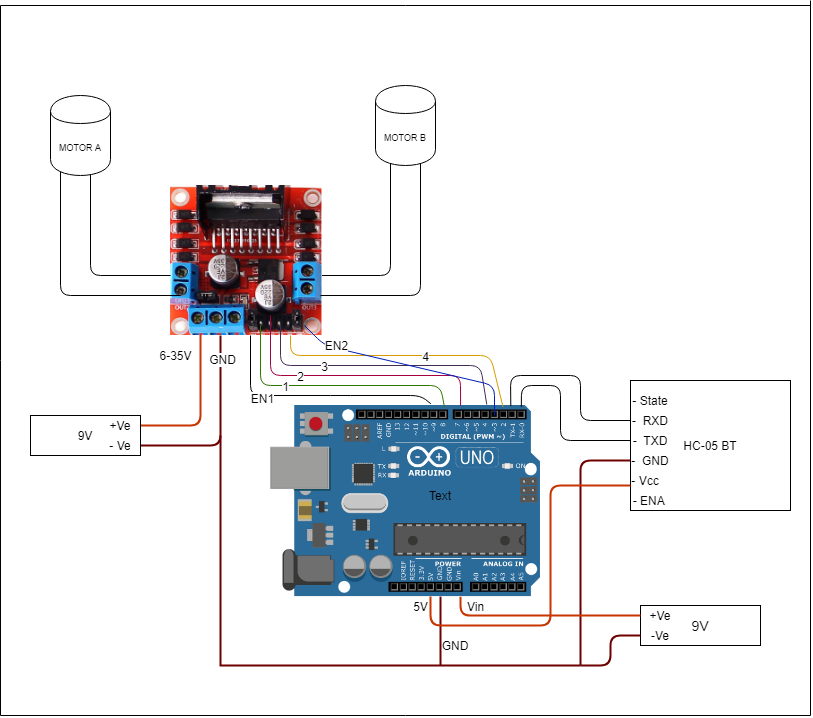
Circuit Diagram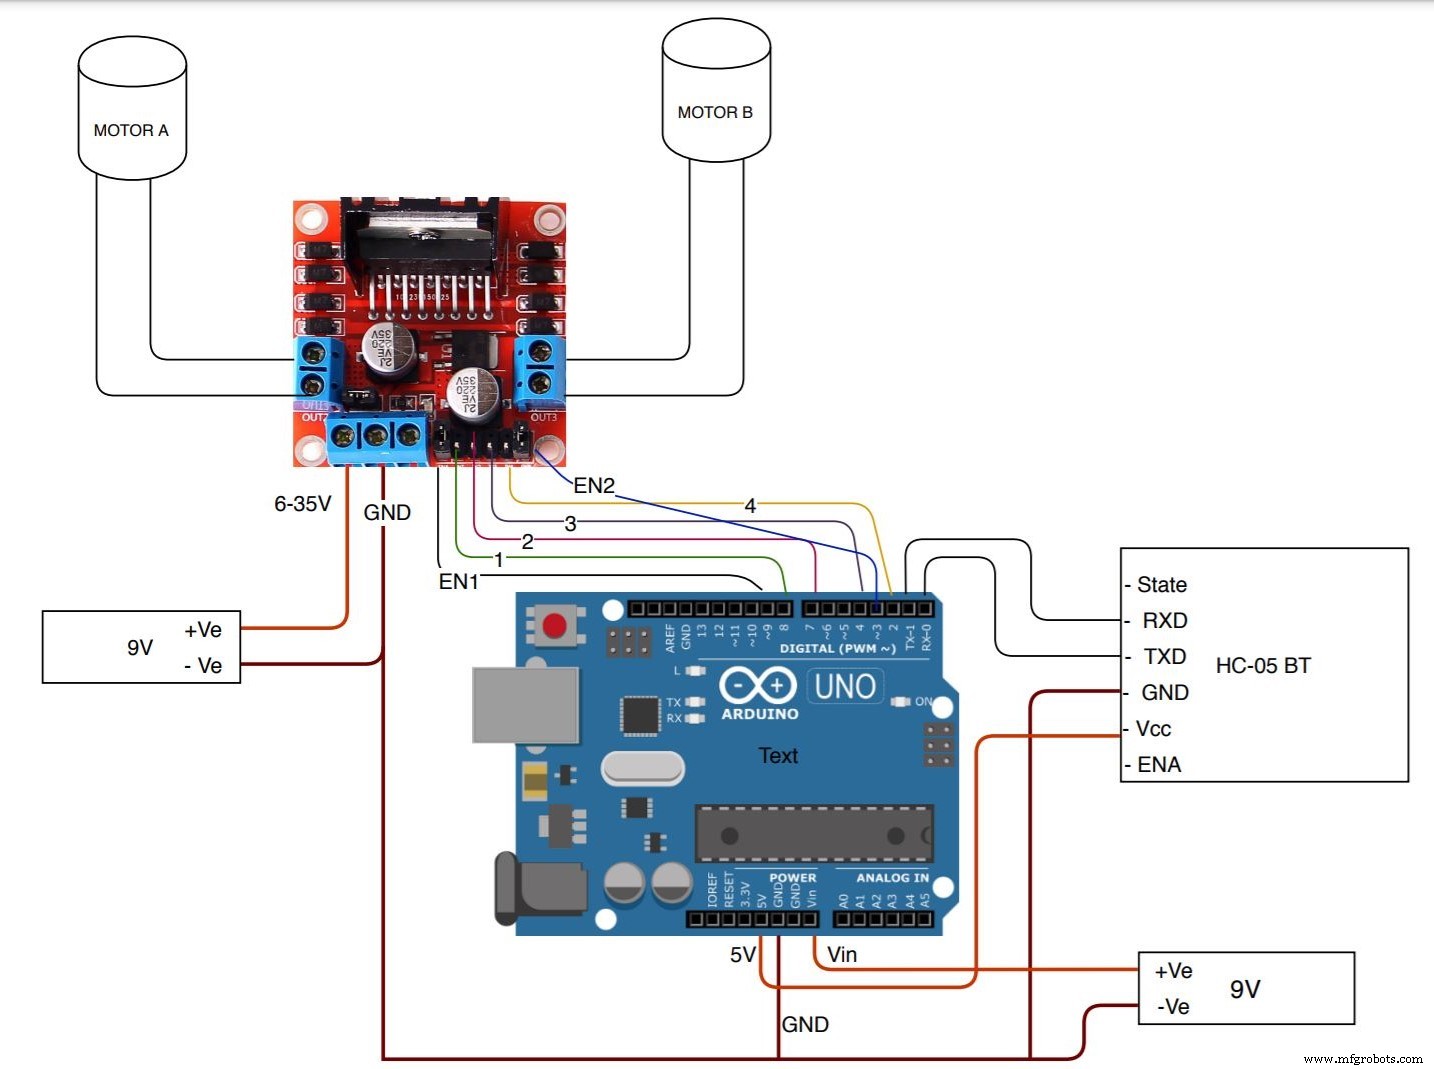
As shown above the circuit diagram, the L298 motor driver is powered by a 9V Battery, the two motor control outputs are connected to Motor A and Motor B and as the motor has no polarity you can connect any terminal to it, but make sure that both motors rotate in the same direction. Do not remove the 5V regulator jumper.
Note: if you power L298 with more than 12 volts the onboard 5V voltage regulator will be damaged.
Arduino Uno is also powered by a 9V battery with its positive terminal connected to the Vin pin of Arduino and the negative terminal to the common ground. Arduino in-turn will power the Bluetooth module, so connect the Vcc pin of HC-05 to 5V of Arduino and GND to ground.
For serial communication between HC-05 and Arduino, connect the TXD pin of HC-05 to the RX pin of Arduino and RXD pin of HC-05 to the TX pin of Arduino.
Now to control the L298 module you can connect the EN1 and EN2 pin with any PWM pin of the Arduino. And then connect L298's Input pin -1, 2, 3, 4 with any digital pin of Arduino.
Data Transmission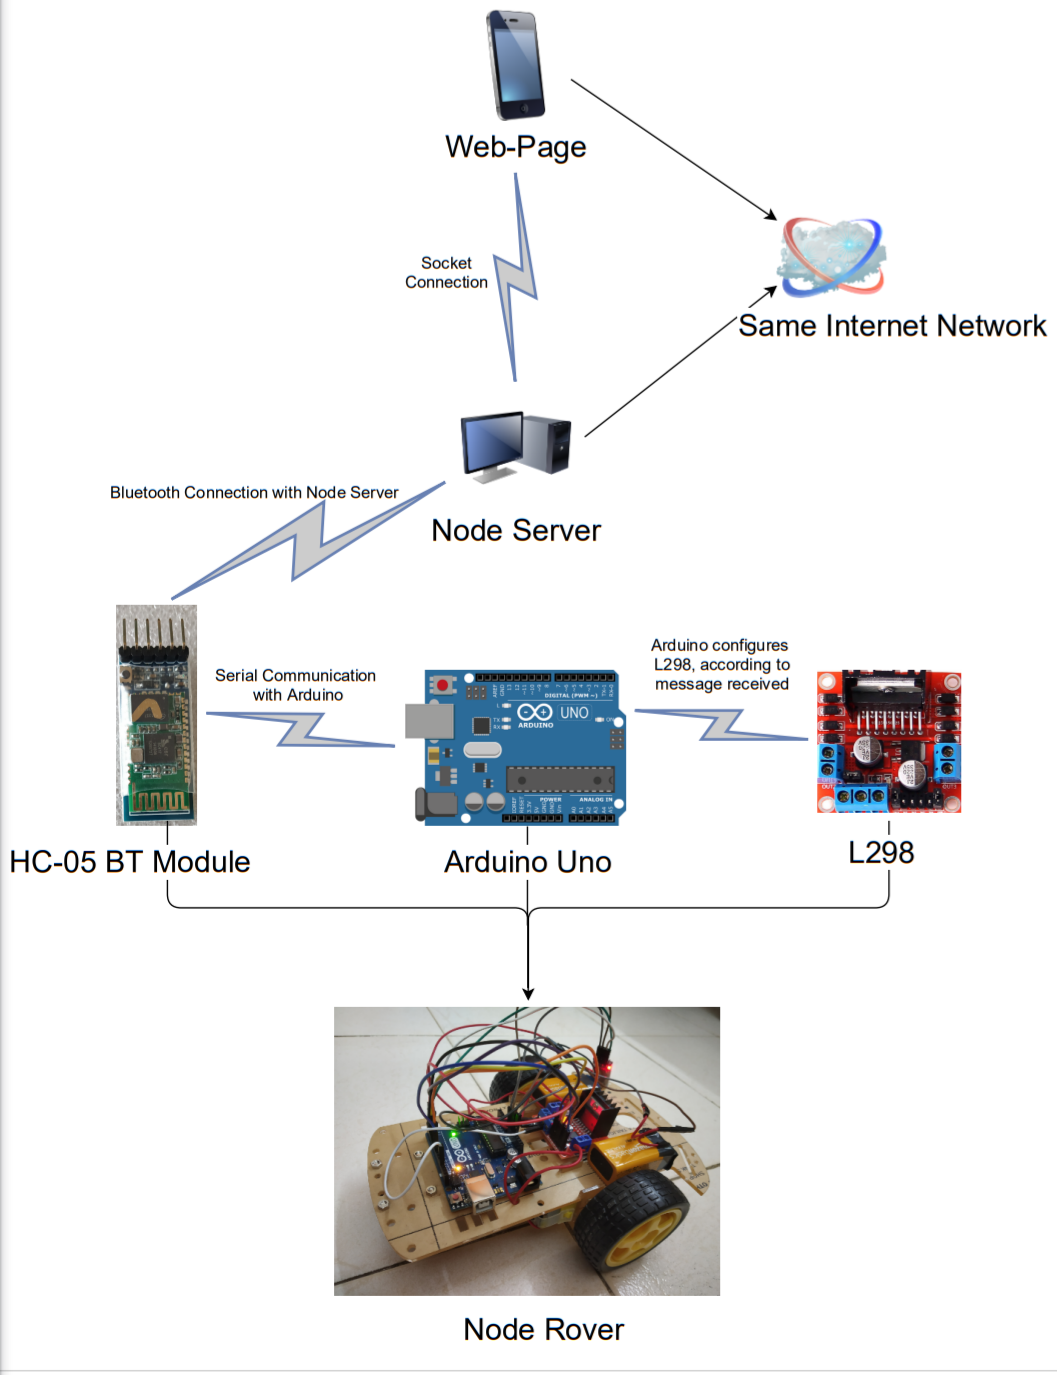
As shown above, is a diagram showing the transmission of signals.
1. The user will access the web-page served by the node server. The URL would be the IP address with port number used, for e.g- "192.XXX.XXX.129:8080".
2. When the user clicks a button on the web-page, it will trigger the server to perform the required function. This communication happens due to Sockets.
3. The Node server which is connected to the HC-05 module via Bluetooth, will send the required data to the HC-05 module.
4. The HC-05 will transmit data to Arduino UNO using serial communication.
5. The Arduino UNO in turn will control the L298 module.
Step 2- Setting up the serverFor our server, we need to install Node.js. Install any stable version of node, mine is 11.15 version. We need to install the following packages-
- node-gyp
- express
- node-bluetooth
- socket.io
- ejs
Note - Installation of "node-gyp" might be tricky as it does not support some latest version of Node, so better install version 11.15 of Node.
Now, we need to listen to events from a web page, as soon as an event is triggered while interacting with the web-page, the page will emit the required function which needs to be executed to our Node server. The server in turn will listen to that message and will execute the desired function (which is in our case, send data to Bluetooth).
So, create a server and web-page using packages like "express" and "EJS". Design the web-page with the controls you want and set up socket connections for it by creating a socket server, you can refer to this documentation.
For Bluetooth setup refer to this documentation. Whenever any control-button is clicked a message is sent to the HC-05 module.
Here is my simple web-page --
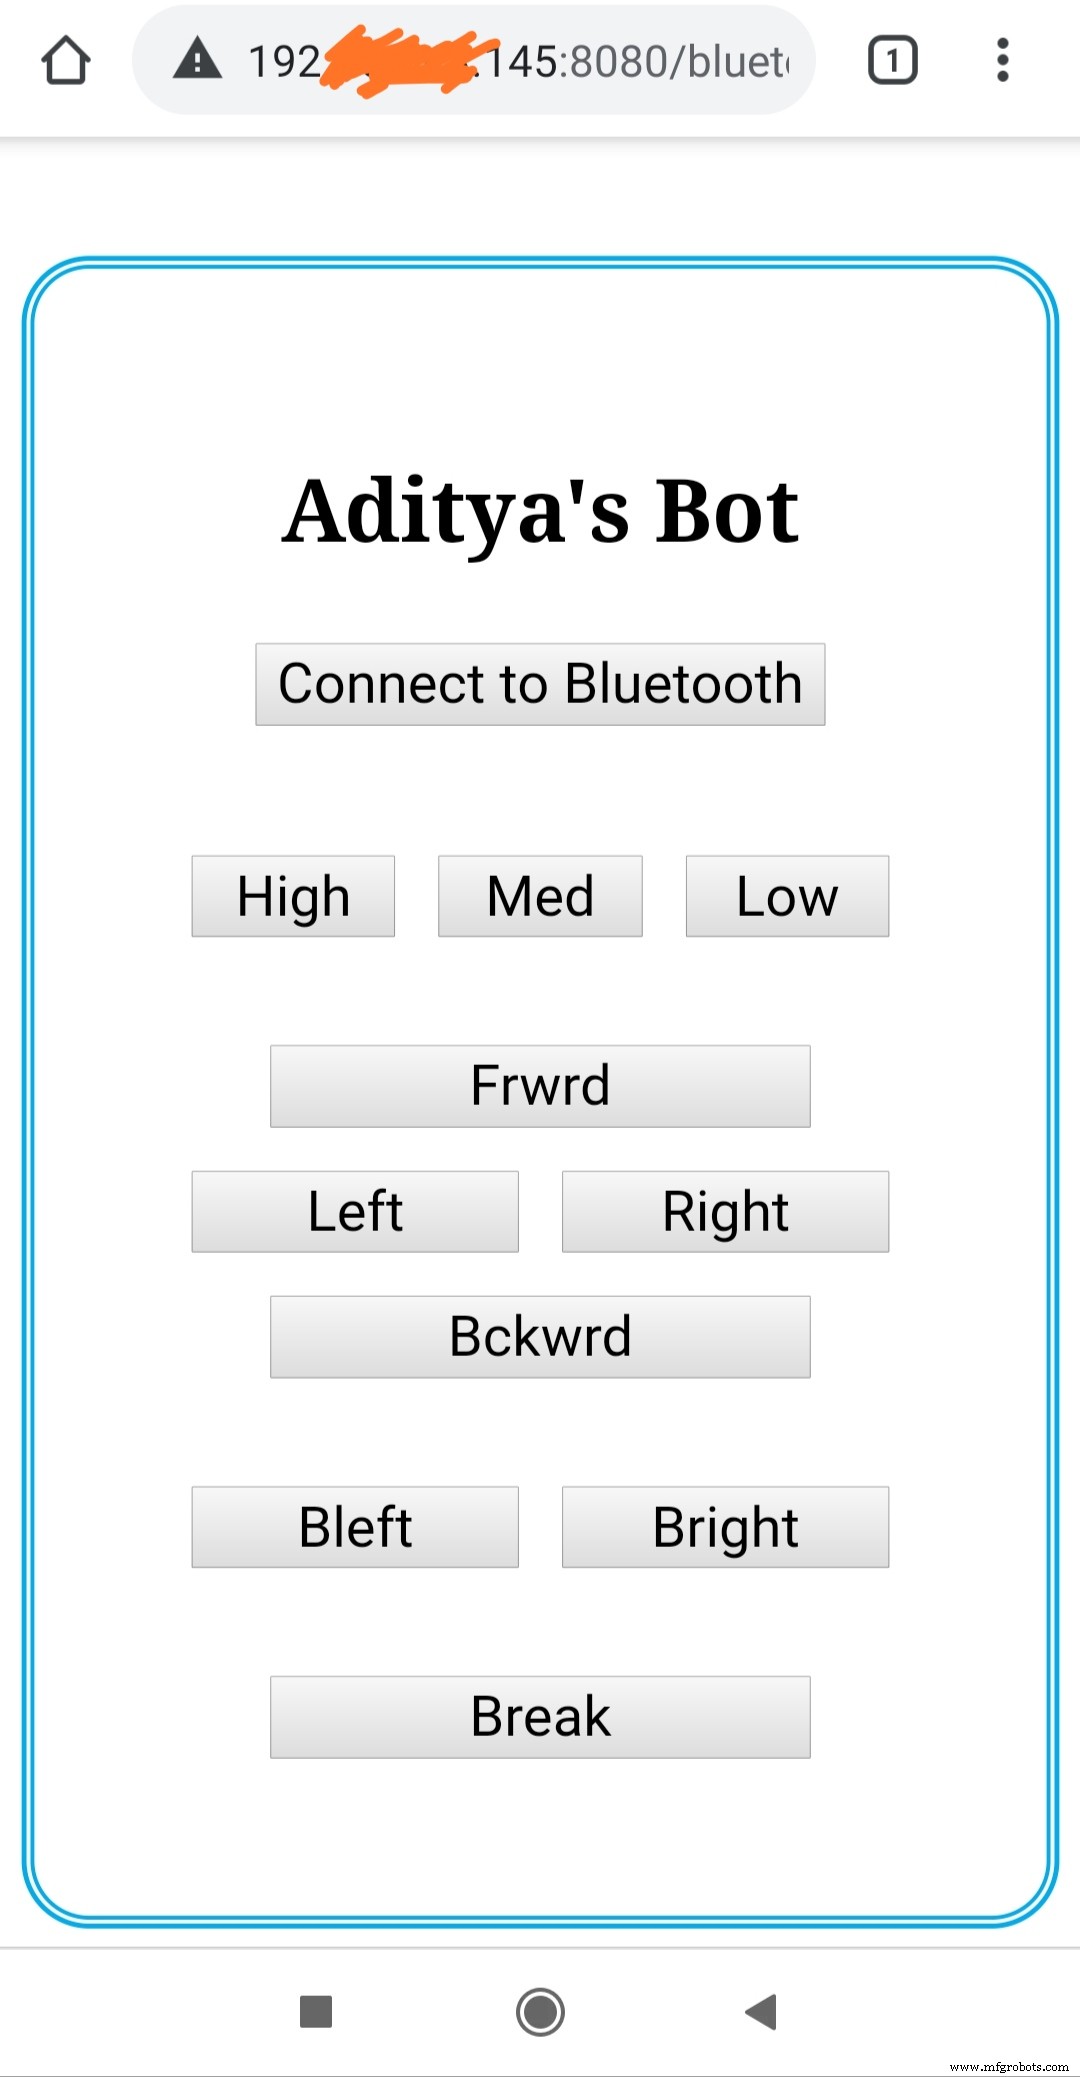
As Bluetooth will communicate with Arduino-Uno using Serial Communication we will send some "string" as a command and an additional letter which will tell us to terminate and capture the string.
For example-: for moving forward, Bluetooth will transmit "forwardT", and in the Arduino end as soon as we encounter the letter "T" we will know the serial communication is completed.
And with that incoming string command, we will configure the L298 driver to move forward, backward, left, right, alter the speed, etc.
Find the Arduino Code attached.
Step 4- Final ResultEnhancements and Future ScopeIn later stages, I am planning to control the rover using voice commands, and obstacle avoidance feature. I can also maintain a database where I will keep statistics records such as distance traveled, max speed, avg speed, etc. I will also add multiple sensors such as temperature, light, and humidity and will keep track of it at regular intervals which will get stored in our DB.
Next VersionCheck my next project "Voice Controlled Rover using Mobile"
Code
- Node Rover Arduino Code
Node Rover Arduino CodeArduino
const int en1 = 9;
const int en2 = 3;
const int inp1 = 2;
const int inp2 = 4;
const int inp3 = 7;
const int inp4 = 8;
char charRead;
String inputString = "";

void setup() {
  Serial.begin(9600);
  pinMode(en1, OUTPUT);
  pinMode(en2, OUTPUT);
  pinMode(inp1, OUTPUT);
  pinMode(inp2, OUTPUT);
  pinMode(inp3, OUTPUT);
  pinMode(inp4, OUTPUT);
}

void loop() {
  // put your main code here, to run repeatedly:
  if (Serial.available()) {
    charRead = Serial.read();
    if (charRead != 'T') {
      inputString += charRead;
    } else {
      if (inputString == "forward") {
        // To move Forward
        digitalWrite(inp1, HIGH);
        digitalWrite(inp2, LOW);
        digitalWrite(inp3, HIGH);
        digitalWrite(inp4, LOW);
      } else if (inputString == "backward") {
        // To move backward
        digitalWrite(inp1, LOW);
        digitalWrite(inp2, HIGH);
        digitalWrite(inp3, LOW);
        digitalWrite(inp4, HIGH);
      } else if (inputString == "fleft") {
        // To move left
        digitalWrite(inp1, HIGH);
        digitalWrite(inp2, LOW);
        digitalWrite(inp3, LOW);
        digitalWrite(inp4, LOW);
      } else if (inputString == "fright") {
        // To move right
        digitalWrite(inp1, LOW);
        digitalWrite(inp2, LOW);
        digitalWrite(inp3, HIGH);
        digitalWrite(inp4, LOW);
      }
      else if (inputString == "bleft") {
        // To move back left
        digitalWrite(inp1, LOW);
        digitalWrite(inp2, LOW);
        digitalWrite(inp3, LOW);
        digitalWrite(inp4, HIGH);
      }
      else if (inputString == "bright") {
        // To move back right
        digitalWrite(inp1, LOW);
        digitalWrite(inp2, HIGH);
        digitalWrite(inp3, LOW);
        digitalWrite(inp4, LOW);
      }
      else if (inputString == "break") {
        // To Stop
        analogWrite(en1, 50);
        analogWrite(en2, 50);
        delay(550);
        digitalWrite(inp1, LOW);
        digitalWrite(inp2, LOW);
        digitalWrite(inp3, LOW);
        digitalWrite(inp4, LOW);
        analogWrite(en1, 150);
        analogWrite(en2, 150);
      }
      else if (inputString == "maxspeed") {
        // Max speed
        analogWrite(en1, 250);
        analogWrite(en2, 250);
      }
      else if (inputString == "medspeed") {
        // Medium Speed
        analogWrite(en1, 180);
        analogWrite(en2, 180);
      }
      else if (inputString == "lowspeed") {
        // Low speed
        analogWrite(en1, 90);
        analogWrite(en2, 90);
      }
      else {
        // Stop
        digitalWrite(inp1, LOW);
        digitalWrite(inp2, LOW);
        digitalWrite(inp3, LOW);
        digitalWrite(inp4, LOW);
      }
      inputString = "";
    }
  }
}
Schematics

Manufacturing process
- Real‑Time Temperature & Humidity Monitoring via Web on Raspberry Pi 4
- From $4 Solar Light to a Smart Wireless Sensor Node: MSP430 + nRF24L01+ for Garden Monitoring
- Turn Your Raspberry Pi 4 Into a Web Server and Build Your Own Site
- Transform an Old RC Car into a Joystick‑Controlled Vehicle with Arduino
- Arduino-Based Nunchuk-Operated 6-DoF Robotic Arm Kit
- Build a Bluetooth‑Controlled Arduino Car: A Complete DIY Guide
- Bolt IoT Smart Robot Car – Arduino UNO & L298 Motor Drivers
- Build a Voice‑Controlled Arduino Car with BLE – DIY Guide
- Build a Precise PC‑Controlled Robotic Arm with Arduino Nano & Tower Pro MG996R Servos
- Bluetooth‑Controlled Car: DIY Arduino Remote Vehicle