


Control Your TV with Alexa: Arduino & ESP8266 Setup
Components and supplies
 |
| × | 1 | |||
 |
| × | 1 | |||
| × | 1 |
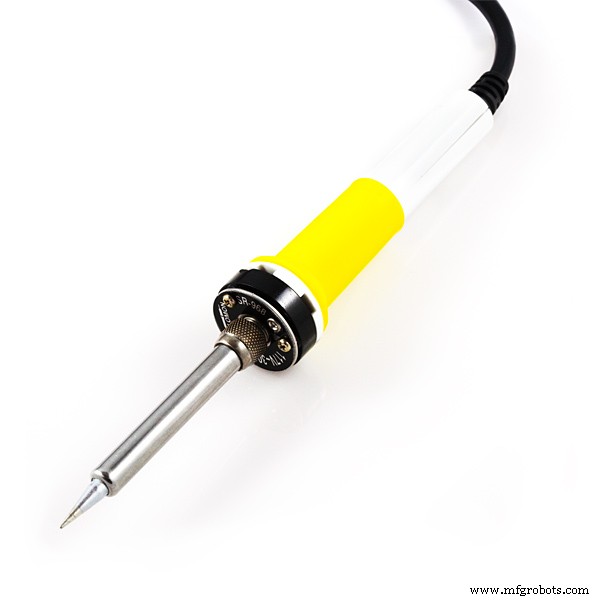
Necessary tools and machines
 |
|
Apps and online services
 |
|
About this project
Using Alexa to Control Your TV!Intro: So this project goes over how to use your Alexa to send commands and control your TV by talking to it. Anything your TV Remote can do, your Alexa can do. What we are going to do is record the remote IR Signals and use Alexa to resend those same signals when voice commanded. Here are the steps you need to make this happen or watch this YouTube video:
Step 1: Download Prerequisite LibrariesDownload the following libraries and put them into your Arduino IDE libraries:
- ESPAsyncTCP - https://github.com/me-no-dev/ESPAsyncTCP
- ESPAsyncUDP - https://github.com/me-no-dev/ESPAsyncUDP
- FauxMoESP - https://bitbucket.org/xoseperez/fauxmoesp > Downloads > Download Repository
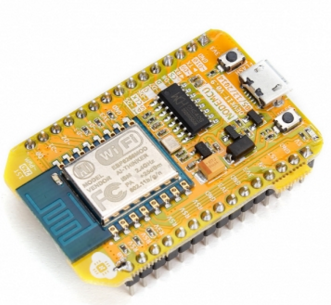
Open up the ESP8266-Alexa.ino sketch and upload it to your NodeMCU (download the board info from Board Manager in Arduino IDE). All you should need to change is the Wi-Fi Credentials and the Device Names.
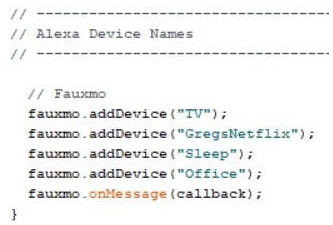
You can customize the Device Names in the ESP8266-Alexa.ino sketch and the Signals that go out in the IR-Alexa-Send.ino sketch:
Upload the IR_REMOTE_read.ino sketch to your Arduino to read the remote signal hits and record your IR signals received for reference later on as seen in this tutorial:
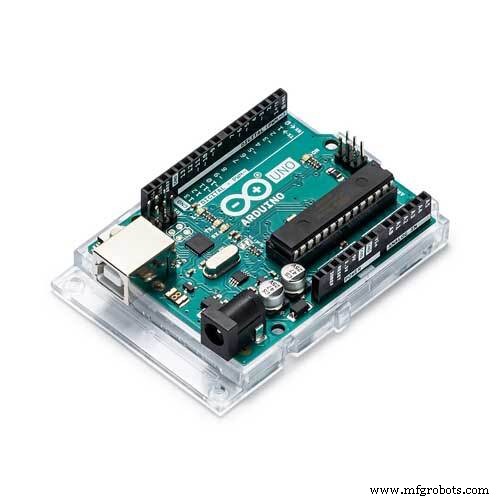
Step 4: Programming Arduino to Send TV IR Signals via AlexaNext, open up IR-Alexa-Send.ino in the Arduino IDE and upload it to your Arduino Uno (make sure you change the uploading board info to UNO).
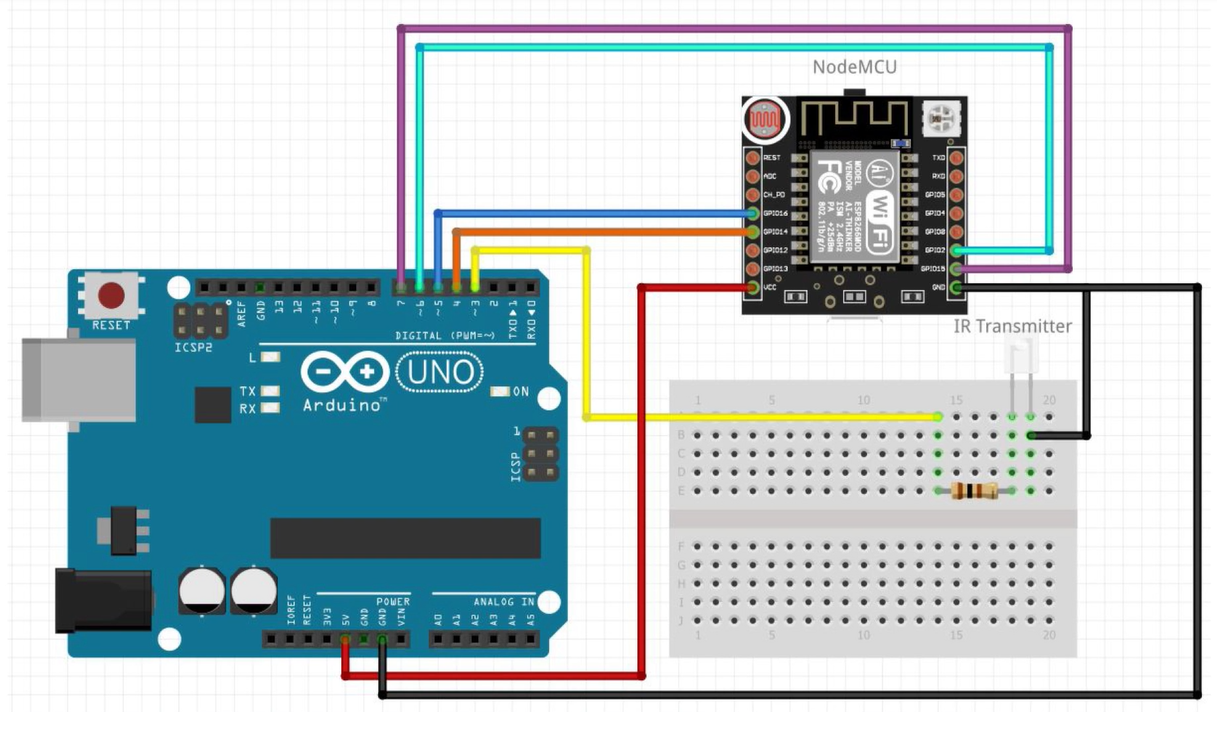
Wire up power to both modules and connecting wires between. Make sure IR transmitter is wired up to Terminal 3 of UNO. See attached schematic for more information:
Now go into your Amazon Alexa app on your mobile device or PC, go to your Smart Home and press "Add Devices" to find each of the commands you set in the ESP8266-Alexa.ino sketch.
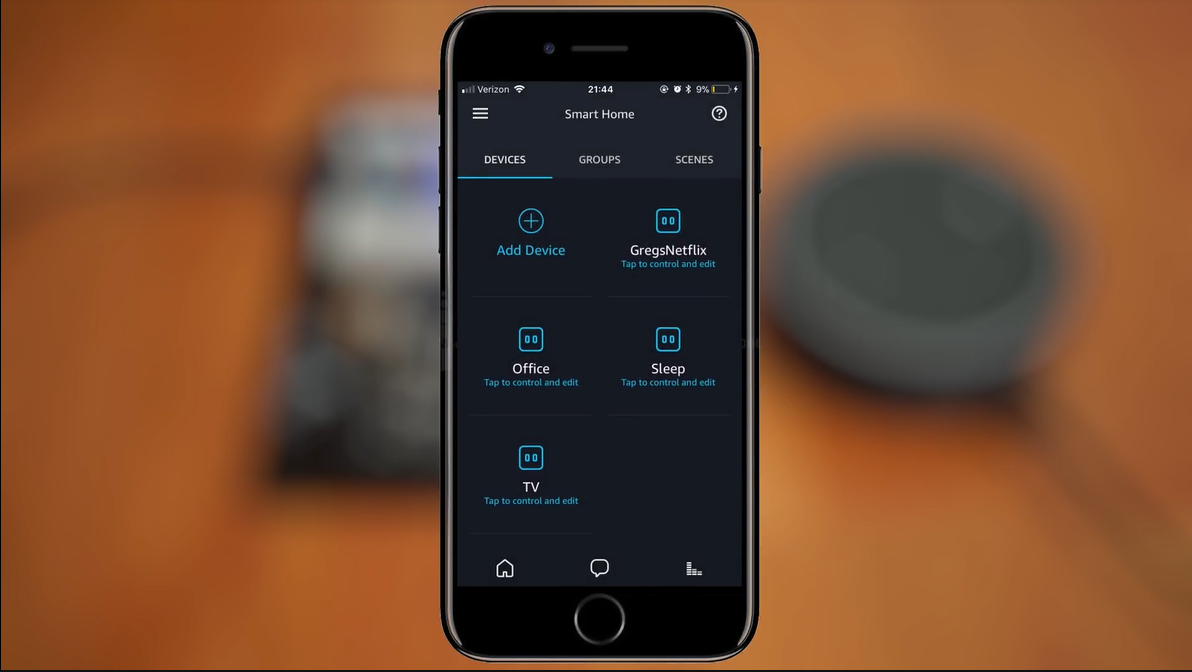
Once they are found you can test it using one of the following command structure:
- "Alexa, turn on DEVICE NAME"
- "Alexa, turn DEVICE NAME on"
- "Alexa, turn the DEVICE NAME on"
- "Alexa, turn on the DEVICE NAME"
Code
- ESP8266-Alexa.ino
- IR-Alexa-Send.ino
- IR_REMOTE_read.ino
ESP8266-Alexa.inoC/C++
This is to be written to the NodeMCU Chip to Emulate a "WEMO" Device via Arduino IDE#include <Arduino.h>
#include <ESP8266WiFi.h>
#include "fauxmoESP.h"
// -----------------------------------------------------------------------------
// Wifi Credentials
// -----------------------------------------------------------------------------
#define WIFI_SSID "linksys"
#define WIFI_PASS ""
#define SERIAL_BAUDRATE 115200
fauxmoESP fauxmo;
// -----------------------------------------------------------------------------
// Wifi
// -----------------------------------------------------------------------------
void wifiSetup() {
// Set WIFI module to STA mode
WiFi.mode(WIFI_STA);
// Connect
Serial.printf("[WIFI] Connecting to %s ", WIFI_SSID);
WiFi.begin(WIFI_SSID, WIFI_PASS);
// Wait
while (WiFi.status() != WL_CONNECTED) {
Serial.print(".");
delay(100);
}
Serial.println();
// Connected!
Serial.printf("[WIFI] STATION Mode, SSID: %s, IP address: %s\n", WiFi.SSID().c_str(), WiFi.localIP().toString().c_str());
}
// -----------------------------------------------------------------------------
// Initilize Pins
// -----------------------------------------------------------------------------
#define RELAY_PIN1 13
#define RELAY_PIN2 2
#define RELAY_PIN3 14
#define RELAY_PIN4 15
void setup() {
//initialize relay pins
pinMode(RELAY_PIN1, OUTPUT);
digitalWrite(RELAY_PIN1, LOW);
pinMode(RELAY_PIN2, OUTPUT);
digitalWrite(RELAY_PIN2, LOW);
pinMode(RELAY_PIN3, OUTPUT);
digitalWrite(RELAY_PIN3, LOW);
pinMode(RELAY_PIN4, OUTPUT);
digitalWrite(RELAY_PIN4, LOW);
// Init serial port and clean garbage
Serial.begin(SERIAL_BAUDRATE);
Serial.println();
Serial.println();
Serial.println("FauxMo demo sketch");
Serial.println("After connection, ask Alexa/Echo to 'turn pixels on' or 'off' or 'turn relay on' or 'off'");
// Wifi
wifiSetup();
// -----------------------------------------------------------------------------
// Alexa Device Names
// -----------------------------------------------------------------------------
// Fauxmo
fauxmo.addDevice("TV");
fauxmo.addDevice("GregsNetflix");
fauxmo.addDevice("Sleep");
fauxmo.addDevice("Office");
fauxmo.onMessage(callback);
}
// -----------------------------------------------------------------------------
// Alexa Operation Calls
// -----------------------------------------------------------------------------
void callback(uint8_t device_id, const char * device_name, bool state) {
Serial.printf("[MAIN] %s state: %s\n", device_name, state ? "ON" : "OFF");
if ( (strcmp(device_name, "TV") == 0) ) {
// adjust the relay immediately!
if (state) {
digitalWrite(RELAY_PIN1, HIGH);
} else {
digitalWrite(RELAY_PIN1, HIGH);
}
}
if ( (strcmp(device_name, "GregsNetflix") == 0) ) {
// adjust the relay immediately!
if (state) {
digitalWrite(RELAY_PIN2, HIGH);
} else {
digitalWrite(RELAY_PIN2, LOW);
}
}
if ( (strcmp(device_name, "Sleep") == 0) ) {
// adjust the relay immediately!
if (state) {
digitalWrite(RELAY_PIN3, HIGH);
} else {
digitalWrite(RELAY_PIN3, LOW);
}
}
if ( (strcmp(device_name, "Office") == 0) ) {
// adjust the relay immediately!
if (state) {
digitalWrite(RELAY_PIN4, HIGH);
} else {
digitalWrite(RELAY_PIN4, LOW);
}
}
}
void loop() {
fauxmo.handle();
delay(500);
digitalWrite(RELAY_PIN1, LOW);
digitalWrite(RELAY_PIN2, LOW);
digitalWrite(RELAY_PIN3, LOW);
digitalWrite(RELAY_PIN4, LOW);
}
IR-Alexa-Send.inoC/C++
This is Uploaded to the Arduino UNO to read signals from NodeMCU and send out the appropriate IR Signals via the IR Transmitting Diode#include <IRremote.h>
IRsend irsend;
#define a 4
#define b 5
#define c 6
#define d 7
void setup() {
Serial.begin(9600);
pinMode(a, INPUT);
pinMode(b, INPUT);
pinMode(c, INPUT);
pinMode(d, INPUT);
}
void loop() {
if (digitalRead(a) == HIGH) {
irsend.sendNEC(0x57E3E817, 32); //Power Code
Serial.println("TV");
delay(500);
}
if (digitalRead(b) == HIGH) {
irsend.sendNEC(0x57E354AB, 32); //Enter Key
delay(2000);
irsend.sendNEC(0x57E39867, 32); //Up Key
delay(1000);
irsend.sendNEC(0x57E39867, 32); //Up Key
delay(1000);
irsend.sendNEC(0x57E39867, 32); //Up Key
delay(1000);
irsend.sendNEC(0x57E3B44B, 32); //Right Key
delay(1000);
irsend.sendNEC(0x57E354AB, 32); //Enter
delay(2000);
irsend.sendNEC(0x57E354AB, 32); //Enter
Serial.println("The Office");
delay(500);
}
if (digitalRead(c) == HIGH) {
irsend.sendNEC(0x57E38679, 32); //Options Button
delay(1500);
irsend.sendNEC(0x57E3CC33, 32); //Down key
delay(700);
irsend.sendNEC(0x57E3CC33, 32); //Down key
delay(700);
irsend.sendNEC(0x57E3CC33, 32); //Down key
delay(700);
irsend.sendNEC(0x57E3CC33, 32); //Down key
delay(700);
irsend.sendNEC(0x57E3B44B, 32); //Right Key
delay(700);
irsend.sendNEC(0x57E3B44B, 32); //Right Key
delay(900);
irsend.sendNEC(0x57E38679, 32); //Options Button
Serial.println("Sleep Timer");
delay(500);
}
if (digitalRead(d) == HIGH) {
irsend.sendNEC(0x57E34AB5, 32); //Netflix Code
Serial.println("Greg's Netflix");
delay(500);
}
}
IR_REMOTE_read.inoC/C++
Use this Code on your Arduino to read the Clicker Hits coming from your Remote to the IR Receiver.//2017.06.22
#include <IRremote.h>
#include <LiquidCrystal.h>
/* HOW TO WIRE UP LCD SCREEN LEFT TO RIGHT PIN WITH PINS ON TOP SIDE
*
* GND - VCC - POT MIDDLE - 12 - GND - 11 - NONE - NONE - NONE - NONE - 5 - 4 - 9 - 2 - VCC - GND
*
* POT MUST HAVE 5V AND GND ON IT AND CAN ROTATE THE KNOB TO CHANGE LCD CONTRAST
*/
LiquidCrystal lcd(12, 11, 5, 4, 9, 2); //9 instead of 3 (NEED FOR TRANSMITTER)
int receiverpin = 10;
IRrecv irrecv(receiverpin);
decode_results results;
void setup() {
lcd.begin(16, 2);
pinMode(receiverpin, INPUT);
Serial.begin(9600);
irrecv.enableIRIn();
}
void loop() {
if (irrecv.decode(&results))
{
Serial.println(results.value, HEX);
irrecv.resume();
lcd.clear();
lcd.print(results.value, HEX);
delay(150);
}
}
Schematics
This is the Final Schematic Connecting the Arduino the NodeMCU (Wi-Fi Module)
Manufacturing process
- Why Thermoset Composites Are the Ideal Choice for Modern Manufacturing
- Control Your Ceiling Fan with Alexa: A Step-by-Step Guide
- Control an Arduino LED with Cortana via Bluetooth on Windows 10
- Control Your TV with Alexa via Arduino IoT Cloud – Step‑by‑Step Guide
- Control 65,280 Relays with Arduino: Expandable IO & Relay Solutions
- Control Your Robot with Brainwaves: A Comprehensive Arduino Project
- Hurco WinMax: Multi‑Language Control for Effortless, Reliable CNC Programming
- The Complete Guide to Human‑Machine Interfaces (HMI)
- Pro Guide: Drilling Metal with Your Machine – Expert Tips
- Quality Control: Ensuring Steel Integrity for Reliable Fabrication