


SomfyDuino: USB‑to‑Somfy IO Adapter for Arduino Nano
Components and supplies
 |
| × | 1 | |||
| × | 1 | ||||
| × | 1 |
Necessary tools and machines
 |
|
About this project
IdeationHi there,
I just tried to implement a USB to Somfy IO Adapter with an Arduino Nano to include my roller shutters in the living room. I wanted to connect to my DIY home automation system without having to get any cloud based hardware from the original supplier - and hey! IT WORKED - using just a simple IO remote.
You need:- A Somfy IO Remote - I used the GX037.
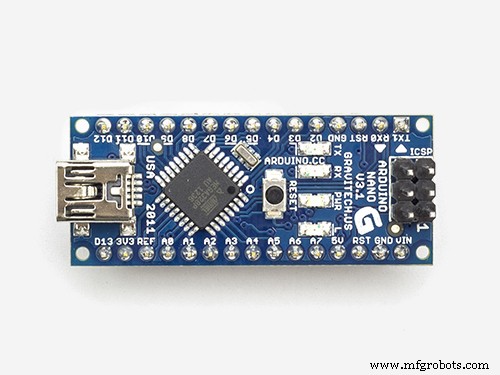
- Almost any Arduino with a USB connector will do - but soft serial also works.
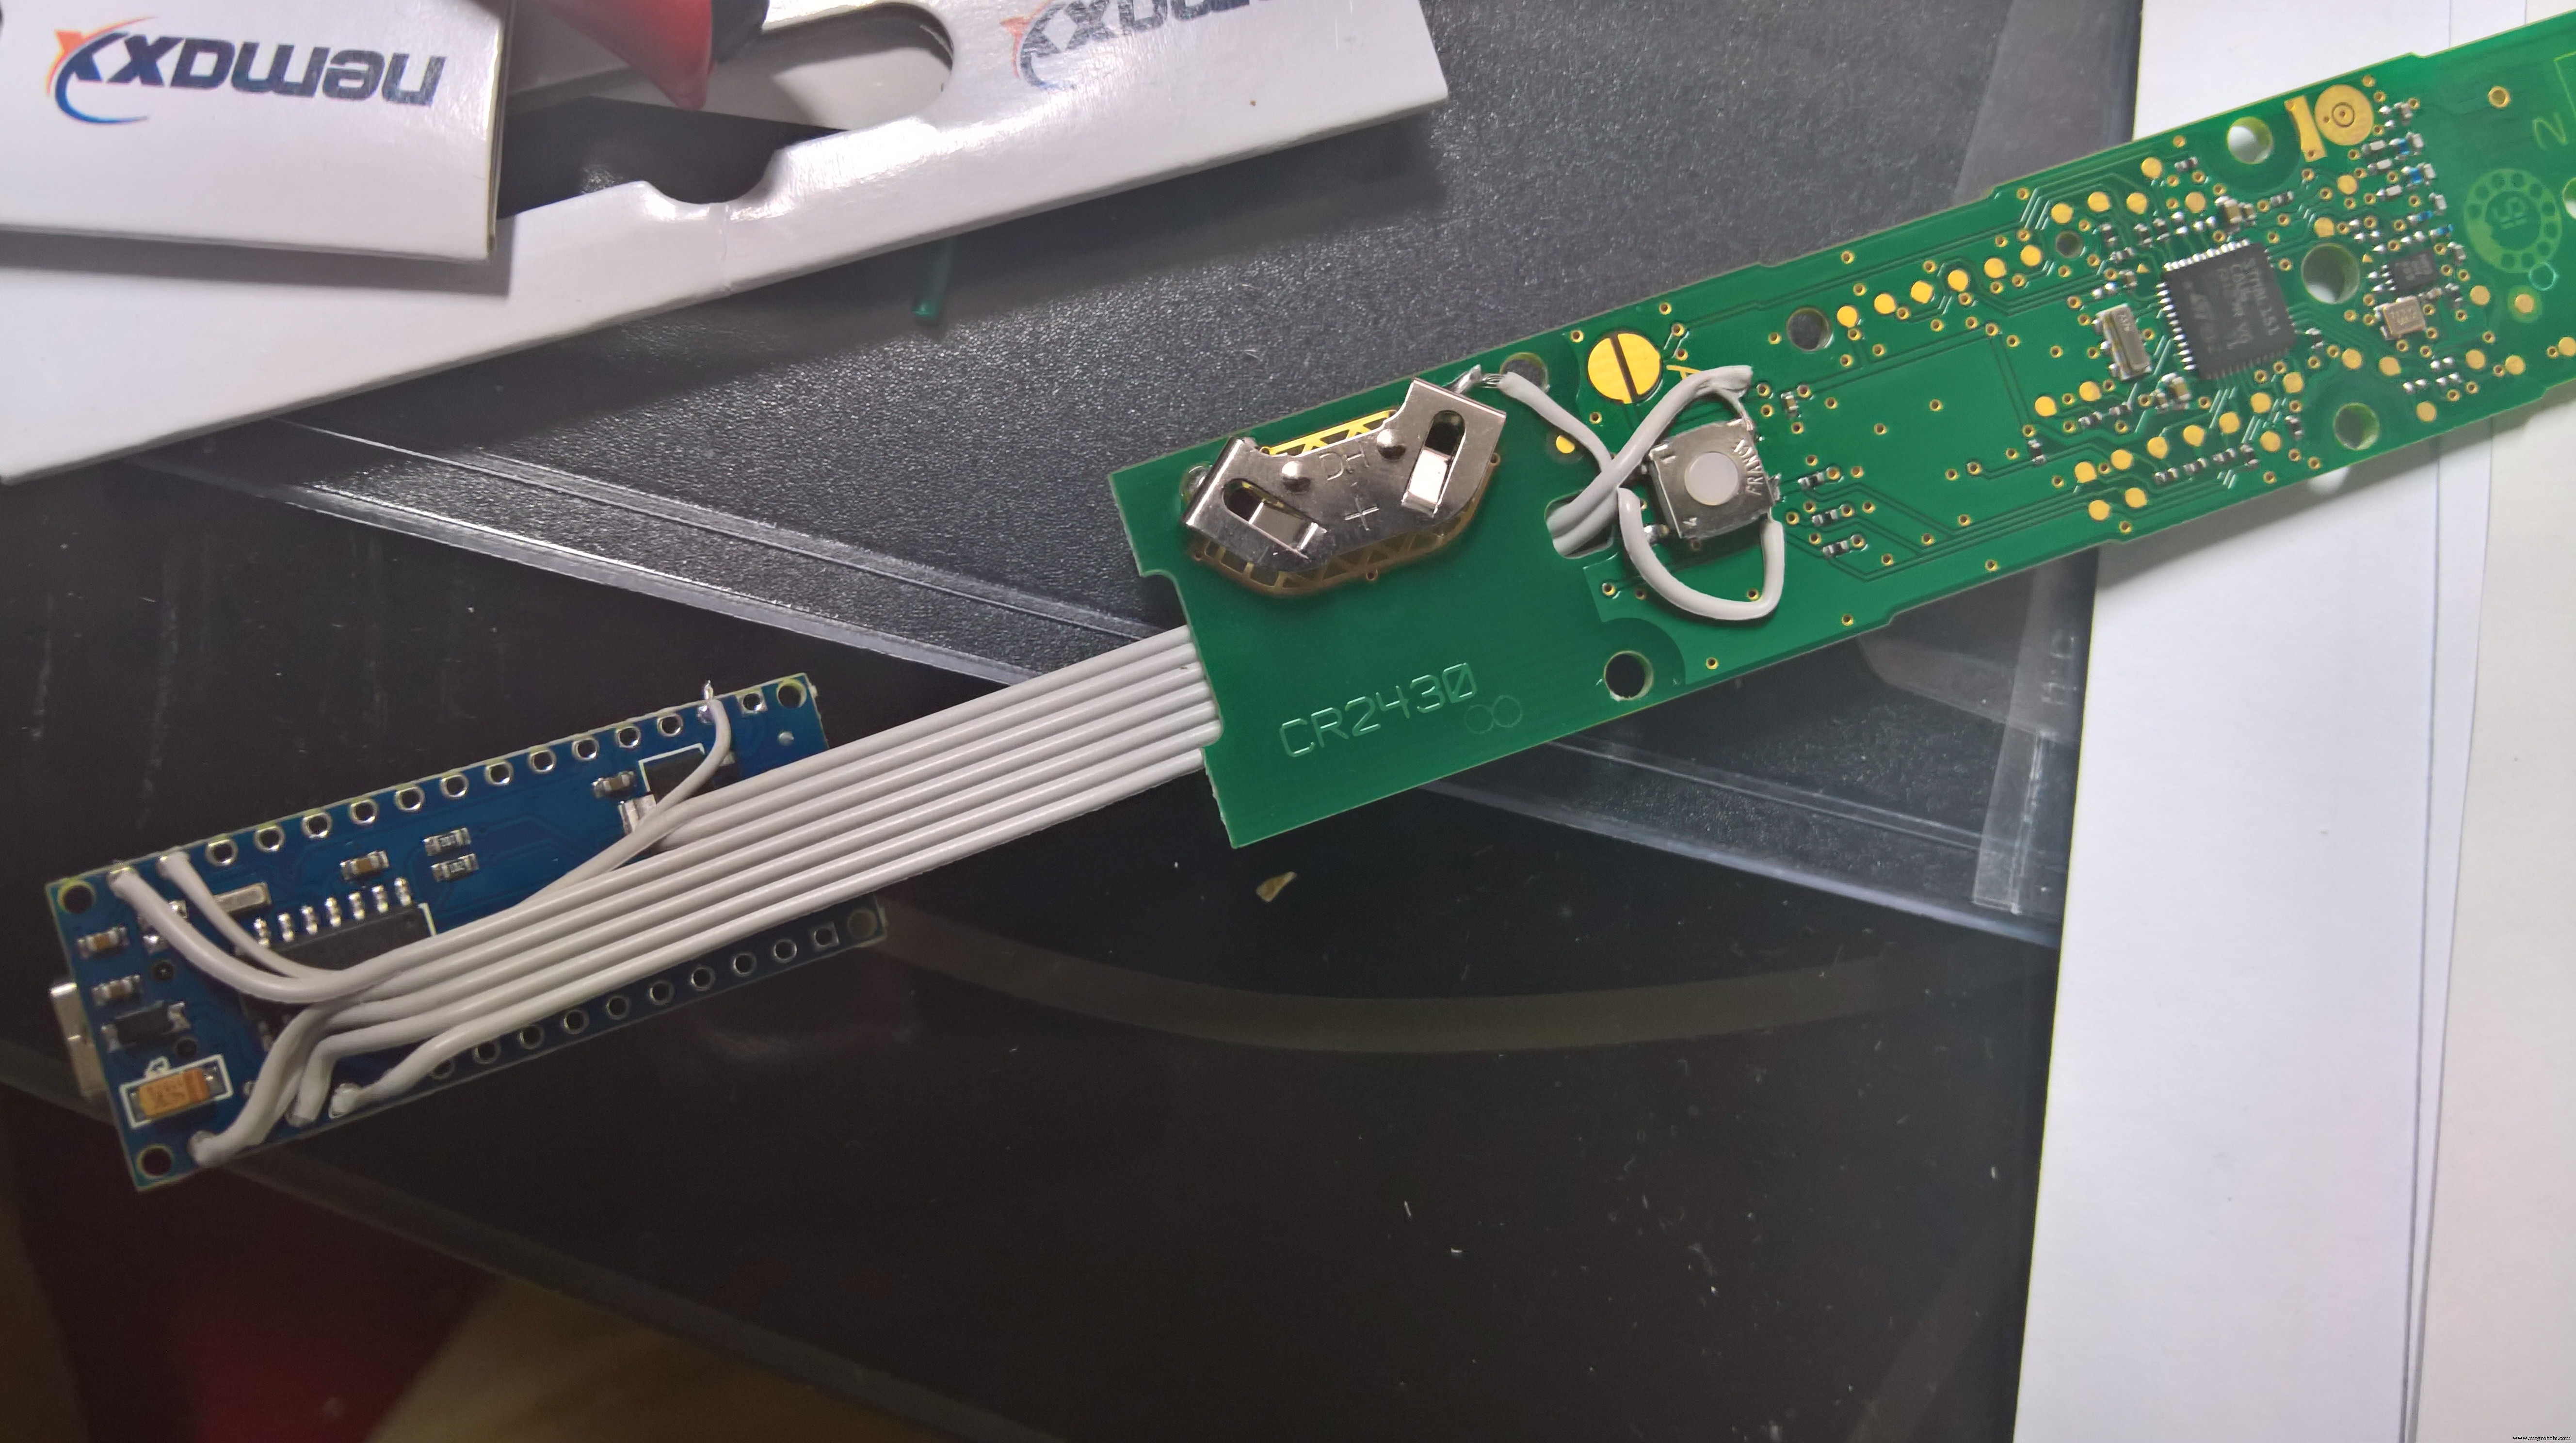
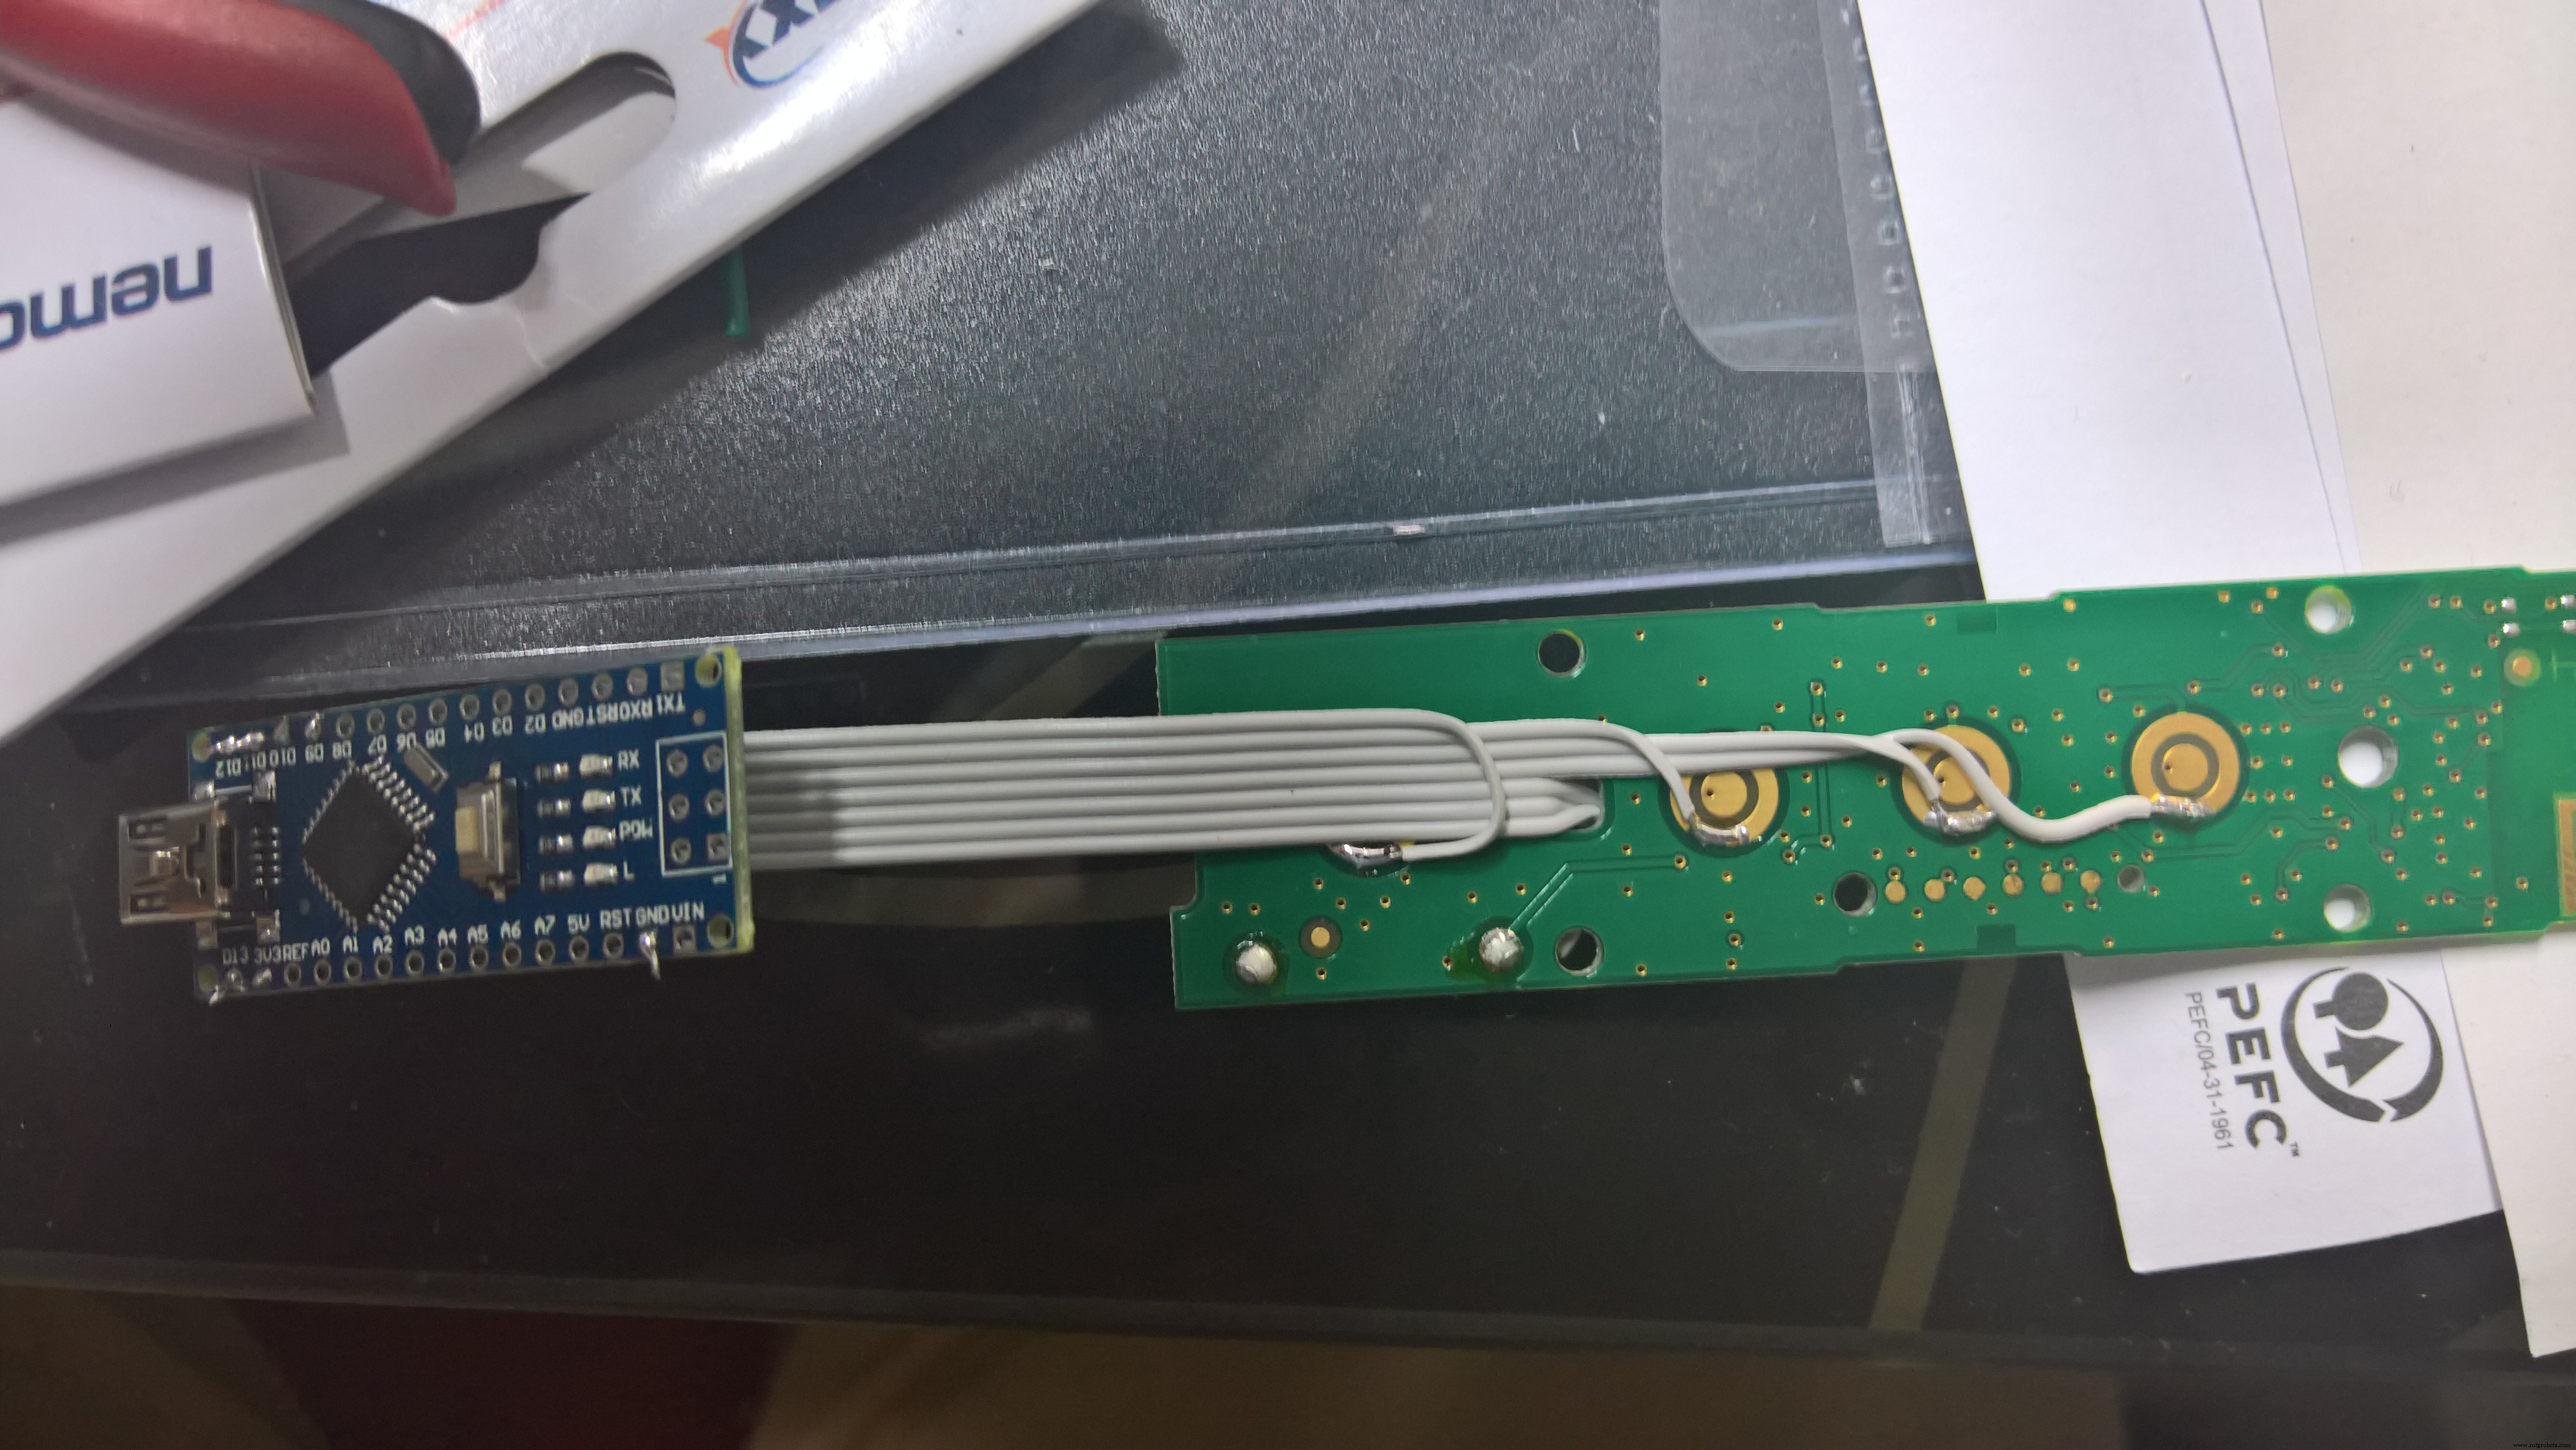
- A seven core flat cable and a shrink hose for neat packing.
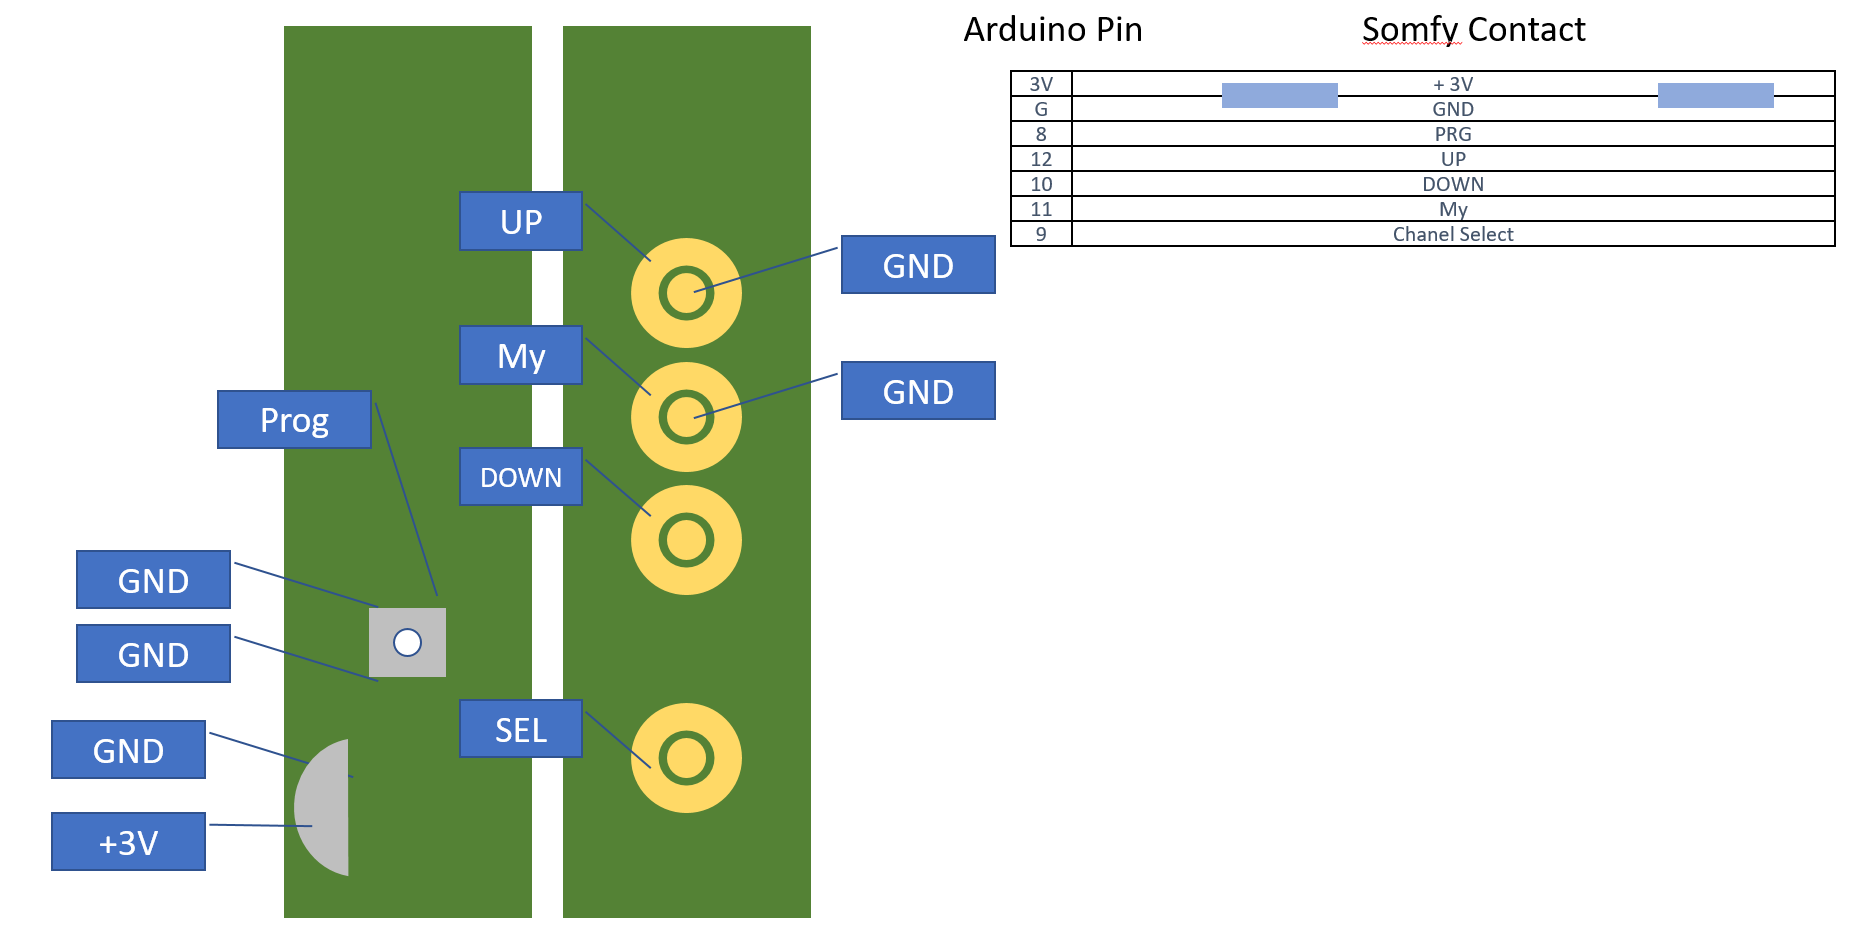
Wiring according to the attachments. The remote is powered through the Arduino - it uses about 20mA while sending, so you should be super fine. So make sure you remove the battery.
Concerning the code:If you want to connect the whole contraption to e.g. a RPi, you might want to consider removing all Serial.print items - it is way easier to communicate with the Arduino if it just listens and shuts up.
How to send commands is explained in the code.
Have fun - comments are welcome!
Cheers,
Bjoern
P.S. - I used a one channel remote. It basically uses the same layout as the 5 channel remote, but some parts (as the additional LEDs) are missing. I wonder if it will jump to different channels if SELECT is triggered. I have not tried yet because I was just glad I got one channel to work, but I'll keep this updated
P.P.S. just checked - the select button unfortunately has now effect - won't change channels but won't screw up the remote either.
Code
- Serial to Somfy
Serial to SomfyArduino
// SomfyDuino
// by Bjoern Foldenauer
// 05/2017


int progPin = 8;
int upPin = 12;
int downPin = 10;
int myPin = 11;
int selectPin = 9;
int ledPin = 13;

boolean upPress = false;
boolean downPress = false;
boolean myPress = false;
boolean progPress = false;
boolean selectPress = false;
unsigned long holdTime = 0;
int repeatSend = 0;

char incomingChar;

void setup() {
  Serial.begin(9600);
  Serial.println("SomfyDuino 0.71");
  Serial.println("Bjoern Foldenauer");
  Serial.println("-----");
  Serial.println("receives single serial characters like:");
  Serial.println("u - prepare to press UP");
  Serial.println("d - prepare to press DOWN");
  Serial.println("m - prepare to press My");
  Serial.println("p - prepare to press PROG");
  Serial.println("s - prepare to press SELECT");
  Serial.println("r - increase send count by one");
  Serial.println("any digit X - increase hold time by X*100 ms");
  Serial.println("e - Execute! Runs a defined (multi button) press and hold");
  /erial.println("");
  Serial.println("Example: regular UP: u5e ");
  Serial.println("         3 second UP/DOWN: ud9993e ");
  Serial.println("         5 second PROG: p999995e ");
  Serial.println("");

  pinMode(progPin, OUTPUT);
  pinMode(upPin, OUTPUT);
  pinMode(downPin, OUTPUT);
  pinMode(myPin, OUTPUT);
  pinMode(ledPin, OUTPUT);
  pinMode(selectPin, OUTPUT);
  digitalWrite(progPin, HIGH);
  digitalWrite(upPin, HIGH);
  digitalWrite(downPin, HIGH);
  digitalWrite(myPin, HIGH);
  digitalWrite(selectPin, HIGH);
  digitalWrite(ledPin, LOW);
}

void loop() {

  while (Serial.available() == 0) { delay(50); } // wait until serial command comes in
  if (Serial.available() > 0) {
    incomingChar = Serial.read();
    Serial.println(incomingChar);
    if (incomingChar == 'u') {upPress = true;}
    if (incomingChar == 'd') {downPress = true;}
    if (incomingChar == 'm') {myPress = true;}
    if (incomingChar == 'p') {progPress = true;}
    if (incomingChar == 's') {selectPress = true;}
    if (incomingChar == '1') {holdTime += 100;}
    if (incomingChar == '2') {holdTime += 200;}
    if (incomingChar == '3') {holdTime += 300;}
    if (incomingChar == '4') {holdTime += 400;}
    if (incomingChar == '5') {holdTime += 500;}
    if (incomingChar == '6') {holdTime += 600;}
    if (incomingChar == '7') {holdTime += 700;}
    if (incomingChar == '8') {holdTime += 800;}
    if (incomingChar == '9') {holdTime += 900;}
    if (incomingChar == 'r') {repeatSend++;}
    if (incomingChar == 'e') {somSend();}
  }
}

void somSend() {
  Serial.print("Pressing: ");

  for(int i=0; i <= repeatSend; i++) {
    if (upPress) {digitalWrite(upPin, LOW); Serial.print("up ");}
    if (downPress) {digitalWrite(downPin, LOW); Serial.print("down ");}
    if (myPress) {digitalWrite(myPin, LOW); Serial.print("my ");}
    if (progPress) {digitalWrite(progPin, LOW); Serial.print("prog ");}
    if (selectPress) {digitalWrite(selectPin, LOW); Serial.print("select ");}
    digitalWrite(ledPin, HIGH);

    Serial.print("for ");
    Serial.print(holdTime);
    Serial.println(" ms");

    delay(holdTime);

    digitalWrite(progPin, HIGH);
    digitalWrite(upPin, HIGH);
    digitalWrite(downPin, HIGH);
    digitalWrite(myPin, HIGH);
    digitalWrite(selectPin, HIGH);
    digitalWrite(ledPin, LOW);

    delay(holdTime);
  }

  upPress = false;
  downPress = false;
  myPress = false;
  progPress = false;
  selectPress = false;


  holdTime = 0;
  repeatSend = 0;

  Serial.println("done.");
}
Schematics
No document.
Manufacturing process
- Remote Weather Monitoring with Raspberry Pi 3 and PubNub
- Build a Professional Raspberry Pi Universal Remote with LIRC
- Capturing IR Remote Commands on Raspberry Pi without LIRC: A Python UART Approach
- Remote Heart Rate Monitoring System with AWS IoT Alerts
- Arduino‑Based Remote‑Controlled Pet Feeder: DIY Kit & Build Guide
- Arduino PowerPoint Pointer – Seamless Wireless Presentation Control
- Build a 4WD IR Remote‑Controlled Arduino Robot Car Kit
- 5 Key Benefits of Remote Production Control for Modern Industry
- Professional Remote Control Manufacturing for Robotics
- Top 3 Benefits of Remote Monitoring for Manufacturing Efficiency