


Build a Reliable Personal Weather Station with Arduino, ESP8266, and ThingSpeak
Components and supplies
| × | 1 | ||||
 |
| × | 1 | |||
| × | 1 | ||||
 |
| × | 1 | |||
 |
| × | 1 | |||
 |
| × | 1 | |||
| × | 1 | ||||
| × | 1 | ||||
| × | 1 | ||||
| × | 1 | ||||
| × | 1 | ||||
| × | 1 | ||||
 |
| × | 1 | |||
 |
| × | 5 | |||
| × | 1 |
Necessary tools and machines
| ||||
 |
| |||
 |
| |||
| ||||
|
Apps and online services
 |
| |||
 |
|
About this project
Intro: Make a Personal Weather Station
Sitting in your room you start sweating or feel chill; you wonder how much would be the temperature in your room? or what would be the humidity? This happened with me some time back.
This lead to inception of Personal Weather Station, that monitors temperature, humidity, pressure and light intensity of your room and uploads it to a private channel on thingspeak.com.
Let's get started.
Step 1: Quick video
Here is a small video, that summaries every thing in 5 mins.
Click here to watch on youtube.
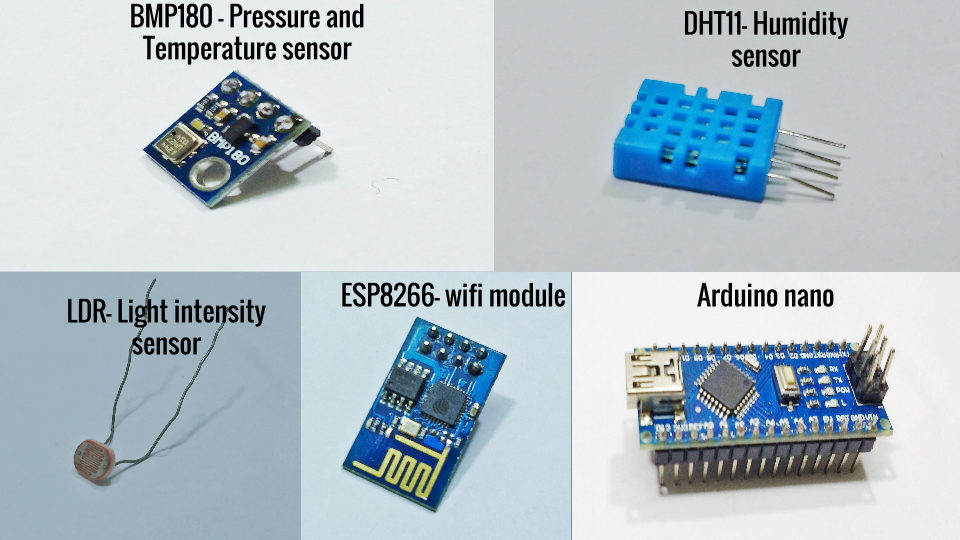
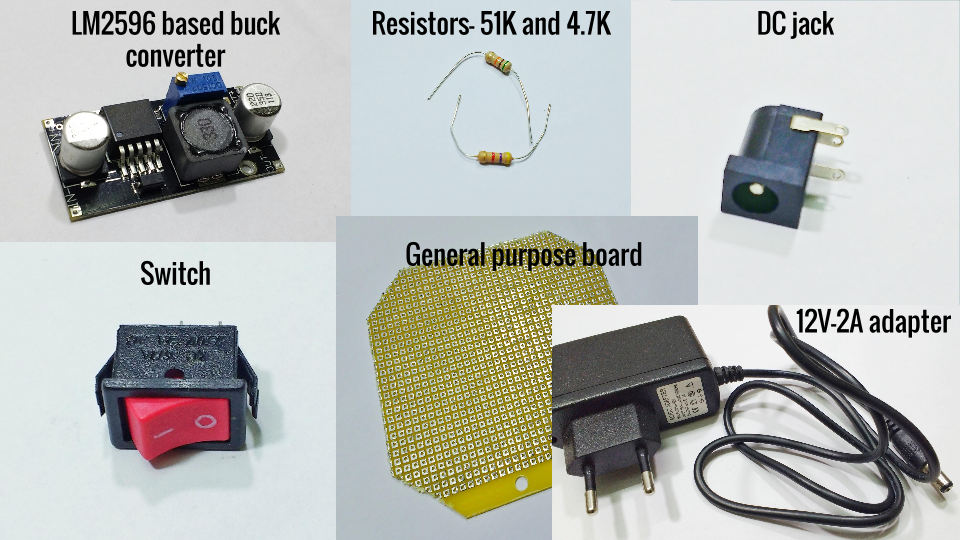
Step 2: Electronics components needed for Personal Weather Station
Description: We will use DHT11 to sense humidity, BMP180 to sense temperature and pressure and a Light Dependent Resistor(LDR) to get rough idea of light intensity. Arduino nano will gather data from these sensors and send to ESP8266 for uploading it to your private channel on thingspeak.com. We will power our Arduino nano from a 12V-2A wall adapter, sensors and ESP8266 will receive down converted voltage from LM2596 based buck converter.
List of components:
- BMP180 pressure and temperature sensor,
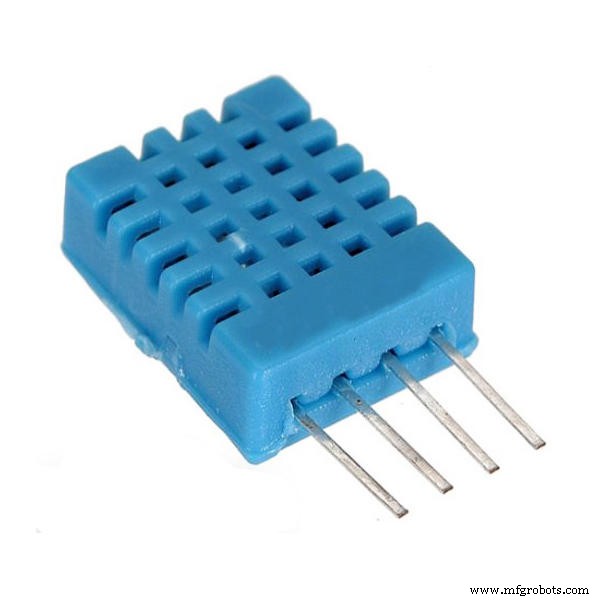
- DHT11 humidity sensor,
- Light Dependent Resistor (LDR),
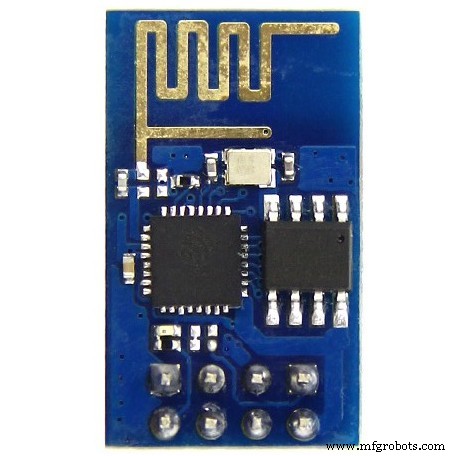
- ESP8266 wifi module(firmware ready),
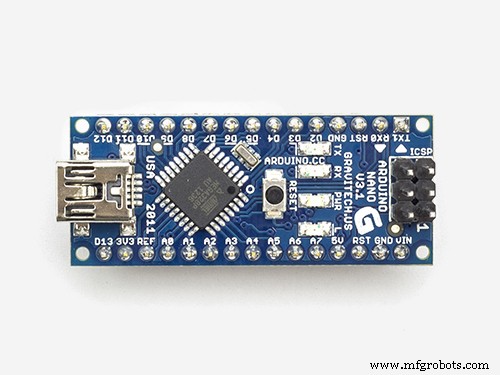
- Arduino nano,
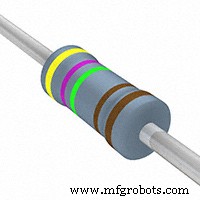
- 2 Resistors- 51 KOhm and 4.7 KOhm,
- LM2596 buck converter,
- DC jack,
- Switch and
- 12V-2A wall adapter.
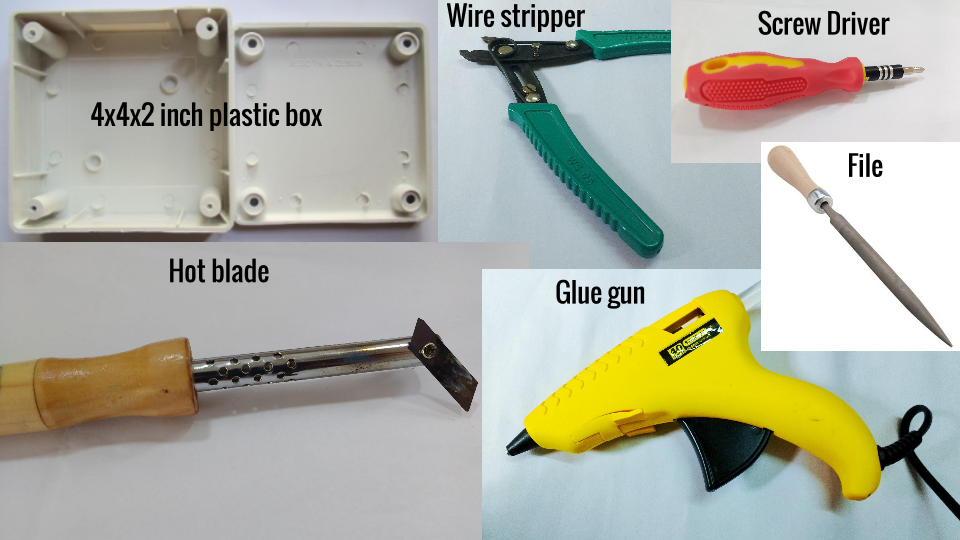
Step 3: Tools and extra items needed for Personal Weather Station
Description: We will use wire stripper for stripping wire, file for smoothing cuts/holes on enclosure, glue gun for placing components inside enclosure, screw driver to close the enclosure lid and solder iron with solder wire to assemble circuit on general purpose circuit board(GCB). 4x4x2 inch plastic box acts as enclosure. We will also need male and female berg strip along with female connectors for proper assembly on GCB.
List of Tools:
- Wire stripper,
- File,
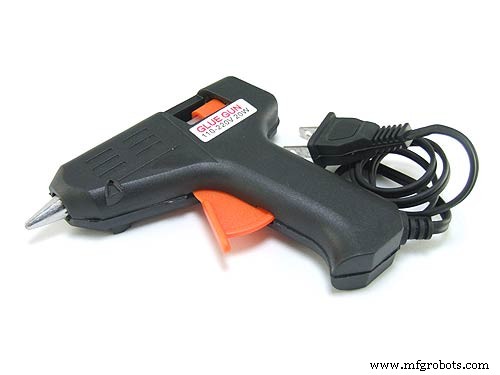
- Glue gun,
- Screw driver and
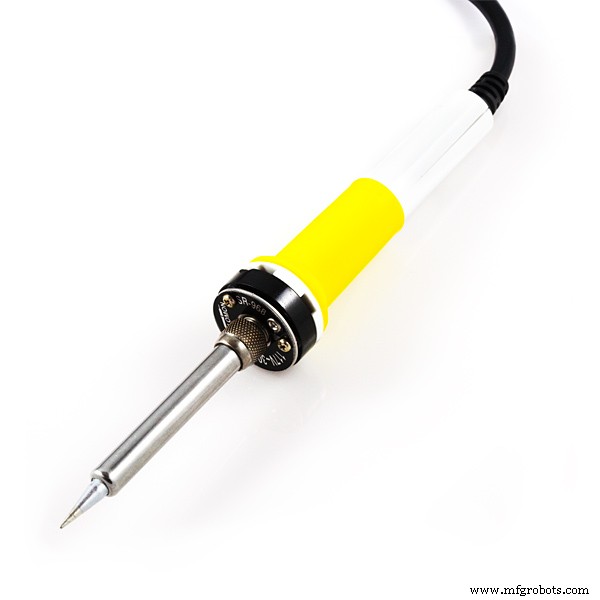
- Solder iron and solder wire.
List of Extra items:
- 4x4x2 inch plastic box (I used this dimension, any nearby dimensions should be fine),
- General purpose circuit board,
- male and female berg strip and
- female connectors.
Step 4: Software requirements
Description: In order to see the value of sensor data, we will need a private channel on thingspeak.com. We will need Arduino IDEto write arduino code for arduino nano. (I assume that you guys are in possession of PC/laptop and a wifi route with access to internet)
List of software requirements:
- Private channel on Thingspeak.com and
- Arduino IDE (Preferably latest version).
You can download latest version of Arduino IDE from arduino.cc. Now lets create a private channel on thingspeak.com.
Step 5: Creating private channel on Thingspeak.com
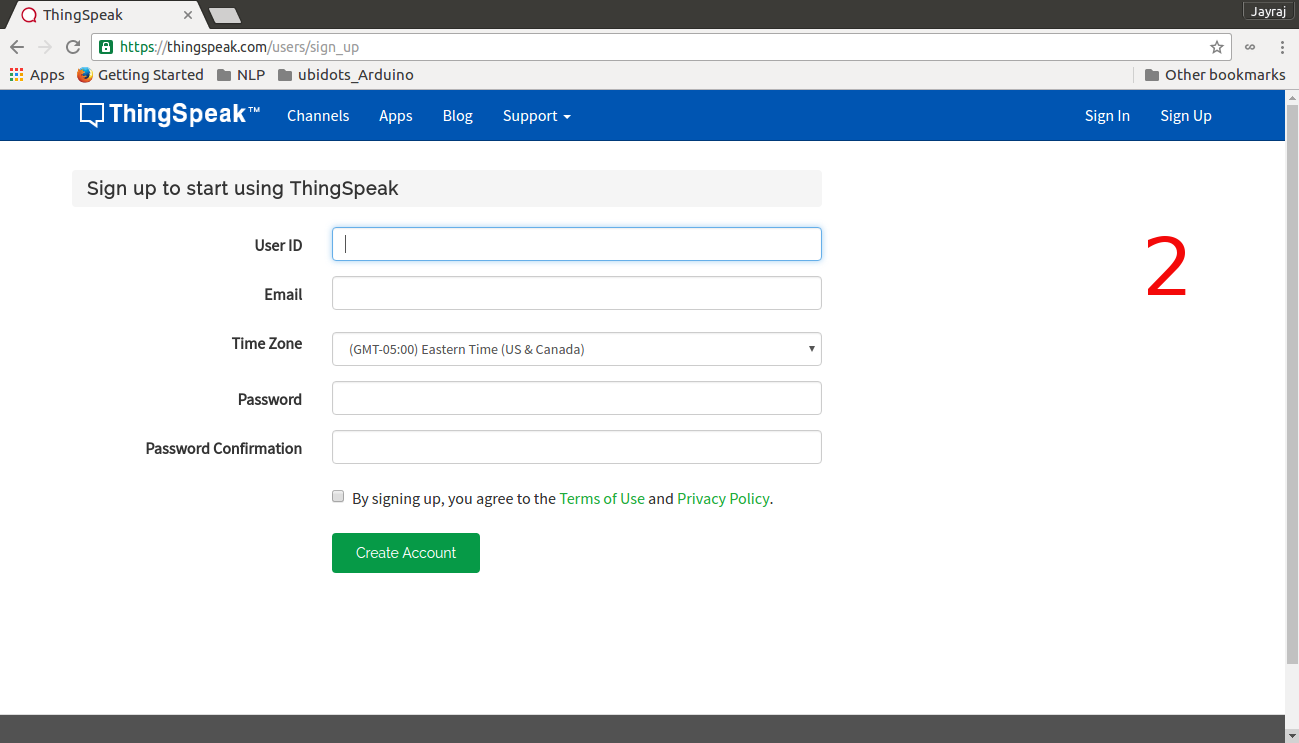
To make a private channel on thingspeak.com follow these steps:
- Open your web browser and go to thingspeak.com and click on 'Sign Up' tab in right top corner, (Image no.1)
- Fill in the details and click on 'Create account', (Image no.2)
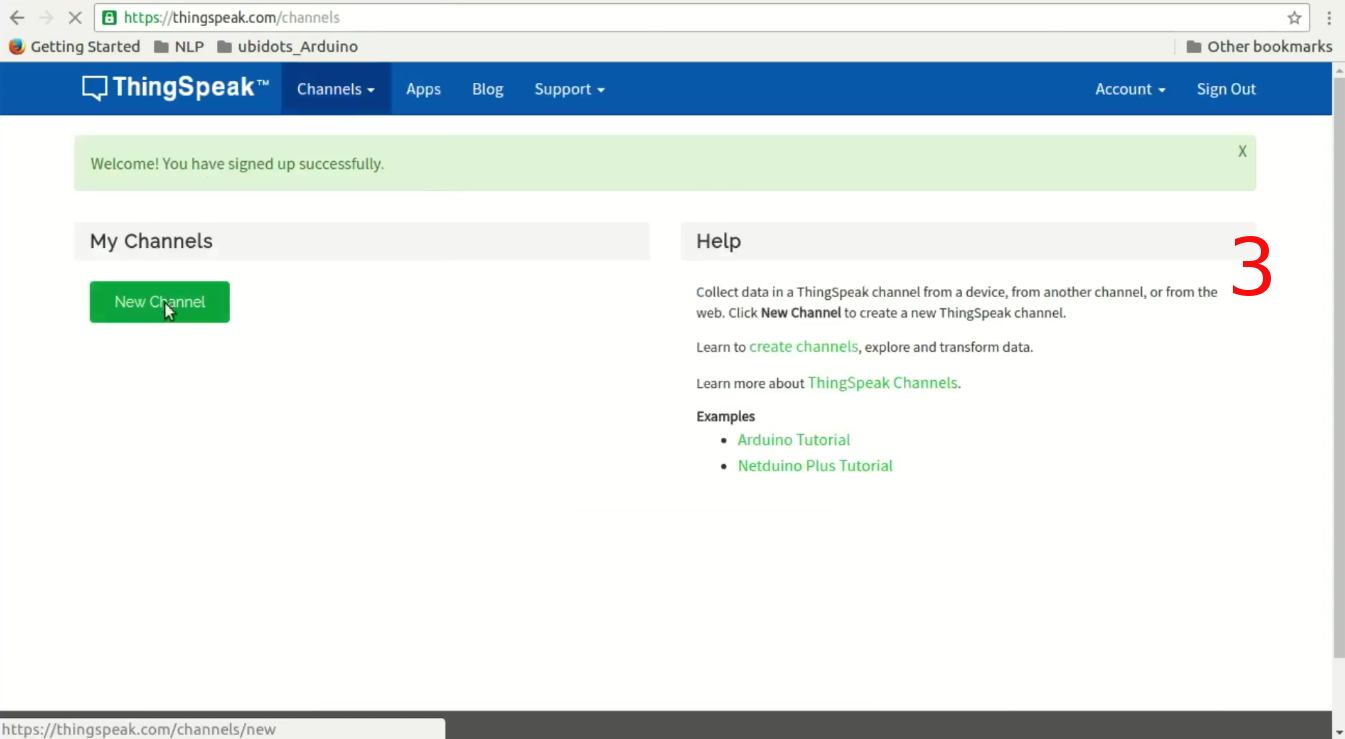
- Now click on 'New Channel' tab, (Image no.3)
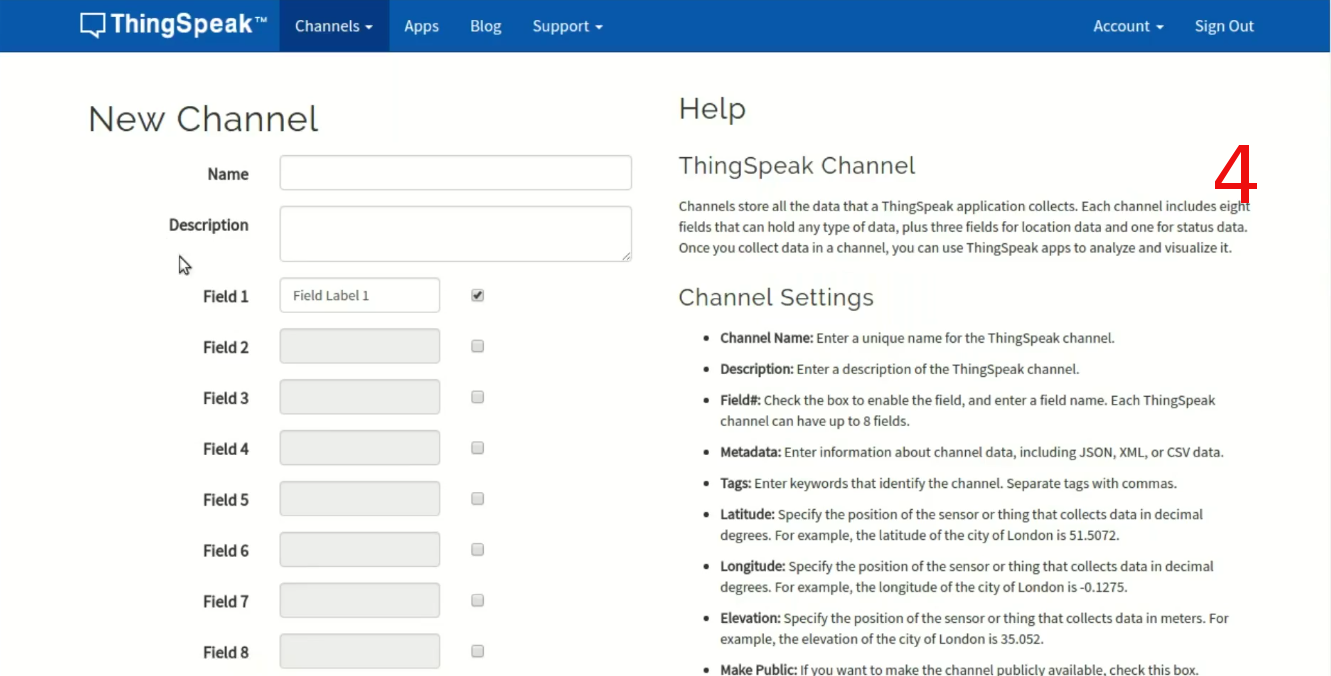
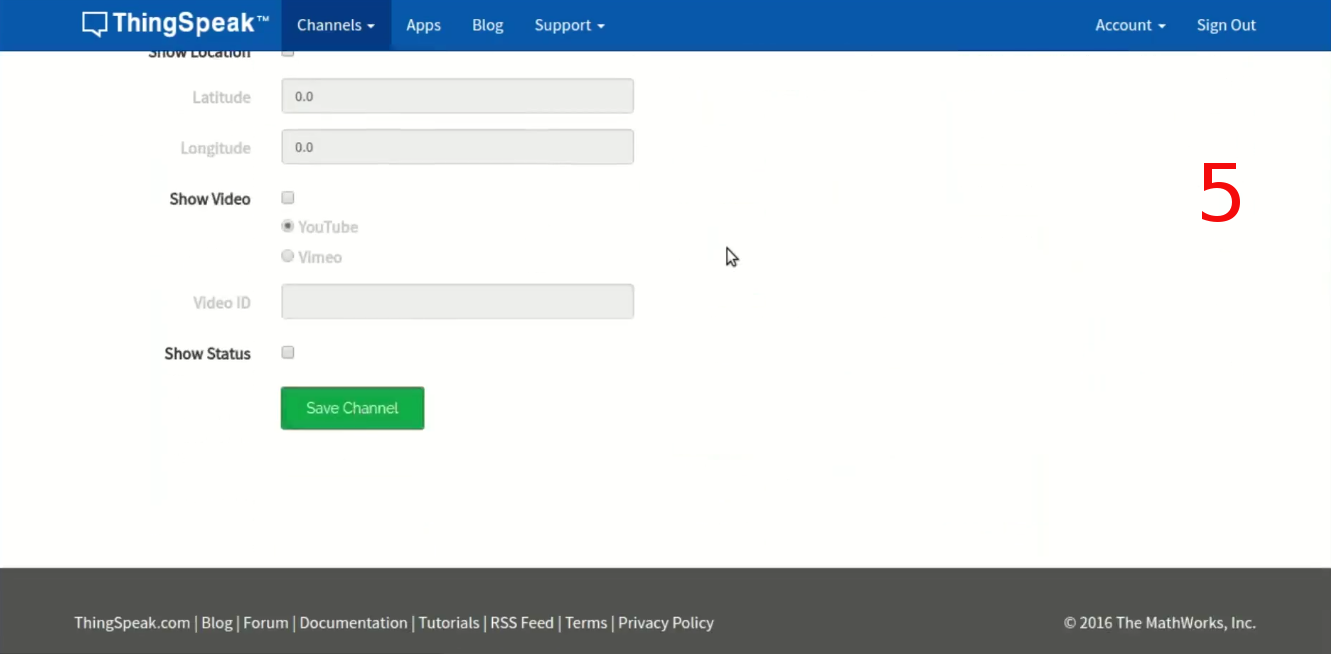
- Again fill in details for channel and enable 4 fields (as we will be sending 4 sensor values), scroll down and click on 'Save Channel' tab, (Image no.4/5)
- On this page click on 'API Keys' tab and note down your 'Write API Key'.

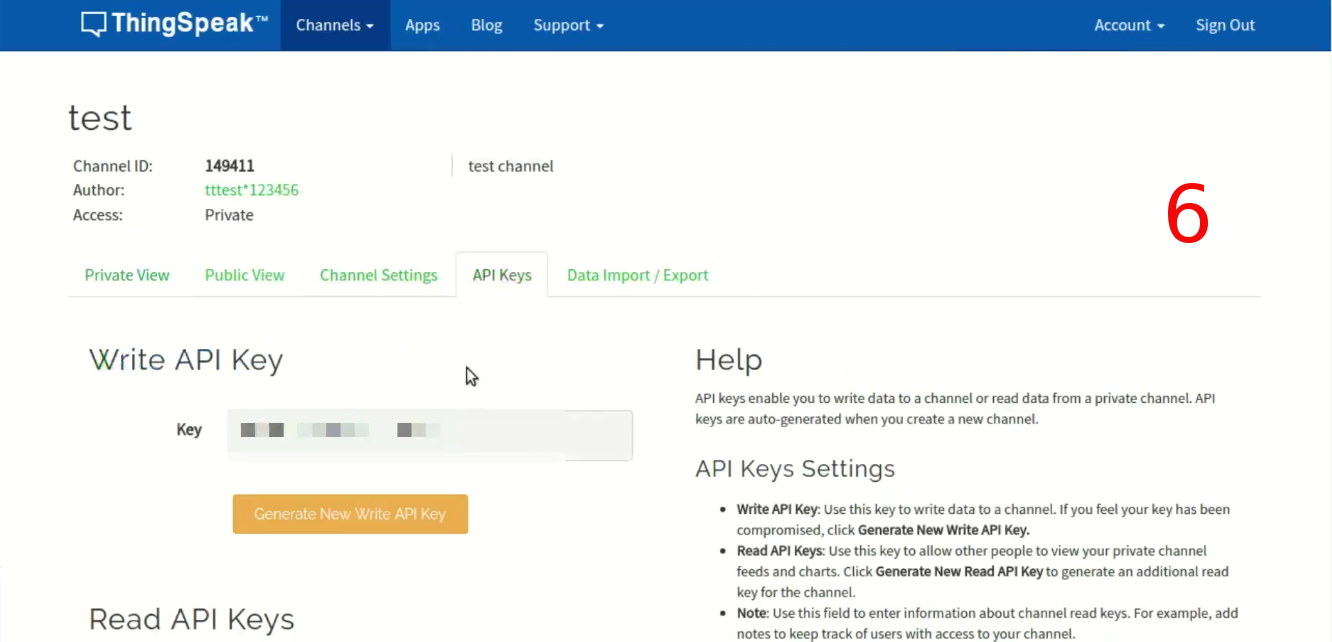
That's all folks, now you have your private ThingSpeak channel.
Now lets put all electronics component together.
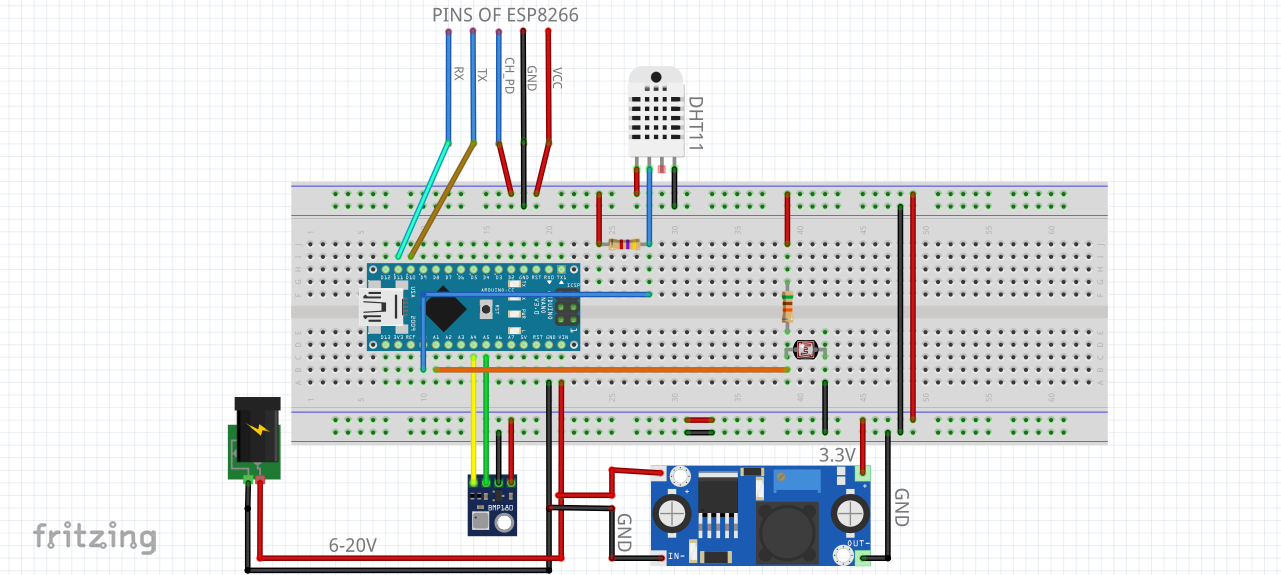
Step 6: Schematic for Personal Weather Station
Here I am attaching image of schematic for Personal Weather Station. I am also attaching fritzing file for the same. Connections are fairly simple.
- BMP180 connects to I2C port of arduino nano.
- LDR is connected in voltage divider fashion with 51 KOhm resistor and junction is connects to A1 pin of arduino nano.
- DHT11's data pin is pulled high with 4.7 KOhm resistor and connected to A0 pin of arduino nano.
- ESP8266's TX and RX connects to D10 and D11 of arduino nano respectively. ESP8266's CH_PD connects to 3.3V rail.
- Adjust LM2596 module's output to 3.3V by turning potentiometer on this module. Connect output of this module to Vcc and Gnd of BMP180,DHT11,LDR and ESP8266's Vcc and Gnd respectively.
- Input of LM2596 module comes from 12V-2A wall adapter which also connects to Vin and Gnd of Arduino nano.
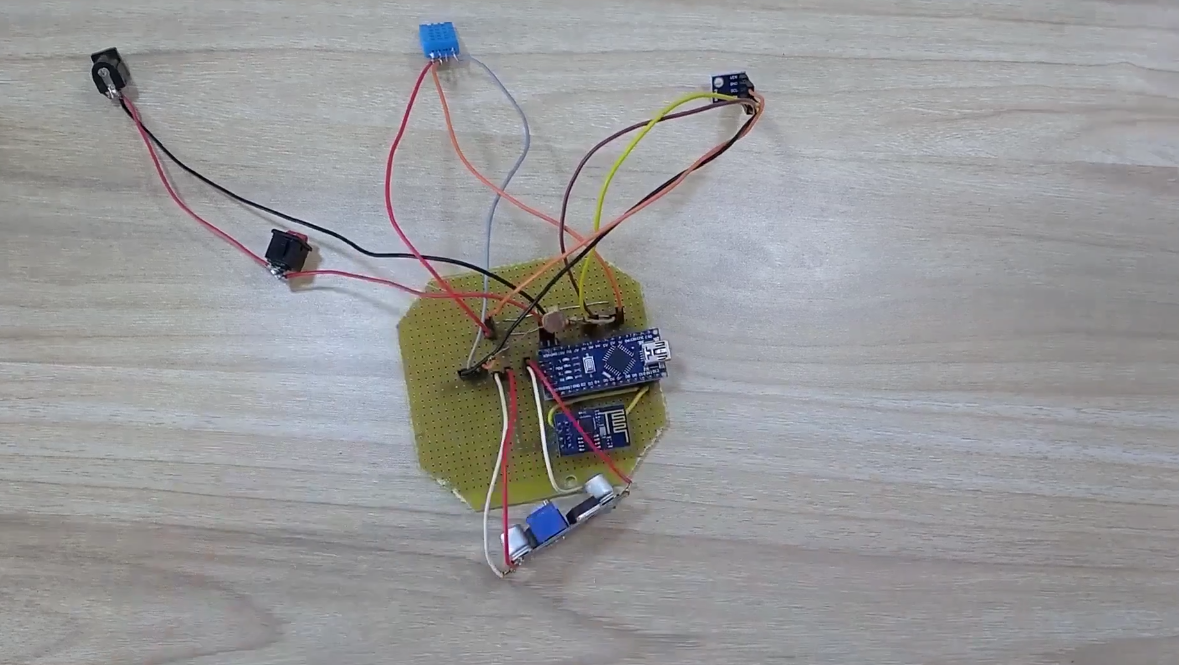
We need to assemble this circuit on General Purpose Circuit board. Lets do that.
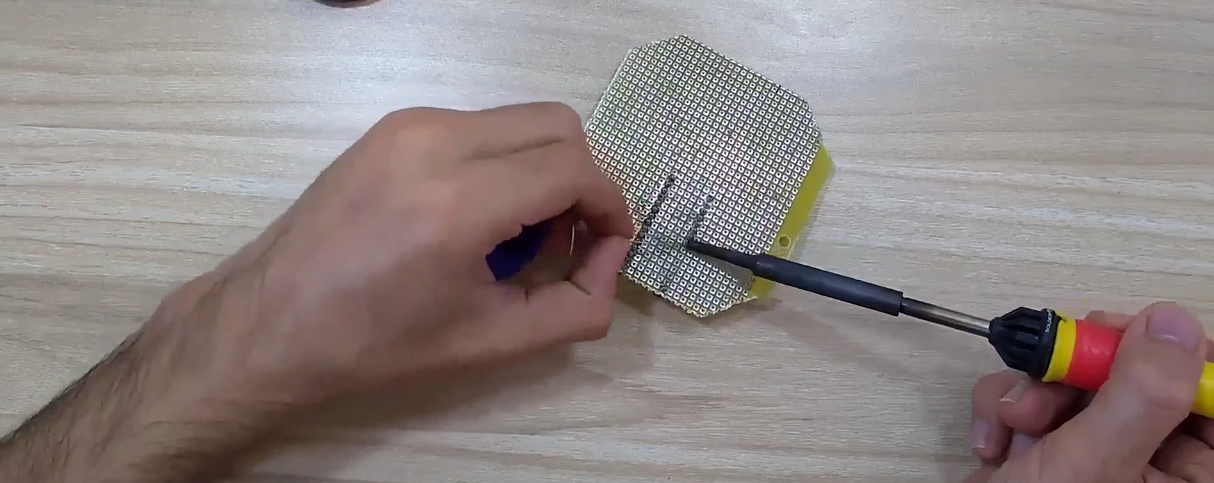
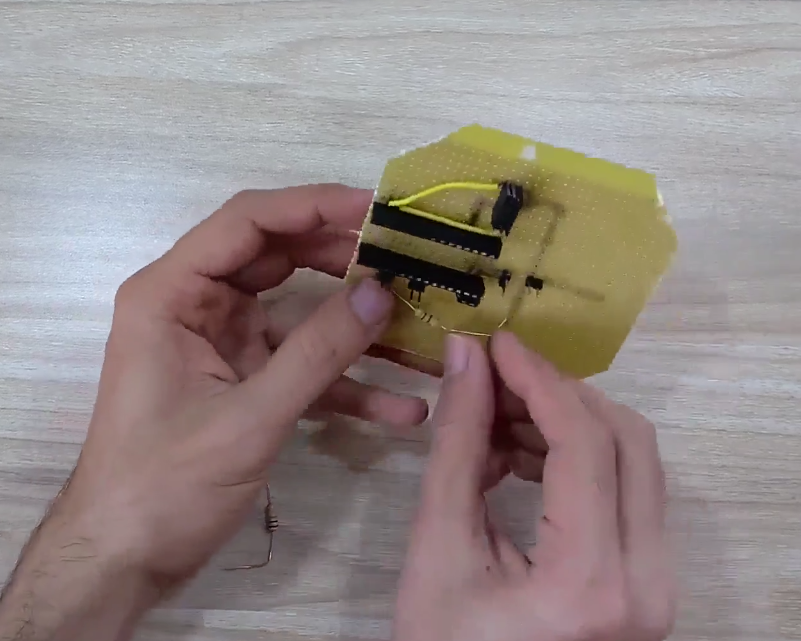
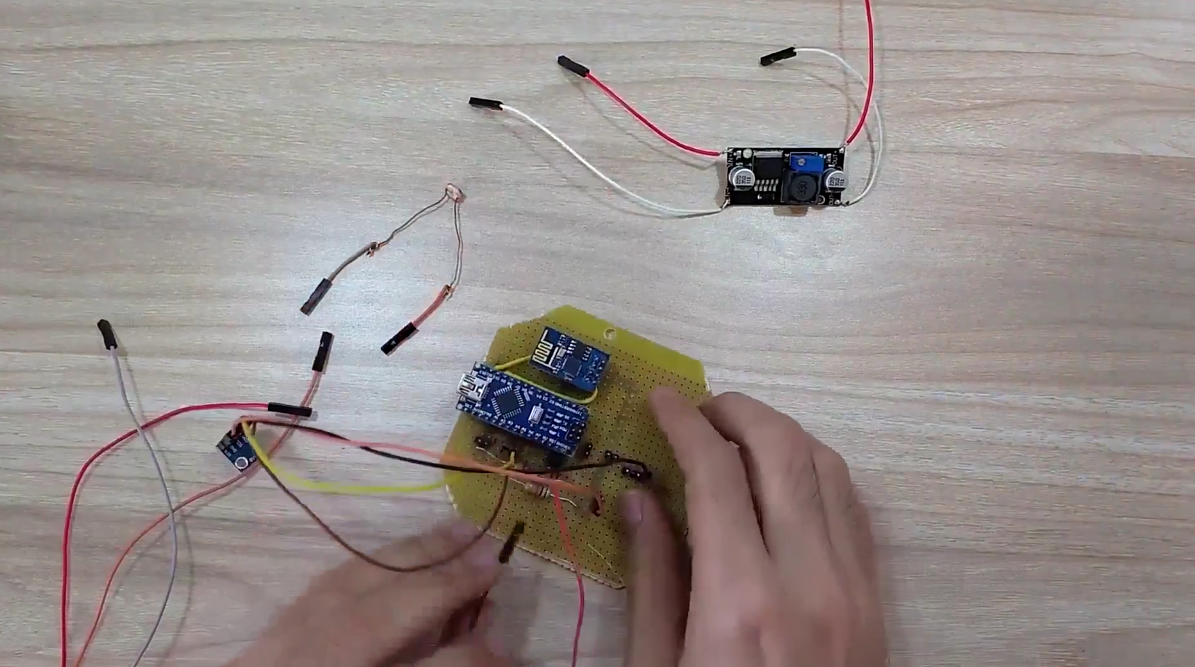
Step 7: Assembling circuit on General Purpose Circuit board (GCB)
Hardware tools and extra items from step 3 are now in business.
- Use female berg strip for Arduino nano and ESP8288's placement on GCB,
- Use solder iron and solder wire to connect them electrically to the board,
- Use female connectors to extend the reach of all sensors and LM2596 module as they will be stuck to the lid and wall of enclosure,
- Use male berg strip to make connecting points for female extensions made above,
- Realize circuit schematic on GCB using wires (strip them using wire stripper), or rail of melted solder wire and finally,
- Check for sorts before powering the circuit using a multimeter.
Now that all hardware is placed on GCB, let's look at the code.
Step 8: Code
Code for Personal Weather Station is fairly simple. I have commented code properly for ease of portability. Before you burn the code take care of following things.
- Make sure that all libraries are installed,
- Replace hyphens with SSID of your access point (wifi router) in line 14 of the code,
- Replace hyphens with PASSWORD of your wifi network in line 15 of the code,
- Replace hyphens with your ThingSpeak's private channel write API key in line 17 and
- While programming Arduino nano make sure that your 12V DC supply is OFF.
Here is the link to github (Personal Weather Station) for downloading code and libraries that I used.
Now that we have our hardware and software in place, only thing remaining is packaging.
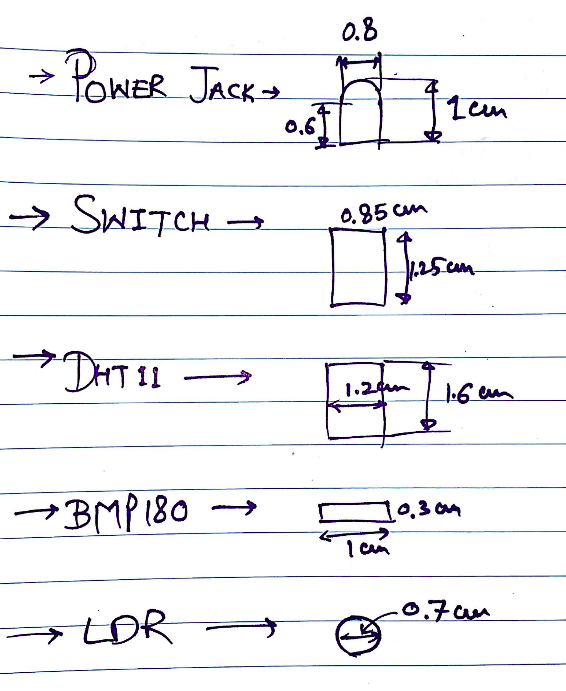
Step 9: Enclosure preparation
Now we need to make holes of various shape and size on the 4x4x2 inch box. We need to make holes for DC jack and switch on any preferred wall of enclosure. We also need to make holes for sensors on the lid of enclosure.
I have attached an image showing the dimensions of the holes that we need to make on the enclosure.
Use hot blade to cut through the plastic.
Use file to smooth the holes.
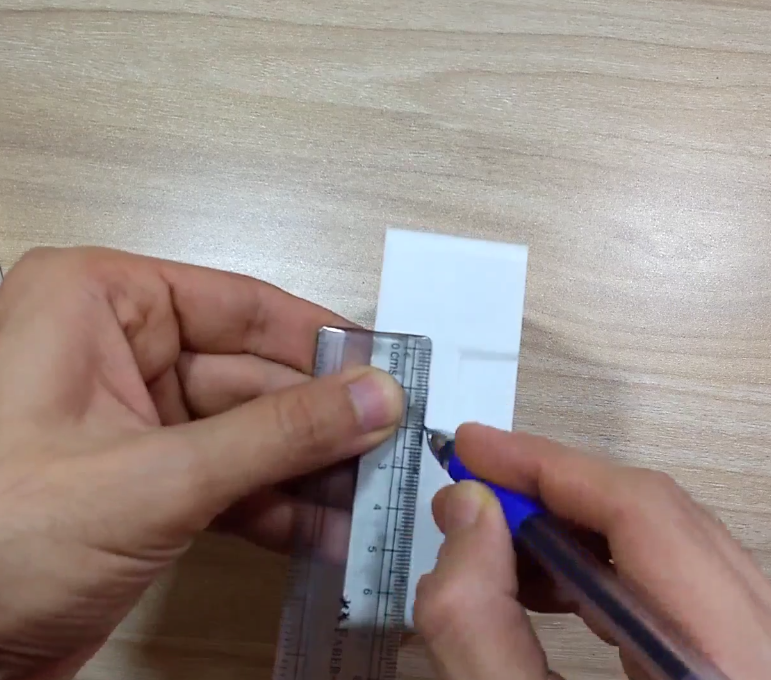
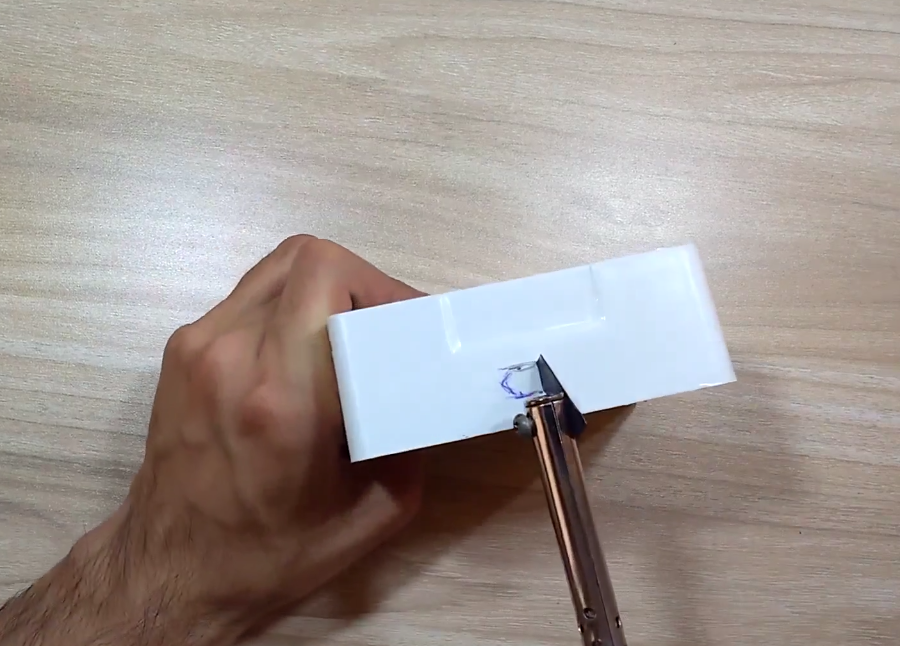
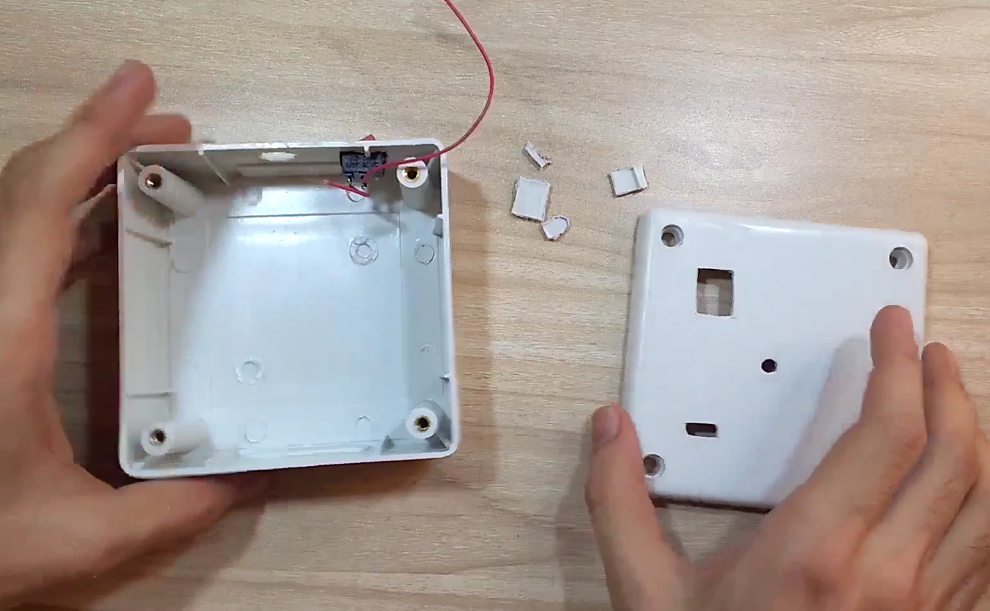
Now your enclosure is prepared to host your circuit.
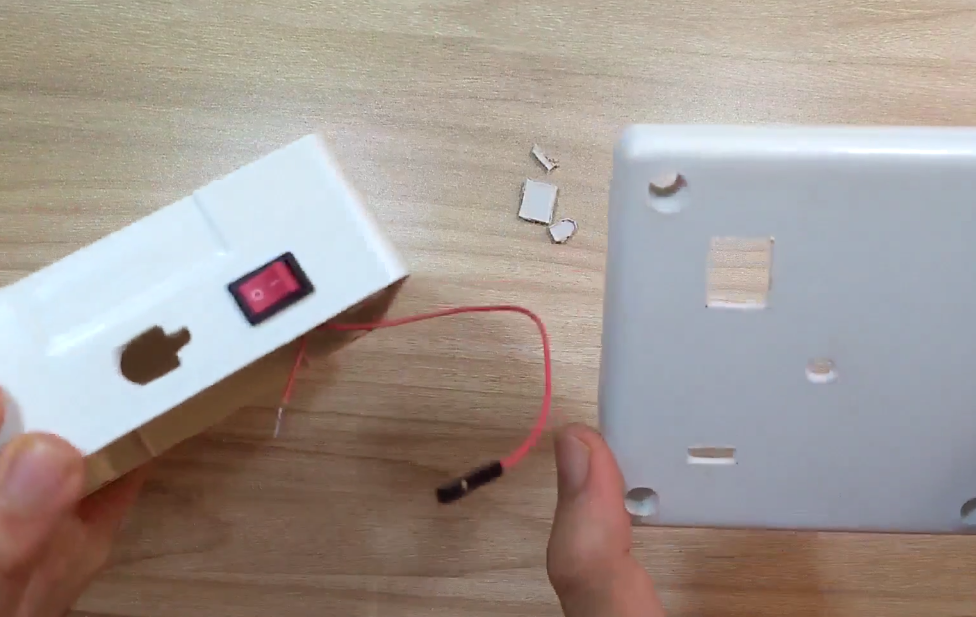
Step 10: Closing the lid
Put your assembled GCB inside the enclosure.
Place switch and DC jack in the holes on the wall; sensors on the holes of the lid. Finalize their position and use glue gun to fix them. Finally use screw driver to close the lid.
There you have it, your Personal Weather Station. Turn on the power supply and see your room's temperature, humidity, pressure and light intensity from any where in the world through your smartphone/PC/Laptop/Tablet on your ThingSpeak private channel.
That's all for this Project. Comment in case of any doubt. Thanks for reading.
Code
- Code
CodeArduino
#include <SoftwareSerial.h>
#include <Wire.h>
#include <dht.h>
#include <Adafruit_BMP085.h>

#define DEBUG 0                                     // change value to 1 to enable debuging using serial monitor
#define dht_pin A0                                  // defining pin A0 for DHT sensor
#define lightSensor A1                              // defining pin A1 as input pin for LDR voltage divider

dht DHT;
Adafruit_BMP085 bmp;
SoftwareSerial esp8266Module(10, 11);               // RX, TX

String network = "----";                            // your access point SSID
String password = "-------------";                  // your wifi Access Point password
#define IP "184.106.153.149"                        // IP address of thingspeak.com
String GET = "GET /update?key=----------------";    // replace with your channel key


void setup()
{
  if(DEBUG){
    Serial.begin(9600);                             // Setting hardware serial baud rate to 9600
  }
  esp8266Module.begin(9600);                        // Setting softserial baud rate to 9600
  if (!bmp.begin()) {
    if(DEBUG){
      Serial.println("Could not find a valid BMP085 sensor, check wiring!");
    }
    while (1) {}
  }
  delay(2000);
}

void loop()
{
    setupEsp8266();
    DHT.read11(dht_pin);
    double humi = DHT.humidity;
    double bmp_temp = bmp.readTemperature();
    double bmp_pressure = bmp.readPressure();
    int lightIntensity = analogRead(lightSensor);
    updateTemp(String(bmp_temp) ,String(lightIntensity),String(bmp_pressure),String(humi));
    delay(30000);
}

//-------------------------------------------------------------------
// Following function setup the esp8266, put it in station made and
// connect to wifi access point.
//------------------------------------------------------------------
void setupEsp8266()
{
    if(DEBUG){
      Serial.println("Reseting esp8266");
    }
    esp8266Module.flush();
    esp8266Module.println(F("AT+RST"));
    delay(7000);
    if (esp8266Module.find("OK"))
    {
      if(DEBUG){
        Serial.println("Found OK");
        Serial.println("Changing espmode");
      }
      esp8266Module.flush();
      changingMode();
      delay(5000);
      esp8266Module.flush();
      connectToWiFi();
    }
    else
    {
      if(DEBUG){
        Serial.println("OK not found");
      }
    }
}

//-------------------------------------------------------------------
// Following function sets esp8266 to station mode
//-------------------------------------------------------------------
bool changingMode()
{
    esp8266Module.println(F("AT+CWMODE=1"));
    if (esp8266Module.find("OK"))
    {
      if(DEBUG){
        Serial.println("Mode changed");
      }
      return true;
    }
    else if(esp8266Module.find("NO CHANGE")){
      if(DEBUG){
        Serial.println("Already in mode 1");
      }
      return true;
    }
    else
    {
      if(DEBUG){
        Serial.println("Error while changing mode");
      }
      return false;
    }
}

//-------------------------------------------------------------------
// Following function connects esp8266 to wifi access point
//-------------------------------------------------------------------
bool connectToWiFi()
{
  if(DEBUG){
    Serial.println("inside connectToWiFi");
  }
  String cmd = F("AT+CWJAP=\"");
  cmd += network;
  cmd += F("\",\"");
  cmd += password;
  cmd += F("\"");
  esp8266Module.println(cmd);
  delay(15000);

  if (esp8266Module.find("OK"))
  {
    if(DEBUG){
      Serial.println("Connected to Access Point");
    }
    return true;
  }
  else
  {
    if(DEBUG){
      Serial.println("Could not connect to Access Point");
    }
    return false;
  }
}

//-------------------------------------------------------------------
// Following function sends sensor data to thingspeak.com
//-------------------------------------------------------------------
void updateTemp(String voltage1,String voltage2,String voltage3,String voltage4)
{
  String cmd = "AT+CIPSTART=\"TCP\",\"";
  cmd += IP;
  cmd += "\",80";
  esp8266Module.println(cmd);
  delay(5000);
  if(esp8266Module.find("Error")){
    if(DEBUG){
      Serial.println("ERROR while SENDING");
    }
    return;
  }
  cmd = GET + "&field1=" + voltage1 + "&field2=" + voltage2 + "&field3=" + voltage3 + "&field4=" + voltage4 + "\r\n";
  esp8266Module.print("AT+CIPSEND=");
  esp8266Module.println(cmd.length());
  delay(15000);
  if(esp8266Module.find(">"))
  {
    esp8266Module.print(cmd);
    if(DEBUG){
      Serial.println("Data sent");
    }
  }else
  {
    esp8266Module.println("AT+CIPCLOSE");
    if(DEBUG){
      Serial.println("Connection closed");
    }
  }
}
Library and code for Personal Weather Station
Check out Readmehttps://github.com/jayraj4021/Personal-Weather-Station-14Schematics
 schematic.fzz
Manufacturing process
- DIY Solar‑Powered Weather Station with Raspberry Pi
- Building an Outdoor Weather Station with Raspberry Pi 2 and ADS‑WS1
- Build a Raspberry Pi Weather Station that Emails Daily Weather Data
- Advanced Weather Station v2.0: Real‑Time Temperature, Pressure, Humidity & Altitude Monitoring
- Real‑Time Weather Monitoring with Arduino & ThingSpeak IoT
- Arduino Nano Weather Station: Sensor Kit & OLED Display
- Build a Reliable Arduino Weather Station with DHT Sensors
- Build a Simple Weather Station with Arduino UNO, BMP280 Sensor & LCD
- DIY Micro Soldering Station: Build a Compact Arduino-Compatible Setup
- Arduino Wireless Weather Station: DIY Portable Weather Monitoring Kit