


DHT11 & DHT22 Temperature & Humidity Sensor Kit for Raspberry Pi & Arduino
Components and supplies
 |
| × | 1 | |||
 |
| × | 1 | |||
 |
| × | 1 | |||
| × | 3 | ||||
 |
| × | 1 | |||
| × | 1 | ||||
| × | 1 |
Apps and online services
 |
| |||
 |
| |||
 |
| |||
 |
| |||
| ||||
|
About this project
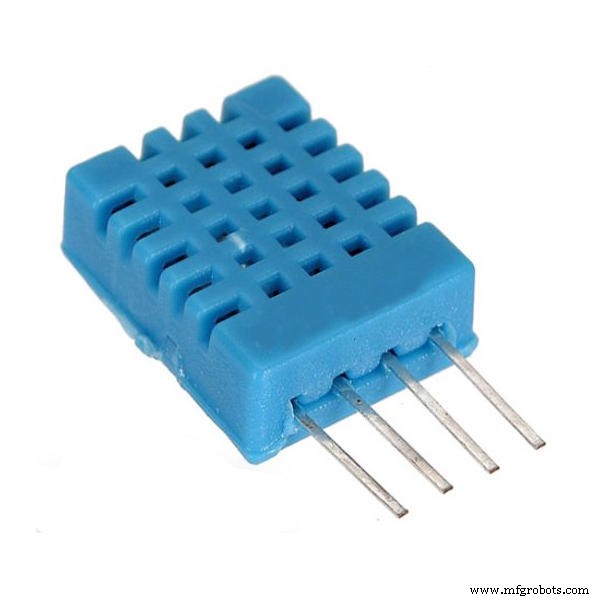
IntroductionBackgroundThe DHT11 is a 4-pin (one pin is unused) temperature and humidity sensor capable of measuring 20% - 90% relative humidity and 0 to 50 °C. The sensor can operate between 3 and 5.5V DC and communicates using its own proprietary OneWire protocol. This protocol requires very precise timing in order to get the data from the sensor. The LOW and HIGH bits are coded on the wire by the length of time the signal is HIGH. The total time to take a reading is at most 23.4 ms. This includes an 18 ms delay required to start the data transfer and a window of up to 5.4 ms for the data. Individual signals can be as short as 20 μs and as long as 80 μs.
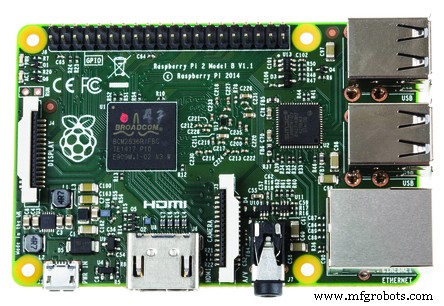
When Windows 10 IoT Core first became available I grabbed my Raspberry Pi 2 and my DHT11 sensor and tried it out in C#. I quickly found that it was not going to work. The issue with C# in the Windows 10 IoT Core is that it is just not going to be fast enough (at least not right now).
I posted to the Microsoft forum and had a few exchanges with other developers having the same struggle. I eventually came across a Microsoft response on the OneWire protocol in Windows 10 IoT Core that read:
After a while I received a response to my post that read:
Well, that will be a great and I am truly excited about the upcoming capability but who can wait? I recently saw that Microsoft posted a sample on how to support the a OneWire protocol using the DHT11 as the sample sensor and using C++ on Windows 10 IoT Core. I saw this as an opportunity to bring it to C#.
This project is about turning that sample into a library that can be used in C#. I am grateful for the person that wrote the library to help make this popular sensor useful in Windows 10 IoT Core, and hopefully, with this library it will be even more useful.
LibraryThe library I created is a simple refactoring of the code originally posted by Microsoft so I take no credit for the work done to get the sensor reading.
The library presents a simple class called Dht11 in the namesapace Sensors.Dht. Creating a new object in C# is simple.
First open the GPIO pin you have the DHT11 sensor pin connected.
using Sensors.Dht;GpioPin pin = GpioController.GetDefault().OpenPin(4, GpioSharingMode.Exclusive);
Then pass this pin to the constructor of the Dht11 class and specify the GPIO Pin Drive Mode. This allows you to decide whether you will add your own pull-up resistor.
Dht11 dht11 = new Dht11(_pin, GpioPinDriveMode.Input);
To get a reading from the device use the GetReadingAsync method.
DhtReading reading = await dht11.GetReadingAsync().AsTask();
There is an overload that allows the maximum retry value to be specified. The default value is 20. This specifies how many attempts to make to read the sensor before giving up and returning a failed reading.
The DhtReading structure is defined as:
public value struct DhtReading
{
  bool TimedOut;
  bool IsValid;
  double Temperature;
  double Humidity;
  int RetryCount;
};
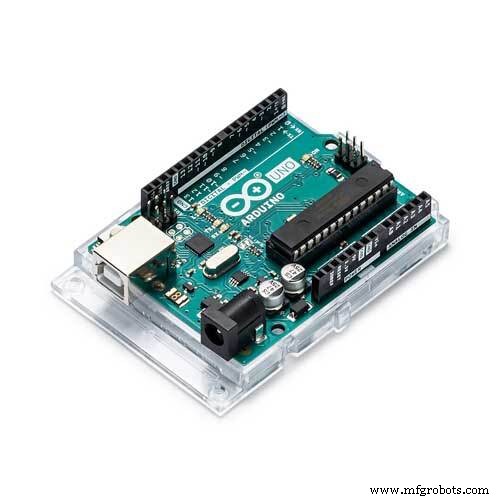
Even though the sensor works in C++ it still does not get a reading every time. Thus, the need for a retry option in the class (this is actually part of the Microsoft sample). I thought it would be best to compare this to other platforms to see how it performs. I tried code on the Raspberry Pi 2 running Raspbian as well as on an Arduino Uno. The code I used for both has been included in the GitHub repository.
The video included in this project will demonstrate and compare the output from each of these platforms.
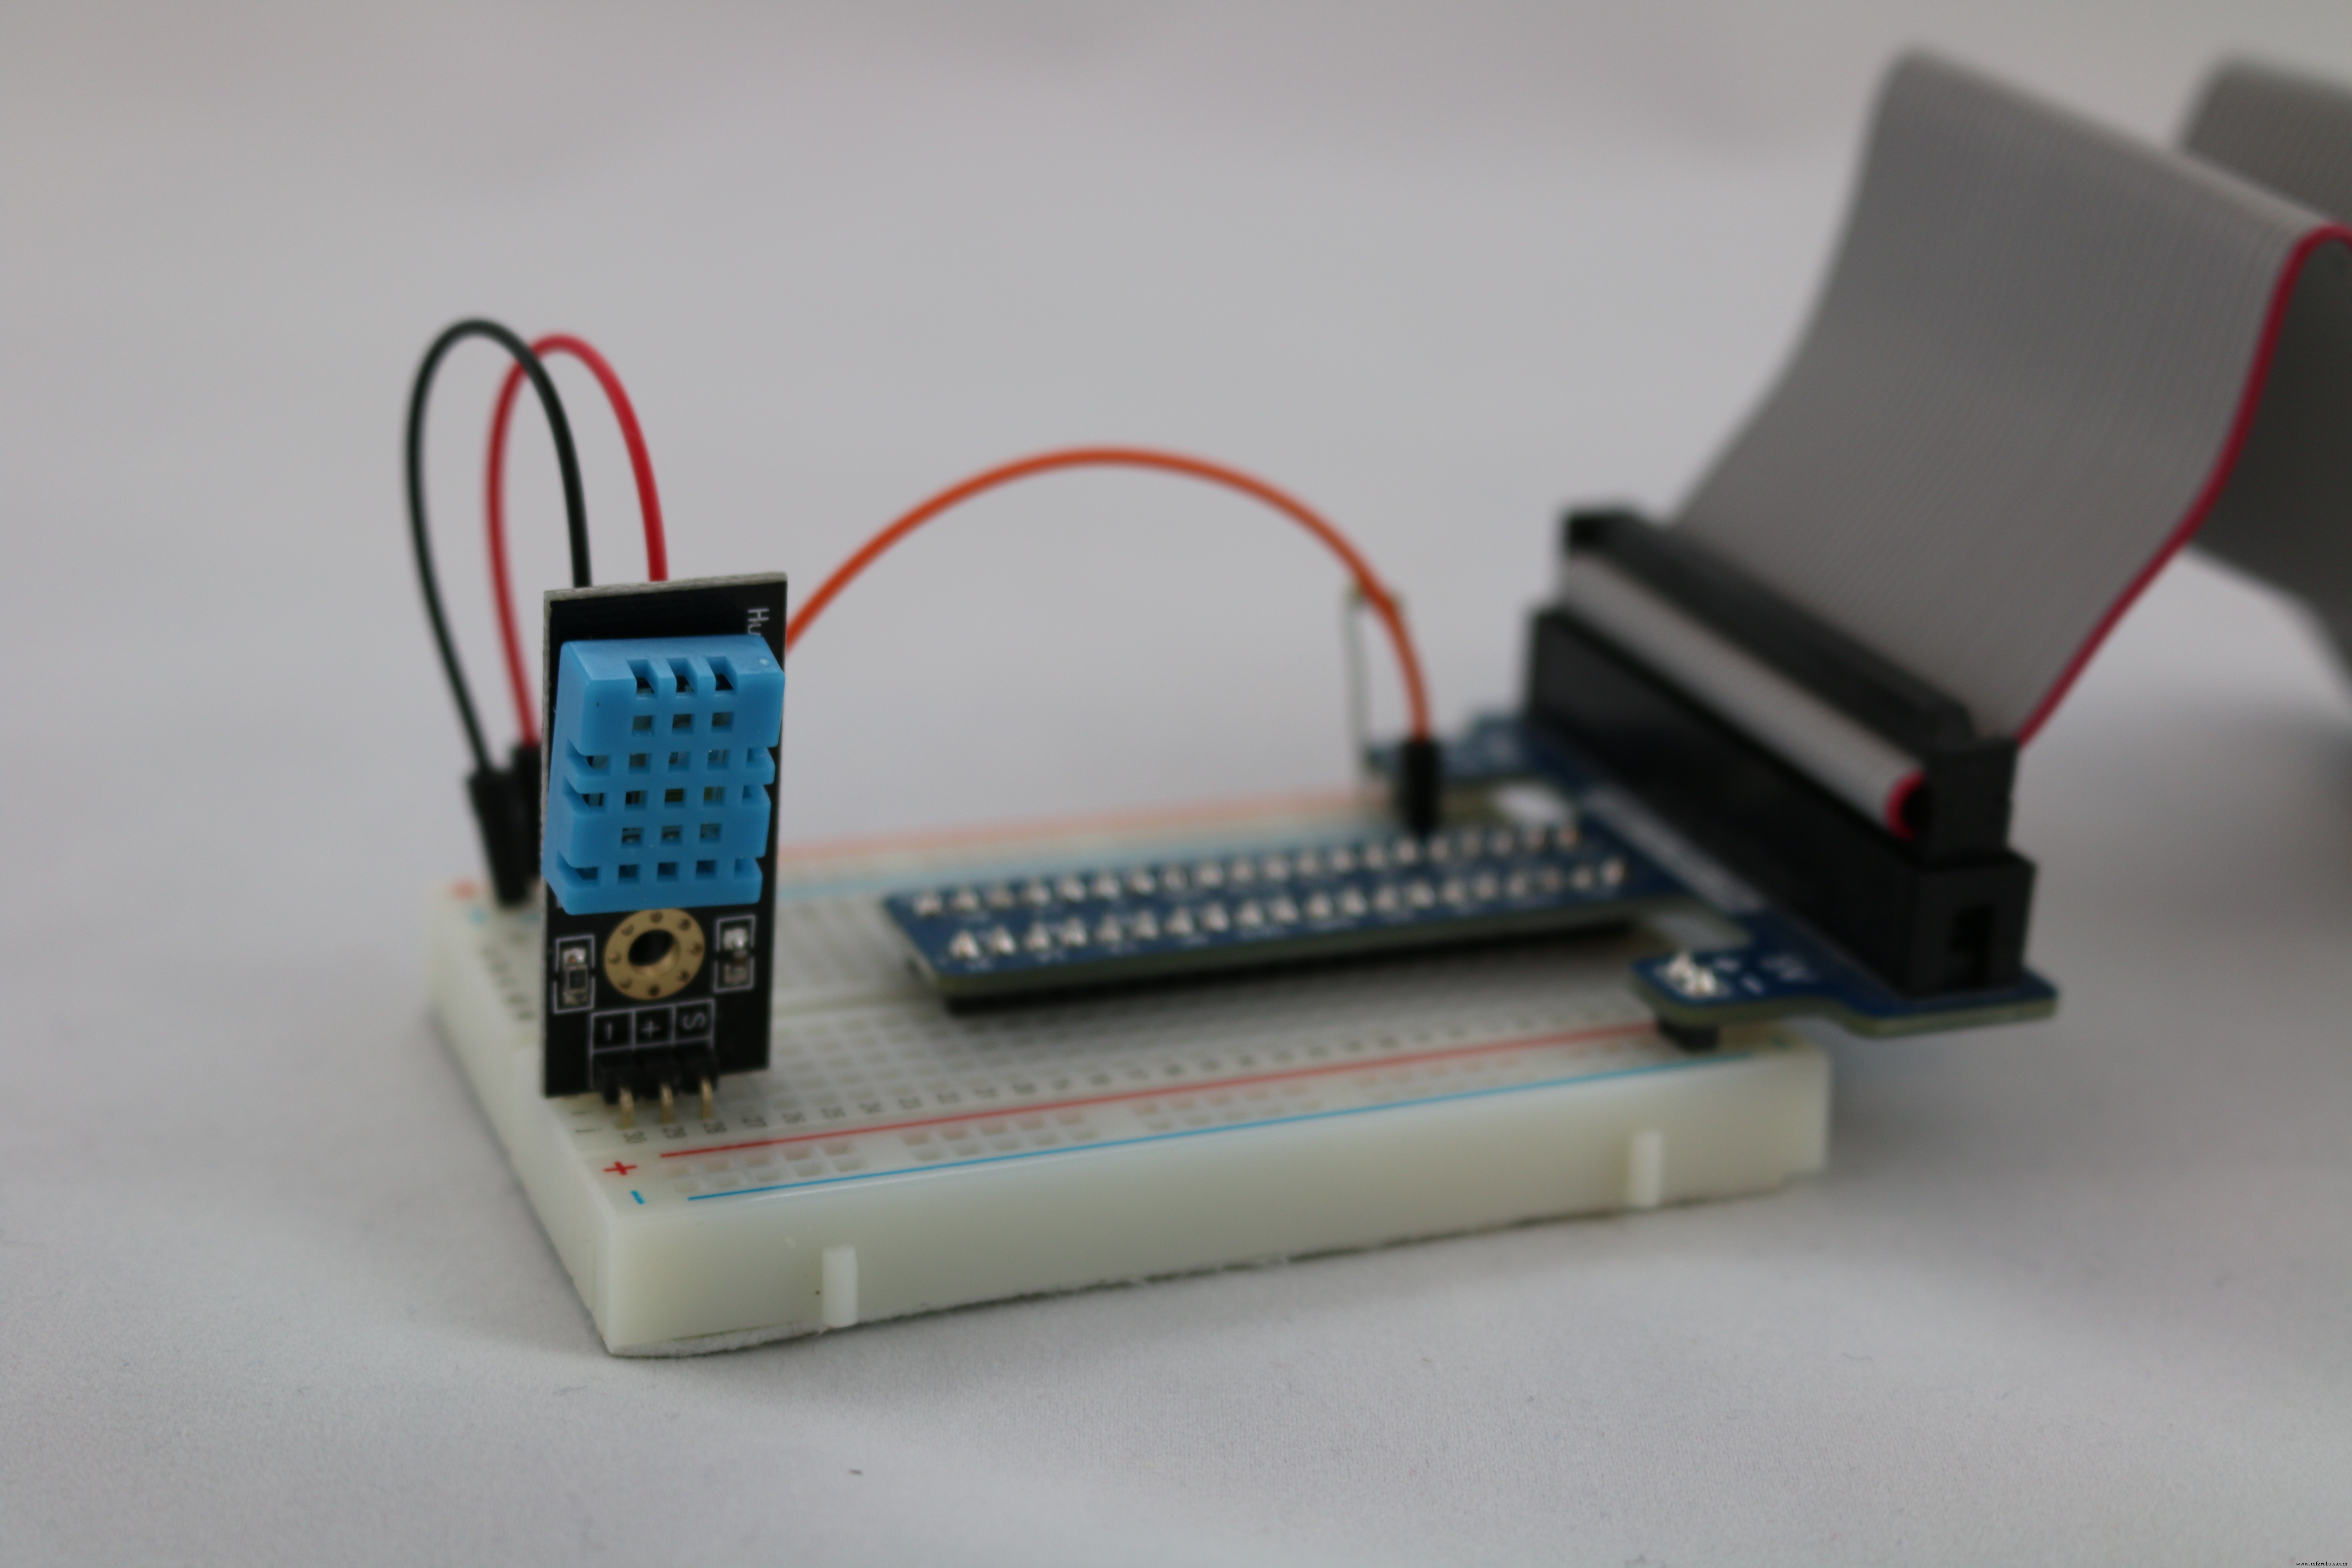
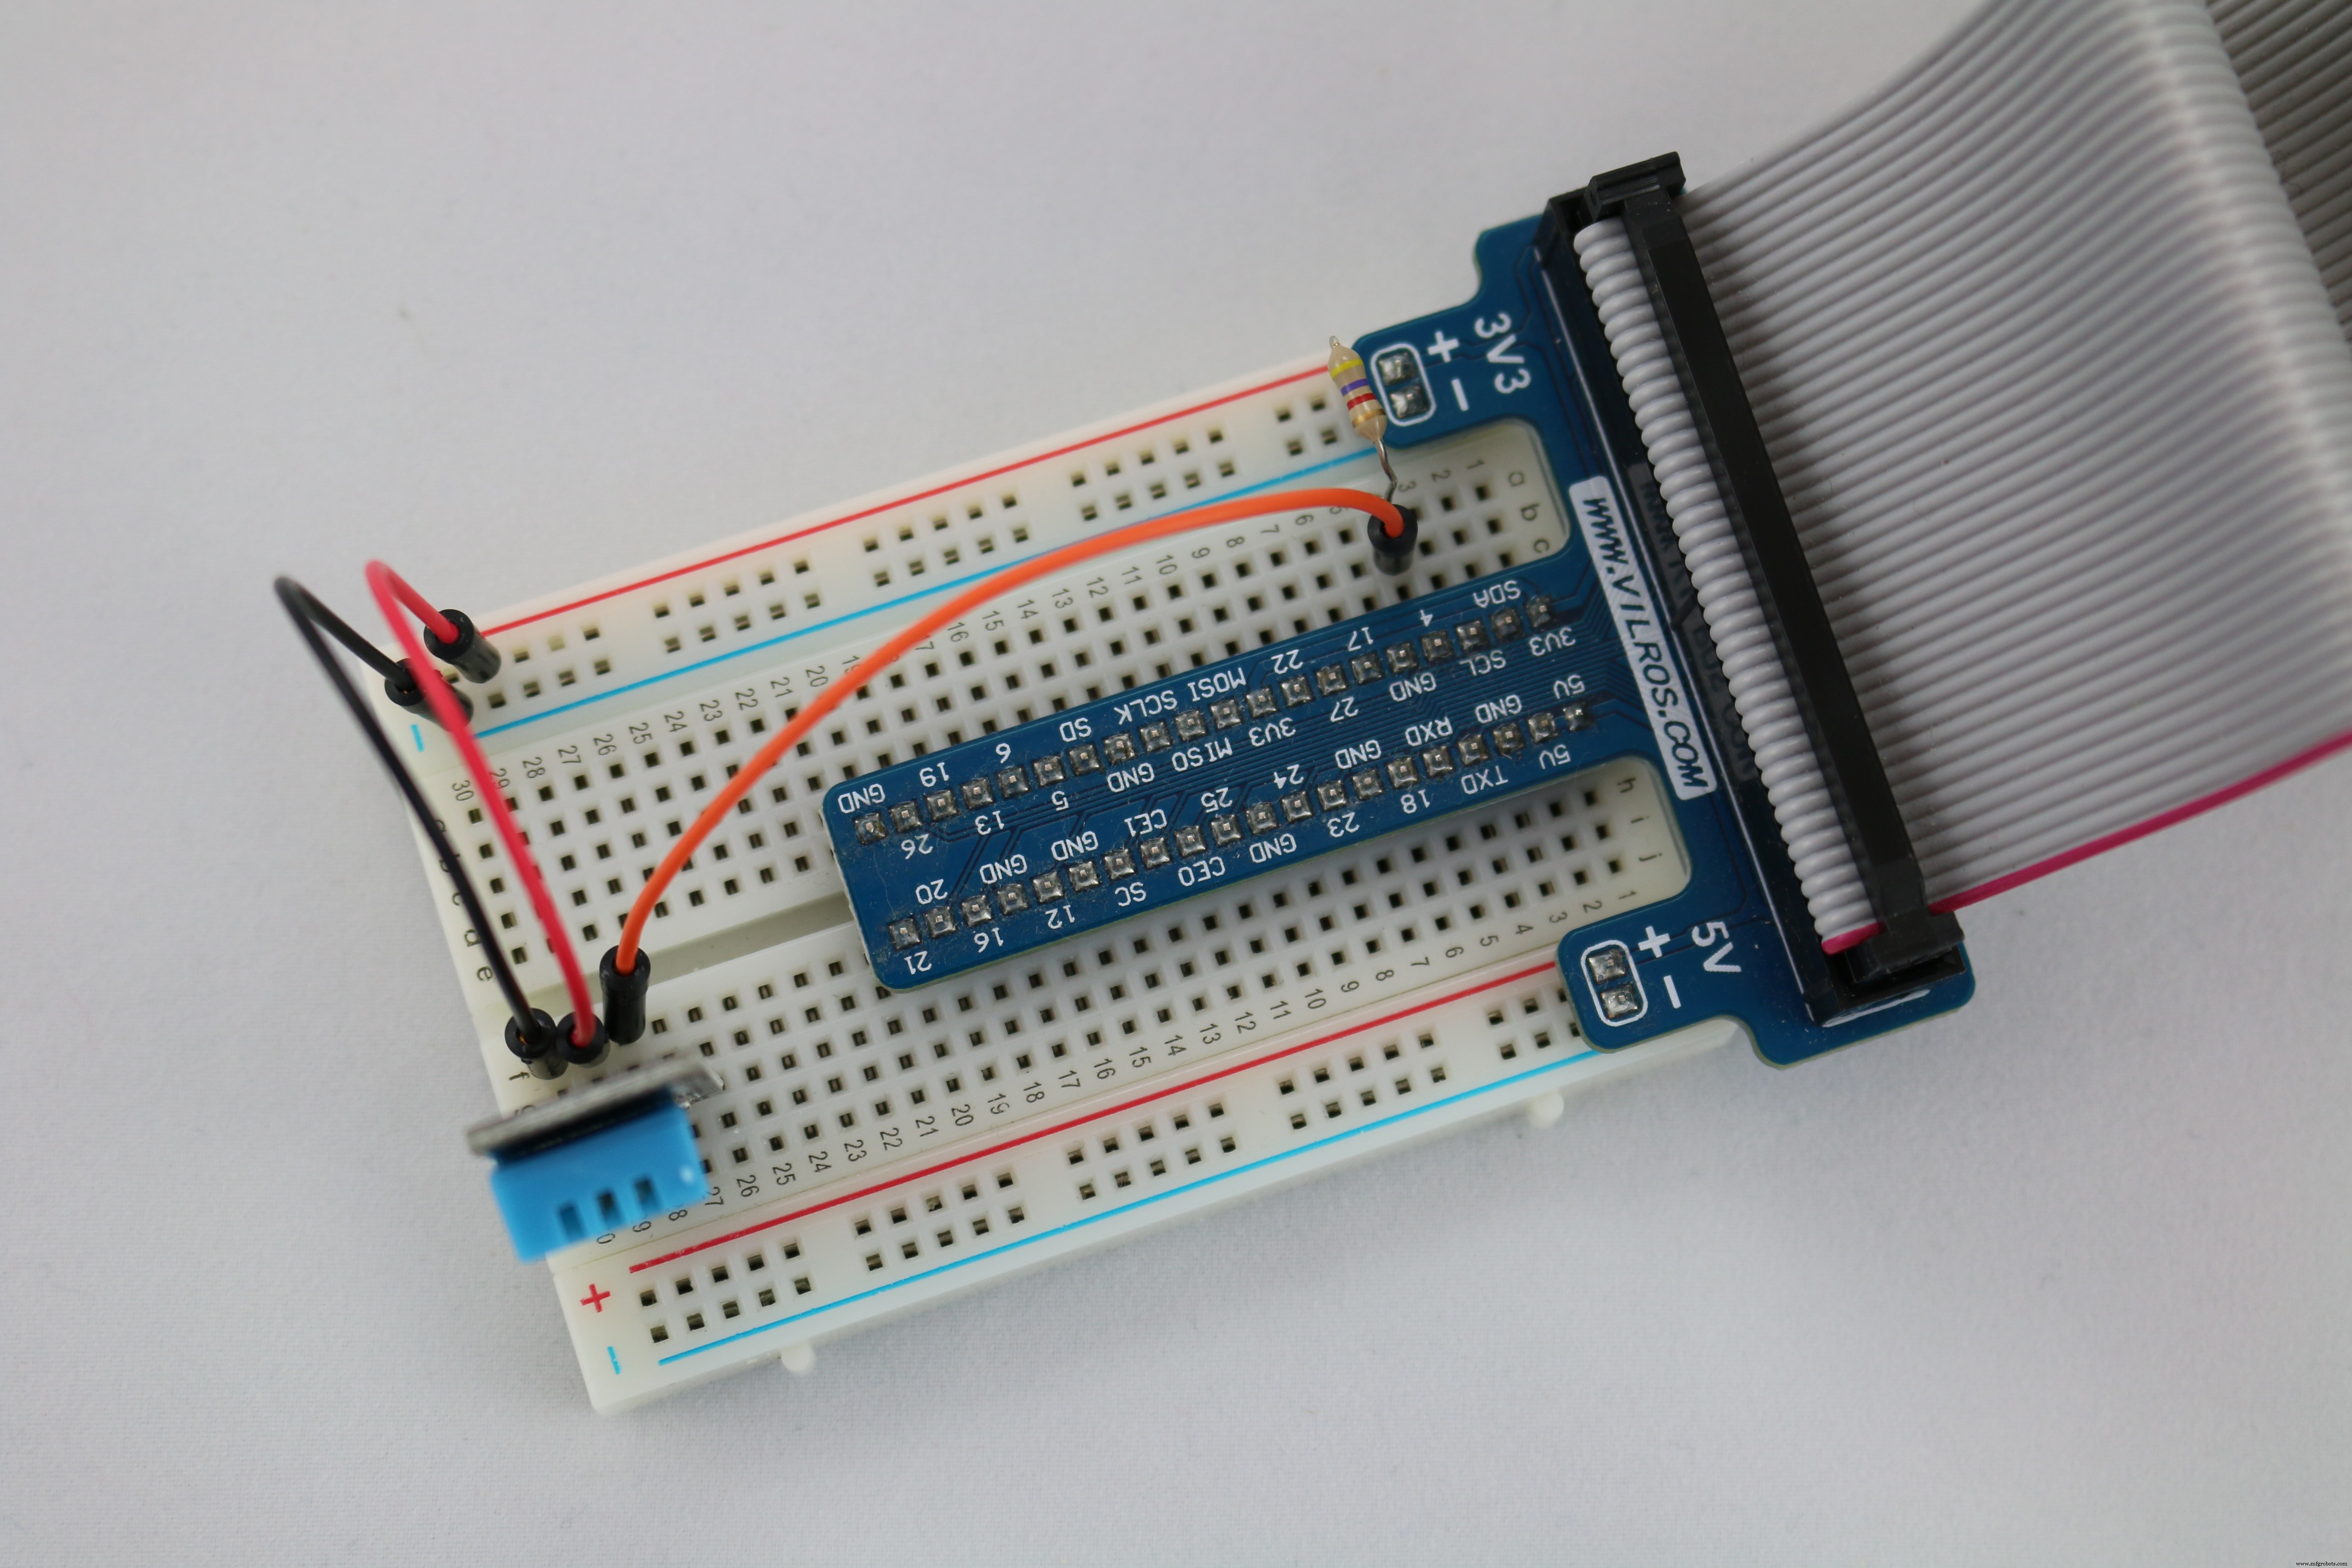
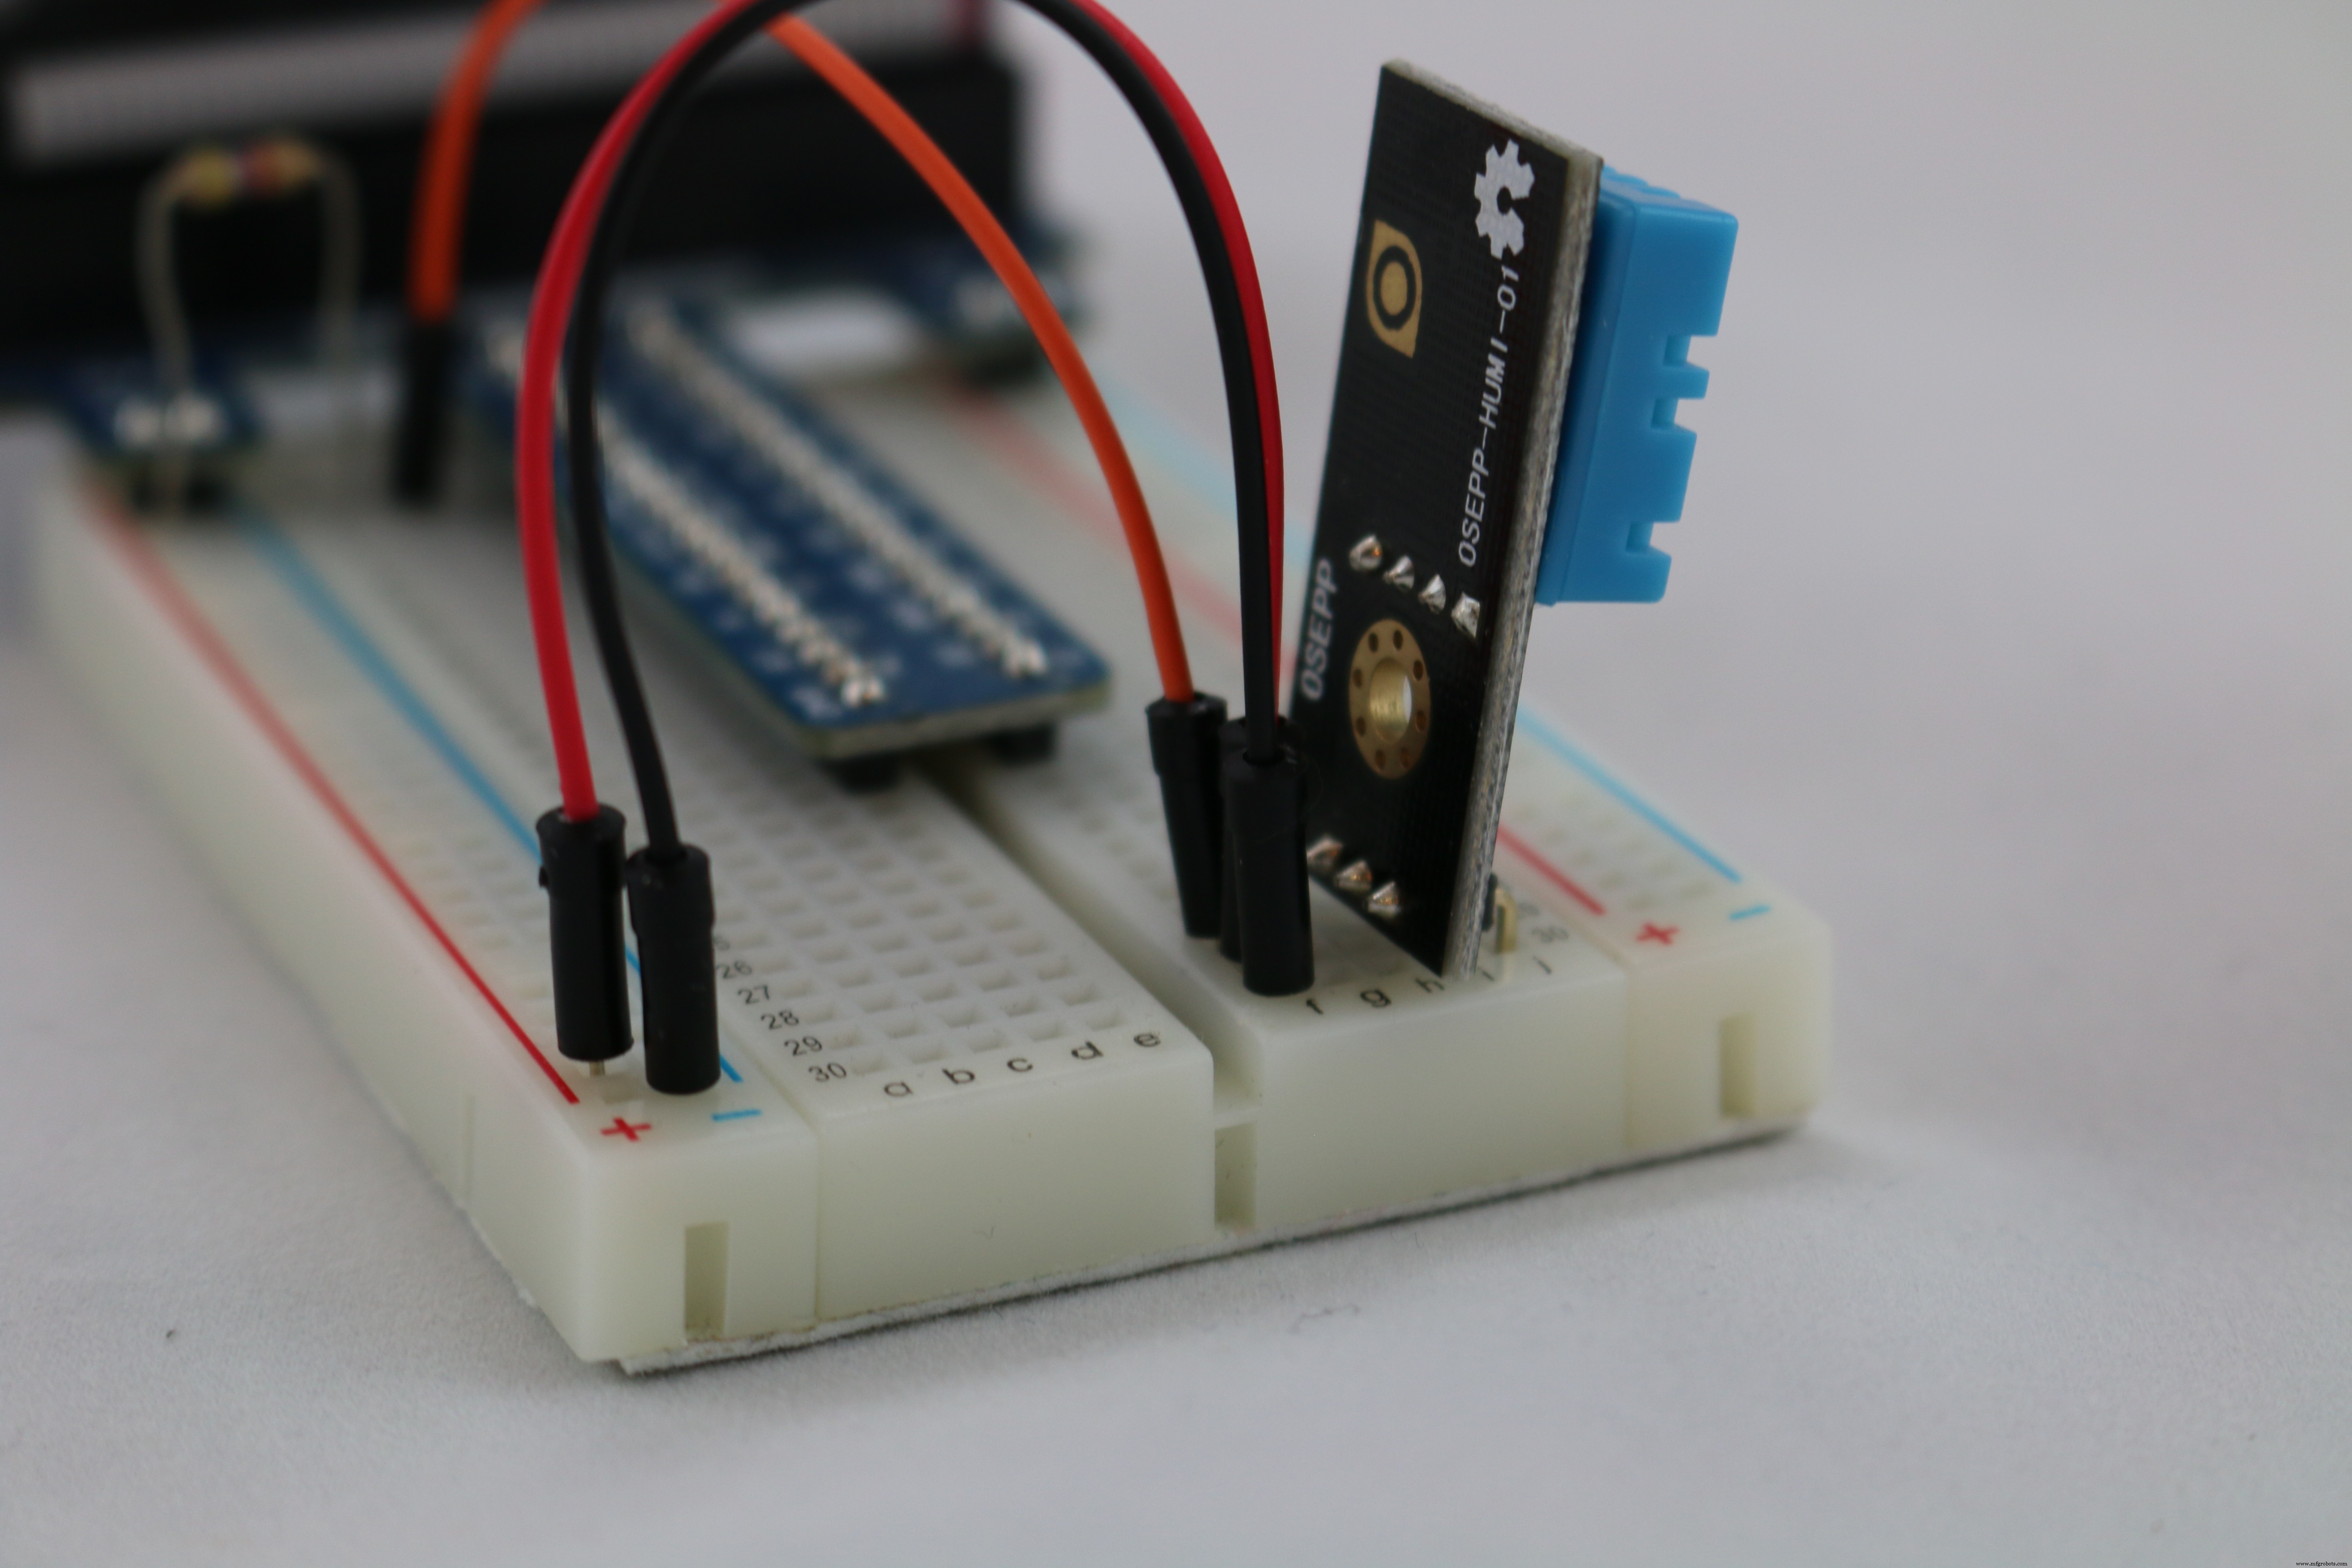
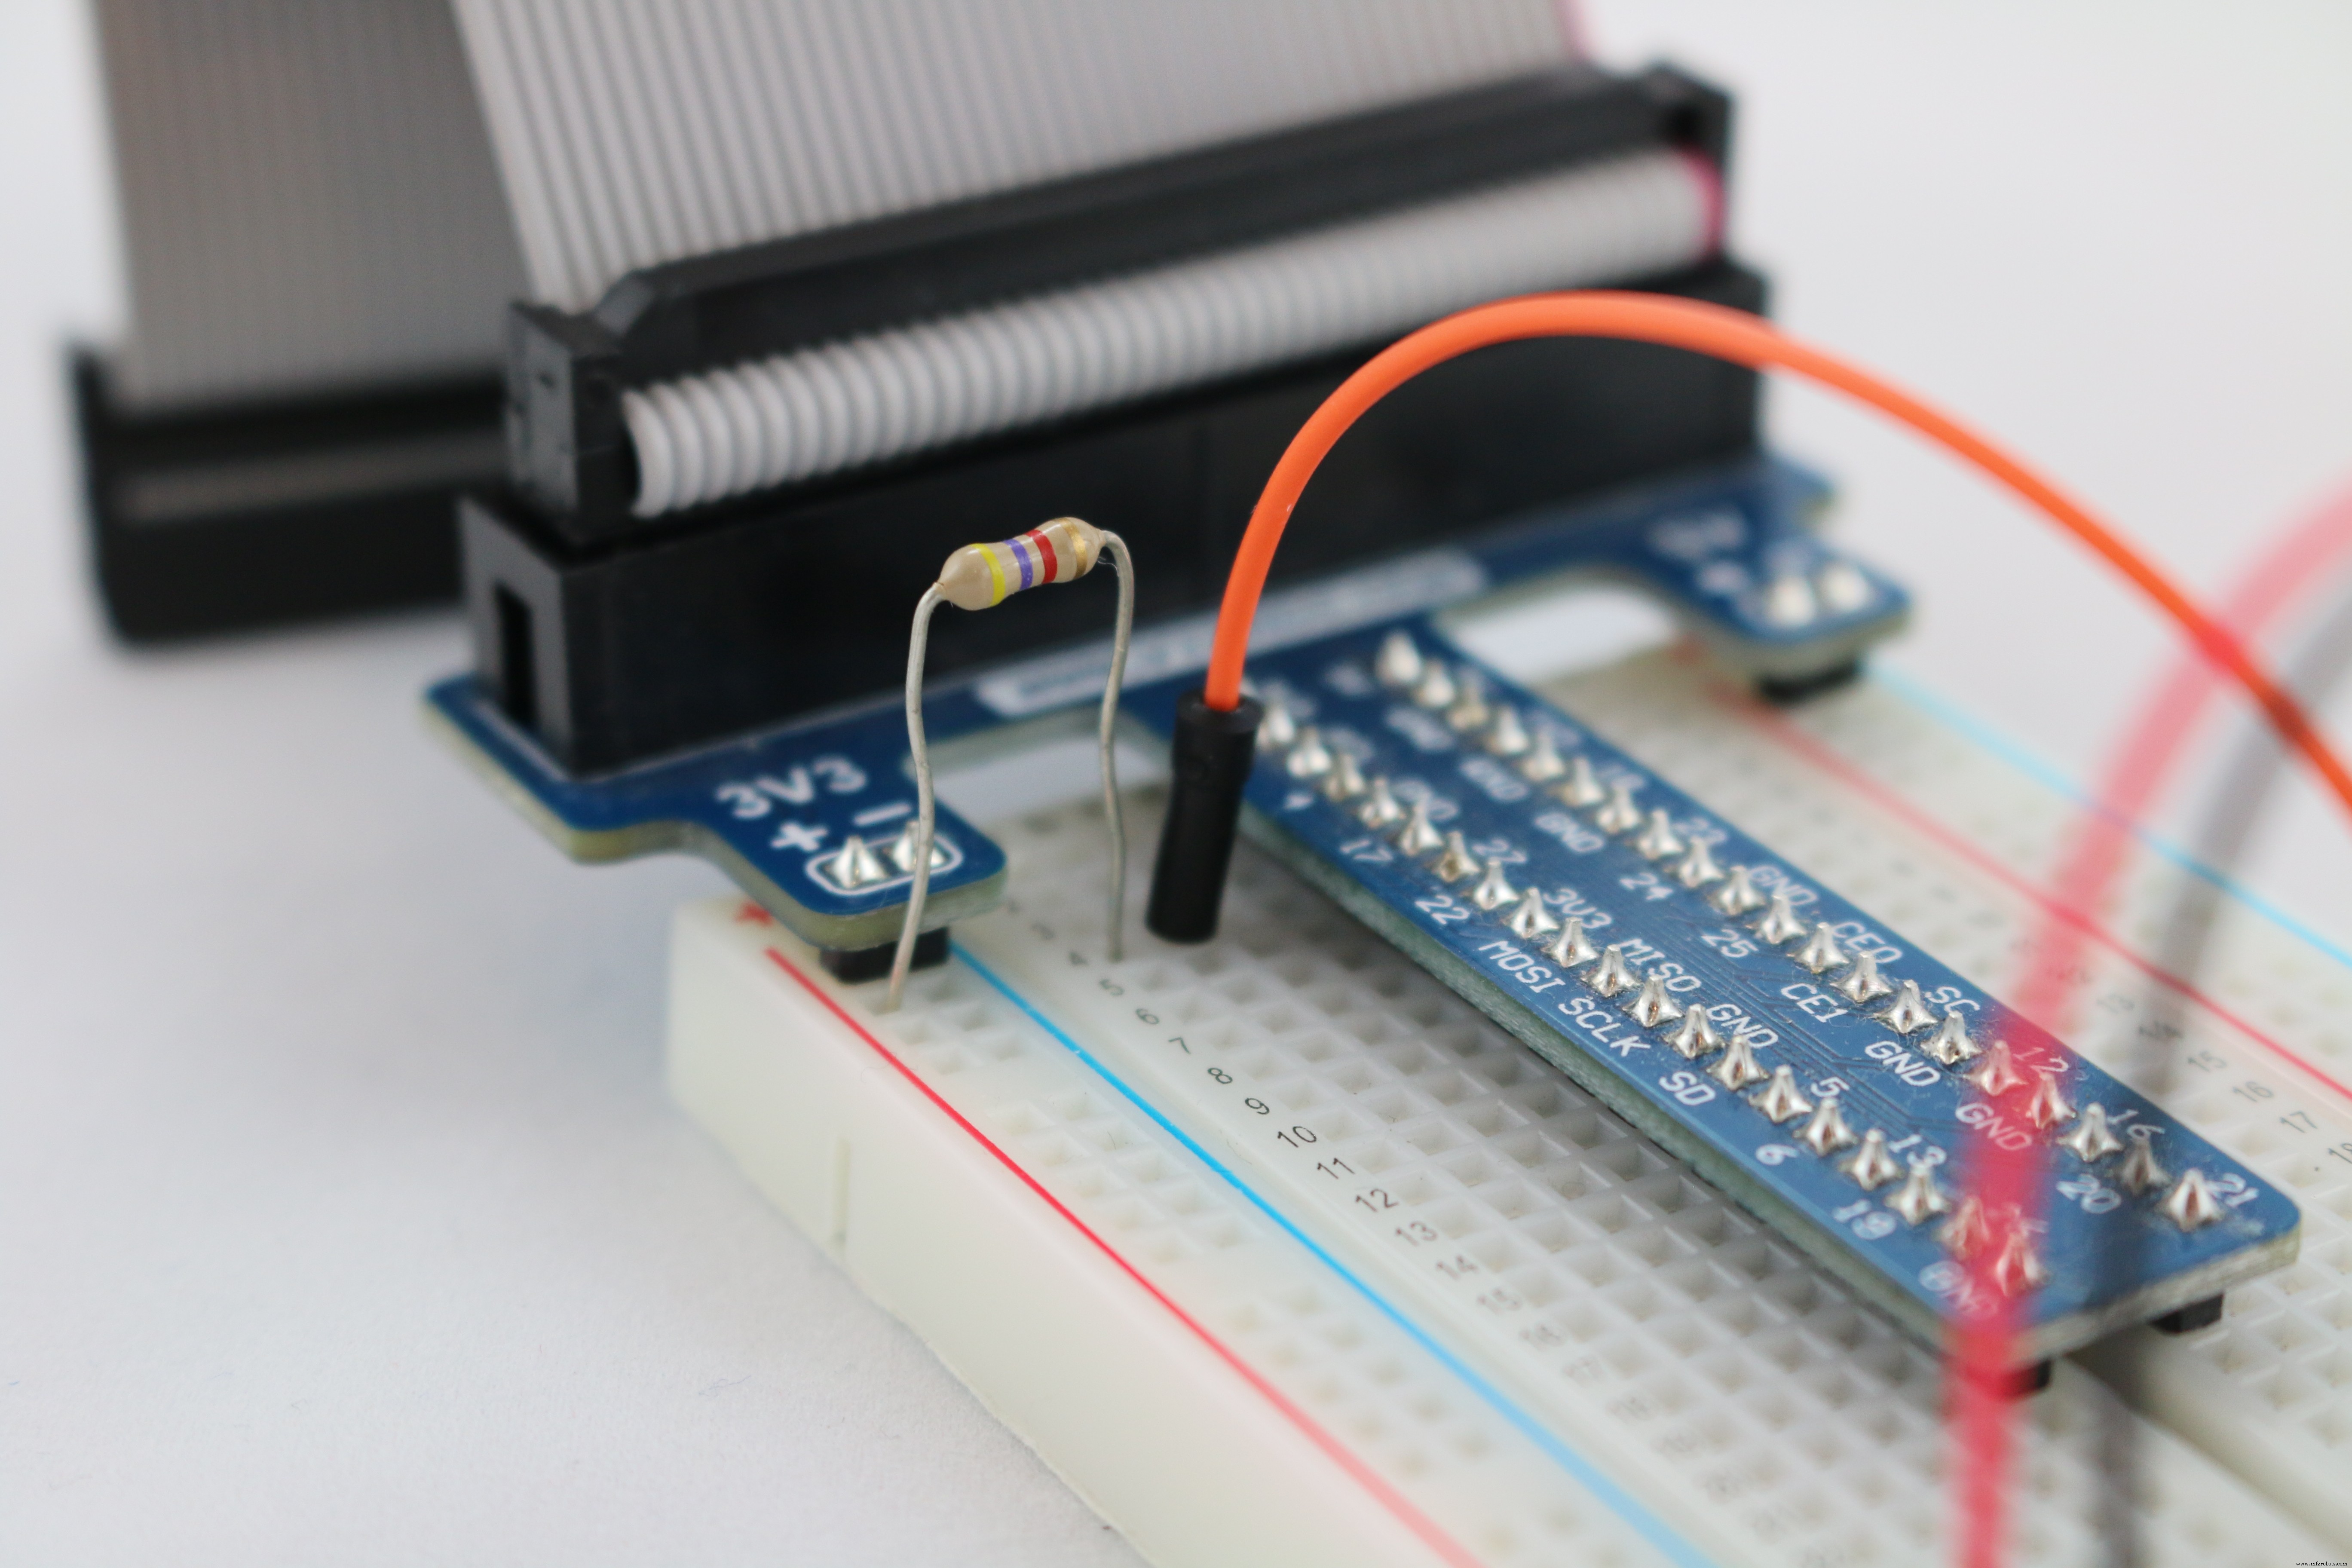
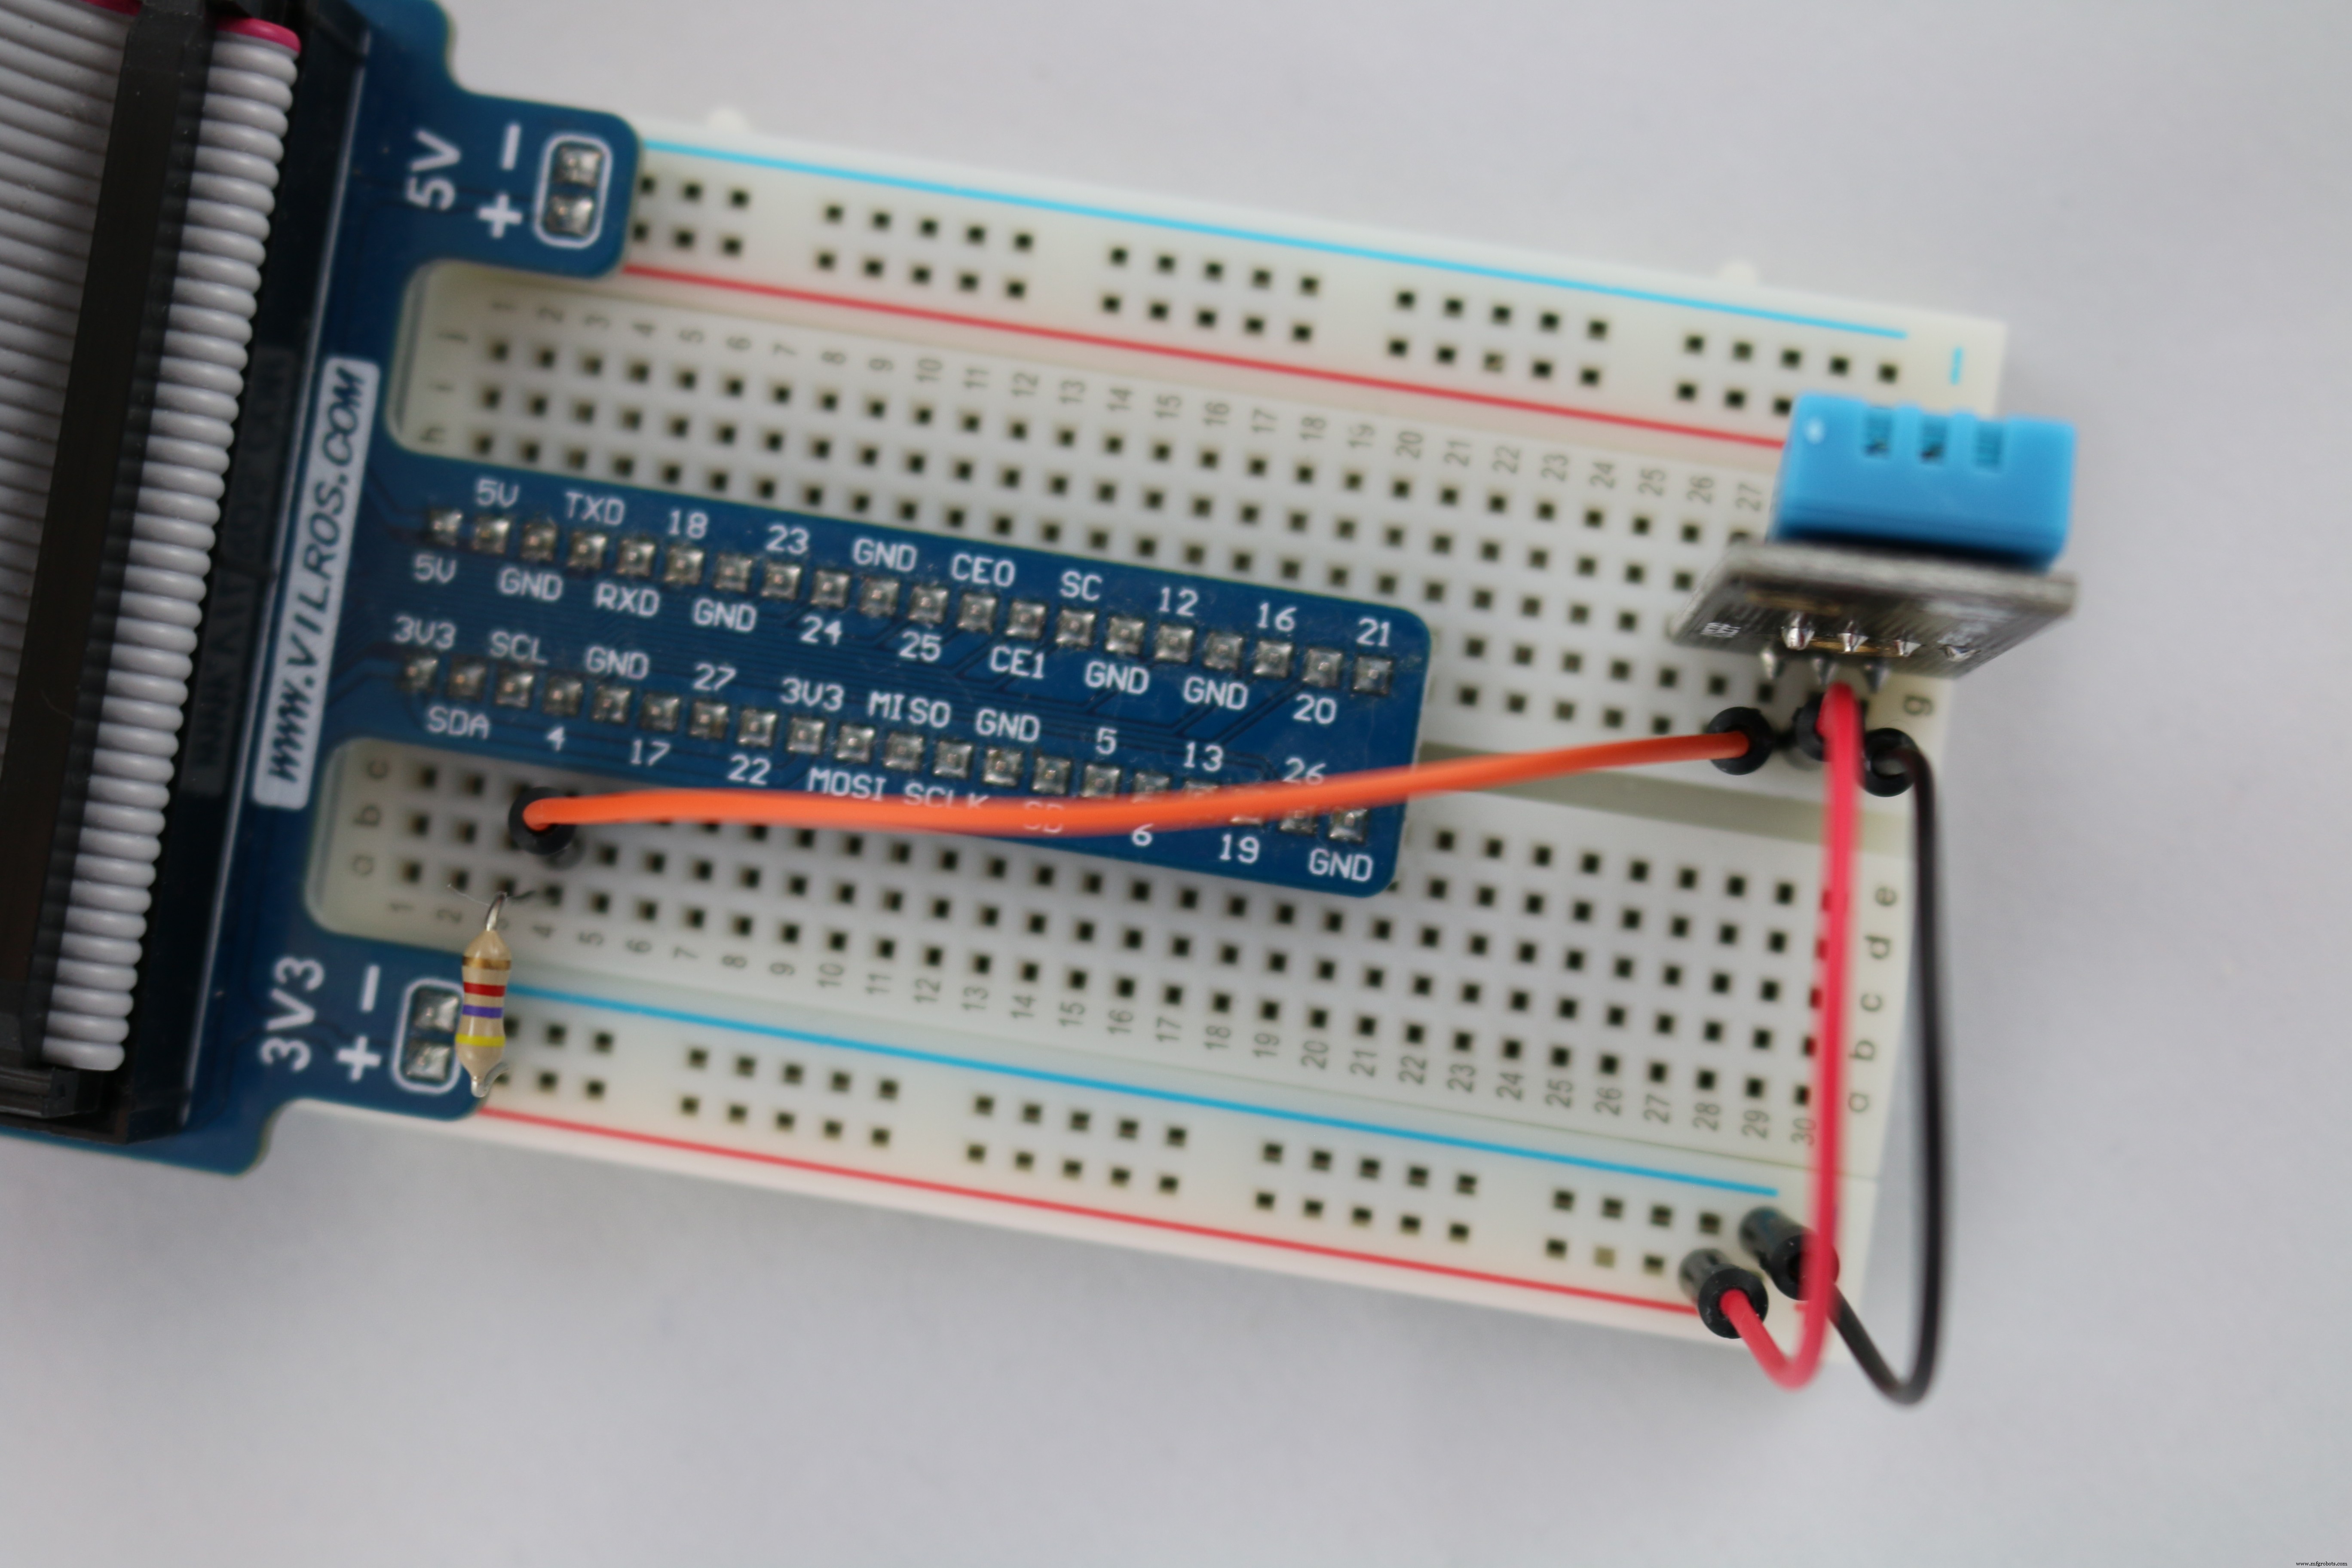
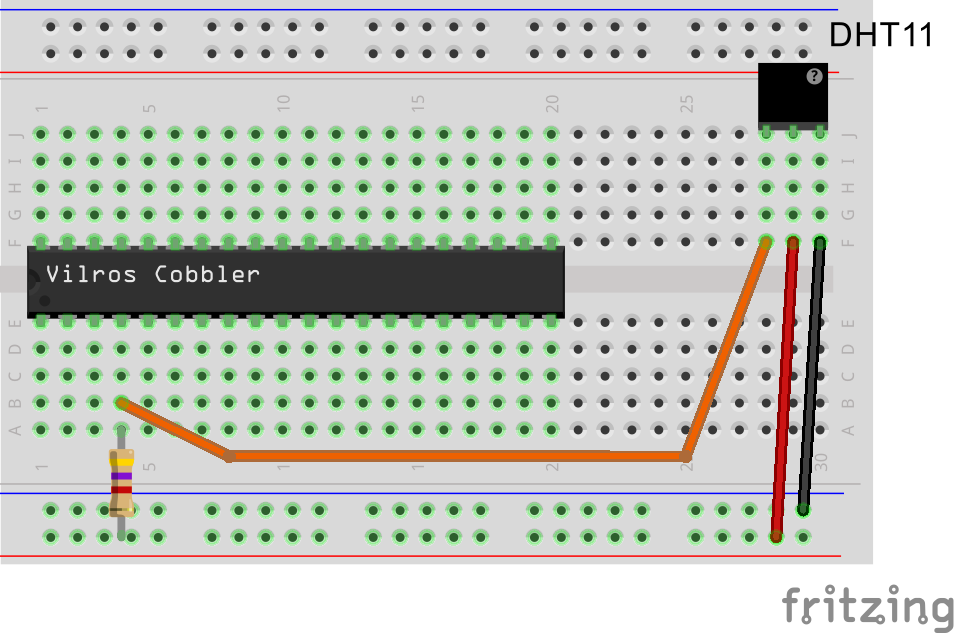
Getting StartedAssemble the Circuit for the Raspberry Pi 2Use this guide to assemble the circuit while using the diagram located near the bottom of the page as a guide (note the color of the wires are optional and have been selected to help make the circuit easy to follow when it is constructed).
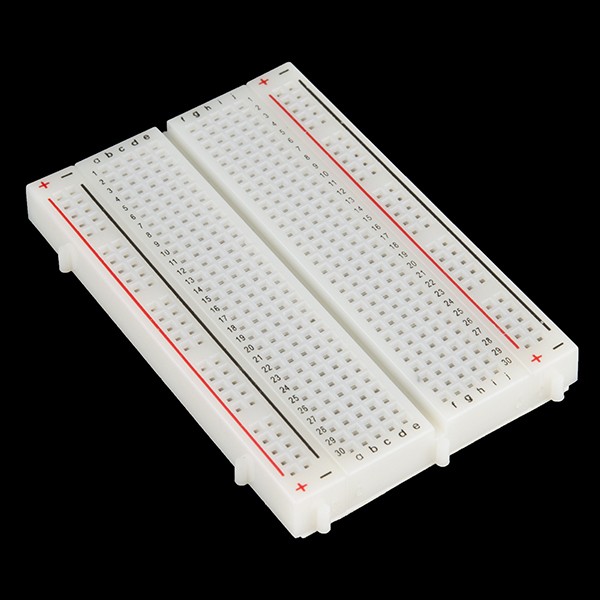
- Place the T-shaped cobbler at the left end of the half size+ board (where the numbers start at 1). The two left most pins will be in E1 and F1 on the board. The two right most pins will be at E20 and F20
- Place the 4.7K Ω resistor between A4 and 3V3
- Connect an orange male to male jumper wire between B4 and F28
- Connect a red male to male jumper wire between F29 and 3V3
- Connect a black male to male jumper wire between F30 and GND
- Place the DHT11 sensors into J30 (-), J29 (+) and J28 (s)
- Plug the ribbon cable into the cobbler and the Raspberry Pi
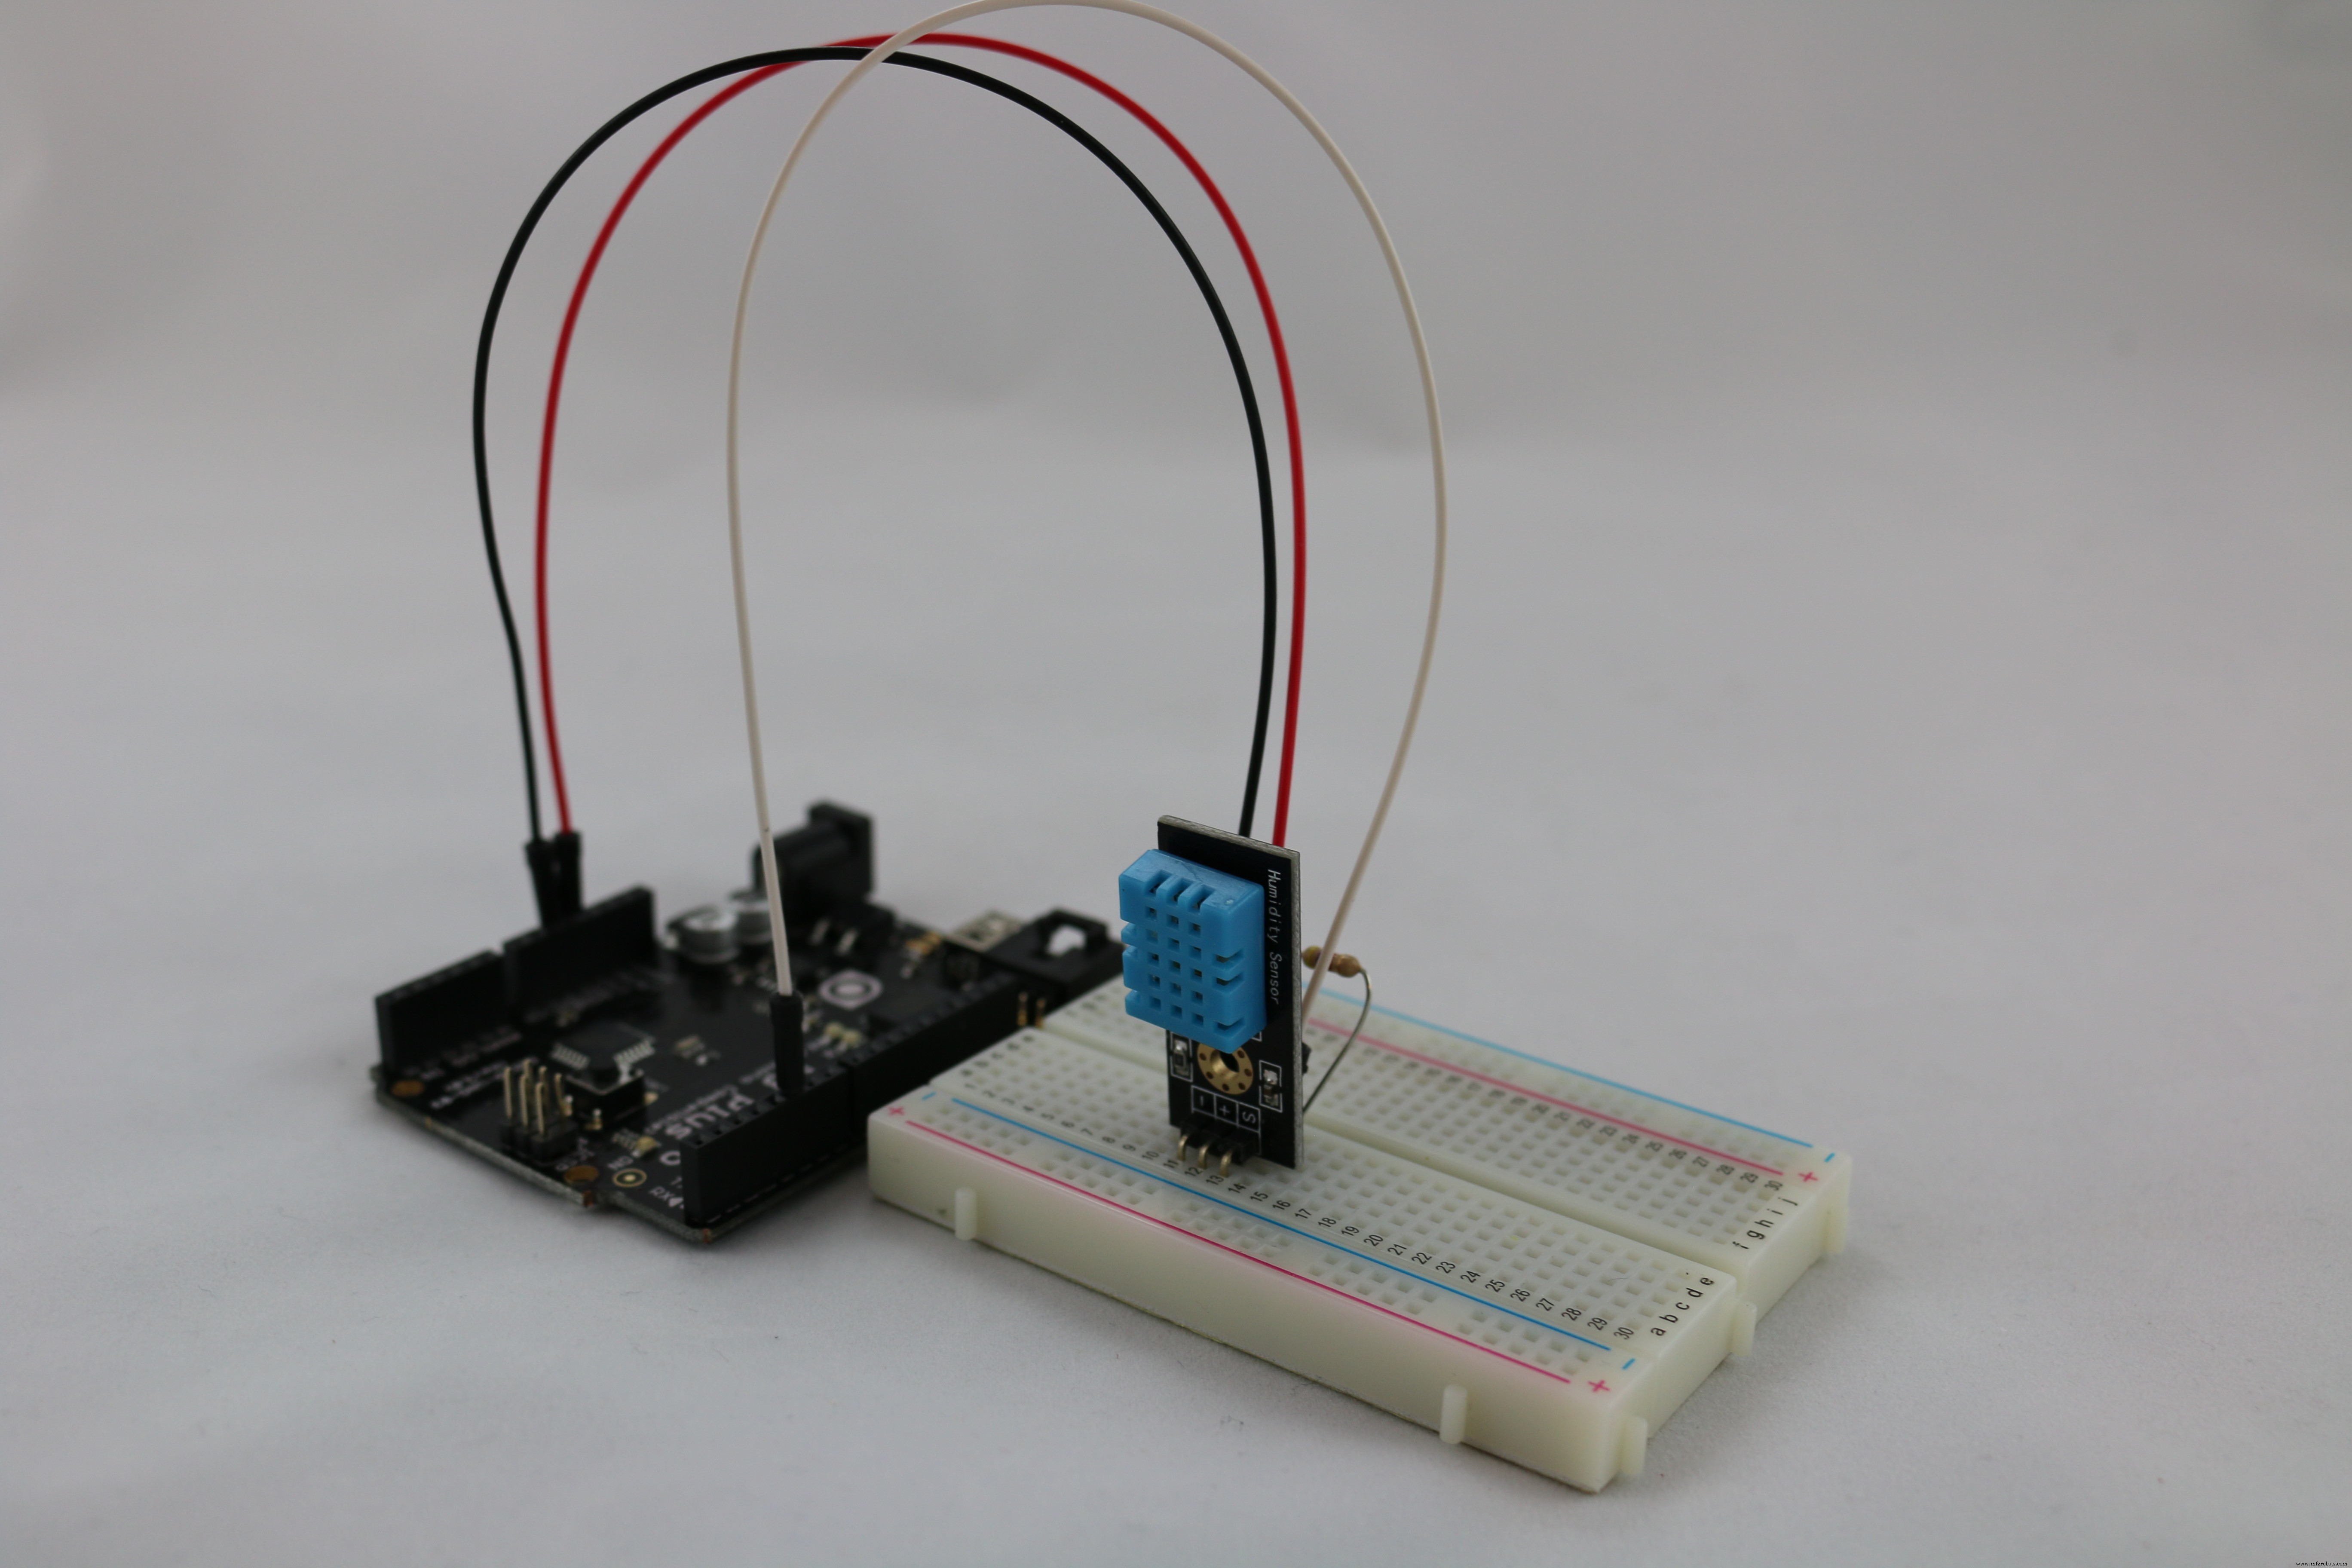
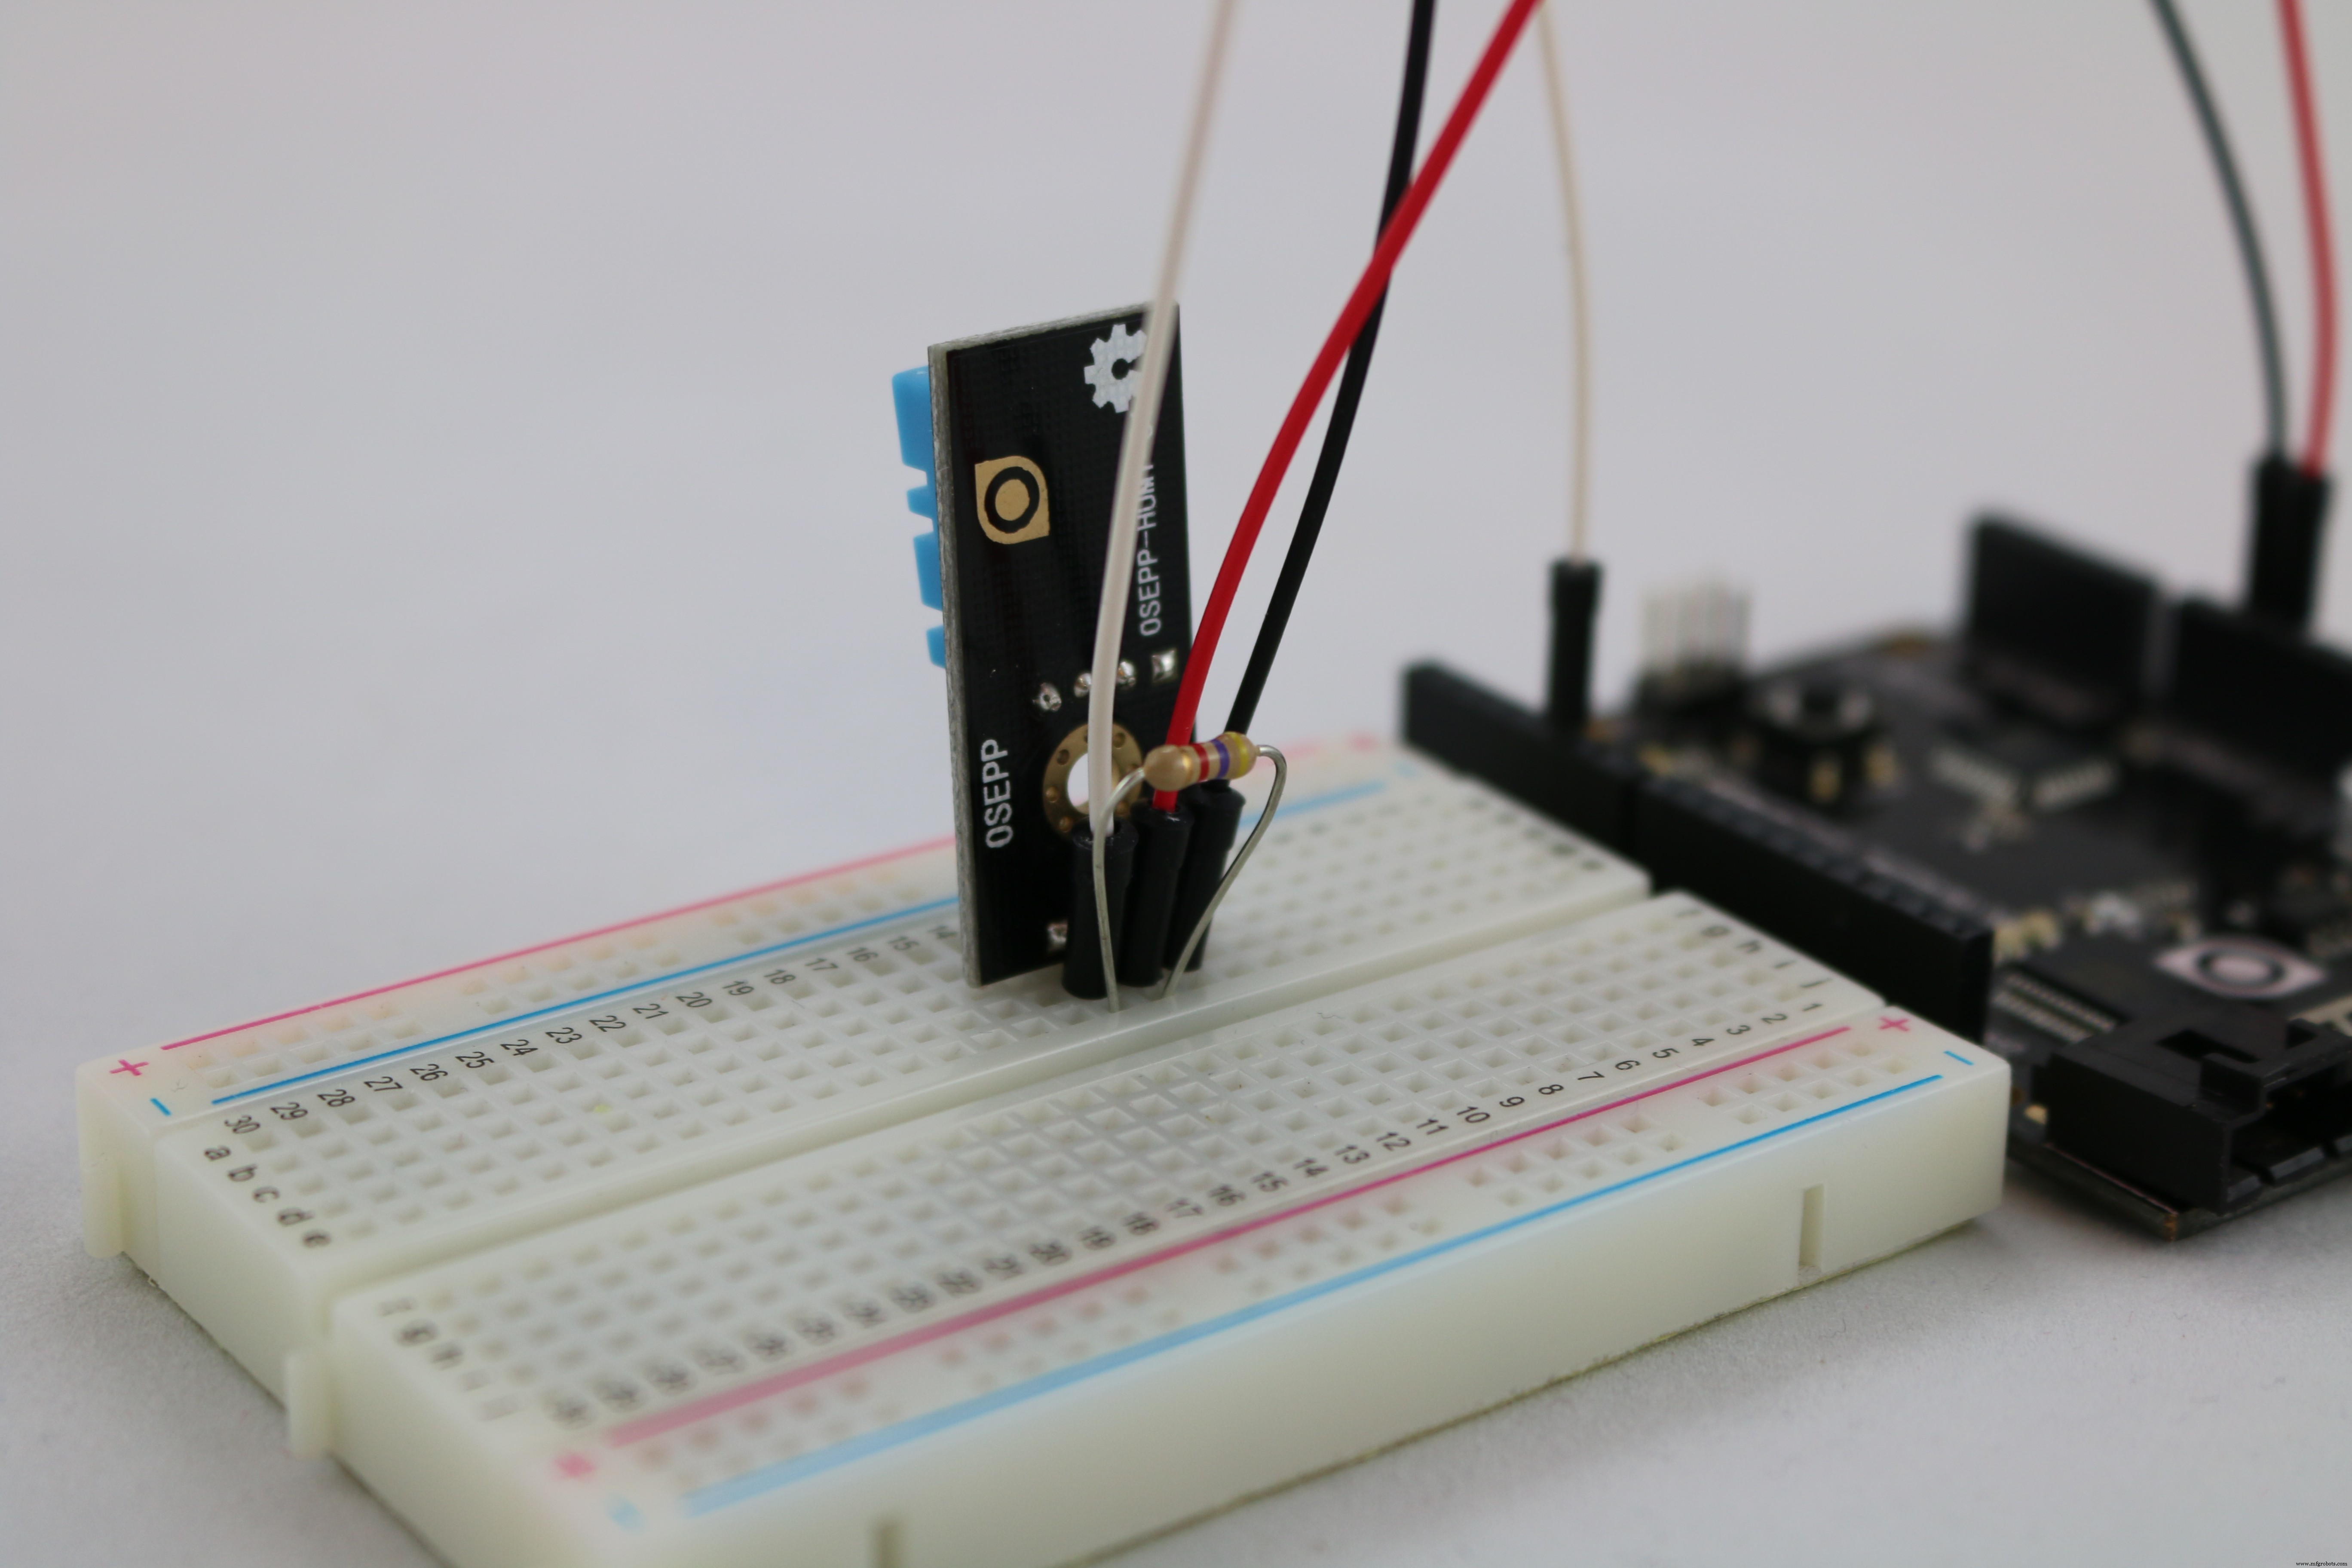
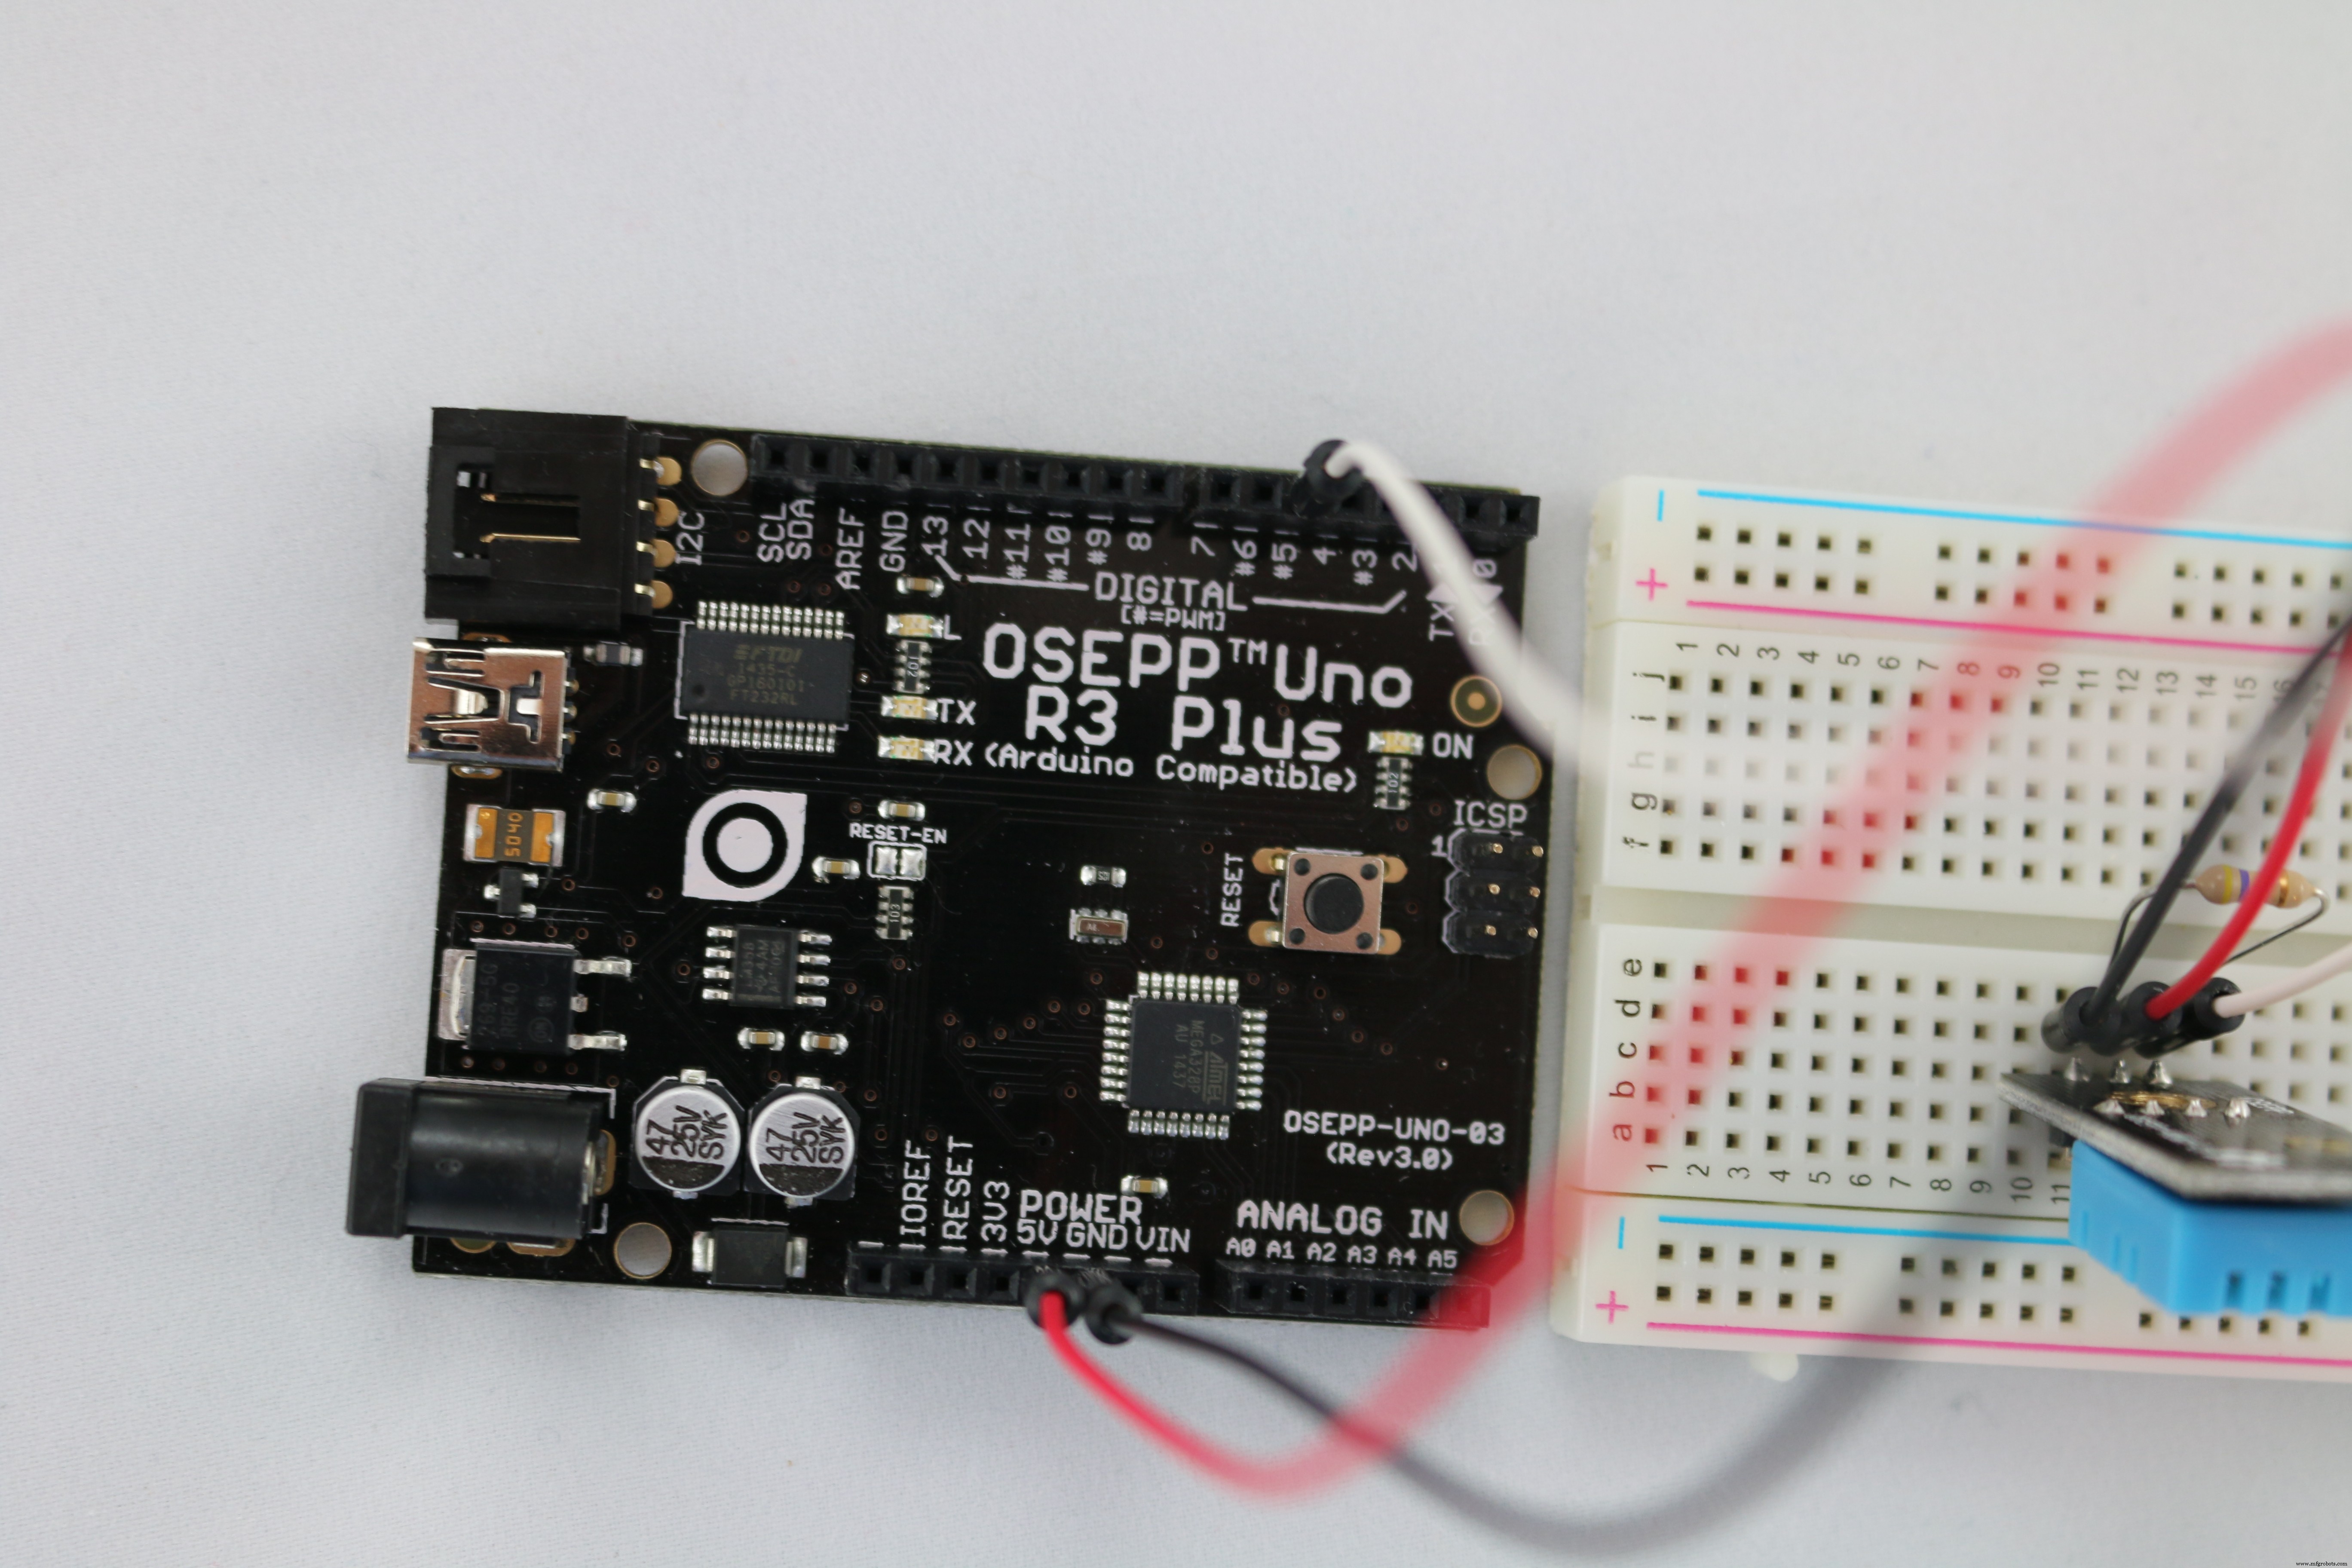
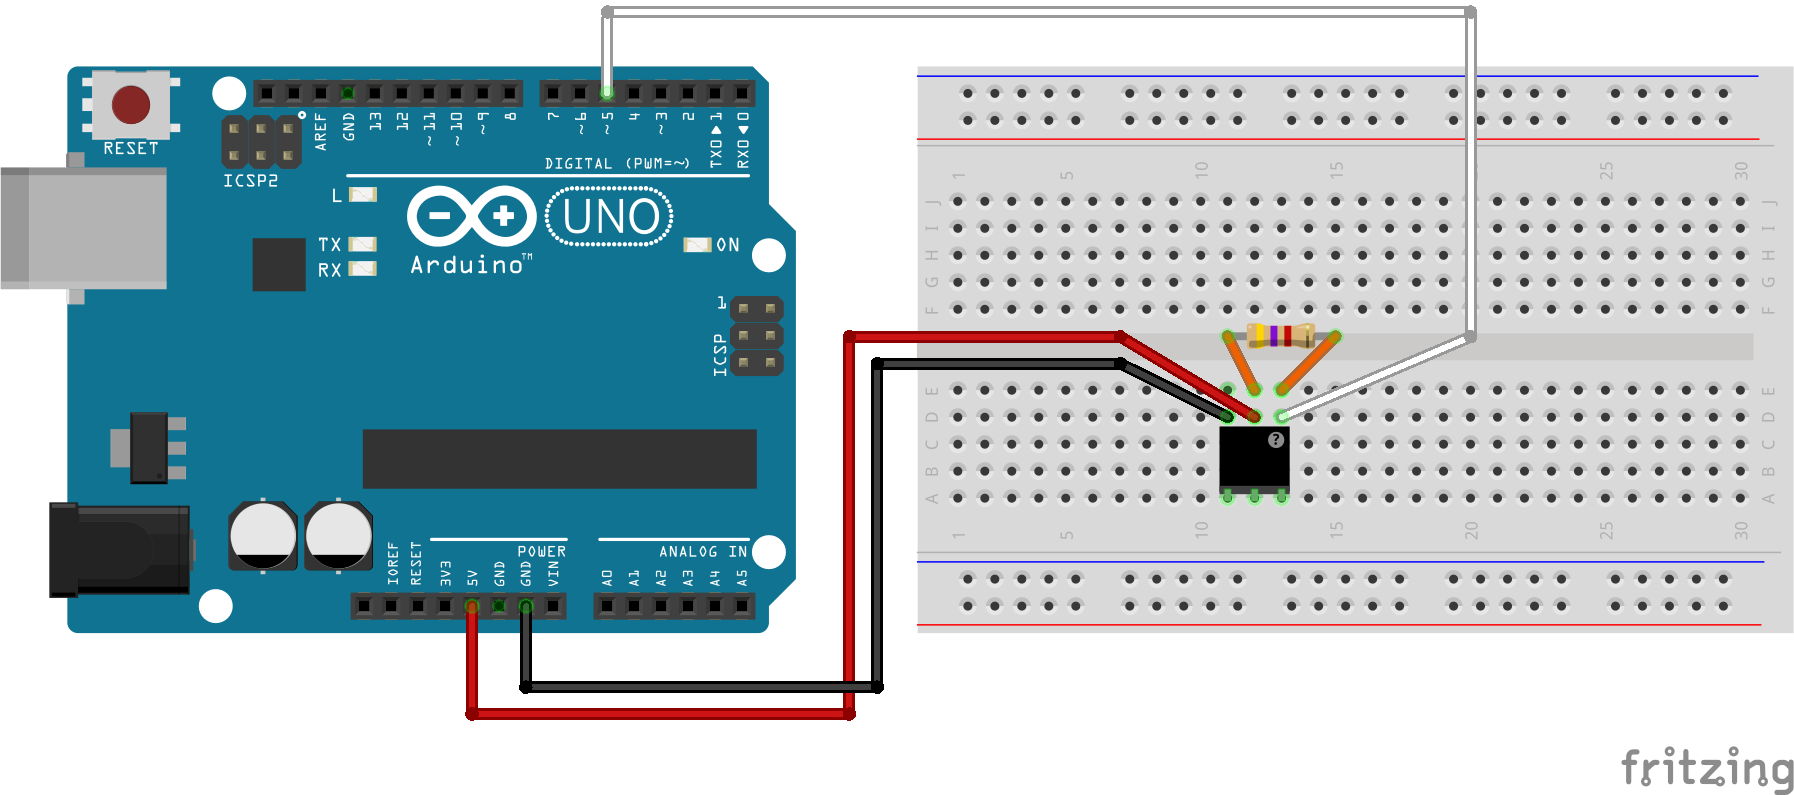
Use this guide to assemble the circuit while using the diagram located near the bottom of the page as a guide (note the color of the wires are optional and have been selected to help make the circuit easy to follow when it is constructed).
- Place the 4.7K Ω resistor between E12 and E13
- Connect a white male to male jumper wire between D13 and Pin 5 in the Arduino
- Connect a red male to male jumper wire between D12 and the 5V pin in the Arduino
- Connect a black male to male jumper wire between D11 and GND on the Arduino
- Place the DHT11 sensors into A11 (-), A12 (+) and A13 (s)
- Plug the USB cable from your computer to your Arduino
Below are photos of the circuits I built.

Choose Debug, ARM configuration and Remote Machine. Now right-click the project, and select Property and then click Debug tag. Next put the Raspberry Pi 2 IP address in the Remote machine field, and uncheck Use authentication.
Press F5. The application will deploy to the device which may take a few minutes the first time.
Starting the Application for the ArduinoThe sketch for this project is available in GitHub in a file called Dht11_Speed. Start the Arduino IDE and open the sketch. Upload the sketch to the Arduino (Ctrl U
) and then start the Serial Monitor (Ctrl Shift M
)
If you are unsure how to do this or are new to this environment the video below will demonstrate how to do this.
Starting the Application for RaspbianThe C code for the Raspberry Pi is available in GitHub for this project in a file called Dht11.c. The source needs to be copied to the Raspberry Pi and then compiled there. I like to use WinSCP to copy files. If you do not have this application I recommend you download and install it now. The source code uses wiringPi which must be installed prior to compiling the application.
The command to compile the code on the Raspberry Pi is:
gcc -oDht11_Speed Dht11_Speed.c -L/usr/local/lib -lwiringPi -std=c99 -lm
To run the application enter the command:
sudo ./Dht11_Speed 1000 10
Where 1000 specifies a delay of 1000 ms (1 sec) and 10 is the number of samples to read.
The video will demonstrate in more detail how to copy the code and how to compile it on the Raspberry Pi running Raspbian. To learn how to load Raspbian on your Raspberry Pi go to https://www.raspberrypi.org/downloads/raspbian/.
VideoThe video below is a demonstration the application:
View this video in You Tube using Theater mode for best quality.
Code
Visual Studio 2015 C#/C++ Source Code
https://github.com/porrey/dht.gitSchematics
Dht11_RPi2.fzz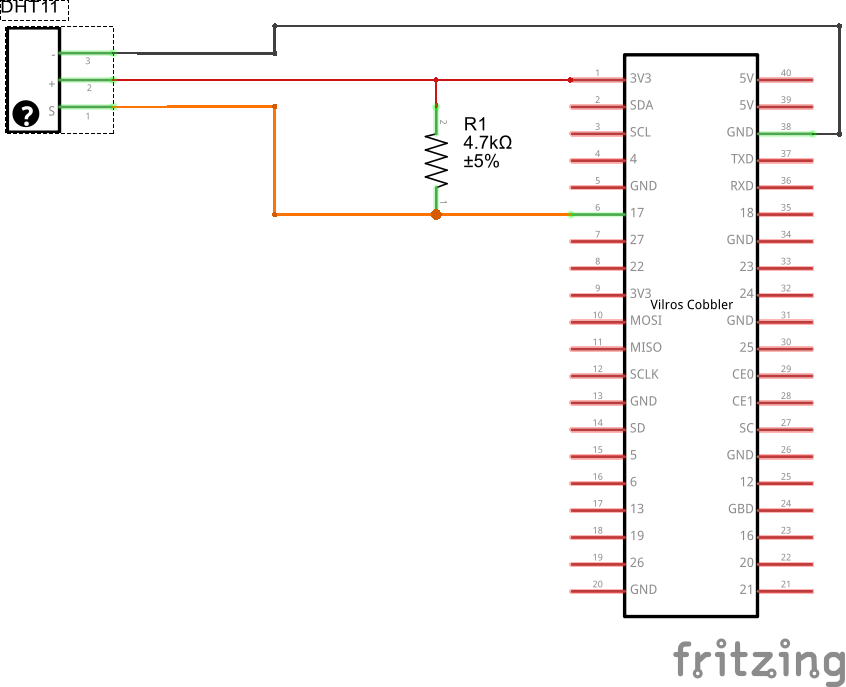
 Dht11_Arduino.fzz
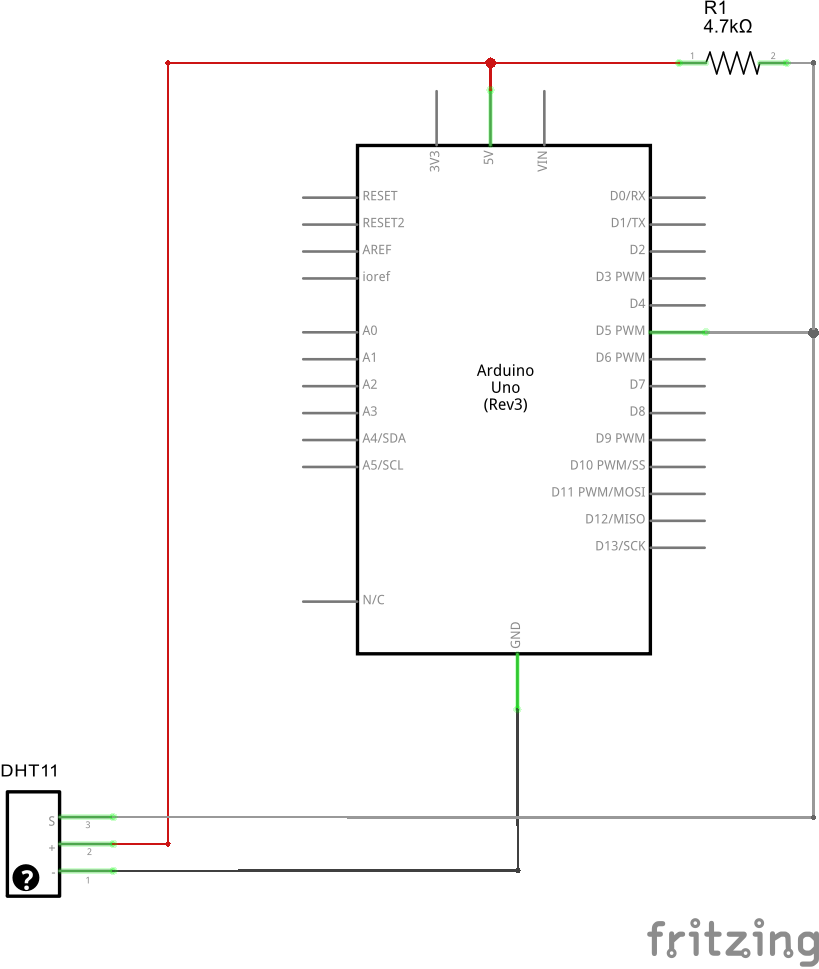
Manufacturing process
- DS18B20 Temperature Sensor – Precise 1‑Wire Digital Thermometer for Industrial & Consumer Use
- Build a Raspberry Pi Temperature Logger with a $5 I2C Sensor
- Build a Multi‑Sensor Temperature & Light Monitoring System with Raspberry Pi & DS18B20
- Build a Raspberry Pi Home Temperature Monitor with MCP9808, InfluxDB & Grafana
- Multi‑Position Temperature Sensor System for Smart Home Integration
- Enable Phone Calls on Arduino UNO Using Twilio & Yaler – Call My Arduino Project
- DasFilisera Smart Greenhouse: Advanced Plant Growth Monitoring System
- Arduino Temperature Sensor Project: Read, Convert, and Display Fahrenheit
- DHT11 Temperature & Humidity Sensor for Arduino Projects
- Arduino Tutorial: Master Temperature & Humidity with DHT11 & DHT22 Sensors