


Mastering 3D Printed Top Layers: Proven Techniques for a Flawless Finish
Most people in the 3d printing community constantly want to find ways to improve the overall quality of their objects. One of the most common issues that can make or break a print is the quality of the top surface. It may come as no surprise that we’ll want to fix these issues. In this article, I’ll go through these issues and describe the most easy solutions.
In order to improve the surface quality of the top layer, it is necessary to get rid of pillowing and holes that may appear due to improperly set parameters in the slicer. The easiest way to solve both issues is by increasing the infill density and/or increasing the top layer thickness. To further improve the aesthetics of the top layers, it is also recommended to enable ironing.
Common top layer problems and their solutions
In a nutshell, the two most common problem related to the top layers of a 3d printed object are holes (or gaps), and an undesired effect called pillowing. Let’s go through each one of these and see how we can also solve the issue.
Holes and gaps in the top layer
Increase top layer thickness
This is the most common solution to this problem because in most cases we are printing our solid top layer over a partially hollow infill which can result in the top layer sagging into the air spaces. Typically you want to have at least a 0.5mm thick solid section at the top of your 3d objects meaning that if you are printing with a 0.3mm layer height you will need two layers or five layers if you are printing with a 0.1mm layer height.
It is worth noting that increasing your top layers won’t change the object size because you are adding them within your object dimension.
Increase infill density
A low infill density means that there’s going to be bigger air gaps in your infill thus less support for your top layer which can result in holes and gaps. It is recommended to have at least a 12% infill in any project. Try increasing your infill density by 10% to see if it improves. If no improvements are noticeable, you can repeat the process by further increasing the infill percentage until you solve the issue.
Check for under-extrusion
If the issue persists you may be experiencing under-extrusion. This happens when your printer’s firmware thinks it is extruding more plastic than it actually is resulting in poor printing quality. Thus, we get those gaps and holes.
A simple way to check if our printer is extruding the correct amount of plastic is to make a 20mm tall cube and give it at least 3 solid layers at the top and bottom. If there are any gaps between those 3 layers then we know our printer is not extruding enough plastic. To fix under-extrusion try the following solutions:
- Check the nozzle condition, you might need to replace it if it’s worn out or just clean it. It is also possible that you have leftovers from previous prints jamming the nozzle.
- Make sure the filament diameter that you are using matches the one in your slicer’s settings.
- Increase extrusion multiplier: This is also known as flow rate and lets you determine how much filament goes into the extruder. Increasing it allows a bigger flow of filament into the extruder. PLA usually prints with a 0.9 multiplier while ABS goes by 1.0. Try increasing the extrusion multiplier by 5%. As a rule of thumb, you should stay within a 0.9 and 1.1 multiplier.
- Use the correct printing temperature for your filament: If the temperature is too low the filament won’t melt properly and will eventually jam the extruder and if the temperature is too high you can end up with modeling problems as it needs more time to solidify. Check your filament spool for the proper temperature.
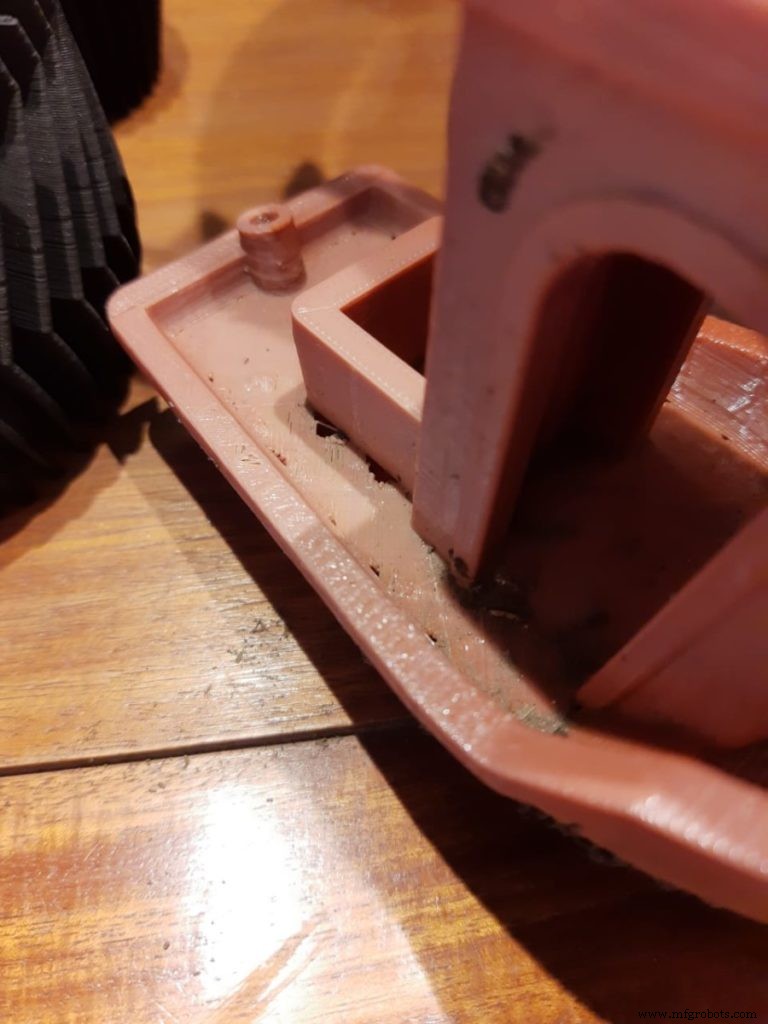
Pillowing

The pillowing effect is another undesirable consequence of bad settings and is a very common issue in 3D printing. It refers to uneven, bumpy, and rough top layers. To fix pillowing try the following solutions:
- Increase top layer thickness, for a smooth top layer, it is recommended to have at least 0.5mm thick solid section at the top as a thinner layer will always be more prone to pillowing. To achieve this, look at the layer height you are using and print as many layers as necessary. For example, for a 0.25mm layer height, you will need to print at least 2 layers.
- Increase infill density: A bigger infill density means fewer air spaces below our top layers, making it less likely to produce the pillowing effect since the infill works as the foundation for top layers to print. Try increasing it by 10% at a time.
- Take it slow: Decreasing printing temperature and printing speed will help you avoid the pillowing effect as it gives the plastic more time to cool off and harden, making it stronger and less likely to curl.
- Check your cooling system: Make sure the layer fan is working at maximum speed while printing the top layers. The surface won’t have time to cool off if it is not working at full speed. If they are working, your fans might not be strong enough to rapidly cool the surface and avoid the pillowing effect. There are some awesome mods that you can get online to improve your cooling system. You could even try with a desk fan aiming towards your printer.
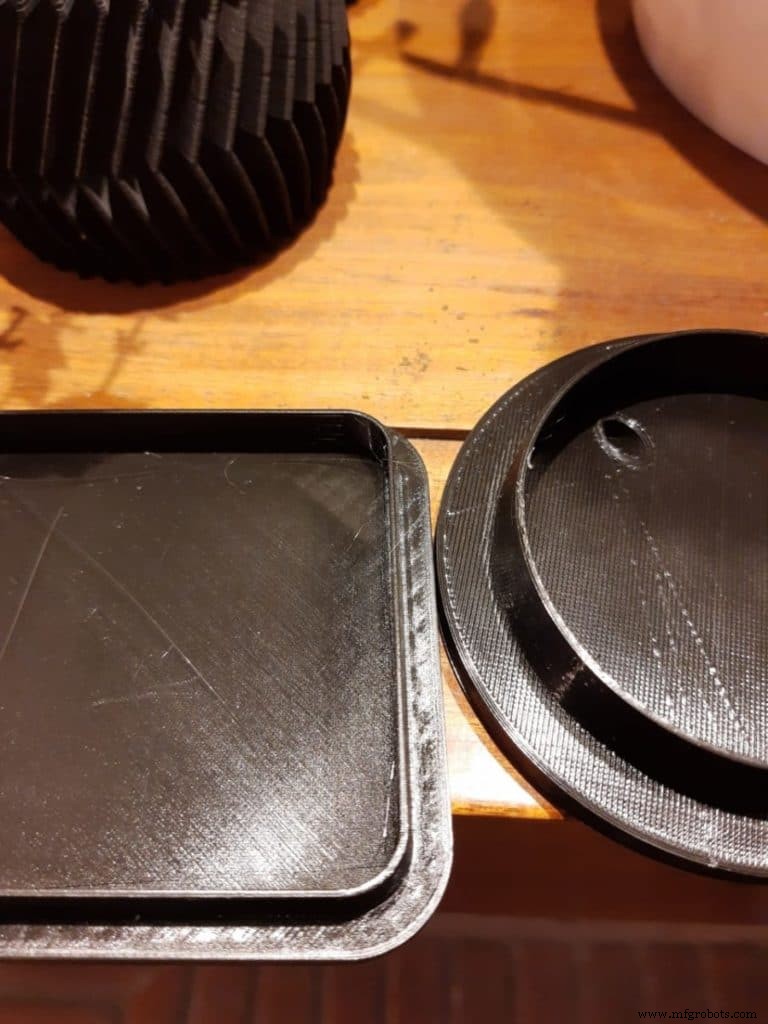
Improving the quality of top layers with Ironing
What is ironing in 3d printing?
Ironing is a function that was first introduced on Cura but is nowadays implemented in all of the most popular slicers in the market. When the topmost layer of each part of an object has finished printing, the printer will keep the nozzle hot and travel all over the top layer, heating and melting it again. It can also be set to extrude a small amount of filament to fill any possible holes. This effect will flatten any layer lines, resulting in a much smoother top layer.
You can use ironing any time you have a flat top surface parallel to the print bed that you want to smooth out. It can also be used when in cases where you want to maximize the contact surface of 2 pieces for better gluing them together. Ironing does not have any noticeable positive effects in figures other than flat top surfaces parallel to the print bed.
When ironing large surfaces, some printers can get filament jammed due to the slow and small extrusion that occurs during ironing. In most cases, ironing will not produce any significant negative effects on our 3D projects, but one thing to take into consideration is that it will take longer to finish the printing. Depending on your project it can take 10-50% extra time to finish printing.
How to enable ironing in Cura?
Ironing is not visible in Cura when you first install it, so in order to make it visible follow these steps:
- Open the print settings panel.
- Click the hamburger menu and go to “Manage Settings Visibility“.
- There type “ironing” in the search bar and check “enable ironing”, and close that window. There you can also enable the ironing settings if you want to try different options.
- Now you will see “Enable Ironing” in the settings menu under the “Shell” submenu. Go ahead and check that box.
That’s it, ironing is enabled now!
Ironing settings
- “Iron Only Highest Layer”: This option lets you decide whether you want to iron out only the topmost layer for when you have a flat surface that’s lower than the top layer. Leave this unchecked if you want to iron every top layer.
- “Ironing Pattern”: This feature lets you control the way the nozzle will move across the top layers. There are 2 options, “Zigzag” is the default one and it moves the nozzle back and forth in a zigzag pattern, and “Concentric”, which will print from the outside to the center.
- “Ironing Line Spacing”: This manages the distance between the ironing lines. A spacing of 0.1mm is the default and it yields a very smooth finish. On the downside, it will take longer to finish, so depending on how smooth you want the top layers to be you can adjust this setting. More space between the lines will speed up the process.
- “Ironing Flow”: This controls how much filament is being extruded while ironing. A flow of 10% is the default value, but you can decrease this if the surface is still rough as it is possible that it is over extruding while ironing.
- “Ironing Inset”: This option lets you decide how far away from the edges you want the nozzle to be. Because ironing extrudes a little bit of filament you don’t want it to go all the way to the edges as it could give you kind of a rim on your top part.
- “Ironing Speed, Acceleration, and Jerk”: These 3 options will let you fine-tune the speed at which the nozzle will move while the ironing process is running. If you want to dig deeper into acceleration and jerk settings, check out the article I recently wrote on the topic.
Check out our recommended products section
We created a recommended products section that will allow you to remove the guesswork and reduce the time spent researching what printer, filament, or upgrades to get, since we know that this can be a very daunting task and which generally leads to a lot of confusion.
We have selected just a handful of 3D printers that we consider to be good for beginners as well as intermediates, and even experts, making the decision easier, and the filaments, as well as the upgrades listed, were all tested by us and carefully selected, so you know that whichever one you choose will work as intended.
3D printing
- Expert Guide to Enhancing Cloud Management: Strategies, Best Practices, and Key Benefits
- Metal Plating for 3D Printed Parts: A Practical, Expert Guide
- Expert Guide to Top DMLS Machines – 2024 Edition
- Choosing the Best Industrial Binder‑Jetting 3D Printers: Top 5 Picks
- The Top 7 Ceramic 3D Printers of 2018 – Expert Review
- Top 6 SLS 3D Printers of 2018: A Comprehensive Comparison
- Industry 4.0 in Maintenance: A Practical Guide to the Future of Asset Management
- Carl Calabria’s Expert Guide to Installing Inserts on the Mark One 3D Printer
- Complete Guide to Printed Circuit Board Assembly (PCBA)
- Why the Layer Fan is Crucial for FDM 3D Printing Success