


Understanding Skirt, Brim, and Raft: Solutions for 3D Printing Adhesion Issues
With the use of non-conventional materials, such as nylon, or when printing some FDM / FFF parts with a small base or a complex design, adhesion problems of the filament to the base may occur both at the beginning and during the 3D printing process. In that case, the first thing to check is if the leveling of the base and the temperature of the base are correct for the type of filament chosen. If, however, the adhesion problem persists, it can be remedied by 3 different methods of improving base adhesion: brim, raft or skirt. The activation of those adhesion options in the slicing software (Cura, Simplify3D, etc) can be found in the section "adhesion platform".
Here's what these three parameters are all about:
SKIRT
In this process, a copy of the contour of the piece to be printed is prepared before the piece itself is printed. It is a way of avoiding errors in the initial stages by making sure that the base is leveled and the extruder is purged before the printing process has begun. The number of contour turns, the separation distance of the skirt from the piece, and the height of the skirt can be set in the slicing software. If the skirt is set to have the same height as the piece, a wall is created that protects the piece from drafts, which helps in the 3D printing of materials sensitive to drafts, such as ABS.
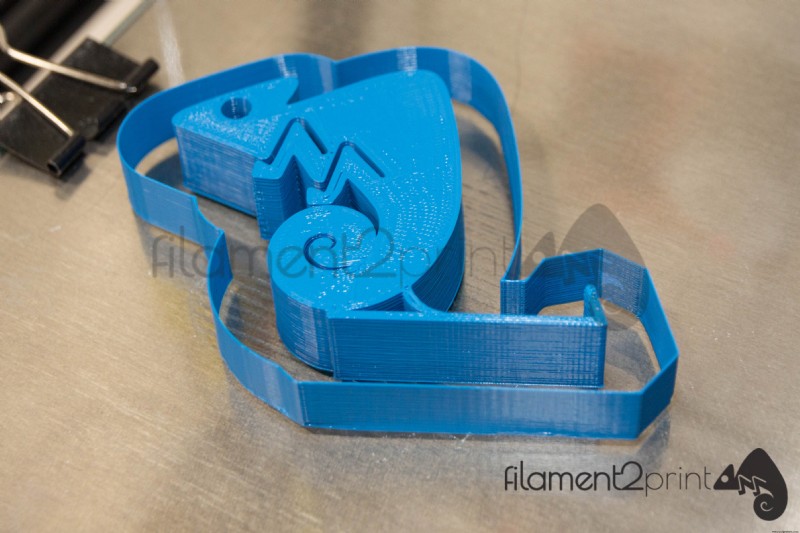
Image 1: Example Skirt.
BRIM
The Brim uses the same process as the skirt, but in direct contact with the piece. This method is ideal for prints with small or narrow base parts, such as a chair or a tower. It is also recommended to use brims when 3D printing parts with corners that can lift or pieces that contain narrow parts, such as pinions and gears. In those cases, a brim of 1-2 layers of height already guarantees sufficient adhesion.The only drawback of this method is the difficulty of removing the brim from the 3D printed part if there is no post-processing tool available, such as Modifi3D.

Image 2: Example Brim.
RAFT
This is the method most adequate for materials that are difficult to bond to the base. A raft is created by 3D printing a horizontal lattice between the base of the 3D printer and the part. As this lattice has more contact area with the base than the piece itself, it favors adhesion and avoids leveling problems (when the attachment is small). Regarding the latter, in some 3D printers that have a large base and whose exact leveling is very difficult to achieve, it is advisable to always use a raft. Unlike a brim, a raft is easy to remove and leaves almost no “debris” on the 3D printed piece.
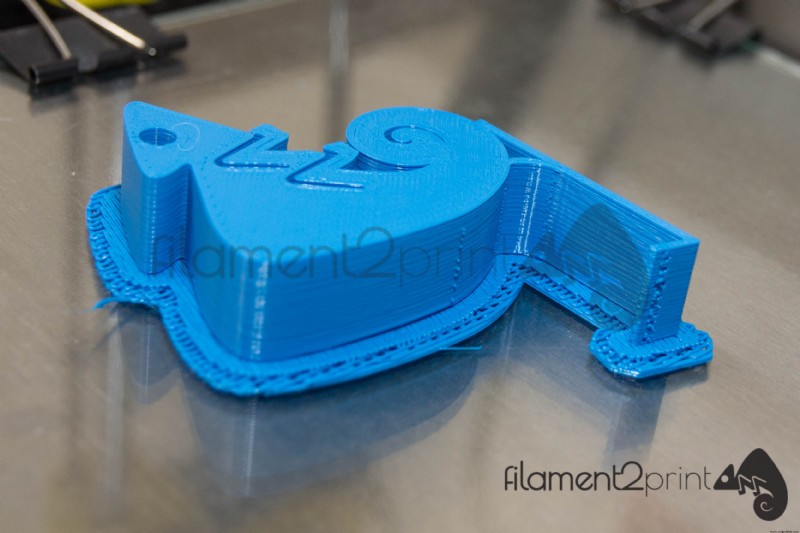
Image 3: Example Raft.
By applying the methods mentioned above, any user can make 3D prints of all types and with almost any material without experiencing complications such as warping.
3D printing
- Molybdenum Rods: Types, Applications, and Care
- Cobalt Alloys: Composition, Key Properties, and Industrial Applications
- Raft vs Brim in 3D Printing: Understanding the Key Differences
- Understanding Textile Dyes and the Dyeing Process
- Kevlar Demystified: Composition, Applications, and Benefits
- Applications and Properties of Manganese Steel: A Comprehensive Overview
- Red vs. Yellow Brass: Composition, Uses, and Key Differences
- Understanding Resistance Welding: Types, Processes, and Industrial Applications
- Connected Manufacturing: What It Is & Its Key Benefits
- Discover the Types of 3D Printers and Their Capabilities