


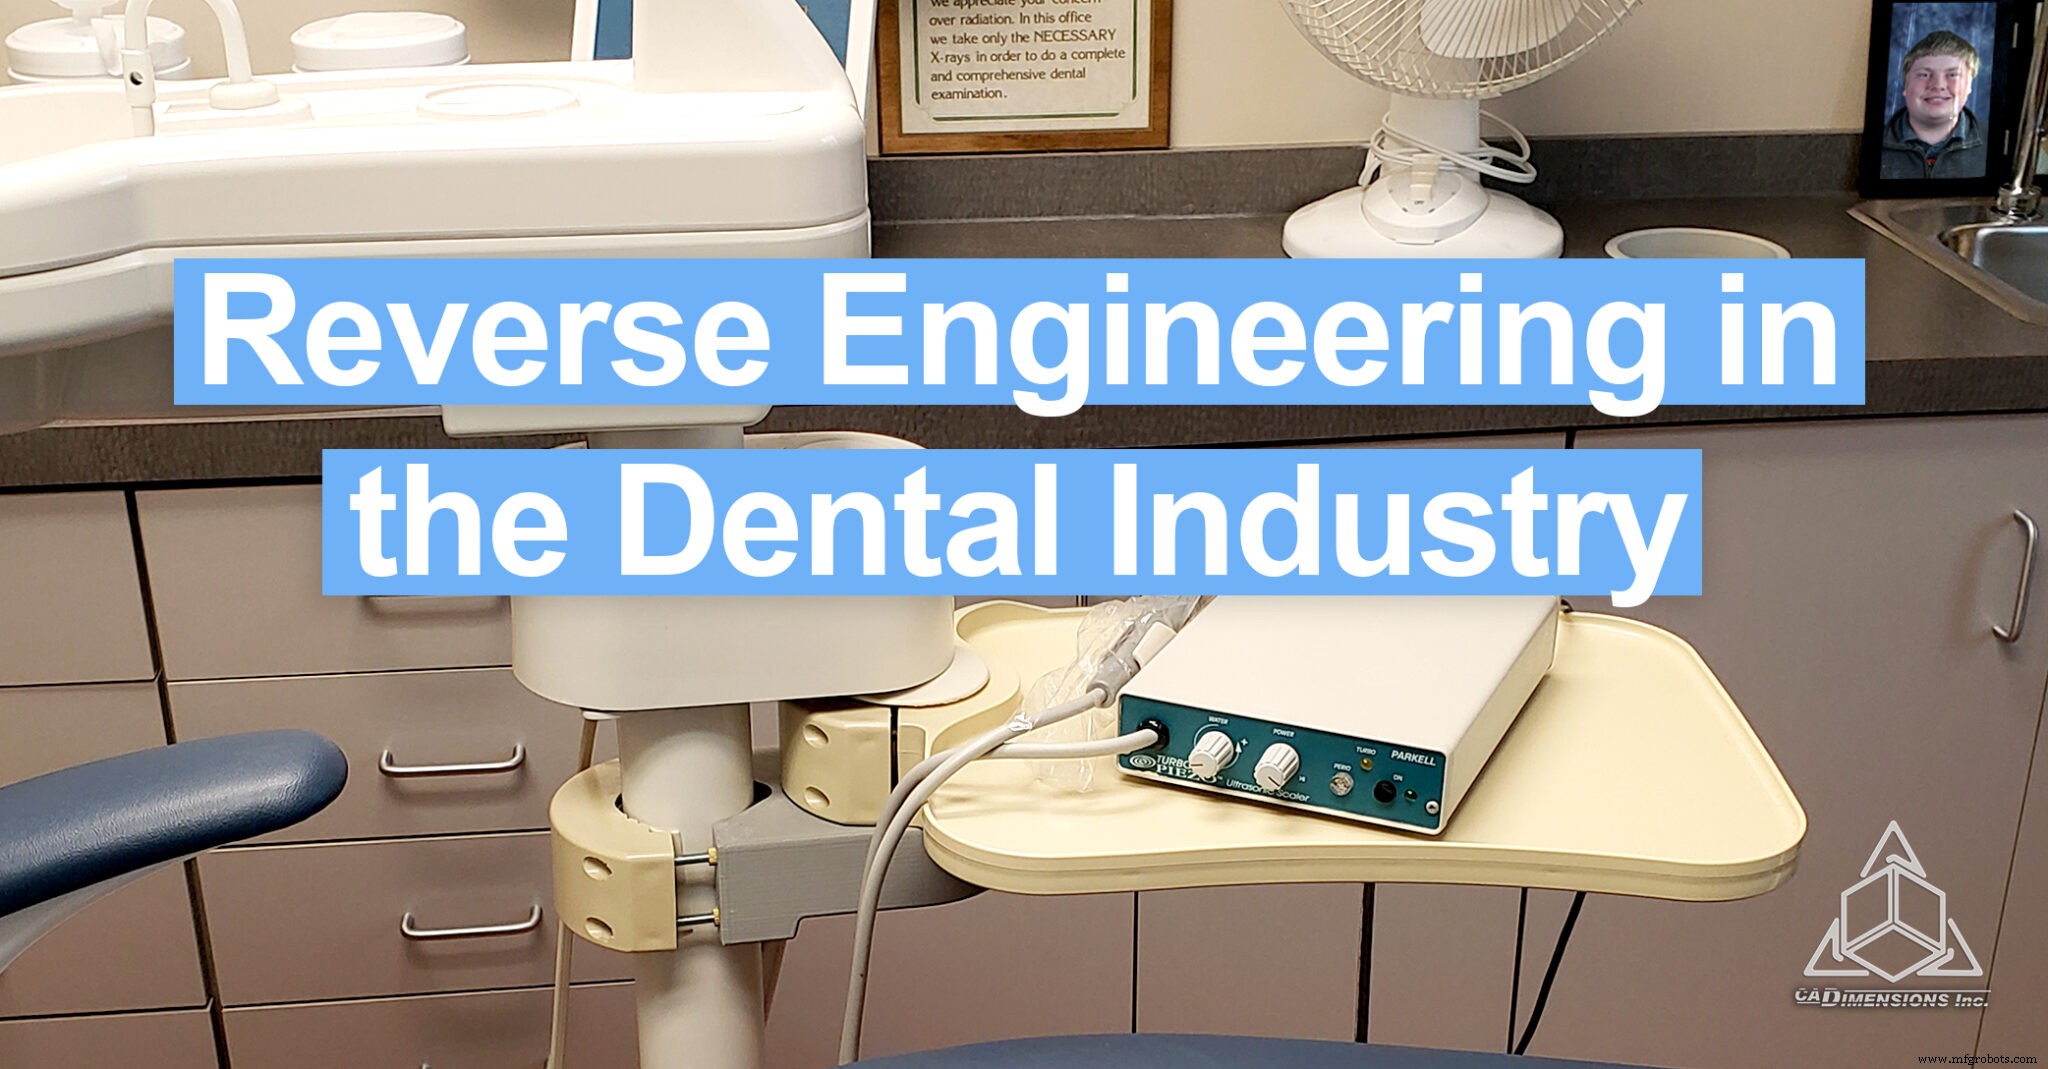
Reverse Engineering a Dental Clamp: 3D‑Printing a Custom Replacement Part
In the dental sector, 3D printing is a game‑changer—mass‑customized aligners, surgical guides, and prosthetics are now produced faster and more cost‑effectively than ever. When a critical clamp component that supports a small worktable fractured, the traditional repair—glue‑sealing—was only a stopgap. My father, a dentist, reached out for a more durable solution. The original manufacturer had discontinued the part, so I volunteered to design and print a replacement using our in‑house 3D‑printing expertise.
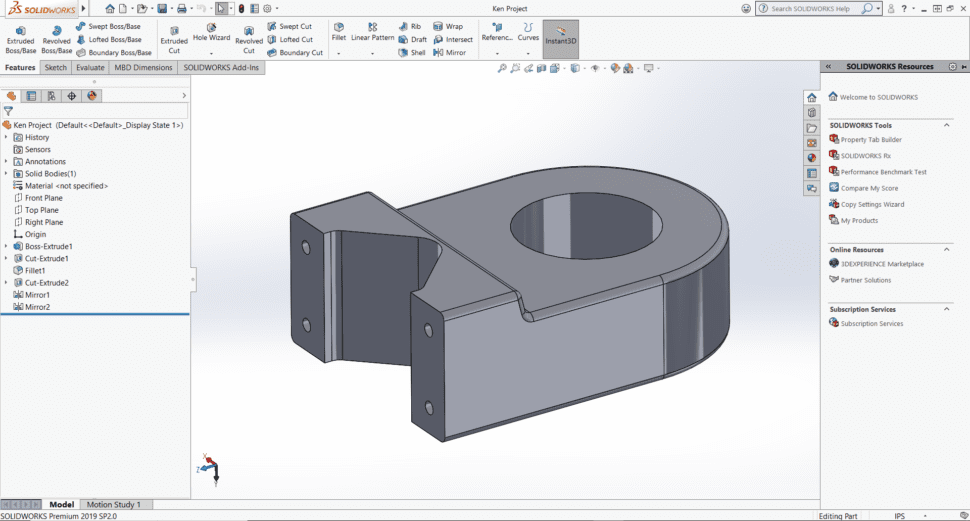
Reverse‑Engineering the Clamp
We began by digitizing the broken component. The SolidWorks team captured its geometry and performed a quick stress analysis. Fred, our support engineer, confirmed that standard ABS would meet the load requirements, even with a sparse infill pattern. This approach balances strength and material savings.
Optimizing for 3D Printing
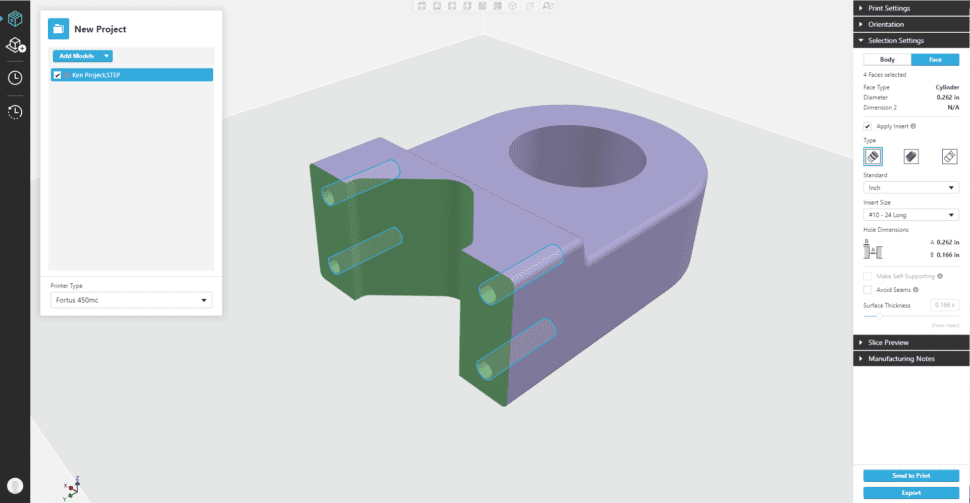
With the CAD model finalized, I imported it into GrabCAD to prepare the print. Using the “Advanced FDM Mode,” I implemented two key modifications:
- Insert application: I re‑scaled the four holes at the base to accept #10–24 long heat‑set inserts, automatically adjusting diameters and surrounding contours for a snug fit.
- Avoid seams: Seam placement was moved away from mating surfaces and the chair contact area, reducing the risk of joint failure during use.
Printing was performed on a Fortus 450mc with a 0.013” layer height and a sparse infill pattern. The part completed in just 3.5 hours. Post‑processing involved a 4‑hour soluble support removal in a wash tank, after which the component was ready for assembly.
To secure the heat‑set inserts, we used a small blow torch. While not ideal for precise temperature control, the method was sufficient for this application. In future builds, a dedicated heating jig could improve consistency.
Final Results
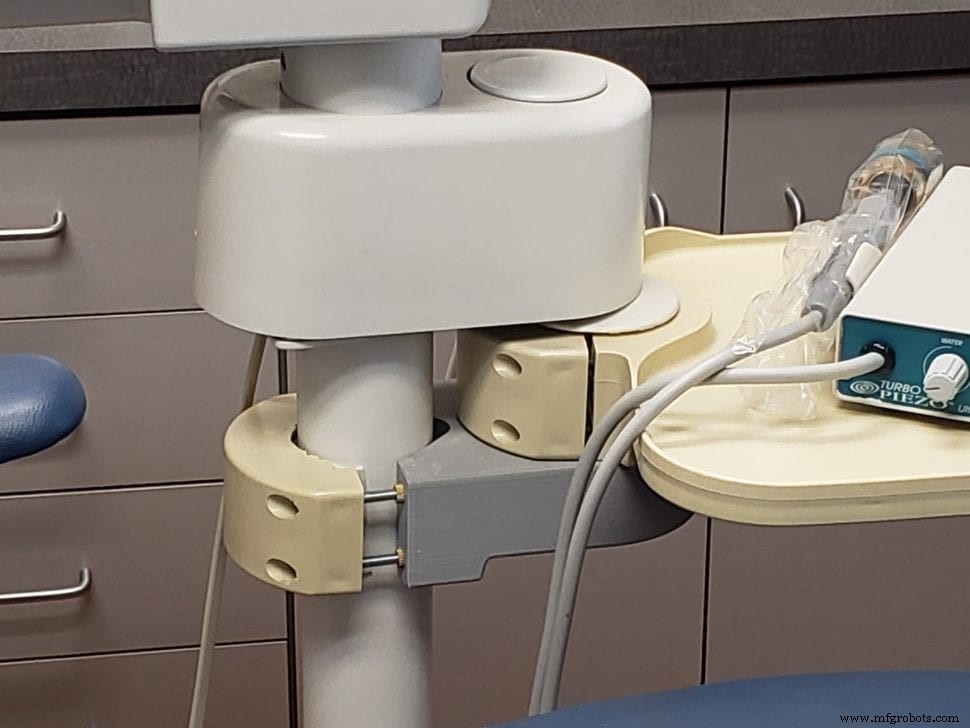
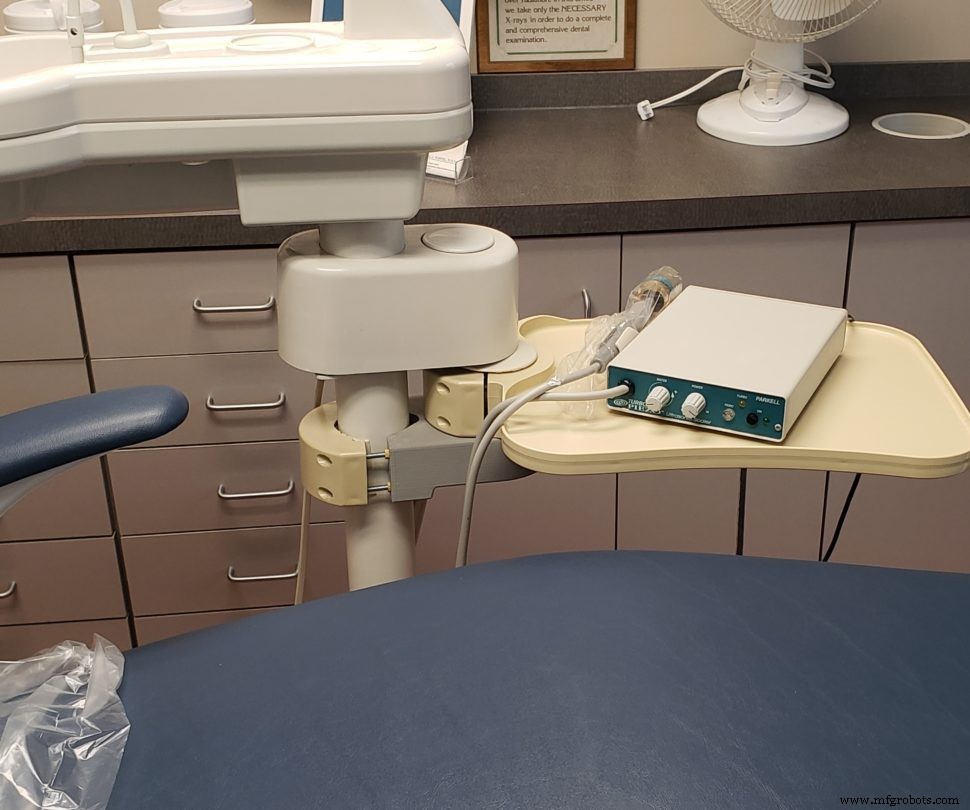
The new clamp installed cleanly in my father’s office. It comfortably supports the worktable and associated tools, with a small margin of additional load capacity. Minor adjustments—such as a slightly larger radius—could enhance the fit further. Additionally, I discovered a rubber sleeve on the original clamp that prevented slippage; re‑adding a similar element would increase friction and overall stability.
Tags: 3D Printing, Replacement Parts, Reverse Engineering
3D printing
- Industry 4.0: Materialise’s Blueprint for the Networked Factory
- Carl Calabria’s Carbon‑Fiber Jig for Precise Composite Spool Tensioner Alignment
- Tracing the Evolution of Polymeric Materials: Part 1 – From Natural Rubber to Celluloid
- Tracing the History of Polymeric Materials, Part 4: Leo Baekeland and the Birth of Bakelite
- The Evolution of Polymer Materials: Part 6 – From Thermosets to Thermoplastics
- Tracing the Evolution of Polymeric Materials: The Rise of Cellulose‑Based Innovations
- Tracing the History of Chlorinated Polymers: The Rise of PVC, Neoprene, and PVDC
- The Legacy of PTFE: From Serendipity to Global Impact – Part 10
- How IIoT Drives MRO Excellence in Industry 4.0: Part 1
- Accelerated 2D & 3D Inspection & Reverse Engineering for Precision Sheet Metal & Component Analysis