


Mark X Unibody 3D‑Printed Drone: Design, Build, and Flight Performance
If you’ve been following us recently, you’ve probably seen our new favorite Mark X part: a unibody, 3D‑printed drone. Conceived as a showcase for the scale, strength, and surface finish of Mark X components, it has exceeded every expectation in practice. In this article we walk through the design process, print strategy, and flight performance of this groundbreaking piece.
Drone Requirements
When building a part from scratch, defining clear requirements is essential. For this drone we identified four key criteria:
- Unibody construction – A single, integrated shell demonstrates the size of the Mark X and eliminates weak points that multiple‑piece assemblies create.
- Fit IRIS+ hardware – We chose the proven IRIS+ drone kit for motors, control electronics, and wiring. The internal cavity had to accommodate every component without shifting the center of gravity, and the parts must be removable for rapid iteration.
- Print on Onyx without supports – The full design contains more than 220 cc of Onyx. To keep build time under three days, we minimized carbon‑fiber use and engineered the geometry to avoid support structures, leveraging Onyx’s ability to print unsupported over 70° inclines.
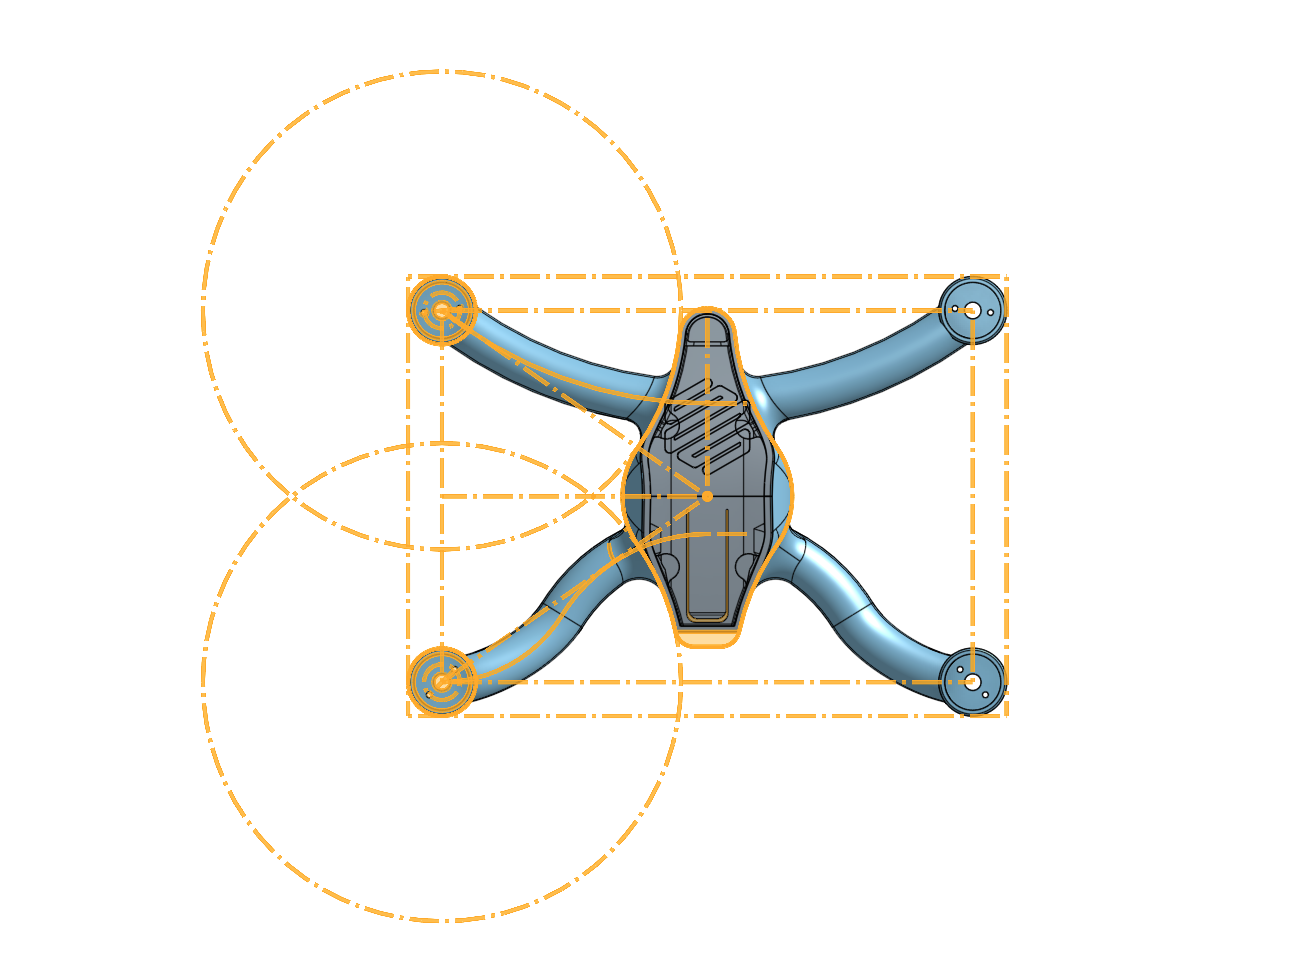
- Fit on a Mark X build plate – This constraint required creative propeller placement to respect the 250 mm plate dimension while maintaining aerodynamic balance.
Design and Iteration
Despite the clear roadmap, turning the concept into a printable reality presented surprises. We began with a top‑down sketch that positioned the four 245‑mm propellers. The 250‑mm build plate left only 5 mm for the motor mounts, forcing the front and rear propellers to collide in the sketch. Raising the rear pair into a higher plane resolved the clash and kept all rotors clear.
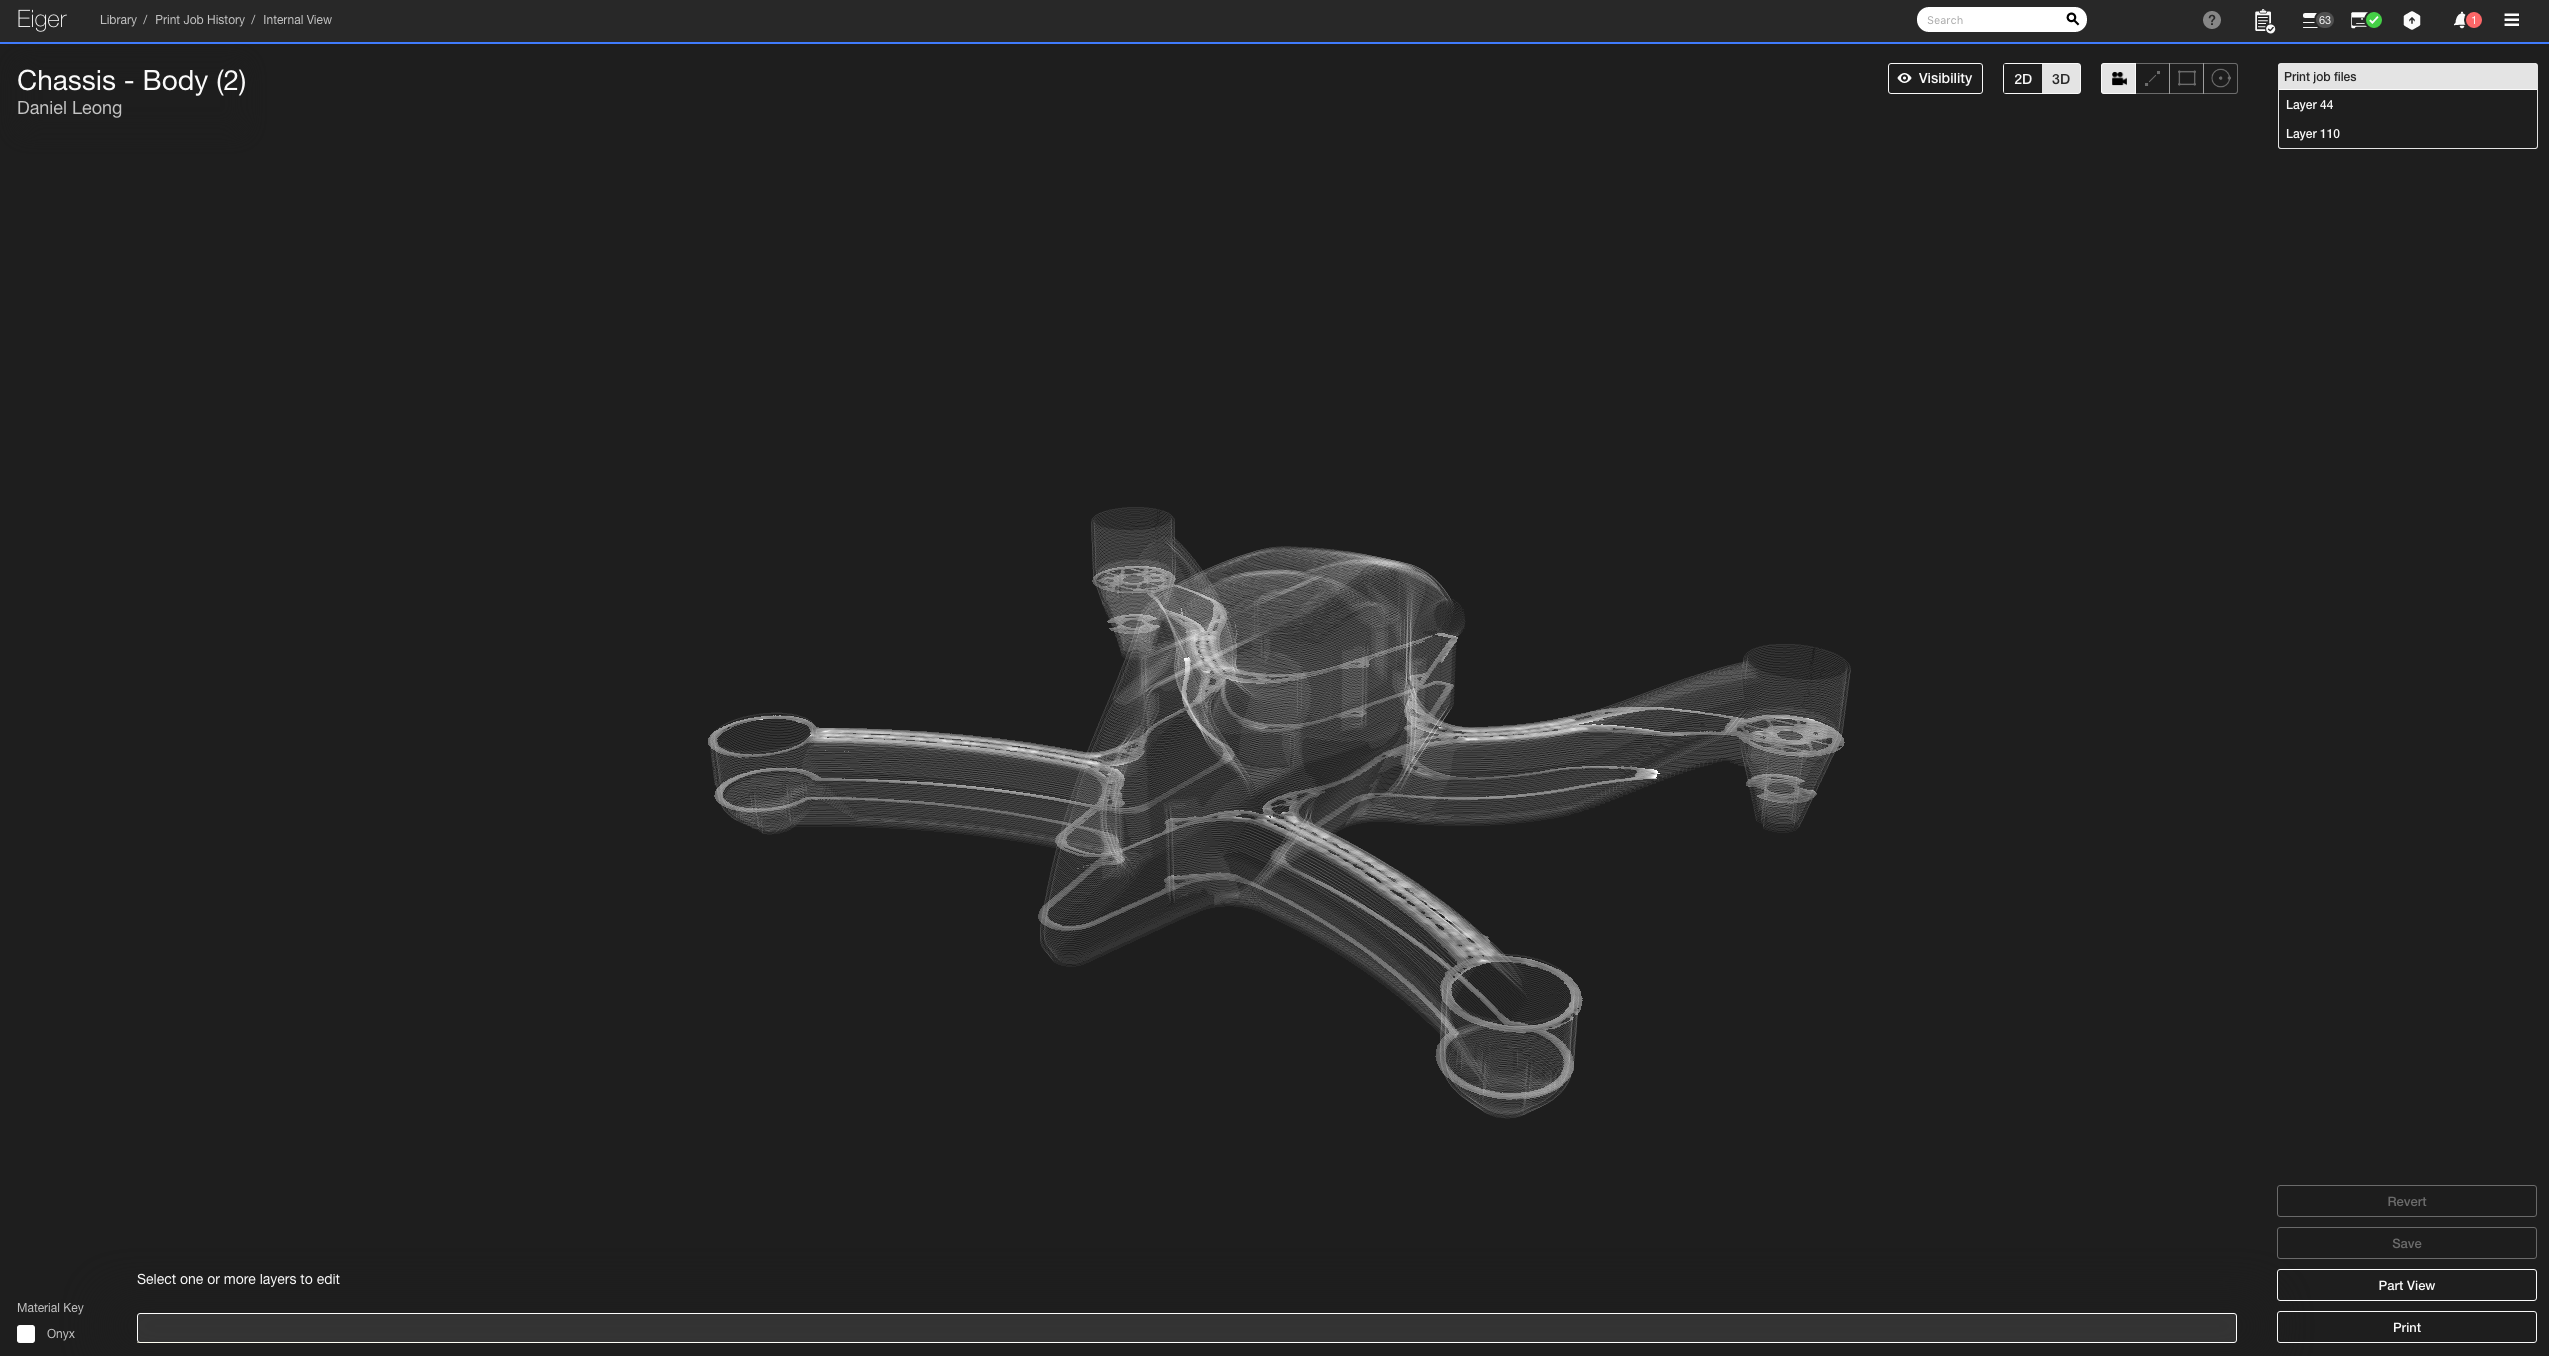
Next, we modeled each IRIS+ component in Onshape, using those files to carve the internal chambers of the main body. Custom mounts kept the electronics centered and routed cables neatly along hollow arms. Because Onyx can print unsupported over 70° angles, we avoided heavy redesign to stay support‑free. After uploading the file to Eiger, the projected print time was roughly two days—well below our three‑day target.
Although the first flight succeeded, the drone didn’t fit perfectly. We continued iterating, producing four distinct prototypes, each refining weight distribution, motor mounting, and aerodynamic surface. Thanks to Mark X’s rapid prototyping speed, re‑printing a 220‑cc part takes only a couple of days, making iterative improvement straightforward.

Flight Performance
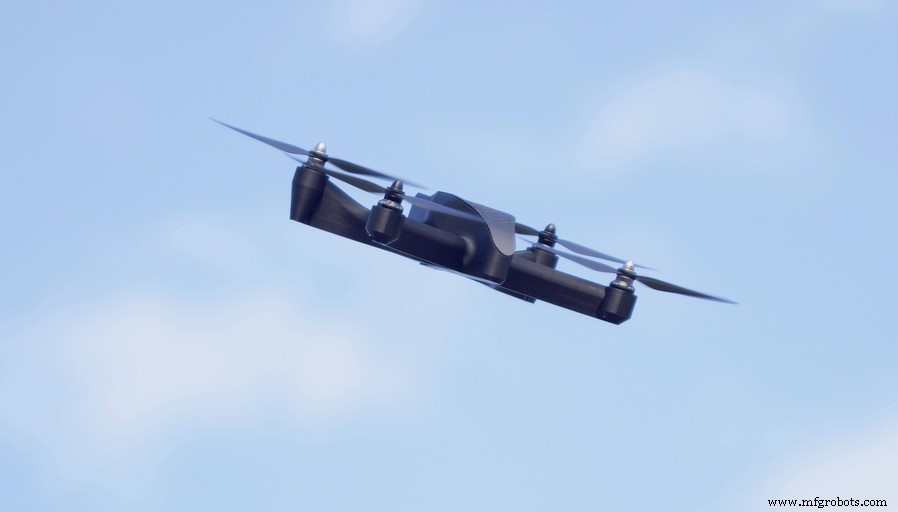
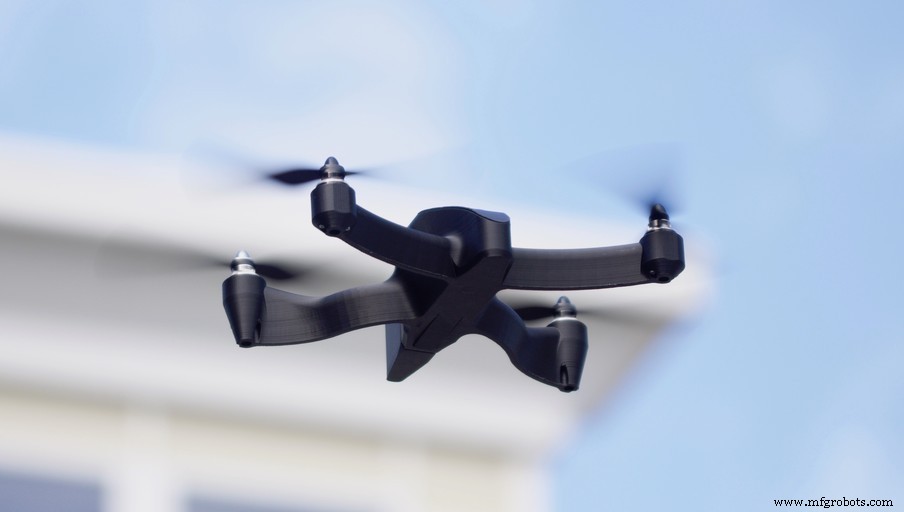
In every iteration, the drone performed on par with the original IRIS+ platform. Minor variations in balance and thrust were easily compensated in the flight controller. Overall, the 3D‑printed design delivers comparable stability, agility, and endurance.
Note: We are still refining the design and have not released an .stl file yet. Once the final iteration is complete, the file will be shared. Follow us on Facebook, Twitter, Instagram, and LinkedIn for updates.
3D printing
- Mark Two Unveiled at SolidWorks World 2016 – Faster, Stronger, Smarter 3D Printing
- Optimizing the IRIS+ Drone: Lightweight, Durable Arms with Onyx 3D Printing
- 3D‑Printed Drone Enables Rapid, Cost‑Effective Data Collection in Antarctica
- Skateboard Part 1: Building Durable 3D‑Printed Wheels
- Markforged’s 3D‑Printed Soft Jaw Delivered the First 25 Mark One Printers
- Revolutionizing 3D Printing: Precise Joinery for Effortless Assembly
- Introducing Inconel 625 for 3D Printing – A Game‑Changing Nickel‑Based Superalloy
- Markforged Introduces 3D‑Printed Copper – Unlocking High‑Conductivity Parts
- Enhancing PCB Assembly: Advanced Bottom-Filling Technologies
- Silencio: A 3D-Printed Tactile Poetry Book for Sighted and Blind Readers