


Professional Guide to Finishing and Painting 3D Printed Parts
High‑strength continuous fibers and the fine surface finish of Onyx make Markforged parts ready for many applications. When a different aesthetic is needed—whether for a Halloween prop or a polished prototype—proper finishing and painting can elevate the look and durability of the part.
Finishing Your Part Before Painting
To achieve a smooth, paint‑ready surface, follow these steps:
- Remove Glue Residue
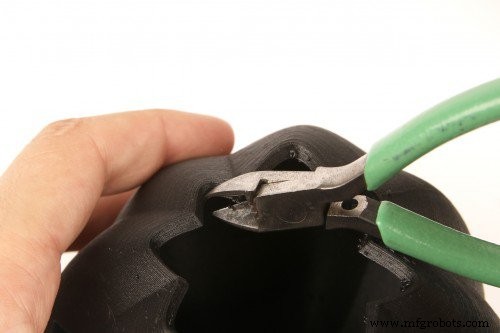
After removing a print from the build plate, wash off any glue left on the part with water. Dry thoroughly before proceeding. - Trim Loose Filament
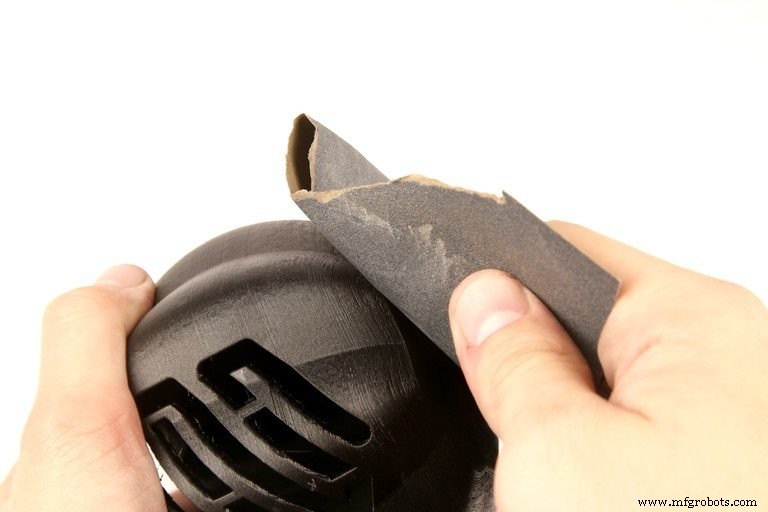
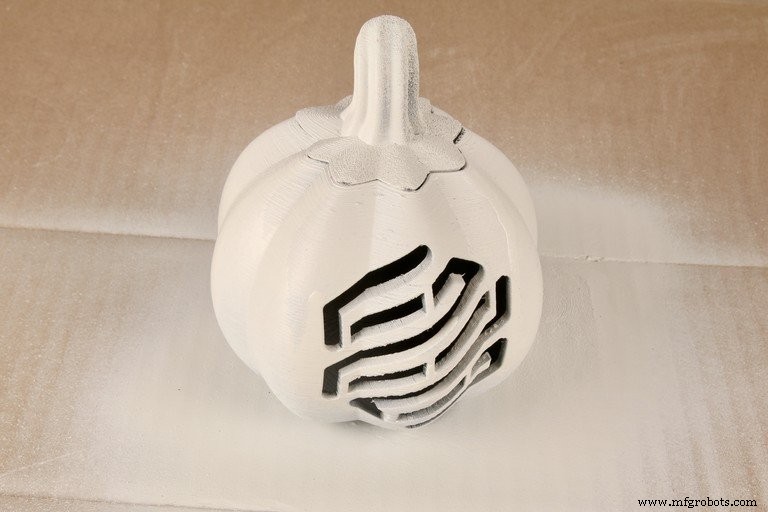
Use wire cutters or tweezers to clip or pick up strings and blobs caused by low‑angle overhangs or material inconsistencies. - Wet Sand the Surface
Use 220‑grit sandpaper while wetting the part. This smooths layer lines and eliminates scratches. If your part contains carbon fiber, work in a well‑ventilated area and wear a mask. - Remove Dust
After sanding, scrub the part with a wet brush to lift fine particles. Once dry, wipe with a tack cloth to remove any remaining specks.

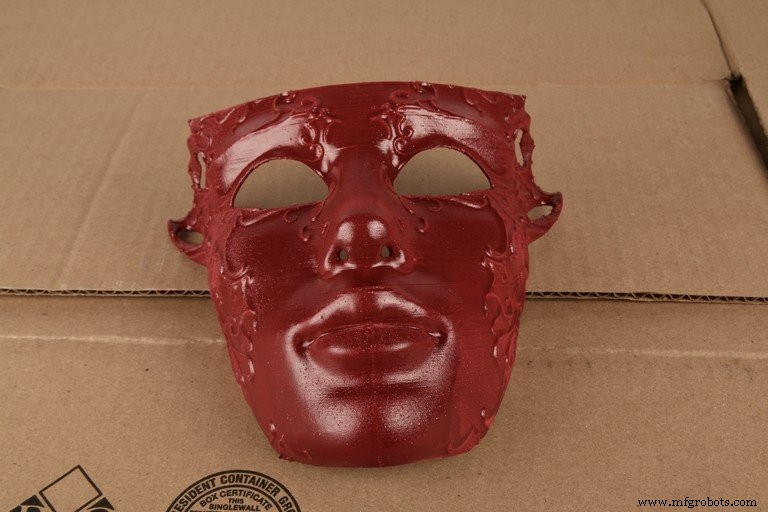
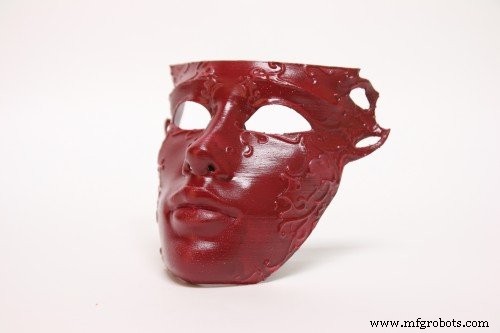
Spray Painting
Spray paint designed for plastics—such as Rust‑Oleum or Krylon—provides excellent adhesion to nylon and other Markforged materials.
- Select the Right Primer and Paint
Choose a plastic primer and a corresponding spray paint. Primer seals the surface and prevents excessive absorption. - Work in a Ventilated Area
Use a fume hood or spray booth. Wear a respirator and gloves for safety. - Set Up the Part
Hang the part on a wire or place it on a stand to expose all surfaces without flipping. If only a section will be painted, mask the rest with painter’s tape. - Apply the Primer Coat
Follow the manufacturer’s instructions for distance, number of coats, and drying time. After the first coat dries, rotate the part to cover the backside. - Apply the Finish Coat
Spray the paint in thin, even layers. Avoid drips by maintaining the recommended distance. Rotate as needed for full coverage. - Dry and Cure
Allow the part to dry per the paint’s guidelines before handling.

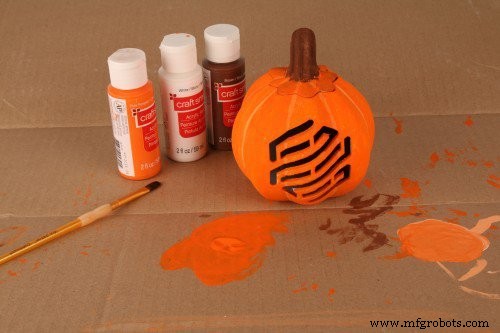
Hand Painting
For more detailed or artistic finishes, hand painting offers flexibility. Acrylic paints work well with nylon and other polymers.
- Choose the Paint
Select an acrylic paint that meets your color and finish requirements. - Primer First
Apply a plastic primer to reduce paint absorption and improve adhesion. Let it dry completely. - Paint the Design
Use brushes or fine tools to apply the acrylic paint. Work in a well‑ventilated area and allow each layer to dry before adding the next. - Final Drying
After the last coat, let the part cure as directed before handling.

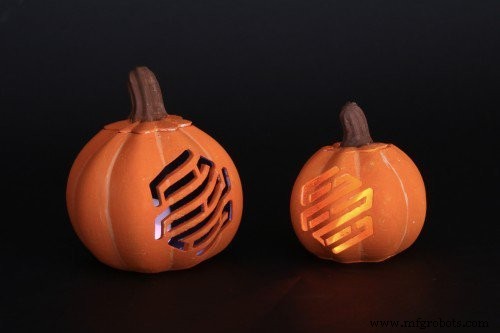
Ready to try your own painted part? Download our sample mask and pumpkin files here. If you don’t have a Markforged part, request a sample to experiment with.
3D printing
- Coloring 3D‑Printed Parts with Wax Crayons: A Novel Post‑Processing Technique
- In‑Process Inspection: Elevating 3‑D‑Printed Part Quality
- MMF #5: Mastering Component Embedding in 3D‑Printed Parts with Markforged Printers
- Optimizing 3D Printed Part Strength with Efficient Fiber Routing – Part 1
- Preventing Warping in 3D‑Printed Parts: Expert Design Tips
- How to Color Nylon 3D‑Printed Parts Quickly and Safely
- Guaranteeing Dimensional Accuracy in 3D Printed Parts
- Enhancing the Strength of 3D Printed Parts: Proven Techniques
- Advanced Inspection Strategies for 3D Printed Engine Parts – Part 3
- Precision Parts & Component Finishing Services