


How to Color Nylon 3D‑Printed Parts Quickly and Safely
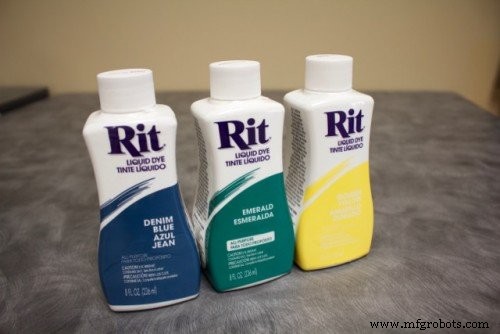
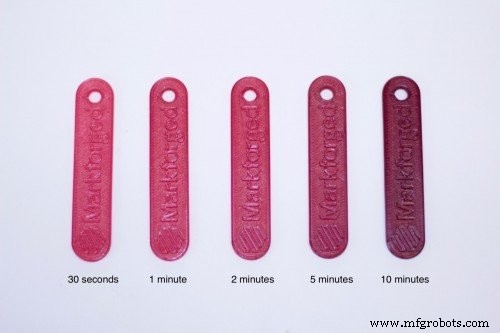
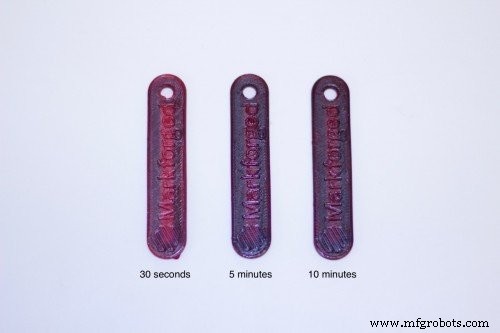
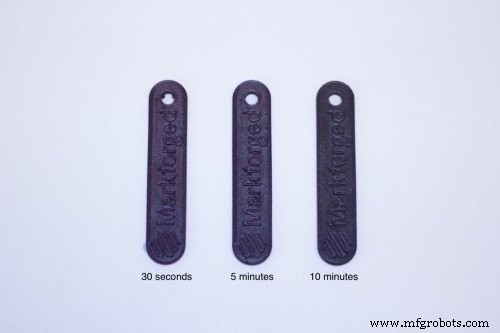
While the Markforged material suite currently offers only two base colors—translucent white and matte black—many users want a broader palette for aesthetics or branding. The dyeing technique described here lets you transform nylon parts into virtually any color using just a tea kettle and a few inexpensive supplies. We recommend RIT liquid dye, a fabric dye formulated for nylon fibers. Its high solubility and wide color range make it ideal for 3‑D‑printed nylon. If you prefer another brand, ensure it is water‑soluble and proven to work on nylon. You can purchase RIT liquid dye here. Remove all support material and clean any adhesive residue from the bottom face of the part. This surface must be free of debris for optimal dye uptake. In the example below we used a standard Markforged nylon test part. Beyond the dye and the print, you’ll need a tea kettle or microwave, a heat‑insulated container (e.g., a mug or bowl) that fully accommodates the part, pliers or tweezers for handling, and a paper towel for drying. Label the container clearly and use it only for dyeing. Mix the dye into hot water at a 5:1 water‑to‑dye ratio for standard colors. For lighter hues or larger parts, increase the concentration to a 3:1 ratio. Boil the required volume of water, then carefully pour it into the container with the dye. Using pliers, submerge the part immediately after pouring the hot solution. The dye penetrates most efficiently between 60 °C and 80 °C. Below 60 °C, absorption is poor; above 80 °C, the part may warp or bubble. Keep the part in for roughly one minute—longer submersion yields deeper color. Monitor the temperature with a thermometer if available. For example, a red dye was left in the solution for 15 s, 30 s, and 60 s to illustrate the gradual darkening effect. Rinse the part under running water to remove excess dye, then pat dry on a paper towel. Allow it to air dry for a few minutes before handling. Reusing the Dye – The dye’s efficacy decreases as it cools. If you need to color multiple parts, simply reheat the solution in a microwave until it simmers before adding the next print. Maintaining Temperature – For large parts, a laboratory hot plate can keep the solution within the optimal range throughout the process. Microwave Method – If a kettle is unavailable, combine dye and water in a container and heat in the microwave until simmering, then proceed as in Step 5. Fiber Visibility – Nylon’s internal fibers are still visible once dyed. A darker finish helps conceal them, but trace fiber patterns may remain, as shown with carbon fiber. Dyeing Onyx – Onyx, already a deep matte black, does not absorb dye in the same way. After extended exposure, it may acquire a subtle tinge, but it is rarely necessary to dye this material. With this streamlined method, you can confidently produce colorful nylon parts in minutes. Try it out with a sample print and explore the full spectrum of hues your projects deserve.1. Selecting the Right Dye
2. Preparing the Print
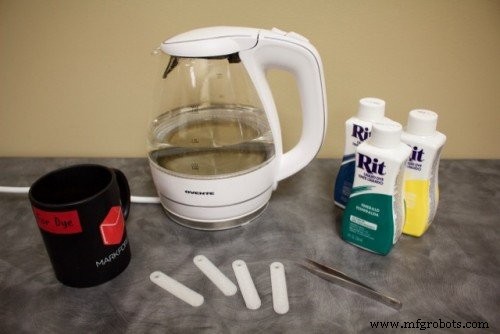
3. Essential Materials
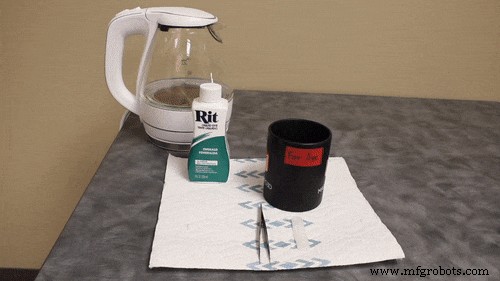
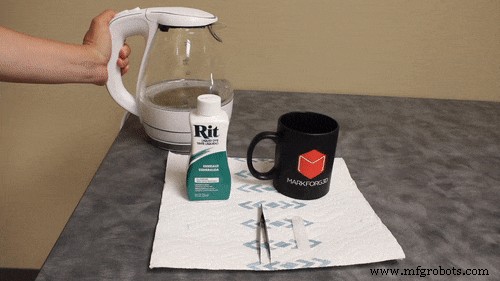
4. Preparing the Dye Solution
5. Dyeing the Part
6. Rinsing and Drying
Additional Tips
3D printing
- In‑Process Inspection: Elevating 3‑D‑Printed Part Quality
- Engineering a Fully 3‑D Printed Shock Absorber with Industrial‑Strength Onyx
- Professional Nylon Part Dyeing with Markforged: Step‑by‑Step Guide
- Weekly 3D‑Printed Highlight: Kevlar‑Reinforced Pliers
- Professional Guide to Finishing and Painting 3D Printed Parts
- Customer Part of the Month: Showcase Your 3D‑Printed Innovation
- Carl Calabria’s Caddytown: 3‑D Printed Nylon Caddies for Power Bits and Wera Sockets
- CNC vs. 3D Printing: Choosing the Right Production Method
- Guaranteeing Dimensional Accuracy in 3D Printed Parts
- PPprint: Expert FDM 3D Printing of Polypropylene Parts