


Designing a 3D‑Printed Tesla Turbine – Part 2: Bearing Housing Development
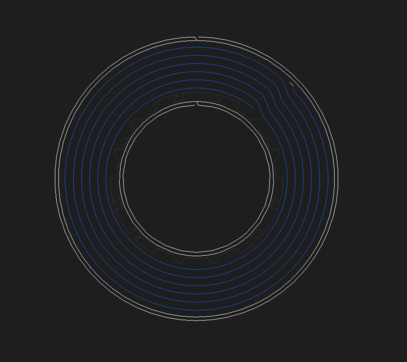
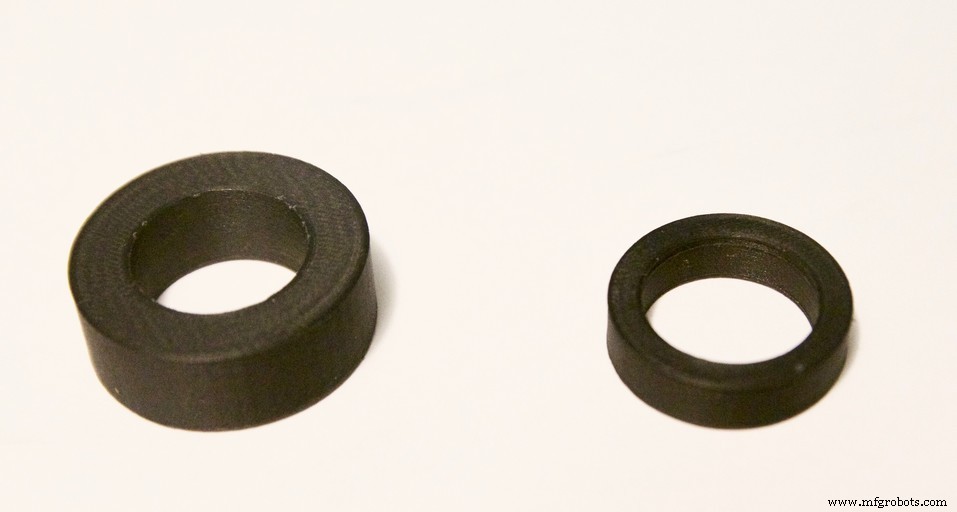
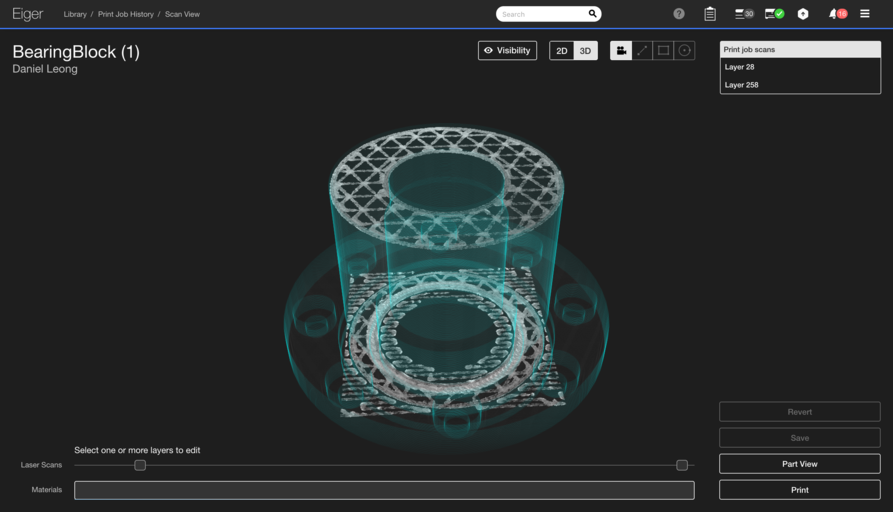
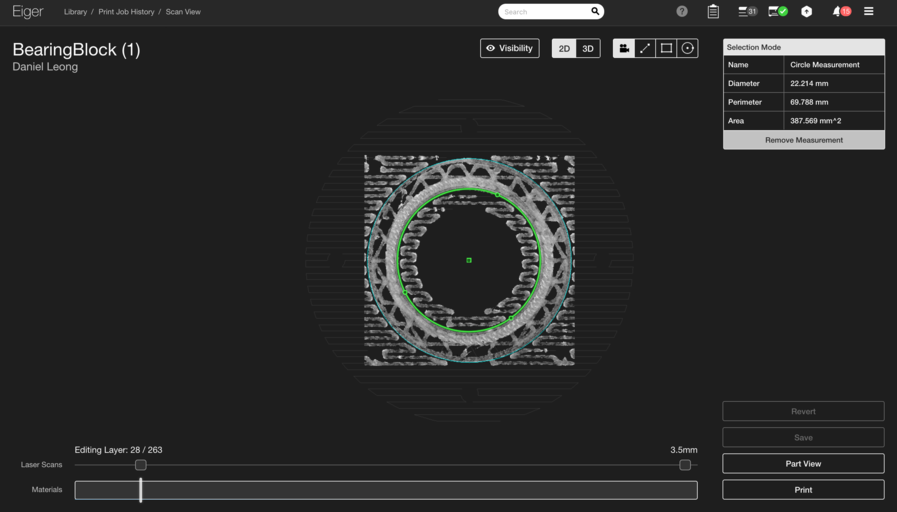
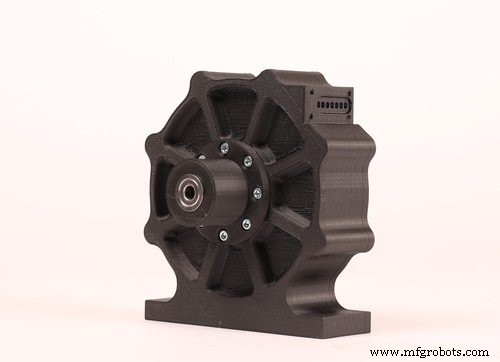
In the second installment of our two‑part series, we explain how to retrofit a machined Tesla turbine with Markforged parts. The first article introduced Tesla turbines, identified components ideal for 3D printing, and replaced the turbine housing with a custom Markforged part. This entry focuses on the remaining printed element: the bearing housing. The turbine housing encases the shaft assembly but does not contact it directly. Instead, an intermediary component—the bearing housing—bolts onto the turbine housing and secures the shaft assembly with two perfectly concentric bearings. By cantilevering the rotor assembly on the bearing housing, the original designers allowed a machinist to verify bearing hole concentricity easily. This precision is critical; at 24,000 rpm, even a slight misalignment can cause catastrophic failure. In the original aluminum housing, the bearing fit tolerances were +0/‑0.0004 in, ensuring a snug press‑fit without hindering rotation. While a Markforged machine can produce this part, it presents a greater challenge than the turbine housing due to its tighter tolerances and critical function. Printing the bearing housing demands precision and concentricity. Fortunately, the reduced surface hardness of Onyx relaxes tolerances slightly—achieving +0/‑0.001 in is realistic compared to the aluminum requirement. We also needed to print retaining‑ring grooves and overhanging flanges with high accuracy; these features require significant support material, which is removed cleanly using Peel‑Off supports. Additionally, the part must accommodate a high volume of fiber, especially around the bearings, to maintain dimensional stability. The design allows six layers of fiber around each bearing, providing ample reinforcement. To validate our approach, we printed two versions of the bearing housing: one on the Mark Two Enterprise and another on the Mark X, each evaluated with laser dimensional verification. On the Mark Two, tight tolerances rely on independently measured unit tests. By printing and measuring unit test rings for each bearing fit, we iterated twice, adjusted the CAD dimensions, and incorporated the refined dimensions into the full part. Only after verifying the complete housing did we insert the hardware. When successful, the bearings achieved a snug press‑fit and integrated seamlessly with the turbine housing. Although the Mark X also relies on human validation, laser dimensional scanning simplifies the workflow. By scanning layers that contain the critical bearing fits, we verify tolerances in real time without calipers. We achieved both tolerances on the first attempt, eliminating the need for reprints. This hands‑off process is more efficient than unit testing. Despite its complexity, the bearing housing demonstrates the viability of tight‑tolerance 3D printing for high‑performance components. We confirmed functional parts on both the Mark Two and Mark X with minimal design changes, and both housings enable flawless rotor spin. Want to explore more Markforged applications? Follow us on Facebook, Twitter, Instagram, and LinkedIn for updates!Introduction
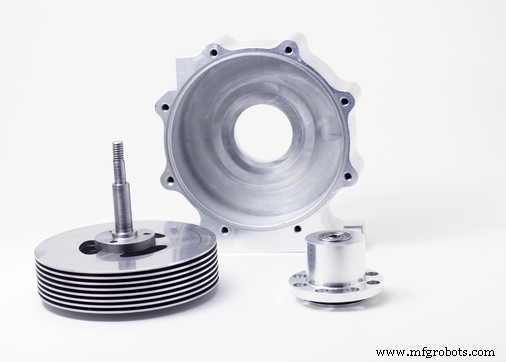
The Tesla Turbine Bearing Housing
Additive Manufacturing Design Adjustments
Printing the Housing
Mark Two Housing
Mark X Housing
Conclusion
3D printing
- Designing a 3‑D‑Printed Tesla Turbine – Part 1: Recreating the Housing with Markforged
- In‑Process Inspection: Elevating 3‑D‑Printed Part Quality
- Revolutionizing Production: Markforged’s 3D‑Printed Spool Dispenser Innovation
- Optimizing the IRIS+ Drone: Lightweight, Durable Arms with Onyx 3D Printing
- Weekly 3D‑Printed Highlight: Kevlar‑Reinforced Pliers
- Skateboard Part 1: Building Durable 3D‑Printed Wheels
- Professional Guide to Finishing and Painting 3D Printed Parts
- Preventing Warping in 3D‑Printed Parts: Expert Design Tips
- Master 3D Printing: Part 1 – Unit Tests & Tolerances for Accurate, Cost‑Efficient Builds
- Guaranteeing Dimensional Accuracy in 3D Printed Parts